*This post may contain affiliate links for which I earn commissions.*
A mudroom may not be the first place that comes to mind when planning Halloween decorations, but that is exactly what makes it so much fun. It is an everyday space where a little unexpected personality can turn grabbing a coat or putting away shoes into part of the celebration.
In this colorful mudroom, a family of smiling ghosts appears to parade across a patterned runner. Their sizes decrease as the procession moves through the room, creating a playful sense of motion.
Pastel paper lanterns, happy crescent moons, black bats, pom-poms, colorful boots, and bright storage furniture complete the scene. The result feels festive and unmistakably Halloween without becoming dark or frightening.
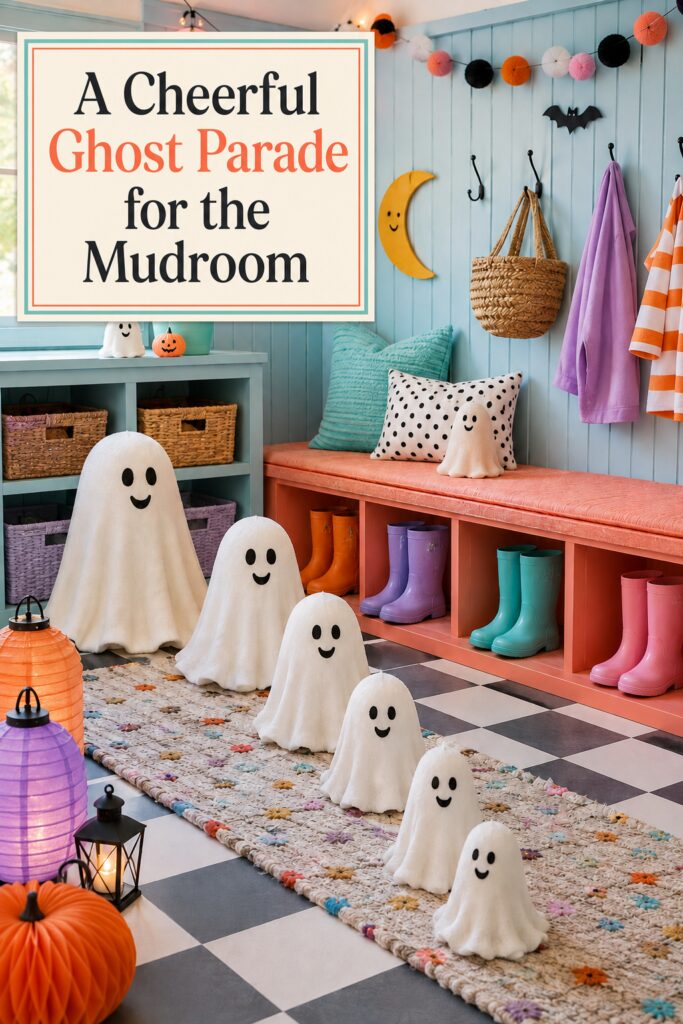
Image disclosure: This inspiration image was created with AI. It is intended to provide decorating ideas rather than represent specific products available for purchase.
Why the Ghost Parade Makes This Room Memorable
One ghost would add a cute seasonal accent. Six ghosts arranged from tallest to shortest create an entire story.
The graduated sizes lead the eye through the room. The largest ghost establishes the beginning of the procession, while the smallest one appears to bring up the rear.
Every figure uses the same basic materials, coloring, and friendly expression. That repetition allows the arrangement to feel connected even though the sizes vary considerably.
The parade also takes advantage of the mudroom’s long, narrow layout. Instead of fighting the shape of the room, the decorations turn it into a miniature Halloween route.
Create a Family of Graduated Ghosts
The easiest way to reproduce the effect is to make the ghosts rather than search for six finished figures in exactly the right sizes.
Build simple forms using lightweight objects such as foam cones, plastic buckets, cardboard supports, or other stable bases. Add round foam balls where needed to create the heads.
Drape white fabric over each form and allow it to pool slightly around the bottom. Fleece, felt, batting, or another fabric with a little body will create the softly sculpted appearance seen in the image. Very thin fabric may collapse against the support or reveal its structure.
Cut oval eyes and small smiling mouths from black felt. Use the same basic facial design on every ghost so they look like one cheerful family.
Before permanently attaching anything, set all the unfinished forms in a row. Adjust their heights until the progression feels smooth rather than jumping abruptly from one size to the next.
If the ghosts will be placed where children or pets can reach them, avoid loose pieces, exposed wire, sharp supports, and unstable bases.
Arrange the Parade From Tallest to Shortest
Place the largest ghost near one end of the room and let the others travel diagonally or lengthwise along the runner.
The figures do not have to stand in a perfectly straight line. Slight changes in position will make the parade look more animated.
Leave a little breathing room around the largest ghosts. The smaller figures can stand closer together because their visual weight is lighter.
Turn some faces by a few degrees so they seem aware of one another. Keeping every ghost pointed in exactly the same direction may make the display feel more like a store shelf than a procession.
The arrangement shown is best suited to a staged photograph, Halloween party, or mudroom that is not the home’s main entrance. For daily use, move the parade to the side of the room, along a wall, or onto a low bench where it cannot become a tripping hazard.
Let the Room’s Existing Colors Join the Theme
This mudroom does not abandon its normal palette for Halloween. It builds on it.
The pale aqua walls and coral bench already create a colorful foundation. Purple, teal, orange, and pink rain boots add more usable color without becoming decorations themselves.
If your mudroom is neutral, select three or four accent colors and repeat them throughout the seasonal pieces. Orange and black will establish Halloween, while pink, lavender, aqua, or yellow can make the display more playful.
A successful colorful room still needs visual anchors. Here, white ghosts and black details keep the brighter shades from becoming chaotic.
You do not have to repaint the room or purchase matching boots. The same principle can be applied with removable textiles, paper decorations, storage baskets, and small accessories.
Hang Pastel Paper Lanterns Overhead
Round paper lanterns bring color and height to the upper-left corner of the room.
Pink, lavender, and peach lanterns are suspended at different levels. Their soft illumination makes the display feel magical, while their rounded shapes relate to the ghosts’ heads and the pom-poms on the opposite wall.
Choose lightweight lanterns suitable for indoor decorating. Battery-operated lights can provide a glow without requiring several visible cords.
Keep paper lanterns away from exposed bulbs, heat sources, doors, ceiling fans, and anything that could tear or crush them. Use only lighting intended for the specific lanterns.
Three lanterns in two or three colors may be enough for a small mudroom. Hanging them at varied heights creates more impact than lining them up evenly.
Add a Colorful Pom-Pom Garland
The pom-pom garland stretches across the upper wall and carries the room’s palette from one side to the other.
Look for felt balls or tissue pom-poms in orange, black, white, pink, and lavender. A premade Halloween garland is convenient, but a handmade strand offers more control over the colors.
Alternate the shades loosely rather than following a strict pattern. The image uses black and white to interrupt the brighter colors and keep the garland connected to the Halloween theme.
Let the strand dip slightly between attachment points. A gentle curve will look more relaxed than one pulled tightly against the wall.
Keep the garland clear of hooks, coats, doors, and frequently used storage areas. Secure each end firmly so it cannot fall into the walking path.
Make Smiling Moons and Simple Black Bats
The yellow crescent moons add an especially cheerful touch. Their smiling faces repeat the expressions on the ghosts and prevent the wall decorations from becoming too serious.
They can be made from lightweight craft board, thick felt, foam board, or papier-mâché shapes. Paint the moons a warm yellow, then add simple black eyes and smiles.
Cut bats from black cardstock, felt, or lightweight foam. Use several sizes so the wall arrangement feels more natural.
Place one larger bat between the moons and smaller bats above or beside it. Avoid scattering them evenly across every open section of wall. A few loose groups will look more animated.
Use removable, surface-appropriate hanging materials and test them in an inconspicuous area. Lightweight decorations are preferable in a working mudroom where bags, coats, and baskets are moved frequently.
Continue the Colors With the Runner
The cream runner introduces small touches of coral, aqua, orange, pink, and blue beneath the ghost parade.
A mostly neutral rug works well because the room already contains several strong colors. The scattered accents connect the floor to the walls and storage bench without adding another dominant pattern.
Choose a low-profile, washable runner appropriate for an entry area. A nonslip backing or rug pad is particularly important on smooth tile.
Make sure the edges remain flat and the rug does not interfere with doors. If decorative ghosts are displayed on it temporarily, remove them before the mudroom becomes busy.
A patterned rug is optional. A plain cream runner could also provide a soft path beneath the white ghosts while allowing the colorful furniture to remain prominent.
Bring in Warm Light at Floor Level
Small black lanterns and colorful paper lanterns add a warm glow near the start of the parade.
Black metal lanterns repeat the wall bats, hooks, and ghost faces. Their darker finish gives the eye a resting point beside the bright orange and purple decorations.
Use flameless candles rather than real flames near paper, fabric, rugs, baskets, or children’s belongings. Timer-equipped candles can make the display easier to manage.
Place the lanterns where they cannot be kicked or knocked over. In a busy mudroom, they may be safer on a cabinet, shelf, or bench instead of the floor.
Warm light is enough. The room should remain bright and cheerful rather than taking on the dramatic shadows of a haunted-house display.
Add Paper Pumpkins for Lightweight Color
The orange honeycomb pumpkin in the foreground provides traditional Halloween color without introducing another heavy ceramic piece.
Paper pumpkins are lightweight, inexpensive, and easy to store flat when the season ends. They also echo the construction and texture of the hanging lanterns.
Use one or two larger pumpkins near the beginning of the parade, then keep the rest of the floor relatively open. Too many rounded paper decorations could compete with the ghosts.
A miniature pumpkin beside the cabinet provides a second touch of orange at a different height. That repetition makes the foreground pumpkin feel connected to the complete room.
Style the Bench Without Losing Its Purpose
The coral bench remains mostly functional.
A turquoise pillow and a white spotted pillow soften the seat, while one small ghost occupies the far end. The decorations do not bury the bench beneath seasonal objects.
If the bench is used every day, limit the Halloween styling to one pillow and one lightweight figure that can be moved easily.
Keep shoe cubbies open and accessible. Decorations should not block wet boots, interfere with seating, or catch on coats and bags.
The best mudroom displays work around the routines that already happen there. A charming room quickly becomes irritating if someone has to relocate half a ghost family every time they need their shoes.
Keep the Display Safe for a Working Mudroom
A full parade across the floor is delightful for a party or photograph, but it is not practical in every home.
Adapt the idea to the available space. The ghosts could march along the back of a bench, across a wide shelf, beneath a window, or along the top of a storage cabinet.
Keep doors, hooks, benches, cubbies, and walkways usable. Secure overhead decorations carefully and inspect them periodically.
Avoid real candles and exposed hot bulbs. Paper, felt, baskets, fabric ghosts, and rugs all require flameless lighting and sensible clearance.
If children help create the parade, let them design the expressions or decide the order of the ghosts. The friendly faces make this an especially approachable family Halloween project.
Shop Similar Pieces
Gather Supplies for a Graduated Ghost Parade
Combine white fabric, lightweight forms, foam balls, and black felt to create six related ghosts in different sizes.
Hang Pink, Purple, and Orange Paper Lanterns
Select several sizes and suspend them at different heights with safe battery-operated lights.
Add a Multicolor Halloween Pom-Pom Garland
Look for orange, black, white, purple, and pink felt balls, or make a custom strand.
Decorate the Walls With Bats and Smiling Moons
Use removable bats and lightweight craft materials for the cheerful crescent faces.
Ground the Parade With a Colorful Runner
Choose a washable cream runner with small accents borrowed from the walls, bench, and accessories.
Add Black Lanterns and Paper Pumpkins
Use flameless light and collapsible paper decorations to finish the foreground safely.
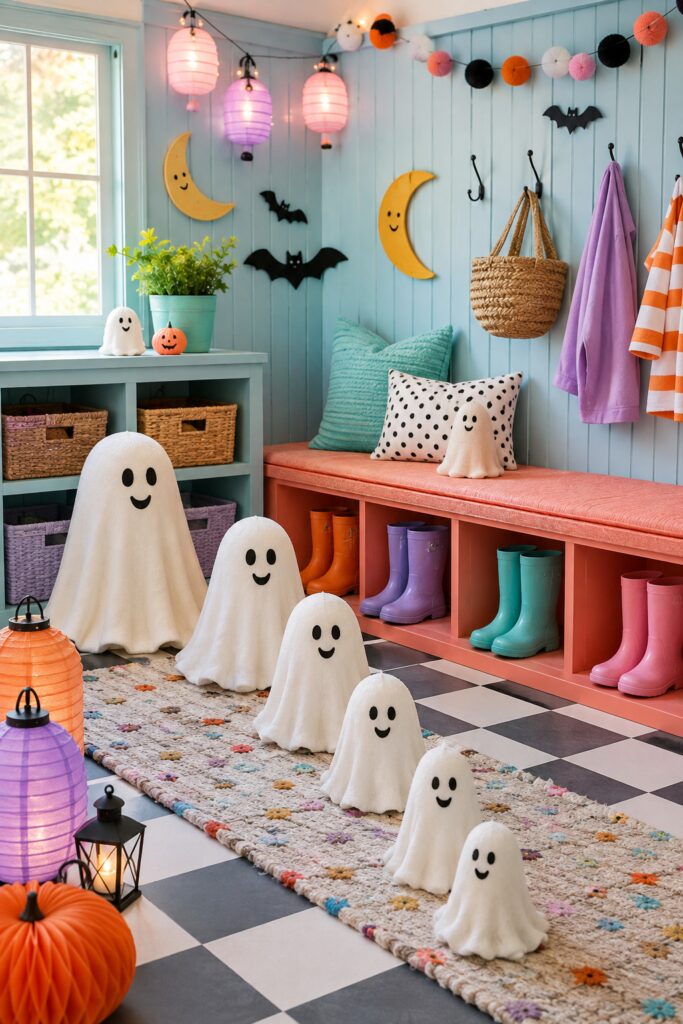
Final Styling Tip
Think of the ghosts as characters rather than identical decorations. Change their heights, turn a few faces slightly, and leave uneven spaces between them. Those small variations are what make the parade appear to be moving through the room.