*This post may contain affiliate links for which I earn commissions.*
Decorating a camper for Christmas requires more restraint than decorating a traditional home. Every surface has a purpose, storage is limited, and even a small object can become an obstacle when the aisle is only a few feet wide.
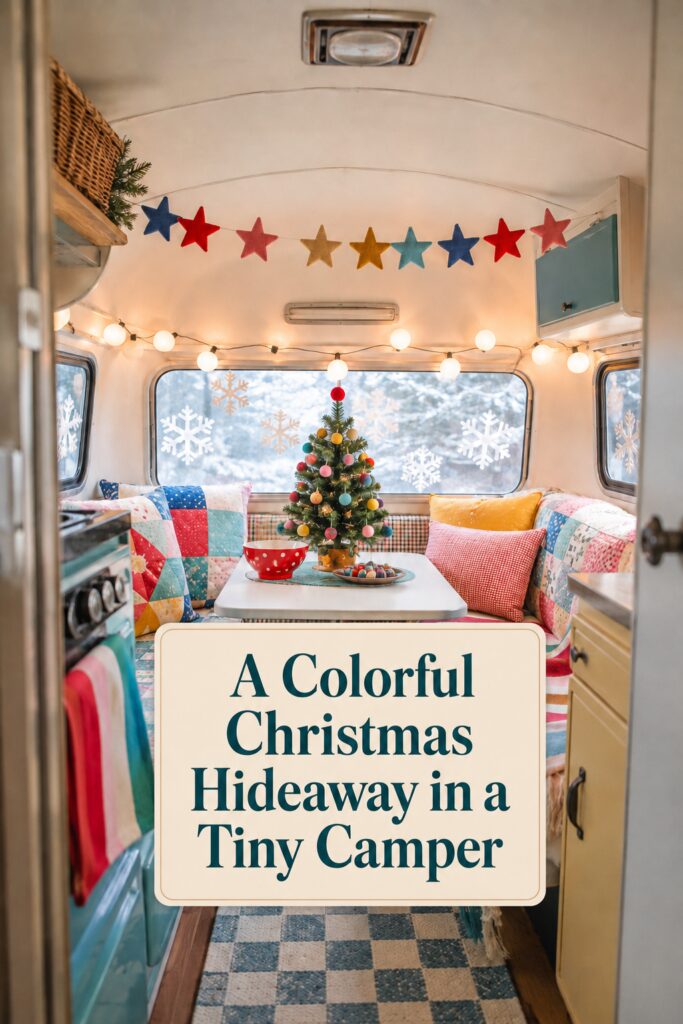
This cheerful camper handles those challenges by placing most of the holiday color above the seating, across the windows, and within the existing textiles. A miniature tree creates a clear focal point, while soft decorations add personality without introducing fragile or bulky pieces.
The result feels cozy, nostalgic, and wonderfully removed from the rush of the season.
Treat the Dinette as the Holiday Center
The dinette is the visual destination when entering this camper. Centering the Christmas tree on the table immediately establishes the theme and draws attention through the compact interior.
A tree between 18 and 24 inches tall is large enough to make an impact without filling the table. Its width is just as important as its height. A narrow tree leaves space for mugs, snacks, games, or a simple meal.
Place it on a low mat or tray that defines its area and catches loose needles or ornaments. The entire tree can then be lifted away when the table is needed for dining.
If the camper will be moved, store the tree securely before traveling. Even a lightweight tabletop tree can damage cabinets or windows if it falls while the vehicle is in motion.
Decorate the Tree With Soft Color
Pom-pom ornaments are particularly well suited to a small camper. They introduce cheerful color without the weight, noise, or breakage risk of glass ornaments.
The inspiration uses red, pink, teal, yellow, orange, and blue against traditional green branches. The colors relate to the surrounding quilts, making the little tree feel fully integrated with the room.
For a similar effect, select five or six colors and distribute them evenly. Place a few larger pom-poms toward the lower branches and smaller ones near the top. A single red pom-pom creates a simple, playful tree topper.
Felt balls can be tied to branches with thread, narrow ribbon, or reusable ornament loops. They should be attached firmly enough to remain in place if someone brushes past the table.
Use the Ceiling Without Making It Feel Lower
The curved white ceiling gives the camper a surprisingly open appearance. Decorations follow the curve rather than hanging down into the room.
The colorful star garland is positioned high, leaving generous space above the tree and seating. Because the stars are soft and relatively flat, they add color without creating the visual weight of a thick evergreen garland.
Keep hanging decorations close to the ceiling and away from cabinet doors, vents, smoke alarms, lighting fixtures, and emergency exits. Before finishing the arrangement, open every cabinet and window to confirm that nothing catches.
When the camper is being driven, garlands should be removed or secured according to the vehicle owner’s instructions. Decorations that appear stable while parked may move considerably on the road.
Layer Stars and Globe Lights
The felt stars supply color, while the globe lights provide warmth. Using both creates more depth than either one would create alone.
The globe lights are arranged lower than the star garland, following the upper edge of the windows. Their round white bulbs repeat the shapes of the pom-poms on the tree, subtly connecting the ceiling to the centerpiece.
Battery-operated lights are often easier to place in a camper because they do not require an extension cord across the interior. The battery case can be concealed in a basket or secured in an accessible storage area.
Only use lights approved for the intended setting. Keep cords away from heat-producing appliances, sharp cabinet edges, moving mechanisms, vents, and areas where condensation forms. Lights should be switched off when the camper is unattended or occupants are sleeping unless their instructions specifically support that use.
Turn the Windows Into a Winter Backdrop
Large camper windows provide much of the visual space in the room. Removable snowflakes make them part of the Christmas display while preserving the surrounding walls and cabinets.
Varying the snowflake sizes creates a more natural arrangement. Start with the largest designs, placing them several inches apart, and use smaller ones to fill a few of the gaps.
Leave sections of the windows uncovered so the interior still receives daylight and occupants can see outside. Visibility is especially important around doors, driving areas, and any window required for safe operation.
Static clings are preferable to permanent stickers because they can usually be removed without adhesive residue. Clean and dry the glass before applying them, and store reusable designs flat after the season.
Let Patchwork Textiles Carry the Room
The patchwork quilts do more than make the benches comfortable. They establish nearly the entire decorating palette.
A camper offers limited space for purely decorative objects, so useful textiles are one of the smartest ways to introduce a strong theme. Quilted throws can cover worn upholstery, provide warmth, protect seating, and bring color into the room simultaneously.
The two sides do not need to match exactly. One bench can feature a large geometric patchwork pattern while the other uses smaller blocks, stripes, or a related print. Repeating a few colors is enough to make them feel connected.
Secure loose covers so they do not slide when someone sits down. Removable upholstery clips, fitted covers, or carefully tucked fabric can make the seating feel more finished.
Mix Patterns Through a Shared Palette
Several patterns appear together in this small interior:
- Patchwork blocks
- Narrow checks
- Wide stripes
- Gingham
- Polka dots
- Buffalo checks
The combination works because the patterns share colors and vary in scale. The patchwork designs are large and visually active. The striped throw is simpler, while the gingham and checked fabrics use much smaller repeats.
To mix patterns confidently, begin with one multicolored textile. Pull three or four colors from it for the remaining pillows, throw, and rug. That original fabric becomes the palette guide.
Avoid using several large patterns at the same level. If the seating already features a bold patchwork design, choose smaller checks or solid colors for the pillows.
Add Warmth With a Striped Throw
The striped throw on the right bench softens the upholstery and brings the tree’s colors down into the seating area. Its red, pink, blue, mustard, and cream stripes are festive without relying on a Christmas-specific pattern.
This is useful in a camper, where storage space may not justify keeping many seasonal textiles. A colorful striped throw can remain in use during other trips throughout the year.
Fold or drape it so it does not spill into the walkway. Long fringe should stay clear of cabinet doors, floor vents, heaters, and moving seat components.
When driving, store loose blankets and pillows where they cannot fall into the aisle or interfere with doors and equipment.
Use Pillows to Balance the Color
The pillows provide solid and small-patterned areas between the more complicated quilts. Mustard yellow, red gingham, blue, and patchwork designs reinforce the cheerful palette without making every surface equally busy.
In a compact dinette, two or three pillows per side may be too many once people sit down. Use only enough to soften the benches, then store the extras in an overhead compartment or under-seat area during meals.
Select pillow covers with removable inserts when possible. Covers take up considerably less storage space than complete seasonal pillows and are easier to wash after travel.
Keep the Floor Calm
The blue-and-cream checked runner is noticeably quieter than the seating. That restraint prevents the small room from feeling visually crowded.
A narrow washable runner can add softness to a camper floor, but it must remain flat and secure. Choose a size that does not block cabinets, floor vents, appliance access, or the entry door.
A nonslip backing or suitable rug pad may be necessary. Check door clearance before settling on the thickness, particularly if the rug sits near an inward-opening door.
The rug should be removed or secured for travel according to the camper manufacturer’s recommendations.
Repeat the Cabinet Colors in Small Details
The teal and pale-yellow cabinets already contribute to the holiday palette. Rather than trying to conceal those colors, the decorations repeat them.
Teal appears in the quilt, tree ornaments, stars, table mat, and striped throw. Yellow appears in the cabinets, pillows, stars, pom-poms, and quilt blocks.
This kind of repetition is especially helpful in a vintage or renovated camper with colorful cabinetry. Existing paint can become the starting point for the entire holiday scheme.
If the cabinets are neutral, choose two accent colors from the upholstery or rug and repeat them at least three times throughout the room.
Preserve Every Working Surface
A decorated camper still needs to function as a camper. The cooktop, sink, counters, dinette, storage compartments, windows, vents, and doors must remain accessible.
Avoid placing decorations near burners or other heat sources. Do not attach garlands to propane lines, electrical components, safety equipment, or appliance controls. Keep exits and walkways completely clear.
Before using the camper, perform a full function check:
- Open every cabinet and drawer.
- Test the entry and emergency exits.
- Confirm that vents and safety equipment remain unobstructed.
- Sit at each dinette position.
- Walk through the aisle carrying a bag or serving tray.
- remove or secure every decoration before travel.
The visual effect should never come at the expense of safe operation.
Create a Simplified Camper Version
The same feeling can be achieved with only five additions:
- One miniature tree with soft colorful ornaments
- One felt star garland
- One strand of warm battery-operated lights
- One patchwork throw
- Several removable snowflake window clings
This scaled-back version still creates color at the table, ceiling, seating, and windows. It also requires very little storage once the season ends.
Why This Tiny Christmas Retreat Feels So Inviting
The camper works because it combines winter imagery with warm, handcrafted color. Snowflakes and evergreen branches establish the season, while patchwork quilts, felt stars, and pom-poms keep the interior from feeling cold or formal.
Everything is scaled to the space. The tree is small, the garlands are lightweight, and the largest patterns appear on useful textiles rather than bulky decorations.
It feels like a place designed for hot chocolate, card games, quiet mornings, and watching snow through the windows. That sense of retreat is what makes the little room feel more special than its dimensions suggest.
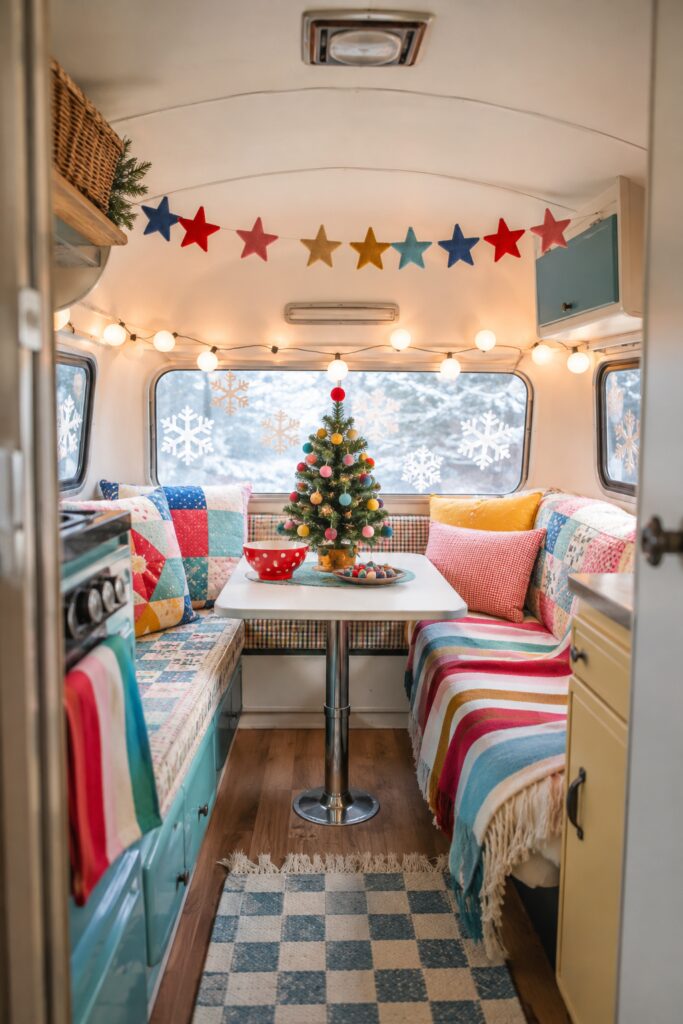
Image disclosure: This AI-generated image is presented as decorating inspiration. Suggested products are visual alternatives rather than claims that exact items shown are available. Product colors, dimensions, prices, ratings, and availability may change.