*This post may contain affiliate links for which I earn commissions.*
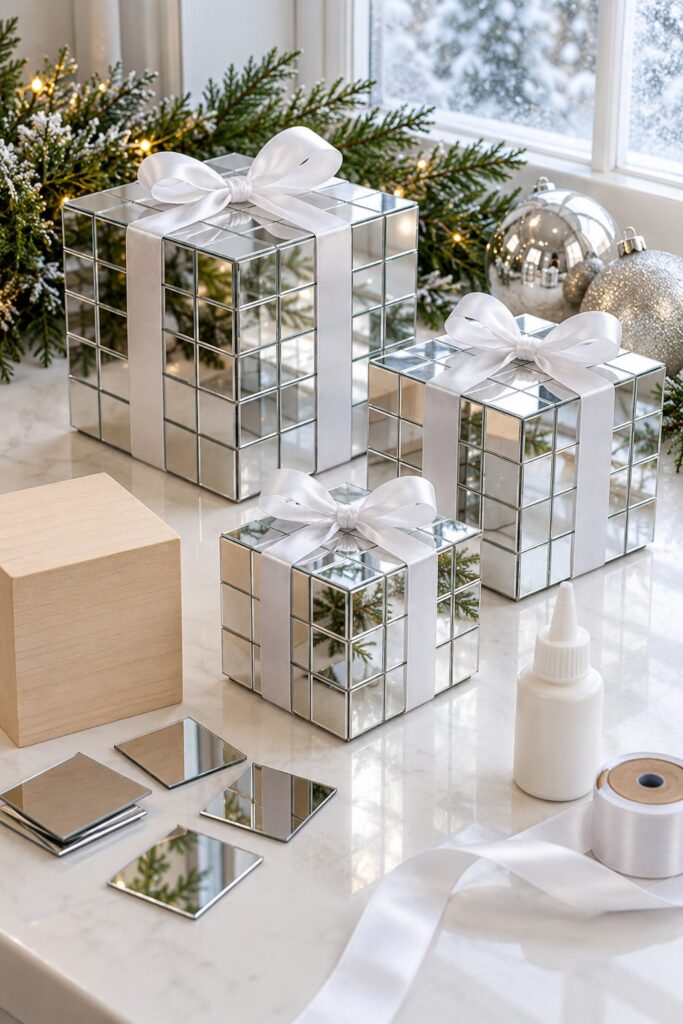
Mirror tiles and white ribbon give these little Christmas parcels their character. The inspiration shows three reflective cubes in different sizes, each with a satin bow on top. The tiled grid catches nearby greenery and light, so the boxes feel decorative even without colorful wrapping paper.
This tutorial uses wooden cubes as solid bases and precut acrylic mirror squares for the outer faces. They are decorative parcels, not boxes that open for gifts. That keeps the construction straightforward while preserving the mirrored look.
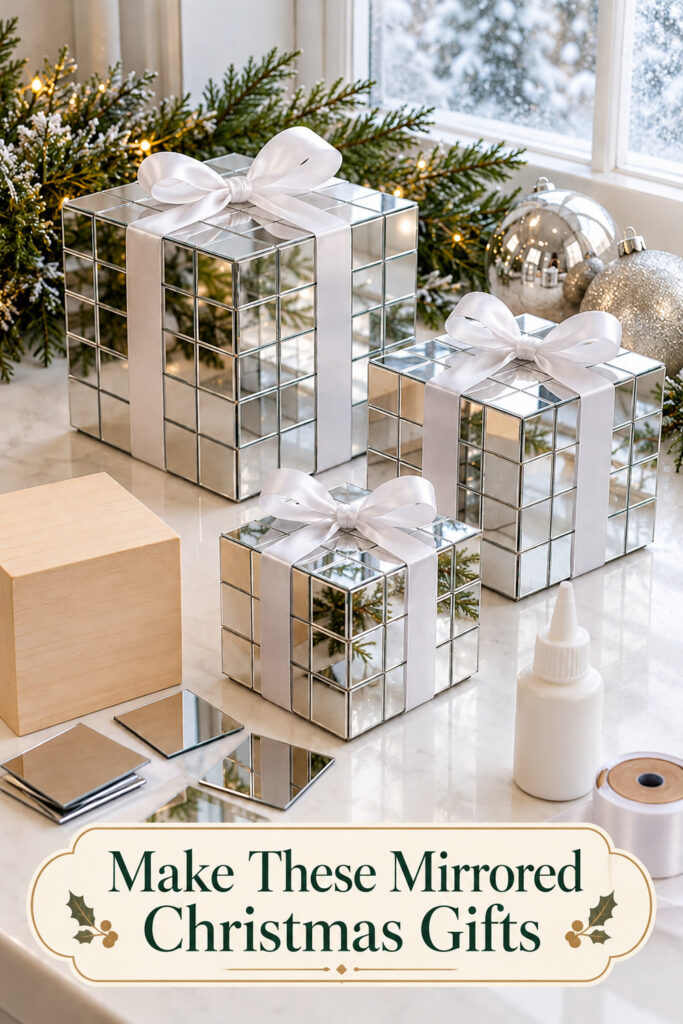
The inspiration and instructional images were created with AI and illustrate a proposed DIY method rather than a photographed build.
What You’re Making
You’ll cover the top and four sides of each wooden cube with a neat grid of acrylic mirror tiles, leave the underside plain, and tie white satin ribbon around it in two directions. Three cubes in different sizes make a staggered group like the inspiration, but start with one to work out your materials.
The practical adaptation is the solid wood base. There is no lid to build and no glass to cut. Choose cubes and precut tiles that fit together so the grid remains the main detail.
Materials and Supplies
Materials
- Smooth unfinished wooden cubes in your chosen sizes (check your scrap wood first!)
- Precut square acrylic mirror tiles with finished edges
- Adhesive explicitly suitable for the chosen acrylic mirror backing and wood if the tiles are not suitable self-adhesive pieces
- White satin ribbon wide enough to read clearly against the tile grid
- Small felt pads for the underside
Tools
- Ruler and pencil
- Fine sanding block for the wood
- Scissors for the ribbon
- Soft lint-free cloth
- A flat protected work surface
Double-faced satin ribbon has a smooth appearance on both sides, which makes bow shaping easier. Quantities depend on the cube and tile dimensions. Count your planned rows before ordering rather than estimating from the photograph.
Want to Make These Boxes?
I’ve put together a convenient Amazon supply list featuring hand-picked, well-rated products that complement the DIY project shown in this post to save you time.
See My Hand-Picked Supply ListAs an Amazon Associate I earn from qualifying purchases but this doesn’t increase your price at all!
Before You Start
Choose the tile size first, then match it to the cube faces. As a suggested starting arrangement, a face could hold three rows of three tiles or four rows of four. These are layout options, not measurements taken from the inspiration.
Account for a little space at the outside edges and between tiles. A cube that is exactly three tile widths across may not leave room for slight manufacturing variation. Test the real pieces on the real cube before attaching anything.
Use acrylic tiles rather than glass for this version, and don’t cut mirror pieces to force a fit. Select a different cube or tile size if the layout doesn’t work. Check the adhesive instructions for surface preparation, application, ventilation, and curing, and test compatibility on a spare piece first.
Step-by-Step Mirror Tile Tutorial
1. Prepare the Wooden Cube
Lightly sand rough areas on the wood, particularly along the edges where ribbon will pass. Keep the faces flat and the corners square enough for the tile pattern. Wipe away dust with a suitable dry cloth and make sure the surface is clean before proceeding.
If the cube has dents or uneven faces, choose a better base rather than expecting thin acrylic tiles to hide the problem. A flat surface supports a cleaner reflection and more dependable contact. Leave the underside uncovered so the cube can sit steadily while you work.
2. Dry Fit the First Tile Grid
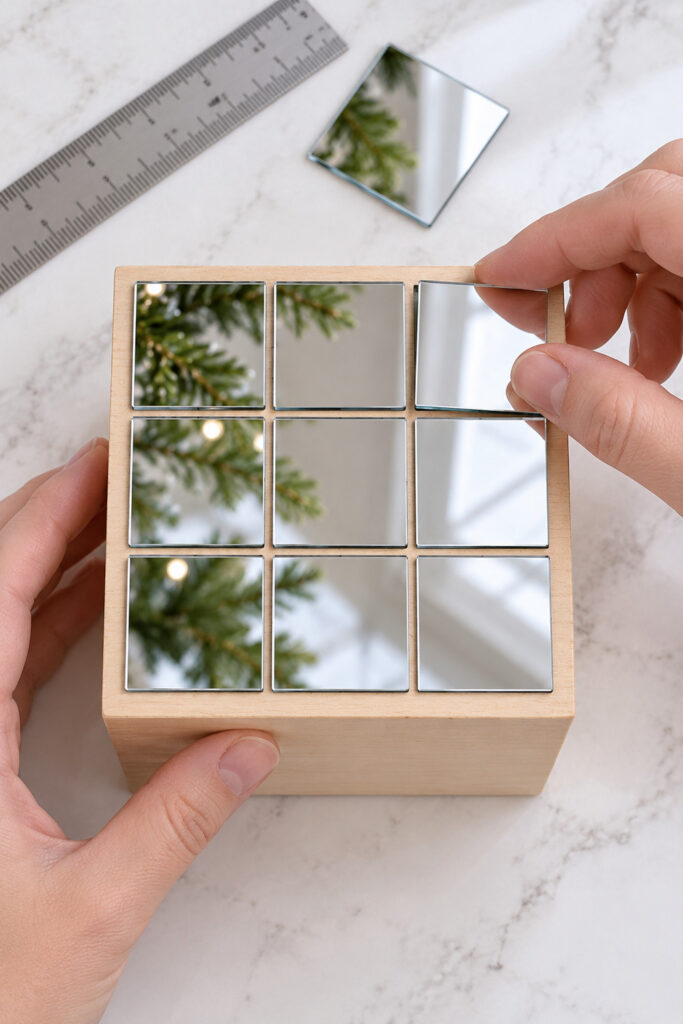
Lay one cube face upward and arrange the tiles without adhesive. Leave their protective front film in place if supplied. Center the grid and keep a narrow, consistent gap between pieces, with all edges inside the cube face.
Check the arrangement against the adjacent face as well. Tiles should not overhang a corner or collide with the tiles planned for the next side. Thin tiles and a small inset at each outside edge make this easier. Lightly mark guide lines on the wood if you need help keeping rows straight.
3. Attach One Face at a Time
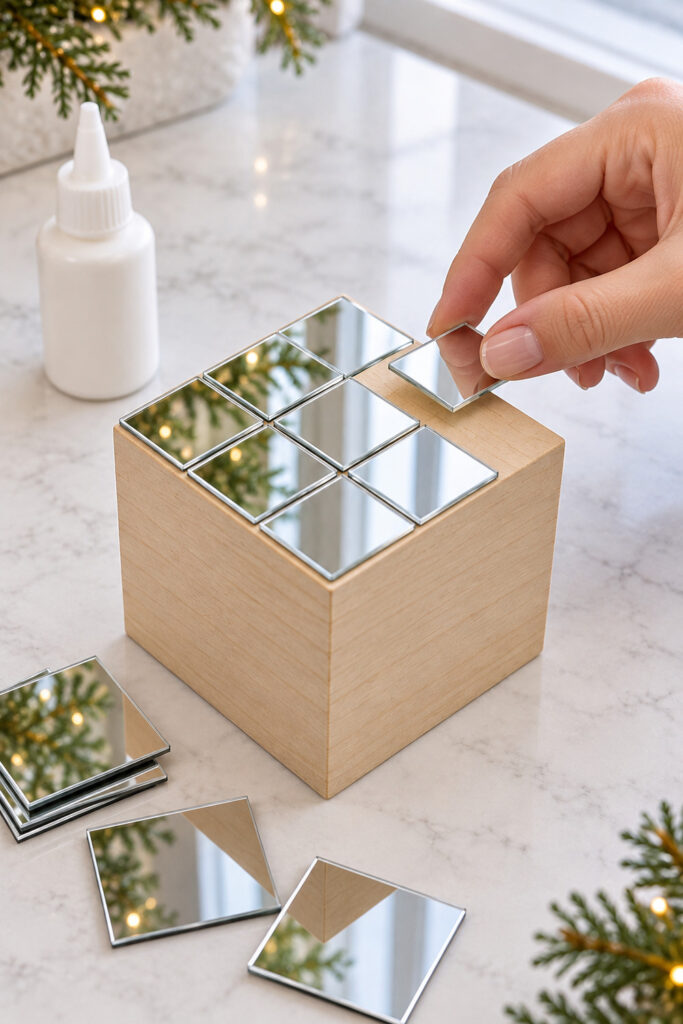
For suitable self-adhesive tiles, remove the backing one piece at a time and press each tile in place according to the manufacturer’s instructions. Otherwise, use an adhesive specifically approved for the actual mirror backing and wood. Don’t substitute an unverified general glue, since compatibility matters to both the bond and reflective coating.
Apply the recommended amount to the tile back, then place it within the guide lines. Too much adhesive can squeeze into the gaps and spoil the clean grid. Keep the front protective film on during this stage where the tile instructions allow it.
Complete the upward-facing surface and allow it to set as directed before rotating the cube. Follow the stated full curing time before adding ribbon. This takes patience, but moving a cube while its tiles can still slide makes the next face harder to align.
4. Finish the Sides and Top
Continue around the four sides, then cover the top using the same row spacing. Keep the underside plain. Support the cube on a protected surface and avoid pressing on freshly attached tiles while working on the next face.
Inspect each corner for projecting edges and uneven rows. If a tile needs adjustment, follow the adhesive’s working-time instructions rather than forcing it after curing. Don’t add grout. The narrow gaps are part of this clean parcel design, and grout would add an unnecessary finishing stage.
5. Clean the Faces and Cross the Ribbon
Once the adhesive is fully cured, remove the protective film as directed and wipe the tiles with a cloth suitable for acrylic. Avoid abrasive cleaners. Check that every piece is secure before wrapping, then add small felt pads underneath without covering the ribbon’s planned route.
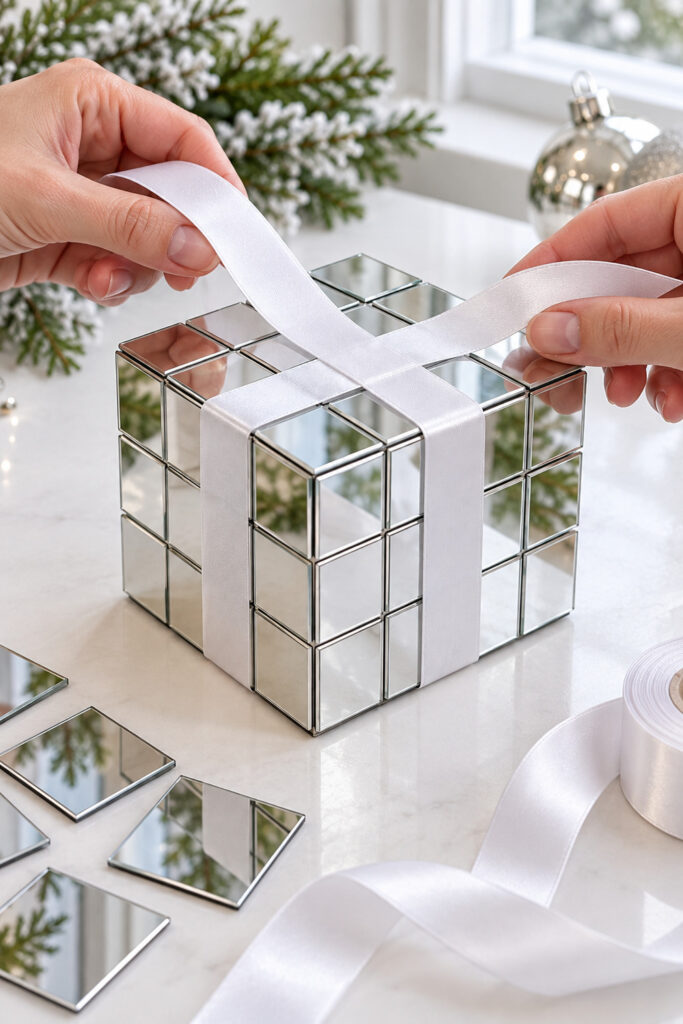
Run a length of white satin ribbon underneath the cube and bring the ends over the top. Cross or tie it at the center, turn the cube, and run the ribbon in the perpendicular direction to make a cross on the top and bottom. Keep both bands flat rather than twisted, and center them on the faces.
6. Tie and Shape the Bow
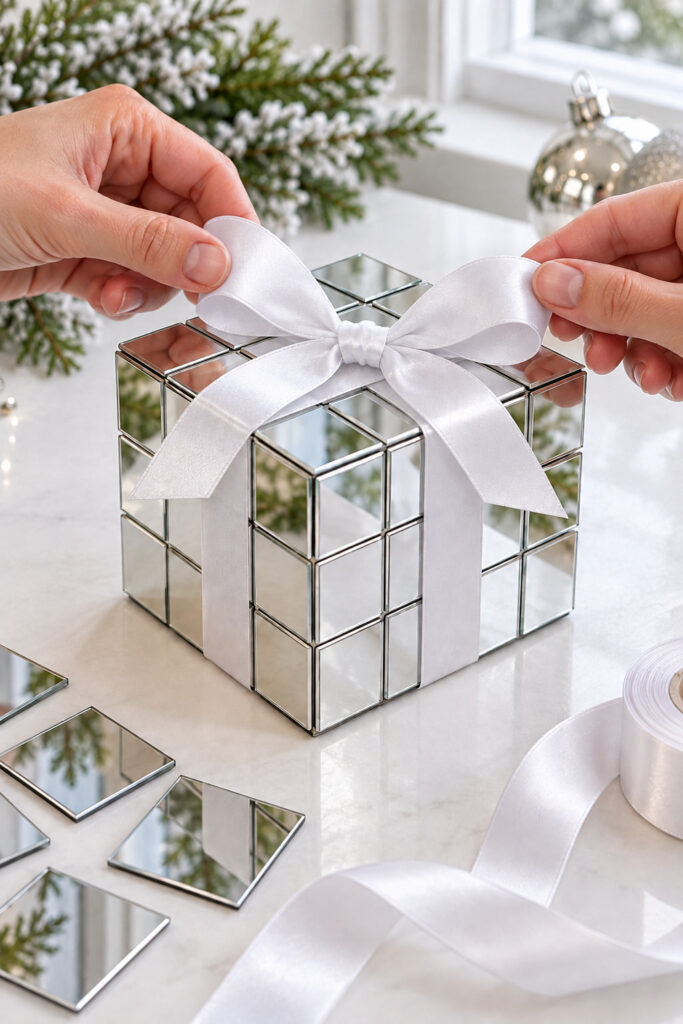
Tie a bow at the top crossing. Keep the first knot firm enough to hold the bands in place without pulling hard against the tiles. Adjust the loops while the knot is still loose, then tighten gently and arrange the tails so the tile grid remains visible.
Trim the ends neatly with scissors. If your bow looks too large for the cube, reduce the loop length rather than adding another ribbon layer. The inspiration keeps the white accents clear but leaves plenty of reflective squares showing.
Tips for Getting the Finished Look
Use consistent gaps rather than trying to make every tile touch. A small, even grid reads more neatly than rows squeezed together on one side and spread apart on another. Check the first face carefully because its spacing becomes your guide for the rest.
White ribbon gives the silver a soft contrast. Choose a width that covers part of a tile row without hiding most of the face. Test a short strip before cutting a full wrapping length, especially if your cubes are small.
Easy Ways to Customize the Parcels
Make cubes in two or three sizes while keeping the same tile size and ribbon finish. That preserves continuity across the group. Another option is a single larger cube beside a few existing silver ornaments, avoiding the work of making a full set.
Ivory ribbon gives a warmer appearance, while pale blue changes the winter palette. Keep one ribbon color across the group if you want the reflections and grid to remain the main details.
Displaying the Finished Boxes
Set the cubes on a level indoor surface where their bases sit fully supported. Arrange them in a staggered group rather than balancing one on another. A little evergreen behind them repeats the inspiration while leaving the bows easy to see.
These are decorative objects with small attached pieces, so keep them out of reach of children and pets who may pull off tiles or chew ribbon. Keep them away from candles, heat sources, damp areas, and direct outdoor exposure unless every component is specifically suited to those conditions.
Final Encouragement
Finish one cube before preparing the whole set. Once the tile spacing and ribbon width suit that piece, repeat the method in your chosen sizes. The clean grid and simple satin bow are what make these parcels recognizable, even when your arrangement differs from the inspiration.