*This post may contain affiliate links for which I earn commissions.*
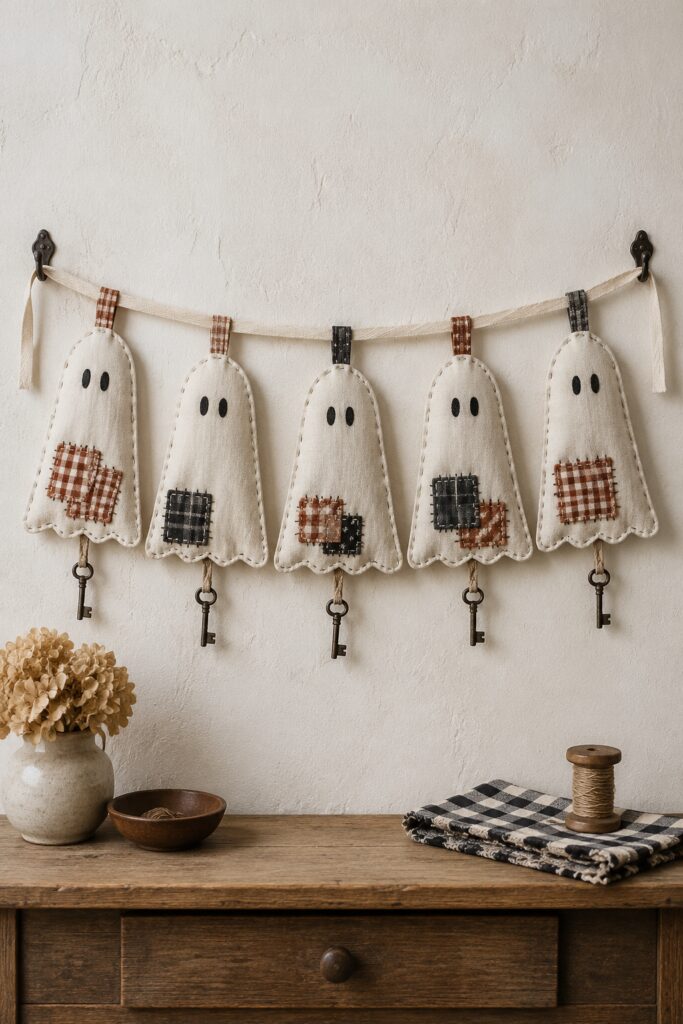
A little checked patch and a dangling key give these linen ghosts an unexpectedly mischievous personality. They look like they might know which cupboard holds the Halloween treats.
This project pairs softly shaped fabric pennants with visible stitching, simple oval eyes, and miniature antique-style keys. The method uses flat layers with a little batting between them, making it manageable to sew by hand without turning narrow shapes or stuffing tiny corners.
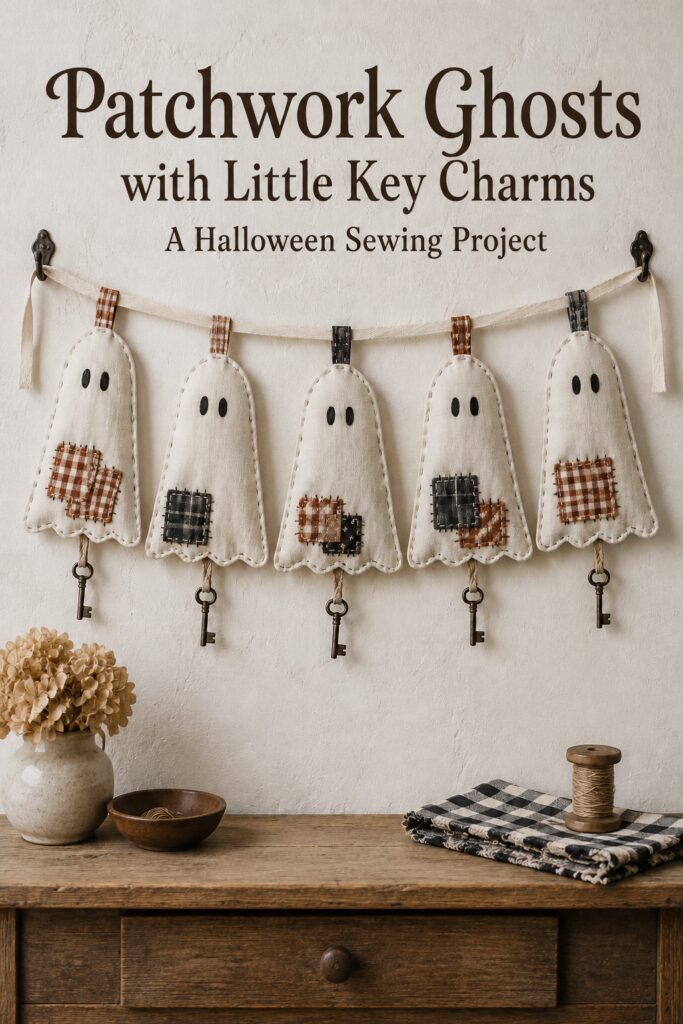
The inspiration and instructional images were created with AI. They illustrate a proposed DIY method rather than a photographed construction process.
A Garland of Little Linen Ghosts
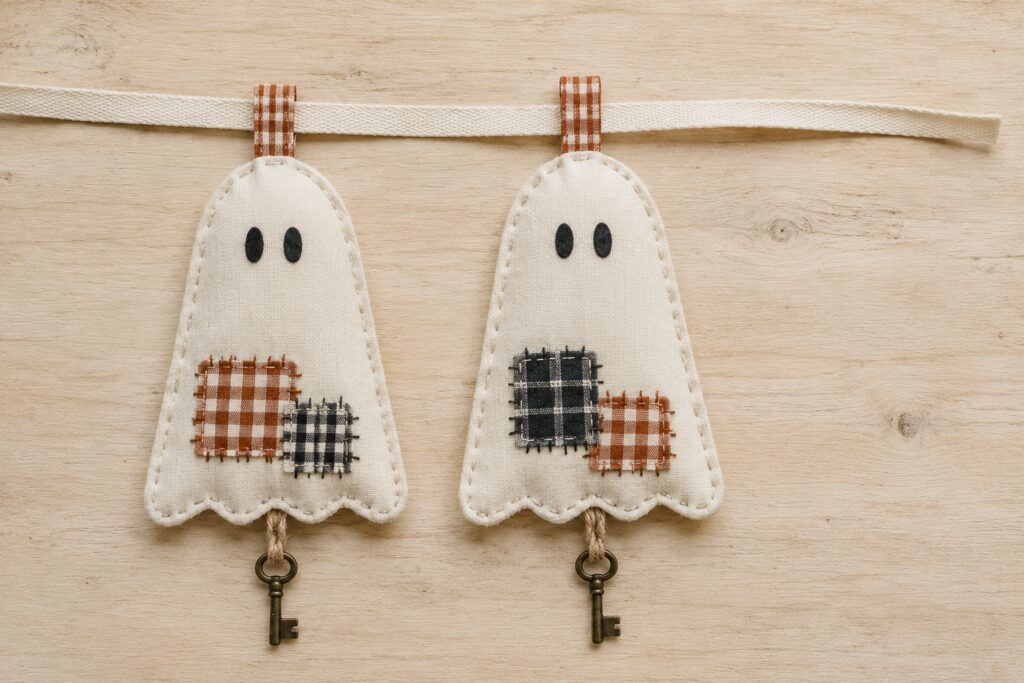
You’ll make five lightly padded ghosts suspended from cotton tape. Each one has a rounded head, a gently scalloped bottom, checked patches, and a small key hanging underneath.
Suggested finished dimensions are approximately 8 inches tall and 4 inches wide per ghost, excluding the hanging tab and charm. A 48-inch length of tape gives you room to arrange them with modest gaps and leave ends for tying.
The main adaptation is using lightweight craft charms instead of heavy antique keys. Reinforced cord attachments help keep their weight from pulling directly on the scalloped edges.
Materials and Supplies
Fabric and Findings
For five ghosts, gather:
- About ½ yard of ivory medium-weight linen or a closely woven linen-cotton blend, at least 44 inches wide
- Rust-and-cream and charcoal-and-cream checked cotton scraps
- A small piece of thin black felt for the eyes
- Low-loft cotton batting, approximately 12 by 24 inches
- Five lightweight antique-style key charms, approximately 1 to 1½ inches long
- About 48 inches of ¾-inch-wide cotton twill tape
- Approximately 30 inches of thin cotton cord that fits through the key openings
- Strong sewing thread in cream and dark brown or charcoal
- Cream embroidery floss for the visible outline stitching
Reserve a few closely woven cotton scraps for reinforcing the cord attachments.
Tools
You’ll need fabric scissors, paper scissors, paper, a pencil, a ruler, a removable fabric marker, pins or clips, hand-sewing needles, an embroidery needle, and an iron with a suitable pressing surface.
A sewing machine is optional. The entire project can be stitched by hand.
Before You Cut the Linen
Wash and press washable fabrics before cutting if you want to remove sizing or allow for shrinkage. Keep the checked scraps reasonably flat, even if you plan to leave a little fringe around their edges.
Test your removable marker on a scrap. Also check that each key has a smooth opening large enough for the cord and that its edges won’t snag fabric.
Make one complete ghost before cutting the entire batch. That gives you a chance to adjust the scallops, patch size, and hanging loop without repeating an awkward detail five times.
Sew the Garland Step by Step
1. Draw a Softly Scalloped Template
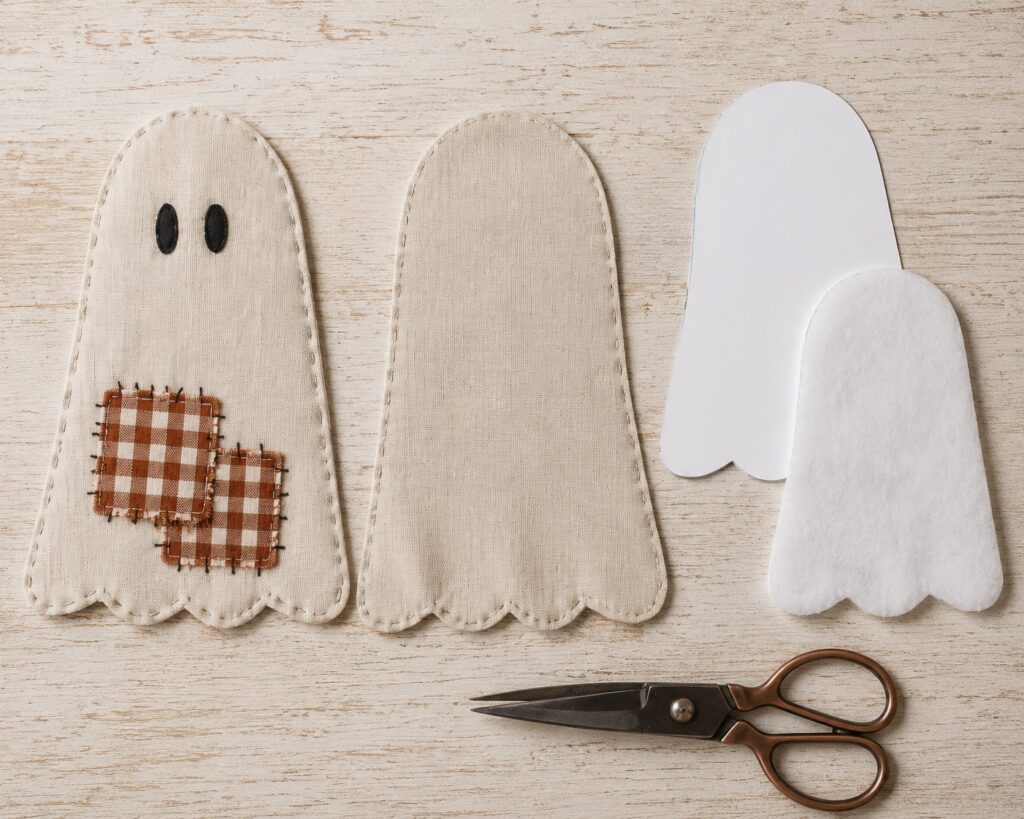
Draw a shape approximately 8 inches tall and 4 inches wide, with a rounded head and sides that widen slightly toward the bottom.
Add three broad, shallow scallops along the lower edge. Keep the dips gentle, approximately ¼ inch deep. Deep notches are harder to finish neatly and don’t add much to the look.
This outline represents the finished shape. Trace it onto the wrong side of your linen, then cut approximately ¼ inch outside the line for the seam allowance.
Cut a matching front and back for each ghost. For the batting, use the finished outline and trim it about ¼ inch smaller all around.
2. Prepare the Edges, Eyes, and Patches
Fold each linen panel’s seam allowance toward the wrong side along the marked outline. Press carefully, then hold it with long temporary basting stitches.
At the shallow dips between scallops, make a tiny clip into the allowance if needed, stopping short of the fold line. Ease the rounded sections into small folds rather than forcing the fabric flat.
Cut two black felt ovals approximately ½ inch tall for each face. Position them near the upper third of the front panel and sew them down with small black stitches.
For the patches, start with checked squares approximately 1 to 1½ inches across. Pull away just a thread or two from the edges for a modest fringe.
Arrange one or two patches toward the lower half of each front. Keep them clear of the folded perimeter. Stitch across their edges into the linen with short, visible stitches, placing the stitches inside the fringe so the patches remain secure.
3. Anchor the Top Tabs and Bottom Loops
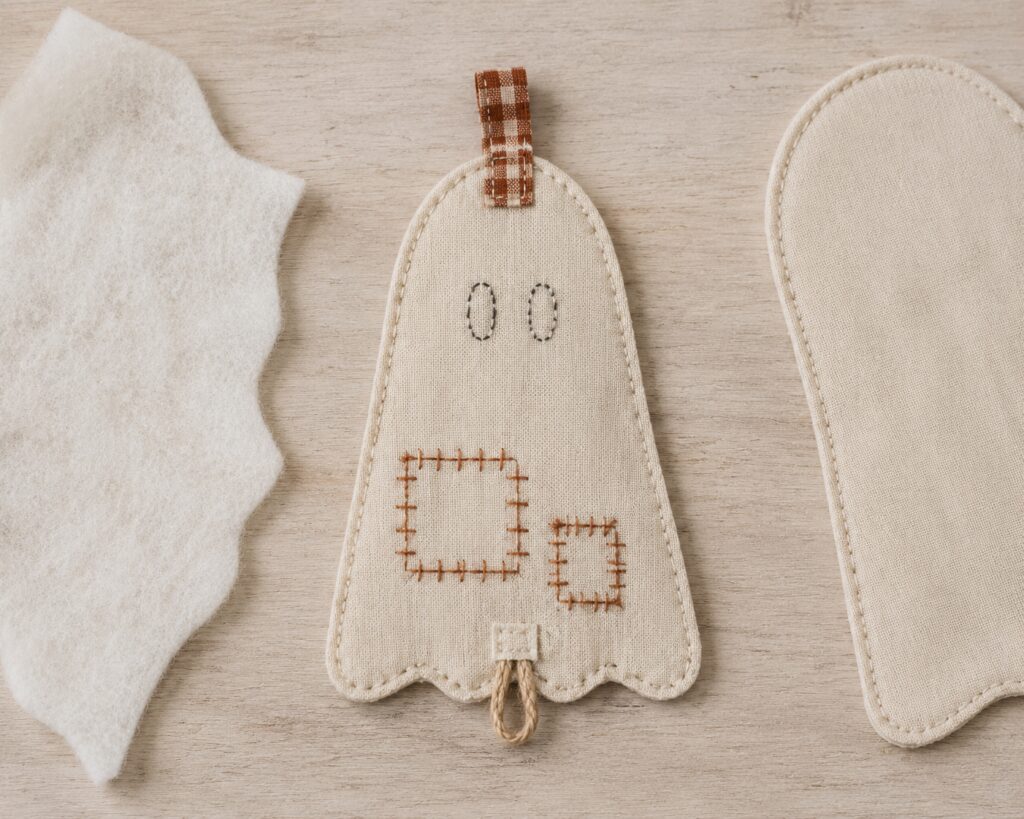
Cut a checked strip approximately 1½ by 4 inches for each top tab. Fold the long edges inward, then fold the strip lengthwise and stitch it closed. This makes a narrow fabric band with enclosed long edges.
Fold the band in half. Position its two raw ends against the wrong side of the front panel at the head, overlapping the linen by about ¾ inch. Leave enough loop projecting above the head for the twill tape to pass through comfortably.
Backstitch the ends securely to the panel. These stitches will eventually be hidden between the layers.
For the lower attachment, fold a roughly 6-inch piece of cotton cord in half. Let the loop project about 1 inch below the center of the scalloped edge.
Lay both tails upward against the wrong side of the front. Sew repeatedly over and around them with strong thread, then cover the anchored ends with a small cotton reinforcement patch. Stitch the patch securely around its edges, catching the cord beneath it.
Gently tug both attachments before continuing. Neither should slide.
4. Join the Layers with Visible Stitches
Place the back panel wrong side up. Center the batting on it, keeping the batting clear of the folded edges.
Set the decorated front over the batting, right side facing you. Align the outlines and check that both hanging loops project freely.
Clip the layers together. Using two strands of cream embroidery floss, work a running stitch around the perimeter approximately ⅛ inch from the edge. Take the needle through both linen layers, keeping the stitches short enough to hold the edges together.
Use smaller stitches around the scallops. Pull the thread snug without gathering the fabric.
Remove the temporary basting as you go. Secure the finishing knot between the layers and tuck away the thread tail.
The result should feel softly padded but remain nearly flat. A bulky insert can make the patches bulge and the lower edge curl.
5. Add the Little Keys
Attach one charm to each bottom cord loop using a lark’s head hitch.
Push the folded end of the cord loop through the key’s opening. Pass the entire key through that protruding loop, then ease the cord snug against the opening.
If the key won’t pass through the loop, adjust the loop before closing the next ghost or select a smaller charm. Don’t force a metal edge through the cord.
Hold the finished piece upright and check its shape. If the charm pulls the bottom into a pronounced point, replace it with a lighter one.
6. Thread and Space the Pennants
Slide the twill tape through the checked tabs. Arrange the five ghosts with approximately 2 to 3 inches between their widest points, adjusting the spacing to suit your display.
Alternate rust and charcoal accents without making every arrangement identical. One ghost might have a single charcoal patch while its neighbor has two overlapping rust squares.
Temporarily hang the tape and adjust the drape. If the tabs slide toward the center, add a small tack stitch through the back of each tab and the tape.
Details That Give Them Character
Keep the faces simple. Two narrow eyes create the quiet, slightly puzzled expressions that make the inspiration appealing.
Choose small checks so the pattern remains recognizable on the tiny patches. A large buffalo check may become a mostly solid square once cut down.
Let the stitching show, but avoid leaving long loose loops. Slightly varied stitch lengths create a handmade appearance without compromising the attachments.
Use warm ivory fabric rather than a stark white if you want the ghosts to sit naturally beside aged wood, cream pottery, and dried flowers.
Small Changes to Make Them Your Own
Use scraps from a worn cotton shirt for the patches, provided the fabric is still sound enough to hold stitches. Faded checks work especially well.
For a quieter palette, combine oatmeal linen with charcoal patches and cream tabs. For more autumn color, add a muted mustard patch to one or two pennants.
A single ghost also makes a hanging decoration for a cabinet knob. Thread a short ribbon through its top tab instead of adding it to the garland.
Where to Hang Your Finished Garland
Display it indoors above a console, across a decorative shelf, or on a wall where the little keys can hang freely.
Use secure hooks appropriate for the surface and total weight. Keep the fabric away from candles and heat, and position the cord and detachable charms out of reach of small children and pets.
When the season ends, lay the pieces flat and cushion the keys with tissue so they don’t catch the fabric.
Start with one little character and let its patch placement guide the others. Matching shapes and a restrained fabric palette will hold the group together, even when each ghost has a slightly different personality.