*This post may contain affiliate links for which I earn commissions.*
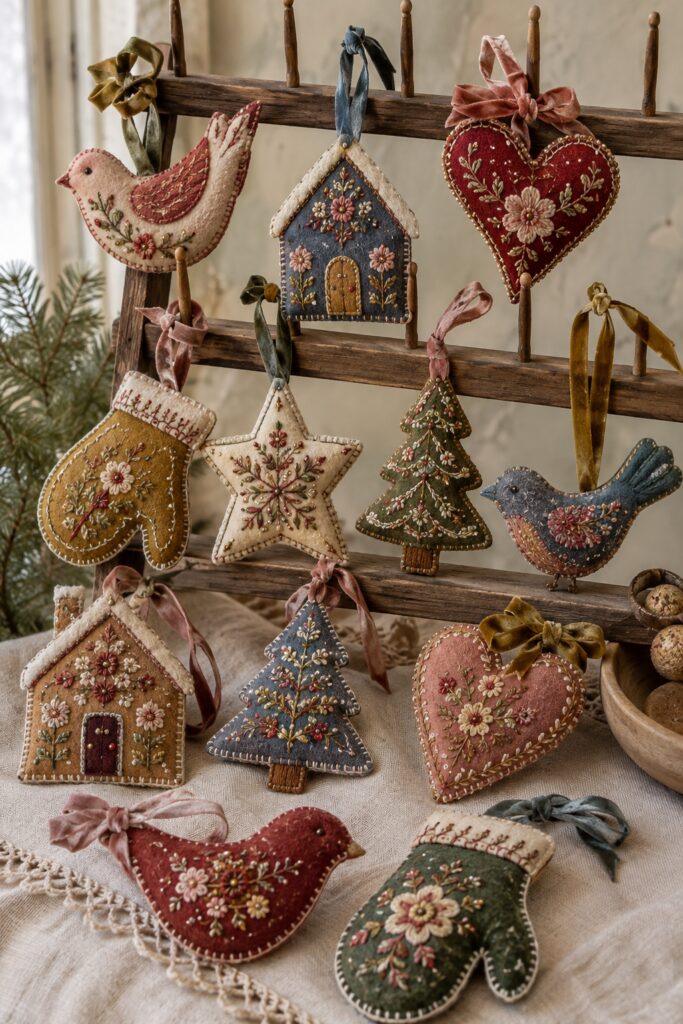
Handmade ornaments feel especially meaningful when their appeal extends beyond a single Christmas season. This collection of embroidered felt birds, houses, hearts, stars, mittens, and trees has the careful detail of decorations intended to be brought out year after year.
Muted wool-blend felt gives the pieces their warm foundation. Floral embroidery, tiny beads, blanket-stitched edges, light padding, and crushed-velvet ribbons transform the simple shapes into richly detailed keepsakes.
The collection also offers plenty of room for personalization. Colors can be chosen to complement existing Christmas decorations, while embroidery patterns can represent favorite flowers, meaningful symbols, or family traditions.
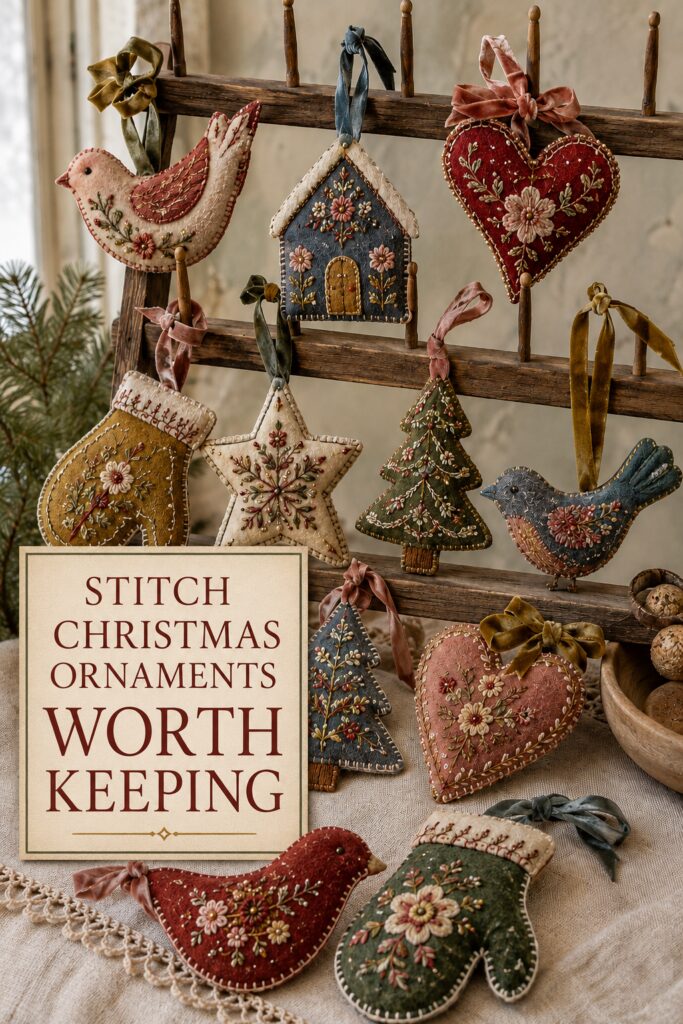
Image disclosure: This inspiration image was created with AI. It is intended to provide ideas for handmade holiday decorations rather than depict specific finished products available for purchase.
What Gives These Ornaments Their Heirloom Quality?
The ornaments are elaborate without feeling overly formal. Their recognizable Christmas shapes make them approachable, while the embroidery introduces finer detail.
A restrained palette is part of their charm. Burgundy, dusty rose, mustard, charcoal blue, moss green, and cream look softer than clear red, green, and white. These shades also allow the small floral designs to remain visible.
Texture gives the collection additional depth. The felt is matte and softly substantial, embroidery thread adds a slight sheen, and tiny beads catch points of light. Velvet ribbon introduces a plush finishing material without overpowering the hand stitching.
Small variations are welcome. Slightly different flowers, stitch lengths, ribbon knots, and edge details help handmade pieces look individual.
Select Felt With Enough Structure
Felt is particularly suitable for ornaments because it does not fray and can support decorative stitching.
Wool or wool-blend felt generally has a denser, more refined appearance than very thin craft felt. It should be firm enough to hold a clean silhouette but flexible enough to stitch without excessive resistance. The ideal thickness for this project is 1.2-1.5mm.


Begin with a coordinated group of six or seven colors. Include several darker shades, one or two warm midtones, and a light neutral. Charcoal blue, burgundy, moss, mustard, dusty pink, and cream would closely reflect the inspiration collection.
Use contrasting felt for small appliqué details. A cream roof, burgundy door, pink wing, or brown tree trunk can make a simple silhouette more dimensional.
Build a Family of Familiar Shapes
A varied collection is more interesting than a dozen identical ornaments.
Begin with simple outlines such as a heart, star, mitten, bird, house, and Christmas tree. Keep their finished dimensions relatively consistent so no single ornament dominates the group.
Curves and corners should be broad enough to turn neatly once the two felt layers are assembled. Extremely thin points can be difficult to fill and may lose their shape.
Cut a front and back for each ornament. If the front includes separate felt pieces, arrange and stitch those details before joining the two main layers.
Paper templates can be reused to produce matching front and back pieces. A removable fabric marker or transfer material can help position the embroidery consistently.
Plan the Floral Embroidery Before Stitching
The botanical patterns are the most important decorative element, so it helps to sketch their placement first.
Allow the ornament shape to guide the composition. A vertical flower stem suits a mitten or narrow tree. A curved garland follows the edge of a heart, while a central flower and radiating branches can fill a star.
A small group of basic stitches can create considerable variety. Use backstitch or stem stitch for branches, lazy daisy stitches for petals and leaves, French knots for flower centers, and satin stitch for small filled areas.
Repeat several thread colors across the complete collection. Burgundy, dusty pink, cream, olive, mustard, and muted gold will make different motifs feel related.
Avoid covering every inch. Leaving visible felt around each design gives the embroidery space to stand out.
Use Pattern-Transfer Material for Detailed Motifs
Drawing directly onto dark felt can be difficult. A washable or water-soluble stabilizer offers an easier way to transfer small designs.
Draw or print the motif onto the transfer material, adhere it to the felt, and stitch through both layers. Remove it according to its instructions after the embroidery is finished.
Always test the process on a felt scrap first. Confirm that the transfer material releases cleanly and that the felt, embroidery thread, and decorative elements tolerate the required removal method.
Simplified hand-drawn motifs can be just as effective. A center flower, two curved stems, and several leaves may be enough to decorate a small ornament beautifully.
Add Beads as Tiny Points of Light
The beadwork in the image is subtle. Small gold, pearl, burgundy, and amber beads accent flower centers and border details without covering the embroidery.
Use a fine needle that passes easily through the bead openings. Secure each bead carefully so one broken thread will not release an entire row.


A few scattered beads often look more refined than a dense covering. Place them where light might naturally catch, such as around a heart border, in a flower center, or between embroidered leaves.
Very small embellishments may not be suitable for ornaments that young children can handle. In that situation, use French knots or metallic thread to create a similar effect.
Join the Layers With Blanket Stitch
Contrasting blanket stitch creates the decorative border visible around each ornament.
Place the embroidered front over the plain backing and hold the layers together with clips or a few pins. Begin stitching around the edge, keeping the stitch depth and spacing reasonably consistent.
Leave a small opening before completing the border. Add a modest amount of filling, working it gently into corners, wings, roofs, and mitten thumbs.
The ornaments should look softly padded rather than firmly stuffed. Too much filling can distort the edges and place unnecessary tension on the stitches.
Finish the opening with the same blanket stitch and conceal the thread end between the layers.
Finish the Ornaments With Velvet Ribbon
Velvet ribbon reinforces the quiet, heirloom character of the collection.
Dusty pink, muted olive, mustard, charcoal blue, and burgundy are particularly appropriate. Narrow ribbon works for simple hanging loops, while wider ribbon can be tied into soft bows above hearts or larger ornaments.

Attach the ribbon securely between the layers or sew it to the back before closing the ornament. Test the loop length on a tree branch or ornament stand before finishing the complete collection.
Varying the ribbon color is an easy way to make each ornament different while preserving the shared palette.
Display the Collection Beyond the Christmas Tree
These ornaments can be enjoyed in several places before they move to the tree.
Hang them from a wooden peg rail, small ladder, cabinet knobs, or a ribbon stretched across a mantel. A few can be tied to wrapped gifts or added to holiday place settings.
A shallow basket or wooden bowl can hold the pieces that are waiting to be hung. Linen, evergreen clippings, wood, and aged metal provide natural companions for their muted colors.
When the season ends, wrap the ornaments loosely in acid-free tissue and store them where they will remain dry and protected from crushing.
Shop Supplies for the Project
Look for Muted Wool-Blend Felt
Choose several harmonious vintage-inspired colors rather than a bright rainbow assortment.
Shop Coordinating Embroidery Floss
Build a compact palette of floral shades, leafy greens, warm neutrals, and muted metallic accents.
Start With Felt Ornament Patterns or a Kit
Use simple shapes that leave enough open space for personalized embroidery.
Add Washable Pattern-Transfer Sheets
Transfer detailed floral motifs onto both light and dark felt before stitching.
Shop Tiny Beads for Embroidery
Choose small pearl, gold, amber, pink, and burgundy accents.
Finish With Soft Velvet Ribbon
Mix several subdued ribbon colors while keeping the widths and textures related.
Final Styling Tip
Give each ornament one feature that makes it memorable, then repeat a few thread and ribbon colors throughout the collection. They will feel coordinated without losing the individuality that makes handmade Christmas decorations worth keeping.