*This post may contain affiliate links for which I earn commissions.*
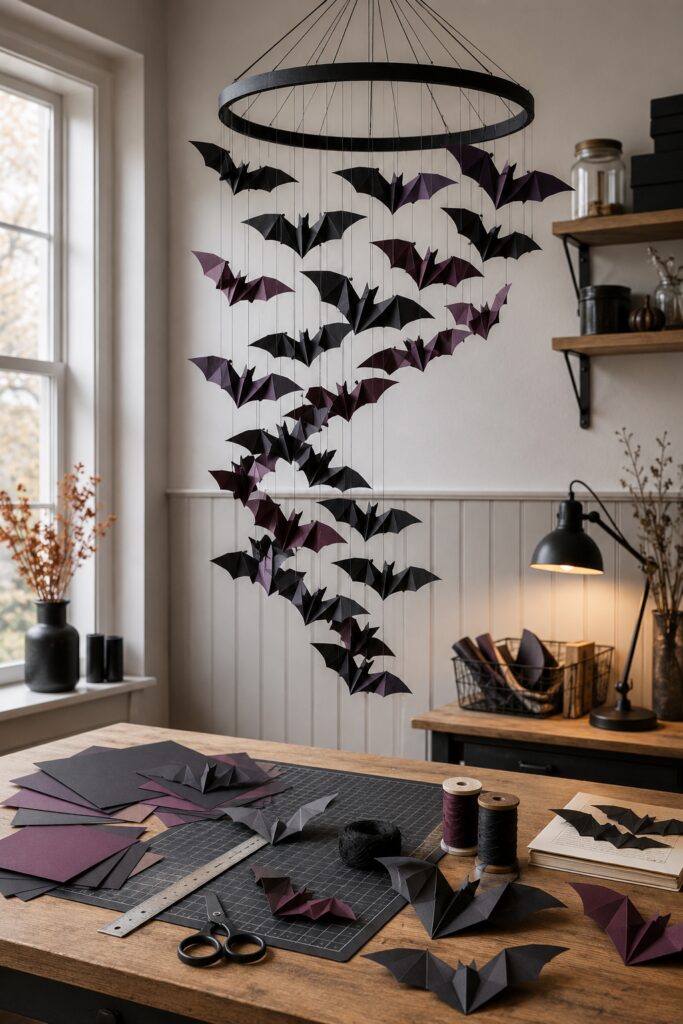
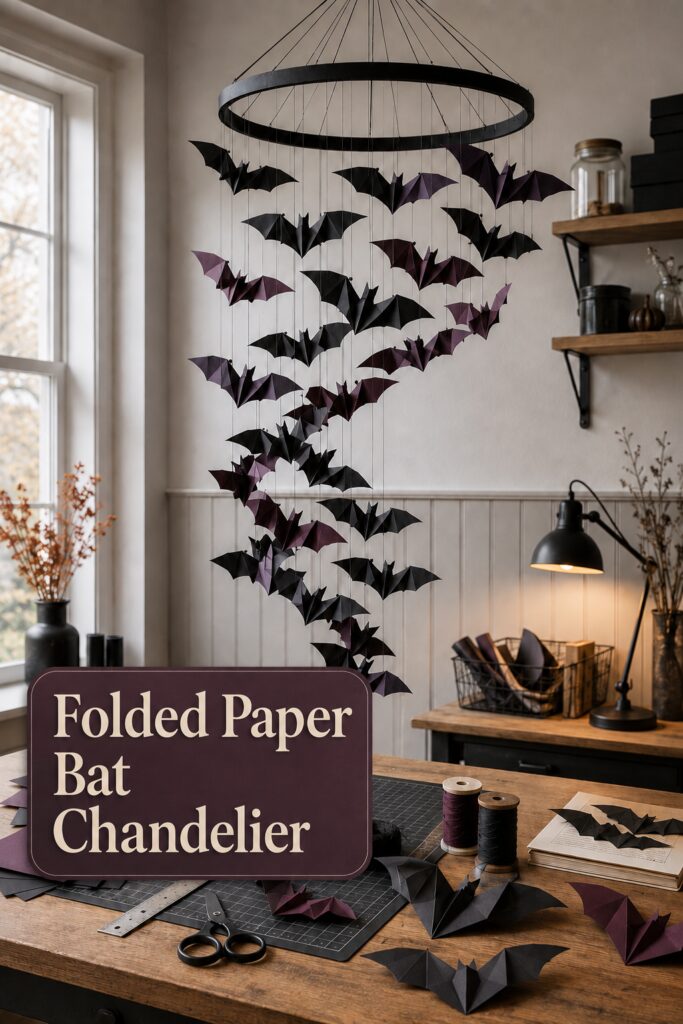
A flock of dimensional paper bats can turn an empty corner into a striking Halloween focal point without adding anything gory or overly theatrical. The inspiration image pairs matte black and deep plum bats with a broad dark ring, then sends them downward in a loose, swirling formation.
The version below keeps that distinctive shape but adapts it into a lightweight hanging mobile that an ordinary crafter can assemble with cardstock, a craft hoop, and clear line. The inspiration and instructional images for this project were created with AI. This tutorial translates the visual idea into a practical project you can recreate at home rather than documenting an object that was physically constructed.
What You’re Making
This project is an indoor Halloween mobile made from roughly 24 to 32 folded cardstock bats suspended from a wrapped craft hoop. An approximately 16- to 20-inch ring creates a substantial display, while staggered lines form the tapered spiral seen in the inspiration image. Instead of a heavy ceiling-mounted metal structure, this practical version uses one lightweight ring and a three-point suspension.
Materials and Supplies
Materials
- One lightweight craft hoop, approximately 16 to 20 inches across
- Medium-weight matte black cardstock, approximately 65 to 80 lb
- Medium-weight deep plum or aubergine cardstock
- Clear monofilament line in a light test weight
- Black waxed cord for the three support lines
- Black paper tape, floral tape, or narrow matte ribbon for wrapping the hoop
- Scrap paper or light cardboard for bat templates
- Small pieces of clear tape or paper-safe glue, optional for securing knots
- Ceiling hook or other hanging hardware appropriate for the installation surface
Tools
- Sharp craft scissors
- Pencil
- Ruler
- Bone folder or another smooth paper-creasing tool
- Small awl, heavy needle, or 1/16-inch hole punch
- Cutting mat if using a craft knife for template work
Before You Start
Choose the display location before deciding how long to make the finished mobile. For a typical indoor corner, plan for the bats to descend approximately 30 to 48 inches below the hoop. Keep the lowest bat well above head height and away from doors, walkways, vents, ceiling fans, candles, lamps, and hot light bulbs.
Make three paper templates in small, medium, and large sizes. Suggested wingspans are about 4, 6, and 8 inches, but the exact measurements are flexible. A mix of sizes creates movement and keeps the flock from looking like rows of identical cutouts.
Step-by-Step Tutorial
1. Draw a Bat Shape That Folds Cleanly
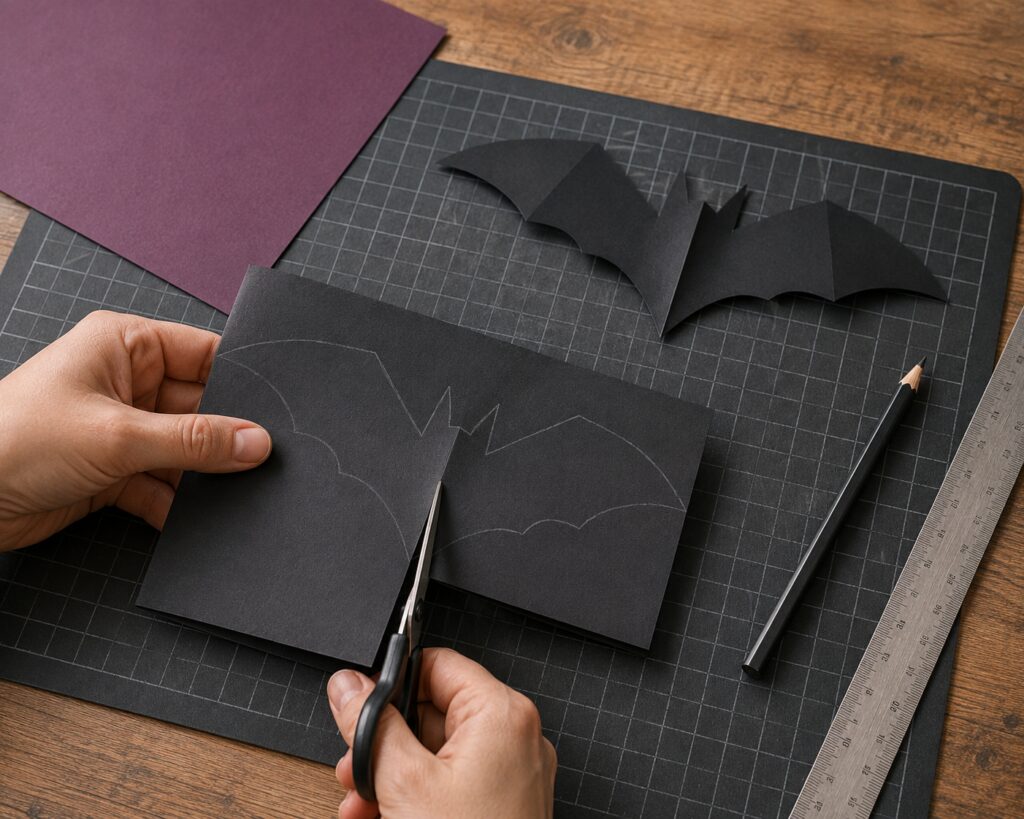
Fold a piece of scrap paper in half. Draw one half of a bat with a narrow body along the fold, two pointed ears, an angular upper wing, and two or three shallow scallops along the lower edge. Cut through both layers, unfold the paper, and inspect the silhouette.
Avoid very thin wing tips or intricate scallops. They are more likely to bend, tear, or disappear visually once the bats are hanging. Refine the shape, then trace it onto light cardboard to create durable templates in three sizes.
2. Cut the Black and Plum Bats
Fold each cardstock section lightly down the middle, place the template’s body against that fold, and trace the outline. Cut both halves at once so the wings stay symmetrical. Make approximately two-thirds of the bats black and one-third deep plum. For a medium display, 24 to 32 bats usually creates enough fullness without crowding the lines.
Vary the sizes within both colors. Reserve several large bats for the upper third, where the hoop is widest, and use more small bats toward the tapered bottom.
3. Give Each Bat Dimensional Wings
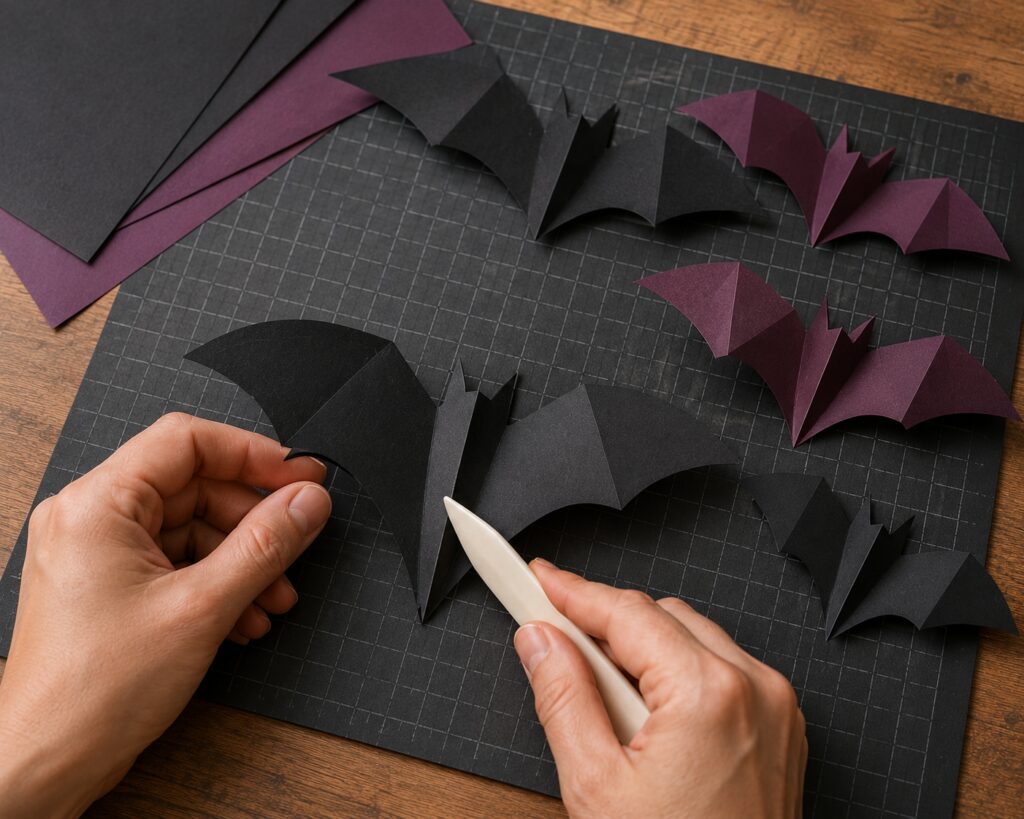
Open a cut bat and reinforce the center body crease with a bone folder. On each wing, score one line from near the shoulder toward the first lower scallop. Fold those two lines in the opposite direction from the body crease. The center should project forward while the wings angle slightly back and then outward.
Crease firmly enough to hold the shape, but do not flatten the paper into a tight accordion. A few broad planes will catch the light better and resemble the sculptural folds in the inspiration image.
4. Wrap and Suspend the Hoop
Cover the craft hoop with overlapping black paper tape, floral tape, or narrow matte ribbon. Keep the wrap smooth and consistent so the frame reads as a simple dark ring.
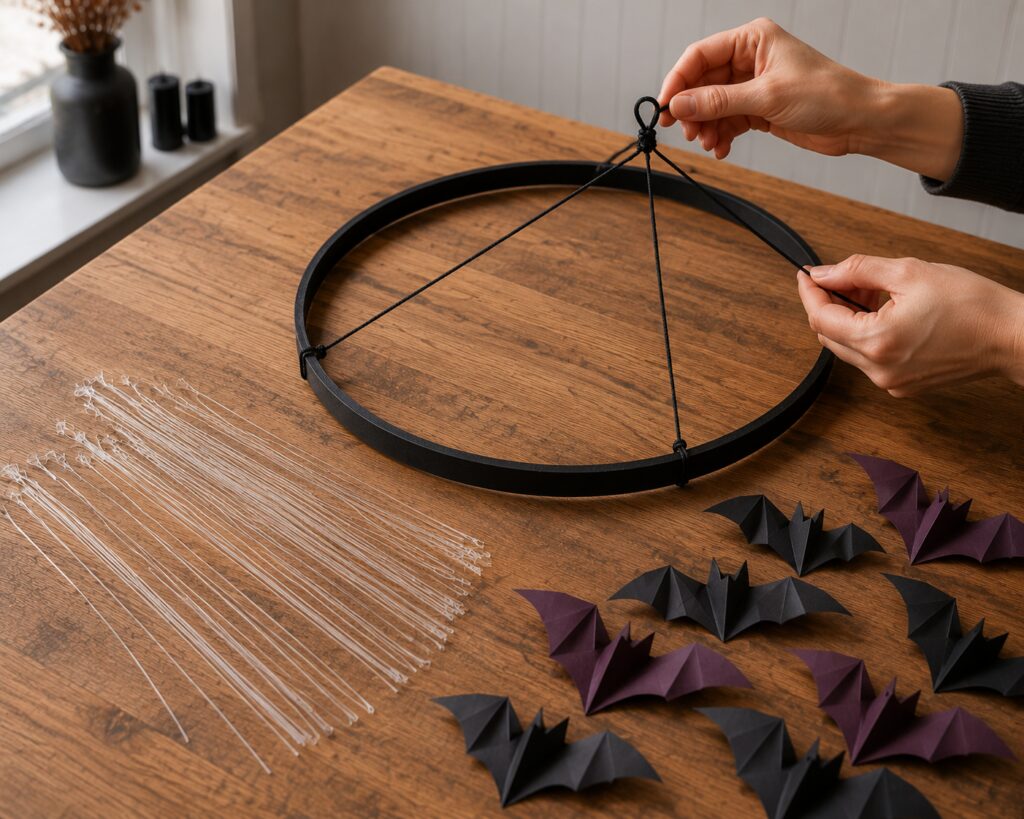
Cut three equal lengths of black waxed cord. Tie them to the hoop at evenly spaced points, then gather their free ends above the center. Adjust until the hoop hangs level and tie the ends into one secure loop. Add a small drop of paper-safe glue to the knots if the chosen cord tends to slip, and let it dry fully.
5. Plan the Descending Flight Pattern
Temporarily hang the empty hoop from a sturdy working hook where you can reach it without stretching. Cut clear monofilament into varied lengths. Begin with several short strands, then increase the lengths gradually until the longest reaches the planned bottom of the display.
Lay the bats on the floor or table in a loose spiral before tying anything. Place the largest pieces near the top and middle, mix the two colors irregularly, and allow the formation to narrow as it descends. Avoid an exact black-plum-black sequence. The flock should feel intentional but not mechanically patterned.
6. Attach the Bats to Clear Line
Use an awl, heavy needle, or tiny punch to make one hole through the center ridge near the bat’s upper back. Keep the hole several millimeters from the paper edge. Thread monofilament through it and tie a small double knot. A tiny piece of clear tape on the back can reinforce the attachment without showing from the front.
Tie the other end to the hoop with a knot that can still slide until the placement is final. Add bats one at a time, moving around the ring rather than completing one side first. This protects the balance and makes it easier to judge the developing spiral.
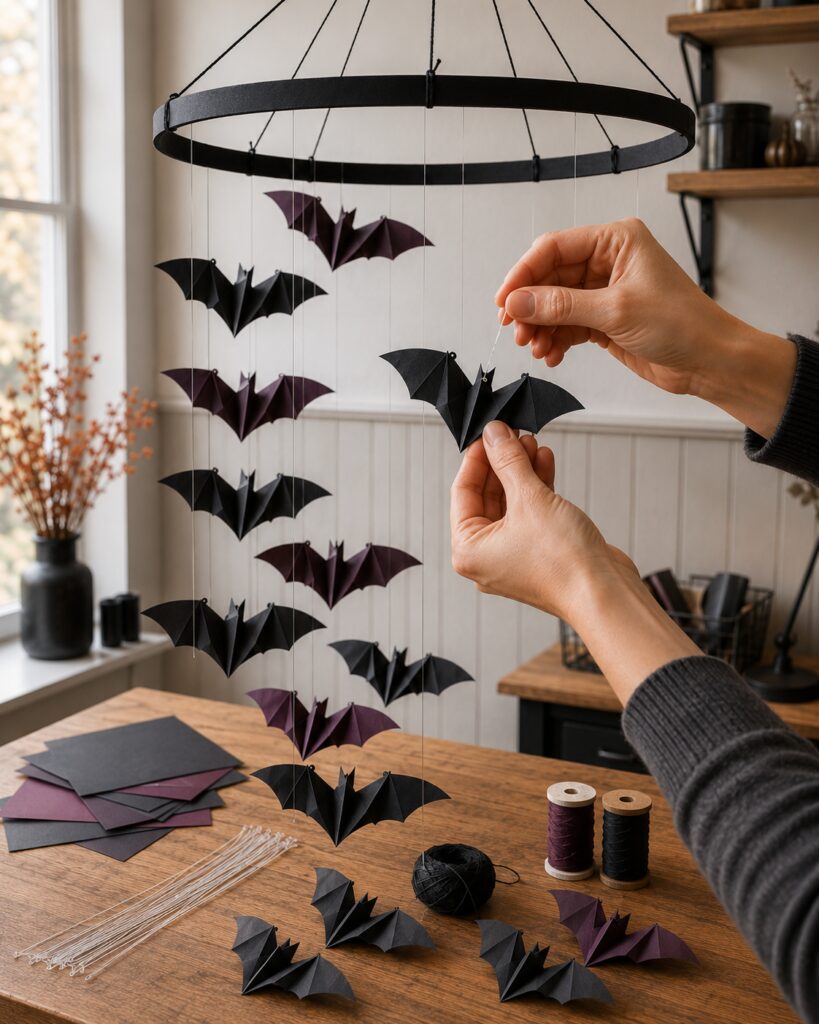
[STEP IMAGE 4: Place after this paragraph. Show hands tying clear monofilament through the small center hole of a folded bat while a partially assembled black-and-plum spiral hangs from the wrapped hoop.]
7. Build Fullness Without Tangling
Stand back after every four or five bats. Rotate the hoop gently and look for empty zones, accidental rows, or wings touching neighboring lines. Slide the top knots to correct spacing, then vary the height of nearby bats by at least a few inches.
Keep most monofilament strands vertical. The spiral comes from the changing positions and heights of the bats, not from crossing the lines. If two bats repeatedly collide, shorten one line or move its knot farther around the hoop.
8. Secure the Arrangement and Hang It
When the shape looks balanced, tighten every knot. Trim excess line while leaving a short tail, then add a minute piece of clear tape or a dot of appropriate glue where extra security is needed. Test the mobile from its hanging loop before installing it.
Fasten it only to hardware rated for the ceiling or support material. A lightweight paper mobile still needs a properly seated hook. If you are uncertain what hardware suits the surface, ask someone familiar with that construction type. Do not hang the project from an electrical fixture, sprinkler component, vent, or adhesive hook that is not rated for overhead use.
Tips for Capturing the Swirling Look
The deep plum bats are accents, not equal partners with the black. Keeping them to roughly one-third of the flock preserves the shadowy appearance while adding enough variation to reveal the folds.
Use large bats near the top, a varied mixture through the center, and mostly smaller bats near the bottom. Leave open air between wings so every silhouette remains readable. Soft side lighting from a window or cool LED accent light will emphasize the paper facets. Keep the display comfortably separated from the light source.
Easy Ways to Customize It
For a smaller apartment-friendly version, use a 10- to 12-inch hoop with 12 to 18 bats and a shorter drop. Replace plum with antique bronze, midnight blue, or dark forest green for a different palette while retaining the black majority. A few bats cut from subtly textured paper can add depth, but avoid heavy glitter paper because its weight can pull the mobile out of balance.
You can also make the flock broader rather than longer by using shorter lines around a larger hoop. For a child’s room or less dramatic setting, round the wing points slightly and choose charcoal with muted violet.
Displaying the Finished Chandelier
This mobile works best indoors in a quiet corner, over a stationary console, or centered above a table where no one walks beneath it. Paper and monofilament are not suitable for exposed outdoor weather. Keep the display away from open flames, hot bulbs, cooking areas, active ceiling fans, and curious pets that may pull on the lowest strand.
A Project That Does Not Require Perfect Copies
The impact comes from the dark ring, sculptural folds, varied sizes, and downward sweep, not from duplicating every bat in the AI inspiration. Once those four elements are in place, small differences in silhouettes and spacing make the finished display feel more natural.