*This post may contain affiliate links for which I earn commissions.*
These colorful patchwork fabric pumpkins offer a wonderfully unexpected way to decorate for Halloween. Instead of relying on spooky motifs or a traditional black-and-orange palette, the collection combines embroidered florals, plush velvet, ticking stripes, gingham, tiny prints, decorative cord, and silky tassels.
The result feels part heirloom sewing project and part whimsical pumpkin patch. Each pumpkin has its own combination of patterns, yet the repeated teal, raspberry, mustard, cream, moss, and navy tones make the entire display feel connected.
Better still, this is a project that can put beautiful fabric remnants, old textiles, and leftover trim to good use.
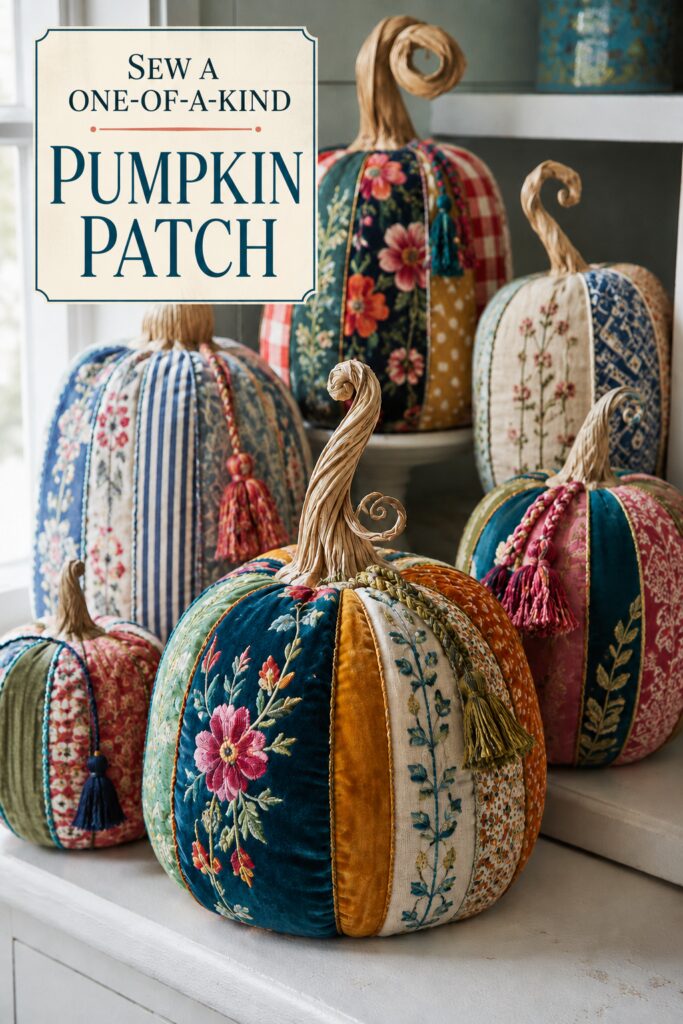
Image disclosure: This decorating image was created with AI as visual inspiration. It does not depict specific finished products available for purchase.
What Gives These Fabric Pumpkins Their Bespoke Style?
The pumpkins are memorable because they contain much more detail than a typical fabric pumpkin.
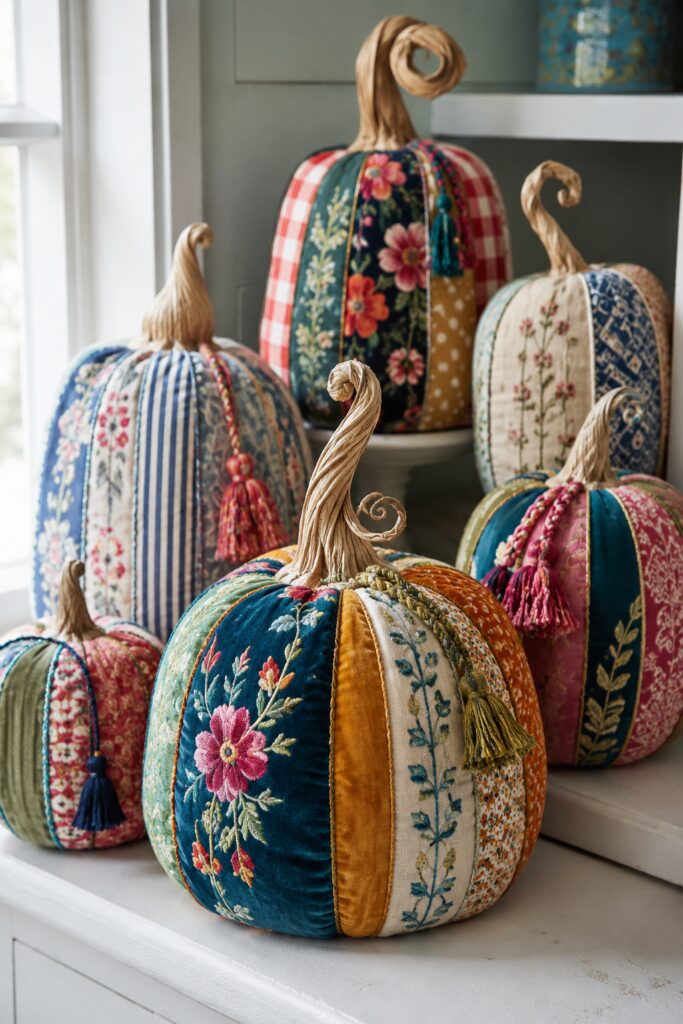
Each body is divided into narrow vertical sections. Rather than cutting every section from one material, the design alternates florals, stripes, solids, and small-scale prints. This turns the pumpkin into a three-dimensional patchwork project.
Texture is just as important as pattern. Velvet panels absorb the light, embroidered fabrics create raised detail, and woven cotton introduces a more casual texture. Piping and braided trim emphasize the seams, giving the pumpkins a polished, upholstery-inspired finish.
The long, curled stems provide another fanciful feature. Their exaggerated shapes make the pumpkins appear almost storybook-like, which is especially fitting for playful Halloween decorating.
Choose a Color Story Before Choosing Fabric
A collection this colorful still benefits from a clear plan. Begin by selecting four or five colors that can appear throughout the group.
The inspiration collection uses teal, blue, raspberry, mustard, moss green, and warm cream. Red and coral appear in smaller amounts. These shades feel autumnal without following the usual harvest palette.
You could also try plum, olive, copper, and faded pink for a romantic Halloween arrangement. Another option would be midnight blue, rust, ivory, and antique gold for a moodier interpretation.
Not every fabric must contain every color. The collection will feel coordinated as long as each pumpkin shares two or three colors with another one.
Mix Statement Fabrics With Quieter Patterns
Choose one or two showpiece fabrics for each pumpkin. Embroidered florals, tapestry remnants, velvet, brocade, or detailed botanical prints are all strong possibilities.
Surround those statement sections with simpler materials such as ticking stripes, gingham, polka dots, small florals, or solid velvet. The quieter sections give the eye a place to rest and prevent the combinations from becoming chaotic.
Fabric weight deserves some consideration. Medium-weight cotton, upholstery remnants, and stable velvet are easier to combine than very delicate or stretchy materials. If a favorite fabric is thin, lightweight interfacing can give it more structure.
This project is also a good reason to look through old pillow covers, fabric samples, damaged table linens, and remnants from previous sewing projects.
Create the Rounded, Segmented Pumpkin Shape
A segmented sewing pattern will produce the sculptural ribs seen in the image. Each vertical piece should curve outward through the middle and taper at the top and bottom.
Cut six to ten segments for each pumpkin, depending on how full and detailed you want it to appear. More segments produce a rounder body and allow more fabrics to be included.
Arrange the pieces on a table before sewing. Move them around until neighboring patterns have enough contrast. A large floral usually looks best beside a stripe, solid, or tiny print rather than another dominant floral.
Sew the curved sides together one section at a time. Leave an opening for turning and filling. Clip or notch curved seam allowances where necessary so they lie smoothly after the pumpkin is turned right side out.
Use Filling to Control the Final Shape
Polyester fiber fill provides a lightweight, plush result. Add it in small handfuls, distributing it around the outside before filling the center.
A loosely filled pumpkin will look soft and relaxed. A firmer fill creates a rounder, more structured shape and better supports an oversized stem.
Avoid creating one dense lump in the center. Work the filling into each fabric section so all the ribs appear evenly rounded.
After closing the opening, strong upholstery thread can be passed through the pumpkin’s center and tightened to deepen the top and bottom indentations. This small step makes the finished piece look considerably more pumpkin-like.
Define the Sections With Decorative Trim
The narrow dividing lines are one of the collection’s most distinctive details.
Piping can be sewn between the fabric panels while assembling the pumpkin. This creates the cleanest upholstered effect, but it requires careful sewing around the curved seams.
For a simpler method, attach narrow braid, twisted cord, or decorative ribbon over the finished seams. Hand stitching provides the most control. Fabric-safe adhesive may work for a display-only piece, but it should be tested on scraps first.
Trim does not need to match perfectly across the collection. Navy, coral, olive, or gold details can reinforce the shared palette while giving each pumpkin an individual finish.
Make the Curled Stems Part of the Design
Ordinary pumpkin stems would work, but the tall, curling versions are central to this fanciful look.
A handmade stem could begin with sturdy floral wire shaped into a sweeping curve. Wrap it tightly with twisted paper cord, raffia, fabric strips, or jute until the wire is concealed. Make the base wider so it sits securely in the pumpkin’s top indentation.
Another option is to use realistic faux pumpkin stems, choosing different shapes and sizes throughout the collection.
Secure each stem firmly and check that its weight does not cause the pumpkin to tip. Large pumpkins can support taller stems, while smaller ones generally need lighter, shorter versions.
Finish Selected Pumpkins With Tassels
Tassels make the pumpkins feel especially decorative, but restraint helps them remain special.
Add one tassel to every second or third pumpkin rather than embellishing the entire group. Attach it near the stem using narrow cord, braid, or a loop of small decorative beads.
Choose tassels that repeat a fabric color. Raspberry, navy, teal, olive, and antique gold would all suit this collection.
Removable tassels are particularly practical because they can be changed when the pumpkins are used in a different room or displayed during another part of the season.
Arrange the Collection at Different Heights
A group of five to seven pumpkins will create a generous display. Include small, medium, and large sizes rather than making a row of equally sized pieces.
Place the largest pumpkin slightly behind the others, then bring one substantial piece forward as the visual anchor. Smaller pumpkins can fill the edges and lower spaces.
Shelves, a deep console, an entryway cabinet, or a wide mantel could all accommodate this arrangement. Use a discreet riser or stack of books beneath the rear pumpkins when additional height is needed.
Keep the background fairly quiet. These patterns already provide plenty of visual detail, so the collection will stand out beautifully against painted cabinetry, simple wood, or a neutral wall.
Shop Supplies for the Project
Look for Vintage-Inspired Fabric Bundles
Combine floral cottons with separately purchased velvet and embroidered remnants for a more collected appearance.
Shop Soft Velvet Fabric Squares
Use velvet as an occasional solid panel to provide rich color and contrast against printed cotton.
Add Polyester Craft Filling
Choose a resilient filling that can be distributed evenly into the curved sections.
Look for Decorative Piping and Cord
Use narrow upholstery-style trim to define the vertical seams and make the finished pieces look more tailored.
Shop Faux Pumpkin Stems or Stem-Making Supplies
Select realistic stems for an easy finish, or use wire and wrapped cord to form the more exaggerated curls.
Add Decorative Craft Tassels
Choose several colors from the fabrics rather than buying one identical color for the entire collection.
Final Styling Tip
Give every pumpkin one memorable feature, such as an embroidered panel, dramatic stripe, colorful tassel, or especially curled stem. That small variation will make the finished collection feel thoughtfully assembled and genuinely one of a kind.