*This post may contain affiliate links for which I earn commissions.*
Three smiling pumpkins lined up beneath a scalloped cream frame give this Halloween wreath the charm of a handmade decoration brought out every October. Their simple black faces feel friendly and familiar, while pleated gingham circles add the sort of detail that rewards a closer look.
The combination is especially appealing if you enjoy cottage or farmhouse decorating. Distressed cream, faded orange checks, brown oak leaves, and small fabric accents make it feel collected and personal. Against a soft sage door, the pumpkins become the unmistakable stars.
You can recreate the character with painted shapes and folded fabric, choosing proportions that suit your own doorway.
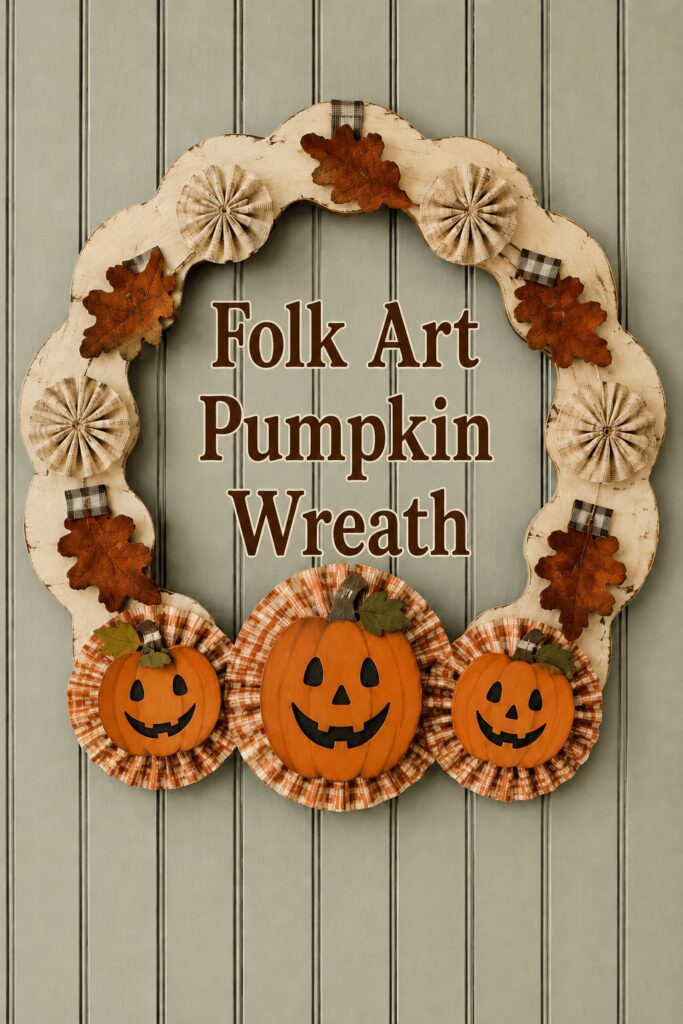
The inspiration image is AI generated. It offers a decorating concept to interpret with similar materials rather than showing a finished wreath that is necessarily available to purchase.
A scalloped frame gives the pumpkins their own little stage
Most of the cream frame remains visible, and that is an important part of this design. Its rounded edges create a decorative border around the empty center, almost like an old-fashioned picture frame.
The pumpkins sit together along the bottom rather than being scattered around the perimeter. A larger center pumpkin establishes the focal point, with two smaller companions making the arrangement feel balanced.
Behind each face, orange-and-cream pleats form a patterned halo. Smaller neutral rosettes repeat that circular shape farther up the frame, carrying the fabric detail through the whole piece.
The oak leaves interrupt the circles with pointed, irregular edges. Their rusty brown color also bridges the orange pumpkins and the lightly worn cream finish. Nothing needs to sparkle or glow for this wreath to feel festive.
Choose the frame before sizing the decorations
A cream scalloped wreath blank
Look for an open wooden craft frame with broad scallops and enough surface area to support small decorations. The exact outline may be difficult to match, but a scalloped oval frame or another open decorative wood shape can suggest the same effect.
Choose a blank with a substantial lower section. That area needs to carry the pumpkin grouping without becoming hidden behind an oversized cluster.
For a gently aged finish, paint the new blank warm cream over a brown base coat. Once dry, lightly distress selected edges so a little brown shows through. Keep the center of each scallop mostly cream, allowing the outline to remain distinct.
Three flat pumpkin shapes
Flat wooden pumpkin cutouts are a practical starting point. Choose one larger shape for the center and two smaller ones for the sides.
Paint them in a warm medium orange and use slightly darker curved lines to suggest the ribs. The faces can stay wonderfully simple: oval eyes, a small nose where desired, and a wide smile with a few square teeth.
Sketch the expressions on paper first. Small differences between the three faces will give them personality without making the group feel unrelated.
Brown stems and a few olive-green leaf accents complete the pumpkins. Keep those details close to the tops so they do not obscure the faces.
Orange gingham rosettes
The checked circles behind the pumpkins are one of the most distinctive features. Each extends beyond its pumpkin enough for the pleats to remain visible all the way around.
For a fabric interpretation, use cotton gingham supported by lightweight interfacing. Form a pleated strip into a circle and secure it to a sturdy backing disc. Make a small sample first to check whether the fabric holds the folds you want.
A checked paper rosette can provide a simpler substitute for an indoor display. Either way, position the pumpkin over the center join, allowing it to conceal the construction beneath.
Smaller neutral fabric circles
Four cream-and-tan rosettes decorate the upper and side sections of the frame. Their quieter colors give the orange ones more importance.
Use a smaller check or a subtle woven stripe for these pieces. They should echo the pleated texture without drawing attention away from the pumpkin faces.
Making all four roughly the same size will help the upper portion feel orderly. Their folds can still vary slightly, which suits the handmade mood.
Oak leaves and checked tabs
Rust-colored faux oak leaves sit between the neutral rosettes. They provide a little autumn texture without turning the frame into a traditional leafy wreath.
Short black-and-cream gingham tabs appear behind several leaves. Fold small ribbon or fabric pieces and tuck their lower ends beneath the foliage so just a checked rectangle remains visible.
These dark accents connect visually with the pumpkins’ black faces. A little goes a long way, especially against the pale frame.
Lay out the wreath in separate groups
Start with the three pumpkin rosettes at the bottom. Place the largest in the center, then move the smaller ones close enough that the pleated edges overlap slightly.
Check the opening before securing them. The central pumpkin should rise into it, but plenty of background should remain visible above.
Next, arrange the four neutral rosettes in two pairs, one pair near the upper curve and another farther down the sides. Slip the oak leaves into the spaces between them, including a leaf near the top center.
Set the checked tabs behind the leaves last. Their job is to punctuate the arrangement, so shorten or remove any that begin to dominate.
Photograph the layout, then assemble each pumpkin and rosette as a separate unit. Attach the pumpkin through to a firm backing rather than relying on fabric pleats alone to support its weight.
Use fasteners or adhesive appropriate for the frame and decorations, following the product directions. Allow everything to set fully before lifting the wreath upright.
Use the background as part of the design
The sage beadboard in the inspiration adds soft color and straight lines behind the curved frame. A muted blue door or a simple painted wall could provide a similarly restful setting.
On a cream door, consider making the frame slightly deeper in tone so the scalloped edge stays visible. On dark wood, the pale finish will naturally stand out.
Hang the wreath where the faces sit comfortably within view and the lowest rosette clears any door hardware. Because the arrangement uses fabric and painted components, an interior door or protected entry is a sensible setting.
Nearby decor can remain modest. A woven basket or one plain orange pumpkin is enough to repeat the palette without distracting from the little faces.
Shop similar pieces for a folk art pumpkin wreath
Look for open scalloped frames and wooden pumpkin cutouts
Check dimensions together. The lower frame needs to accommodate three decorated shapes while preserving the opening above them.
Shop orange gingham and neutral checked fabric
Choose patterns with enough contrast to remain visible once pleated. Small fabric remnants may be sufficient for the neutral rosettes and accent tabs.
Add oak leaves and simple painting supplies
A few individual leaves, warm orange paint, and a fine brush for the faces can supply the finishing details without an extensive collection of materials.
Keep the cream scallops in view
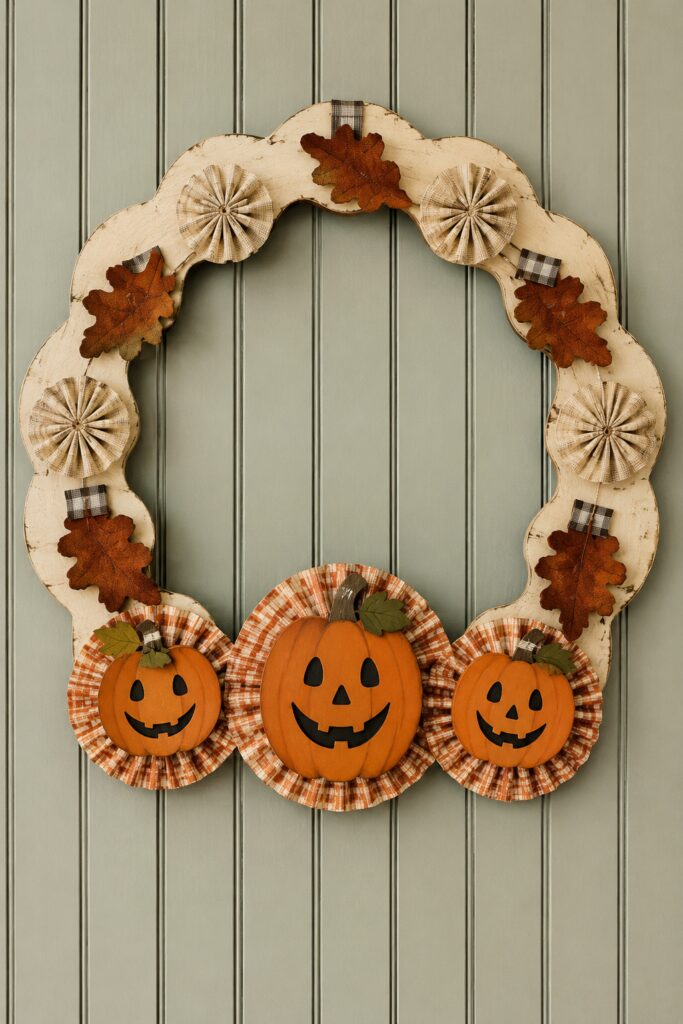
Before adding another leaf or fabric accent, look at the wreath from across the room. If the scalloped outline and three smiling faces are easy to recognize, you have preserved the details that make this design so appealing.