*This post may contain affiliate links for which I earn commissions.*
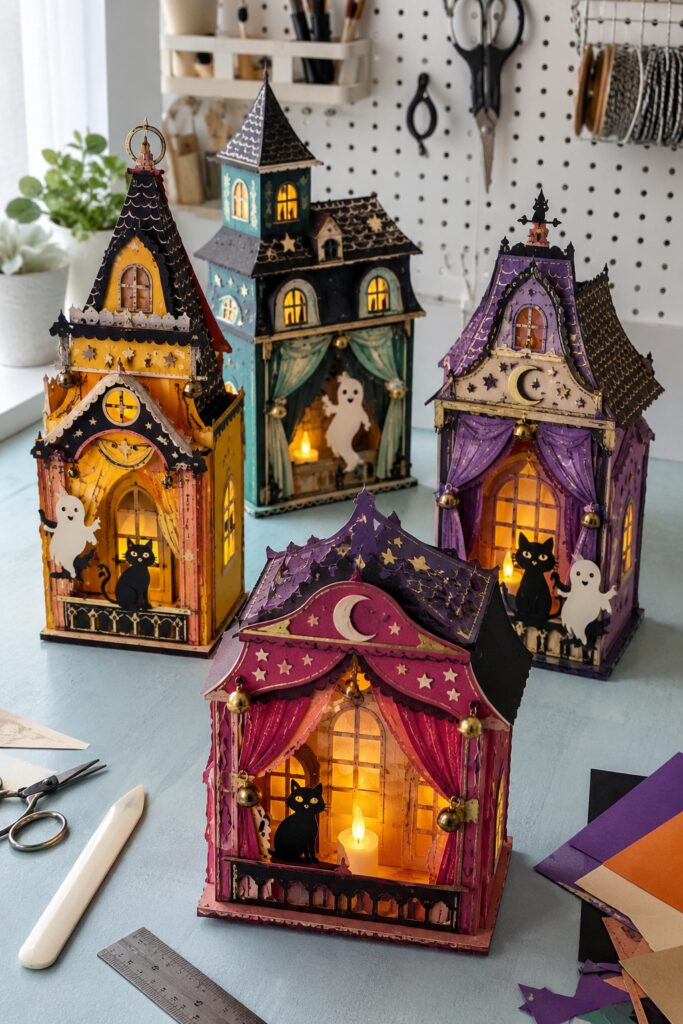
These little haunted houses look as though a traveling paper theater arrived in town for Halloween. Jewel-toned walls, scalloped roofs, tiny curtains, glowing windows, and friendly characters give every building its own personality, yet the collection still feels like one enchanting district.
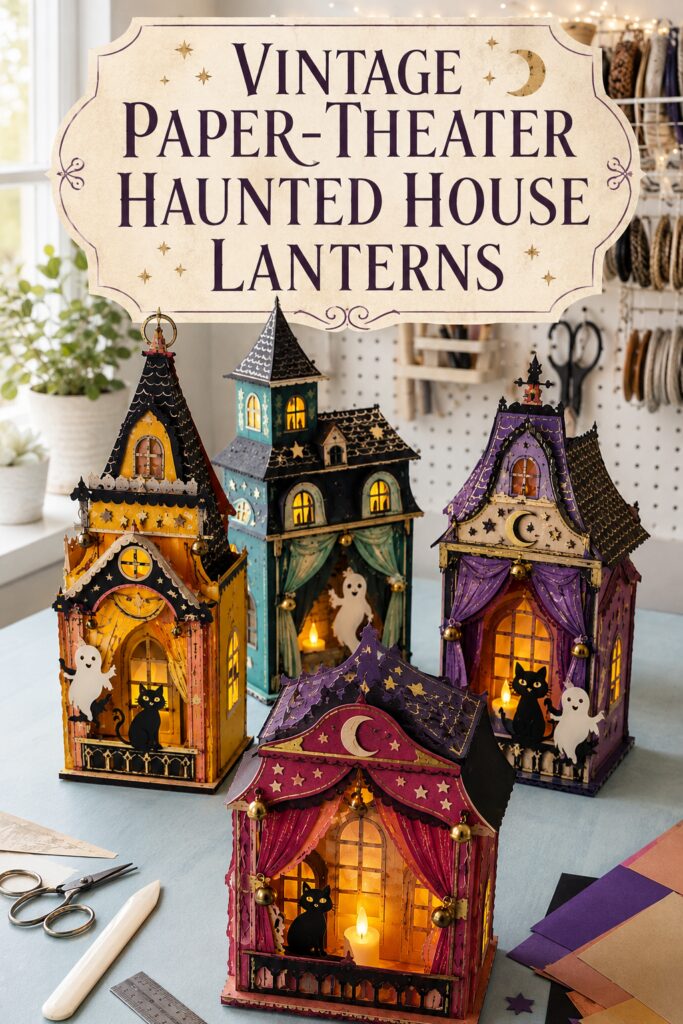
The inspiration image for this project and the instructional images were created with AI. This tutorial translates that visual idea into a practical set of paper lanterns you can make at home.
What You’re Making
Each lantern is a hollow cardstock house with a decorated theater facade, vellum-backed windows, folded side walls, a roof, and a removable base tray. A warm battery-operated LED tea light sits on that tray so it can be switched on or replaced without disturbing the structure. Start with one house approximately 12 inches tall. Once its proportions and tabs work, reuse the construction pattern while changing the roofline and facade.
The design is decorative rather than load-bearing. Layered trim creates the richness seen in the inspiration without requiring intricate three-dimensional architecture.
Materials and Supplies
Materials
- Heavy cardstock for walls, preferably about 80 lb or 200 to 220 gsm
- Additional jewel-toned cardstock in plum, berry, teal, ochre, coral, black, and antique cream
- Translucent amber, gold, or natural vellum
- Thin black cardstock for window mullions and silhouettes
- Narrow double-sided paper-craft tape
- Fine-tip paper adhesive that dries clear
- Small pieces of thin dimensional foam tape
- Gold thread or narrow metallic cord
- One warm-white battery-operated LED tea light per house
- Scrap paper or light cardstock for test patterns
Tools
- Self-healing cutting mat
- Precision craft knife with fresh blades
- Metal ruler
- Bone folder or scoring tool
- Pencil and eraser
- Small sharp scissors
- Hole punch or small decorative punches, if desired
- Paper clips, sewing clips, or low-tack tape for holding tabs
- Tweezers for small layered pieces
Optional Finishing Supplies
- Metallic paint pen for restrained gold accents
- Dark brown or black ink pad and a nearly dry sponge
- Small star, moon, or scallop punches
- Electronic cutting machine for repeated windows and trim
Before You Start
Build one plain paper mockup before cutting the decorative cardstock. For a house around 12 inches tall, a front width of approximately 5 to 6 inches and depth of 3 1/2 to 4 1/2 inches is manageable. These are suggested dimensions. The facade, roof, and proportions can be adjusted to suit the paper size and display space.
Draw the front and two side walls as a connected strip when the cardstock is large enough. Add narrow glue tabs along one outer vertical edge and the bottom. A separate back panel is easier to fit than forcing four walls from one sheet. Plan a roof in two folded halves or as separate panels joined along the ridge.
Mark fold lines with dashes on the back of the paper and cut lines with solid marks. Keep windows at least 1/2 inch from folds and corners. Protect the work surface, close or cover the craft-knife blade whenever it is not in use, and make several light passes rather than forcing deep cuts.
Step-by-Step Tutorial
1. Design the House and Stage Facade
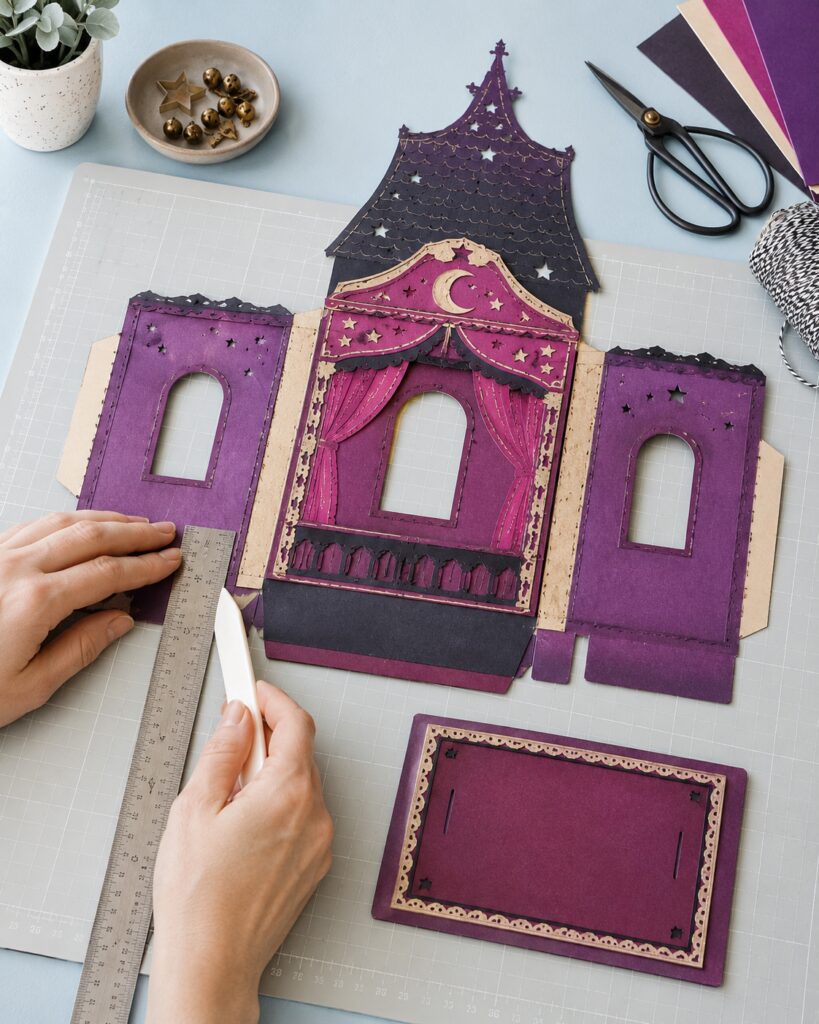
Sketch the basic front first. Place a large arched stage opening in the lower half, one smaller window above it, and enough solid cardstock around both openings to keep the wall firm. Draw two side walls with one or two arched windows apiece.
Create a separate theatrical frame that overlaps the stage opening by about 1/4 inch. This layer can include a curved marquee, narrow columns, a scalloped valance, and curtain pieces. Keep fragile tips broad enough to survive handling.
Add a dramatic roof outline above the front wall, but make the roof itself a separate folded component. This avoids trying to fold heavily decorated cardstock through several angles. Cut the test pattern, score every fold against the metal ruler, and assemble it temporarily with low-tack tape. Adjust any tabs that collide or leave gaps.
2. Cut the Structural Cardstock Pieces
Transfer the corrected pattern to heavy cardstock. Use the ruler and craft knife for long edges. Turn the paper rather than twisting the knife when cutting curves. Small scissors may be easier for curtain scallops and roof ornaments.
Score the wall folds from the back before adding dimensional decorations. A bone folder should compress the cardstock without cutting through it. Fold each crease once, open it again, and keep the panels flat while decorating.
Cut the front trim, roof fascia, window frames, balcony rail, moons, and stars from contrasting colors. Use two or three large decorative layers rather than many tiny fragments. This makes the lantern sturdier and gives the facade a clear hierarchy.
3. Add Vellum and Window Mullions
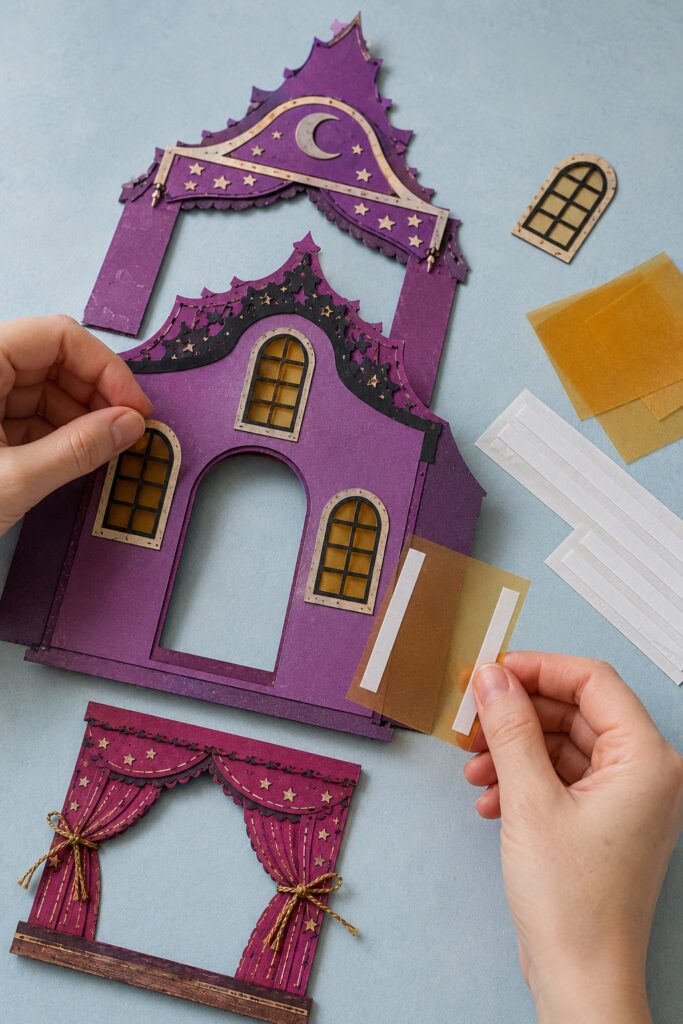
Turn the flat wall piece face down. Cut vellum rectangles that overlap every window opening by at least 1/4 inch on all sides. Apply narrow double-sided tape around the cardstock opening, keeping it away from the visible center. Smooth the vellum over the tape without stretching it.
On the front, add slim black window mullions and a contrasting arch frame. A complete frame layer is easier to align than individual strips. Test the window over a battery light before continuing. If it looks too opaque, use one vellum layer rather than thinning the cardstock structure.
Build the curtain pair separately. Cut a valance and two tapered curtain panels from berry or magenta cardstock. Score two or three shallow lines into each panel and gently curve it around a pencil. Tie fine gold thread around the lower third, then attach the curtains to the theatrical frame without blocking the central stage opening.
4. Layer the Vintage Theater Details
Attach the broadest facade layer first, followed by columns, curtain assembly, scalloped trim, moon, and stars. Use fine-tip adhesive for flat layers and tiny pieces of dimensional foam tape only where a slight shadow adds depth. Keep foam tape away from fold lines.
Create a narrow balcony rail beneath the stage opening from a black strip with simple repeated cutouts. Wider openings are stronger than lace-fine paperwork. Add a second strip behind it in antique cream if more contrast is needed.
For an aged finish, touch a nearly dry sponge to dark ink and skim it lightly over a few edges. Keep the centers clean and jewel-toned. The goal is a softly handled paper-theater look, not a uniformly dirty surface. Add a few fine gold lines to roof scales or curtain folds after all adhesive is dry.
5. Assemble the House Shell
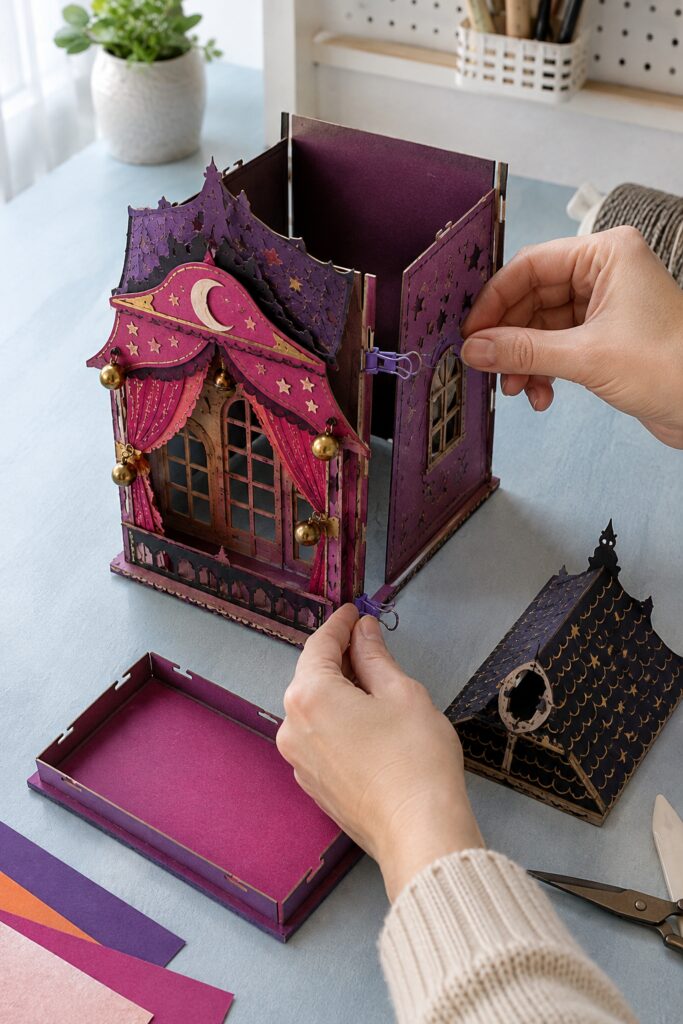
Fold the walls along their scored lines. Apply narrow double-sided tape or a thin, even bead of paper adhesive to the inside tabs. Join the side walls to the back panel one seam at a time, pressing each connection against a ruler or other straight edge from inside.
Use small clips to hold the tabs while liquid adhesive sets. Check the shell from above after every seam. Opposite walls should remain parallel and the bottom edges should sit flat. If the house twists, release the newest seam before it dries and realign it.
Fold and join the two roof panels along their ridge. Attach simple roof tabs inside the upper walls, leaving a small gap at the rear roof edge for ventilation. Avoid very heavy embellishments at the roof peak.
6. Make the Removable Light Tray
Cut a base rectangle about 1/8 inch smaller than the house footprint. Add shallow folded sides, approximately 1/2 inch high, to make a tray that slides through the open bottom or a concealed rear opening. Dry-fit it before applying adhesive.
Mark the center for the LED tea light. If the light has a bottom switch, either remove the tray to operate it or cut a neat finger opening where the switch remains reachable. The tray should slide smoothly without bowing the house walls.
Use only a battery-operated LED. Do not use a real candle, incense, bulb that becomes hot, or exposed electrical wiring inside cardstock. Keep the light clear of paper silhouettes and vellum.
7. Populate the Tiny Stage
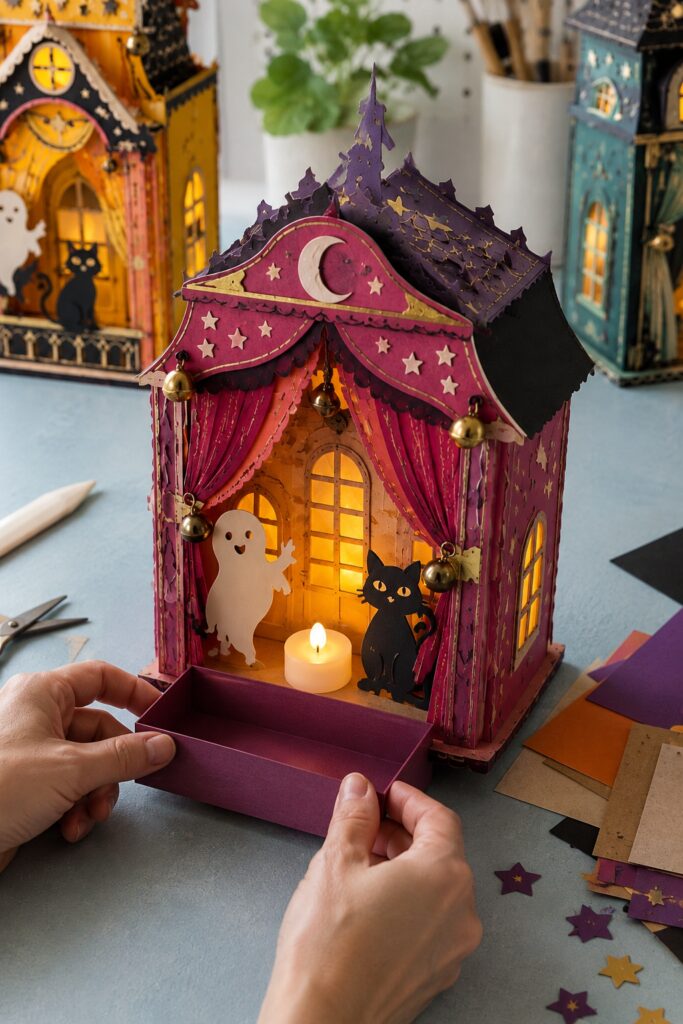
Cut a friendly ghost and black cat from cardstock. Simple silhouettes with broad bases are easiest to secure. Attach each character to a small folded foot and place it just inside the stage opening, away from the LED.
Slide the light tray into position and check the glow in a dim room. The vellum windows should look warm, while the open stage remains readable. If the LED creates a harsh point of light, add a loose vellum shield attached to the tray, not directly to the light.
8. Turn One House Into a Theater District
Reuse the tested wall depth and base system for the remaining houses, then vary the facades. One may have a tall pointed tower, another a curved marquee, and another a wider playhouse front. Keeping the internal footprint similar makes the lights and trays interchangeable.
Distribute the palette rather than giving every building every color. Try ochre and coral with a black roof, teal with antique cream curtains, purple with gold details, and berry with plum. Repeat black, antique cream, and small gold accents across all of them.
Tips for Achieving the Collected Vintage Look
Mix crisp geometry with a few intentionally imperfect edges. Slightly irregular roof scales, hand-drawn gold lines, and gentle ink shading make the houses feel handmade. Keep the window sizes and wall folds clean so the irregularity looks deliberate.
Let the glow provide warmth while the room remains light enough to see the paper layers. Arrange houses in a shallow arc with the tallest toward the back. Repeat one moon, one black cat, or the same curtain shape across multiple facades to make varied buildings feel related.
Easy Ways to Customize the Lanterns
For a more playful set, use candy pink, orange, lavender, aqua, and black with smiling ghosts. A moodier collection can use aubergine, teal, rust, and antique gold while retaining bright ambient lighting.
Change the performances inside the stages with removable paper figures. A witch and cauldron, dancing skeletons, bats, or pumpkin musicians can stand on the same folded feet. For fall without Halloween, replace the ghosts and cats with woodland animals, leaves, acorns, and harvest moons.
Displaying the Finished Theater District
Display the lanterns indoors on a mantel, sideboard, shelf, or dining-table runner where they will not be bumped. Keep them away from moisture, heat sources, open flames, and curious pets. Do not place them where they block a walkway or where small decorative pieces are accessible to young children.
The most appealing collection will not be four identical buildings. A shared palette, repeating window glow, and consistent paper technique are enough to unite different rooflines and characters into one charming Halloween neighborhood.