*This post may contain affiliate links for which I earn commissions.*
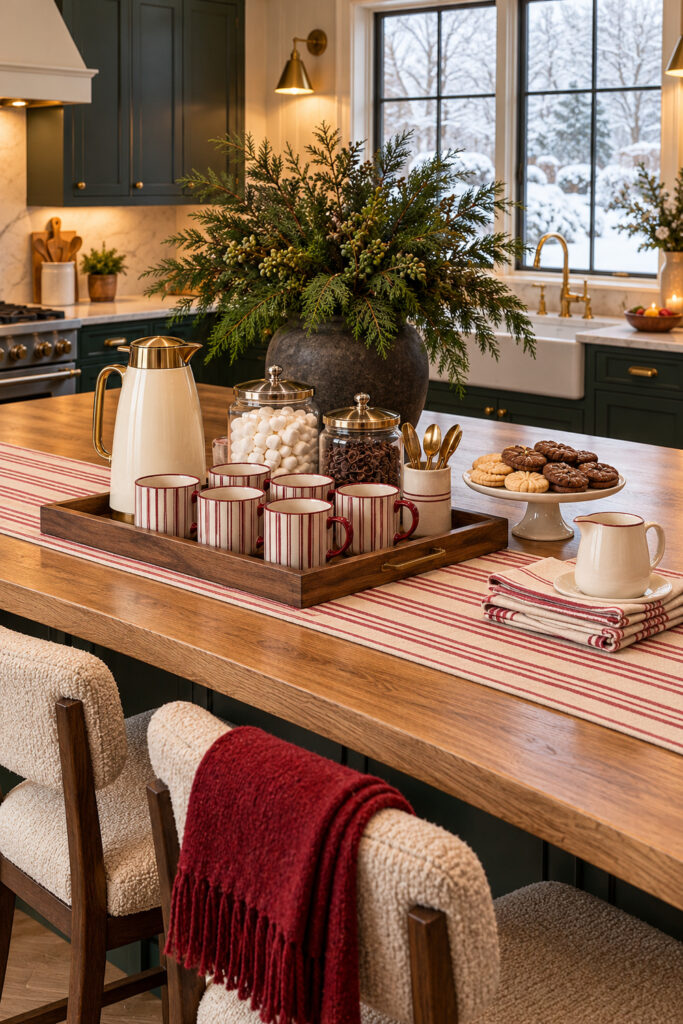
Striped mugs and a cream carafe turn this kitchen island into a place to pause on a snowy day. The cocoa service sits on a wooden tray, with marshmallows and chocolate curls visible in jars behind the cups. A tall evergreen arrangement gives the scene height, while a cranberry throw brings the red down to the seating.
The appeal is partly the color, but it’s also the way everything has a home. Mugs stay together, spoons have a holder, and cookies sit just outside the main tray. You can use the same arrangement for a family afternoon or a small gathering without turning the kitchen into a permanent drinks counter.
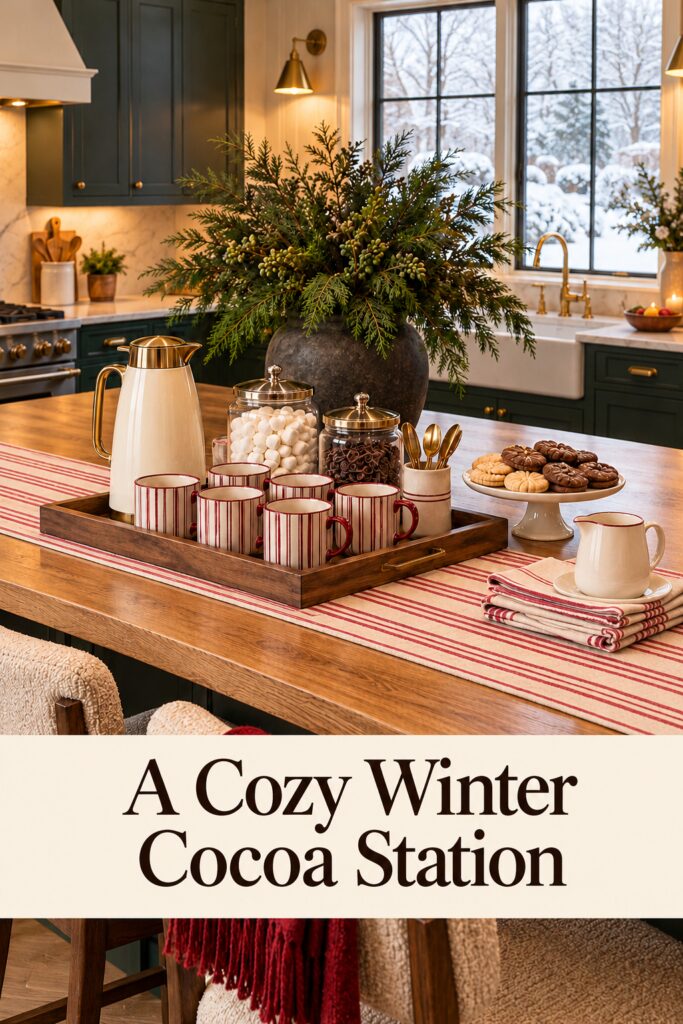
This image is AI generated inspiration for recreating a similar decorating effect with comparable pieces.
Let the striped fabric connect the serving pieces
Red stripes appear on the mugs, runner, and folded towels. Their repeated spacing makes the arrangement feel related even though the pieces have different shapes. Cream keeps the red from taking over, and the wooden island and tray add a warm middle ground between the two colors.
You don’t need an exact matching collection. Pick one striped element to lead, then repeat its red in a plain mug, a folded cloth, or a throw nearby. If all three striped pieces have noticeably different reds, put a little cream fabric between them so they don’t compete at close range.
The evergreen branches make this feel like winter without relying on Christmas ornaments. Leave them plain if you want the display to stay useful after the holiday decorations come down. The snowy window reinforces the mood, but the same palette can work on a sunny kitchen counter.
Find Wooden Serving Trays
Browse current Amazon options that can help you recreate this look.
Browse Wooden Serving Trays on Amazon →As an Amazon Associate I earn from qualifying purchases.
Build the cocoa tray around how you pour
Choose the tray after setting out your main pieces. The carafe needs a spot where its handle is easy to grasp, and the mugs need enough separation that you can lift one without brushing the others. A tray that barely contains the whole collection may look tidy but become frustrating as soon as someone serves a drink.
Put the tallest serving item at the back or side, then arrange the mugs toward the front. The pictured carafe stands to the left, which gives its pale shape room against the greenery. In your kitchen, use whichever side suits your pouring hand and the direction people approach. Function gets a vote in the styling.
A cream insulated carafe can keep the drink service visually quiet beside the patterned cups. Choose one intended for your beverage and use it according to its care and temperature directions. Before filling it, test its pouring action with water over the sink so you know how much space it needs around the spout.
Keep the tray level and away from the island edge. A folded runner should lie flat underneath it rather than bunching up at one corner. If the tray has handles, leave them accessible, but avoid carrying a fully loaded hot drink station just because it technically has something to grip.
Give toppings their own little zone
The clear jars let pale marshmallows and dark chocolate add texture without adding more colors. Metal lids repeat the warm finish of the spoons and carafe. That small repetition helps the jars look like part of the arrangement rather than pantry containers set down in a hurry.
Select containers with openings wide enough for the serving utensil you’ll use. A narrow jar can look lovely until someone has to fish out a topping. Leave room to remove the lids, and give those lids a landing place beside the tray while drinks are being served.
Keep topping utensils separate from the cups and hot drink spout. A small crock holds the spoons upright, making them easy to spot from the guest side. If you’re offering several toppings, a spoon for each is more useful than a perfectly symmetrical arrangement of jars.
Keep the greenery generous but contained
The evergreen arrangement spreads broadly from a dark, rounded vase. Against the cream serving pieces, that dark base gives the branches a clear starting point. The shape feels full without requiring extra ornaments, flowers, or ribbon.
Use a stable vessel and build the outline before filling the middle. Place a few branches outward, then add shorter pieces to cover bare gaps near the rim. Turn the vase to check the side facing the mugs; that is where stray stems are most likely to lean into the serving area.
Choose fresh or artificial branches to suit your home, keeping loose needles, berries, and decorative debris away from food. If the arrangement feels too wide for the island, reduce its spread instead of pushing the cocoa tray closer to the edge. Height can still give the display a winter backdrop when floor space on the counter is limited.
You can also put the vase on a neighboring counter. The branches will remain visible behind the service, but you’ll gain room for pouring and passing cups. That change preserves the connection between greenery and cocoa without asking one small surface to hold everything.
Put cookies and textiles within easy reach
The pedestal plate raises the cookies just above the tray, making them visible without hiding the mug handles. A low cake stand or plain plate can work, depending on how much height you already have. Set it within comfortable reach and leave enough space for someone to take a cookie while another person pours.
Fold the extra cloths into a tidy stack near the serving area. Keep a useful absorbent towel available for drips, even if you also have decorative striped linens. Once a hot drink is involved, someone will eventually test the table styling with a splash.
The cranberry throw draped over a chair repeats the mug color at a larger scale. Keep its end off the floor and away from the island’s walking route. You can use one throw across the seating area instead of dressing every chair, allowing the tray to remain the main event.
Scale it down to one winter corner
A short counter can hold two mugs, one topping jar, and the carafe. Store extra cups nearby and replace them as needed. Keep the striped runner as a smaller folded cloth beneath the group, with enough hard surface exposed for stable serving.
Pick serving pieces that suit the routine
Start with the tray and drink vessel, then choose the smaller accessories around them. The best match is one you can use comfortably after the photograph is taken.
Shop Similar Red Striped Ceramic Mugs
Check handle space and the cup’s care directions before choosing it for hot drinks. A clear red rim or simple vertical stripe can carry the idea without matching the pictured pattern exactly.
Look for Cream Insulated Beverage Carafes
Compare the opening, pouring mechanism, and cleaning access as well as the finish. A cream body and warm metal detail will connect easily to the wooden tray and pale cups.
Shop Similar Wooden Serving Trays
Look for a level base and a low rim that contains the mugs without hiding them. Measure your actual service group first, allowing space to lift cups and remove jar lids.
Check the reach before filling the cups
Arrange the empty service and try every action once. Lift a mug, open a jar, move a spoon, and tilt the carafe. Shift the branches or cookie plate if either blocks the motion. Save filling the hot drink vessel for after those adjustments.
Final Styling Tip
Turn a few mug handles toward the guest side. The red stripes still form a tidy group, and the cups look ready to be picked up rather than counted.