*This post may contain affiliate links for which I earn commissions.*
This New Year’s display gives a glass-front cabinet a different job for the evening. Silver favor boxes fill the middle shelf, glittered party hats stand above them, and noisemakers wait in clear holders below. A white floral arrangement softens the black cabinet, while silver fringe and a banner make the celebration clear from across the room.
It’s a clever way to keep party extras together without scattering them over every table. Guests can see what is available, and the repeated boxes become part of the decorating. You can translate the idea to a bookcase, hutch, or sideboard, provided the shelves are stable and the items people need are easy to reach.
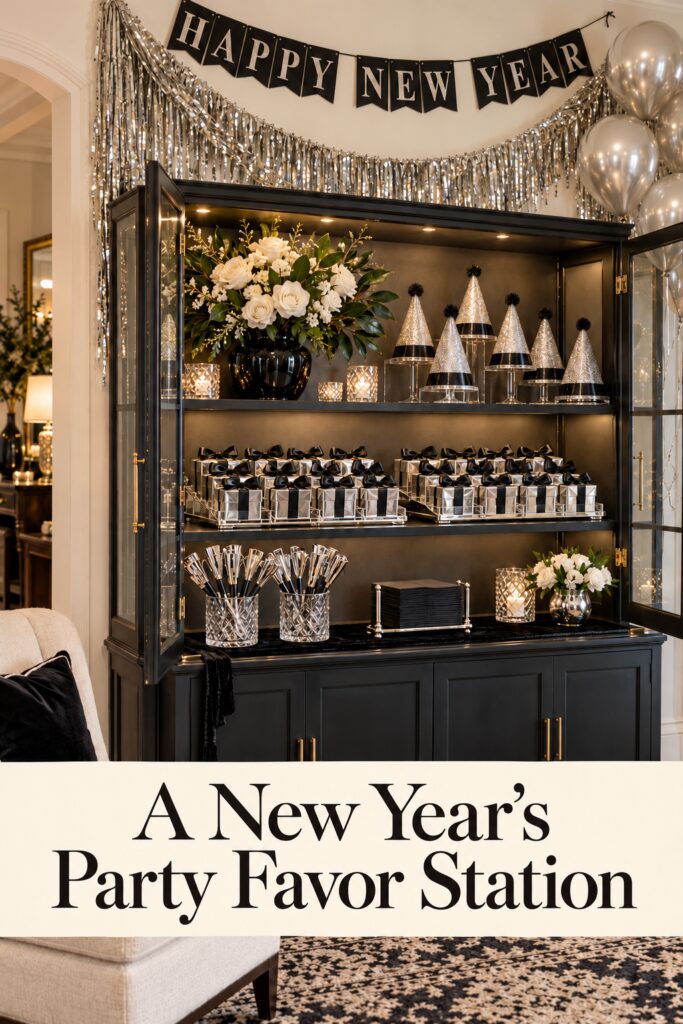
This image is AI generated inspiration for recreating a similar decorating effect with comparable pieces.
Give each shelf one clear task
The display works because the shelves have different roles. Hats and flowers form the decorative upper level, favors occupy the center, and the lower surface holds smaller party supplies. Black gives the reflective pieces a strong background, so even modest silver objects show up clearly.
Repeat that order before worrying about the exact number of boxes. Put the items guests will collect most often at a comfortable height. Decorative pieces can sit higher, where they give the arrangement shape without requiring anyone to reach over glass doors or a vase.
Find Silver Favor Boxes
Browse current Amazon options that can help you recreate this look.
Browse Silver Favor Boxes on Amazon →As an Amazon Associate I earn from qualifying purchases.
Prepare the cabinet for people to use
Empty the shelves you intend to use and check their condition before adding supplies. Wipe glass and reflective surfaces, then make sure each shelf sits properly on its supports. A party display should work with the cabinet’s intended load, especially when several glass containers will share one level.
Think about the doors as part of the arrangement. The pictured doors open to either side, but your room may not have space for that position. Keep them fully out of a walking route, or choose a piece of furniture without projecting doors. Guests shouldn’t have to thread themselves between glass panels to pick up a hat.
Place the cabinet where the line of people will have somewhere to go. An inviting display beside the seating area is useful; the same display blocking the route to the kitchen is less charming by the third trip. Leave nearby seating and doorways accessible.
If the cabinet is used for everyday storage, move fragile pieces out of the guest collection zone. Keep spare favor boxes in a closed lower compartment so you can refill a tray without bringing packaging into the room. A little hidden storage helps the visible shelves stay calm.
Arrange the favors in groups you can replenish
The silver boxes sit in orderly rows on low reflective trays. Their black bows make the repeated shapes easy to read against the metallic surface. You can reproduce that rhythm with simple boxes and ribbon, rather than searching for an exact finished favor.
Decide on the contents first so the box size makes sense. Then assemble one complete box and test how it fits on the shelf. A favor that looks small in your hand can occupy more depth once the bow loops spread out. Leave room for guests to lift it without catching the ribbon behind it.
Use shallow trays to define groups and make refilling easier. Their rims should stay low enough that people can grasp a box from the front. Avoid stacking the favors unless the boxes and contents are suited to it; a second tray nearby is often easier to manage than a tower.
Lift the hats without making them precarious
On the upper shelf, party hats stand at several heights. Their pointed shapes break up the rectangular cabinet and favor boxes. Clear supports give the hats a raised appearance without adding another strong color or bulky surface.
For a practical version, choose sturdy display risers with broad, level tops. Test each hat on its support before filling the shelf. A light paper cone can slide easily on a smooth surface, so use a suitable discreet removable attachment if needed and keep the arrangement away from drafts.
Leave the hats guests should take within reach. If you use raised hats mainly for decoration, keep a separate accessible group on the lower surface. That way nobody has to dismantle the prettiest shelf to find something to wear at midnight.
The white flowers balance the hat grouping on the left. Use a vase that fits comfortably beneath the shelf above and doesn’t crowd the favors. The dark container blends into the cabinet, allowing the pale flowers to be the visible part of the arrangement. A smaller bouquet can give the same contrast on a narrower shelf.
Contain the smaller party supplies
The noisemakers stand upright in clear faceted holders, with their silver ends repeating the boxes above. Separate holders let the supplies spread into a fan without turning into one tangled bundle. Choose containers wide and stable enough for the height of the items inside.
Try taking out one noisemaker and putting it back. If the whole group tips or catches together, reduce the number in each holder. A display that survives being used is much more satisfying than one that only behaves while everyone is looking at it.
Black napkins provide a quiet rectangle beside the shiny supplies. A holder or shallow tray can keep their edges tidy as guests remove them. Use the lower level for a few clearly defined groups rather than filling every gap with another small decoration.
Flameless lights in decorative holders can suggest the warm points of light in the inspiration. Keep any light source away from paper hats, ribbon, and fringe, following its use directions. This cabinet has plenty of shine already; soft lighting will reveal it without needing an especially dark room.
Frame one furniture piece instead of the whole wall
The silver fringe above the cabinet creates a backdrop, and the banner gives the occasion its name. Secure both independently using attachments suitable for your wall. Don’t drape loose strands where they can catch on the doors or fall among the supplies.
A smaller room may need only a short fringe section and one balloon grouping nearby. Keep balloon strings gathered out of the collection area. The cabinet already makes a strong block of decoration, so the surrounding pieces can remain simple.
Choose practical pieces with reflective finishes
Start with boxes, trays, and supply holders. The risers and backdrop can come later if the basic collection area still needs height or a stronger party outline.
Shop Similar Silver Favor Boxes
Check usable interior dimensions against the contents you plan to include. A plain silver surface works well with black ribbon and leaves the repeated shape easy to see.
Look for Low Mirrored Display Trays
Choose a stable base and a rim that won’t hide the favor boxes. Allow some clearance at each end so the tray can be lifted from the shelf when necessary.
Shop Similar Clear Display Risers
Compare the top surface with the hat base before selecting a riser. Broad support and a manageable height matter more here than an invisible appearance.
Check the display from a guest’s reach
Stand in front of the cabinet and collect one favor, one noisemaker, and a napkin. Shift any object that makes the sequence awkward. Check open doors, trailing ribbon, and the space around the lower holders before adding the final decorations.
Final Styling Tip
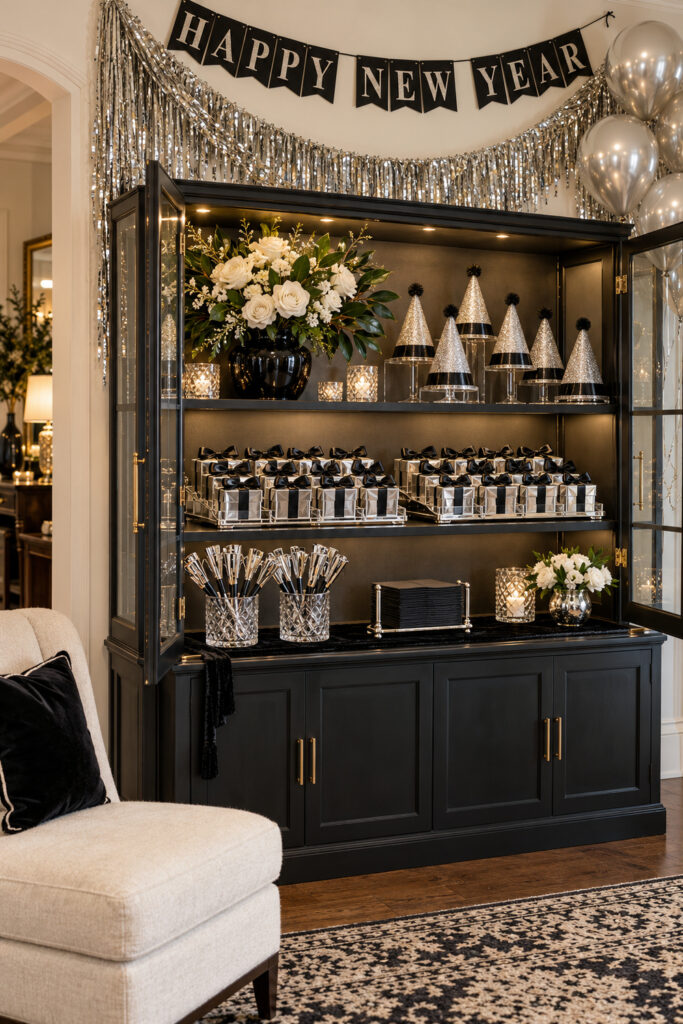
Leave a small open interval between the favor trays. It makes each group easier to approach and lets the silver boxes stand out against the dark shelf.