*This post may contain affiliate links for which I earn commissions.*
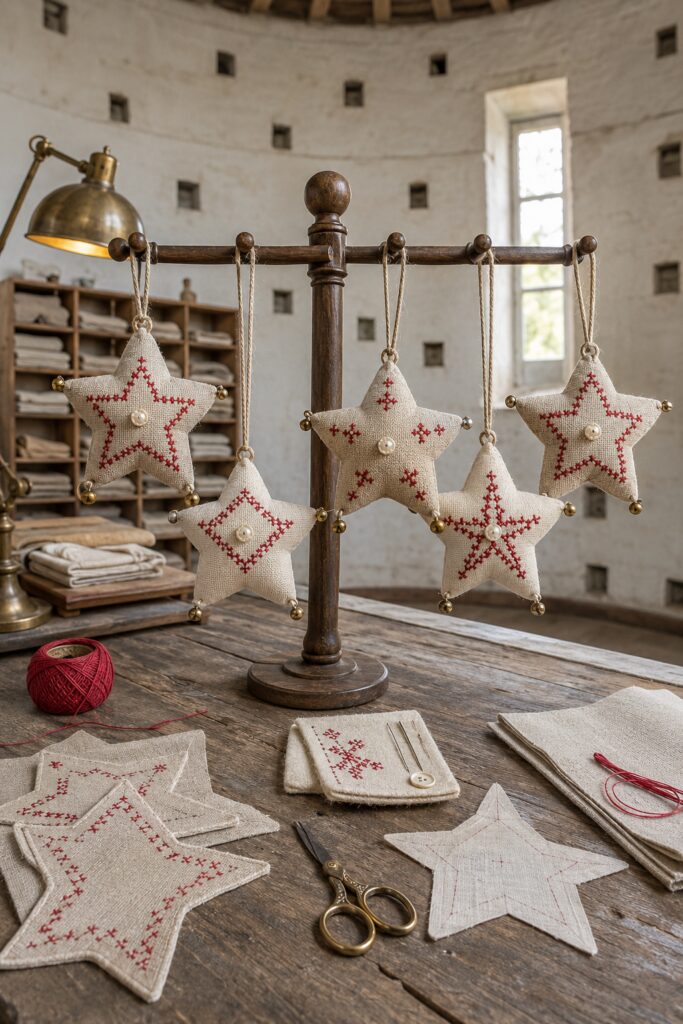
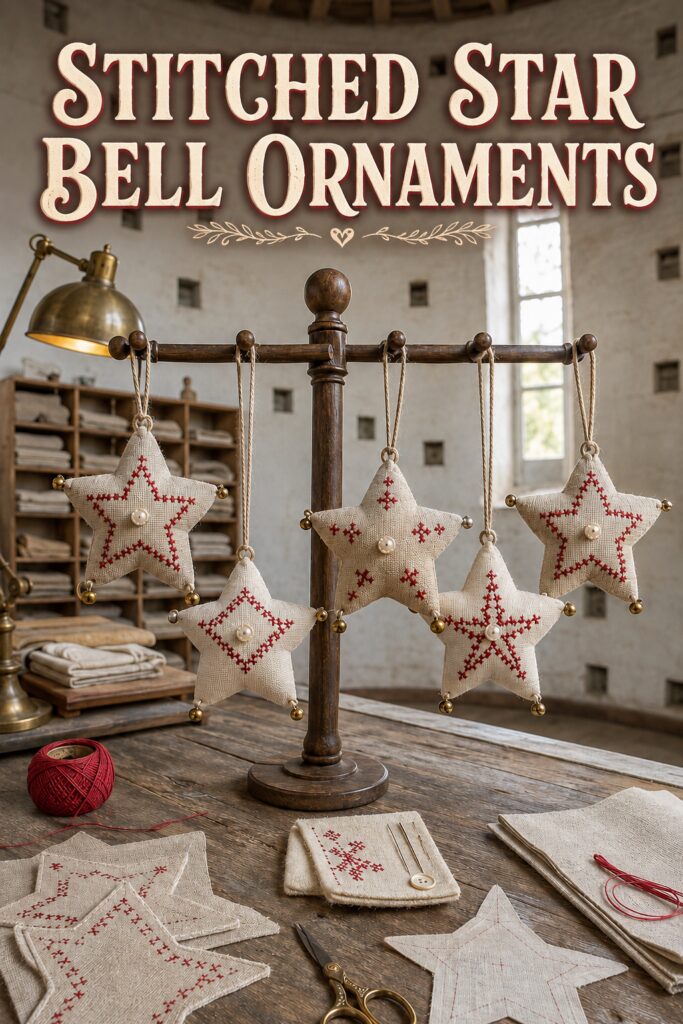
These softly stuffed linen stars pair humble fabric with small, jewel-like details: crimson folk stitching, creamy pearl buttons, flax hanging loops, and tiny brass bells. Although stars often lean toward Christmas, this restrained red, oatmeal, and aged-metal palette can feel wonderfully mysterious in an old-world Halloween display, especially beside dark wood, antique frames, dried branches, or candlelike LED light.
The inspiration image and the instructional demonstration images for this project were created with AI. This tutorial translates the visual idea into a practical sewing and embroidery method you can recreate at home; the demonstrations illustrate the process rather than document a physical project being made.
What You’re Making
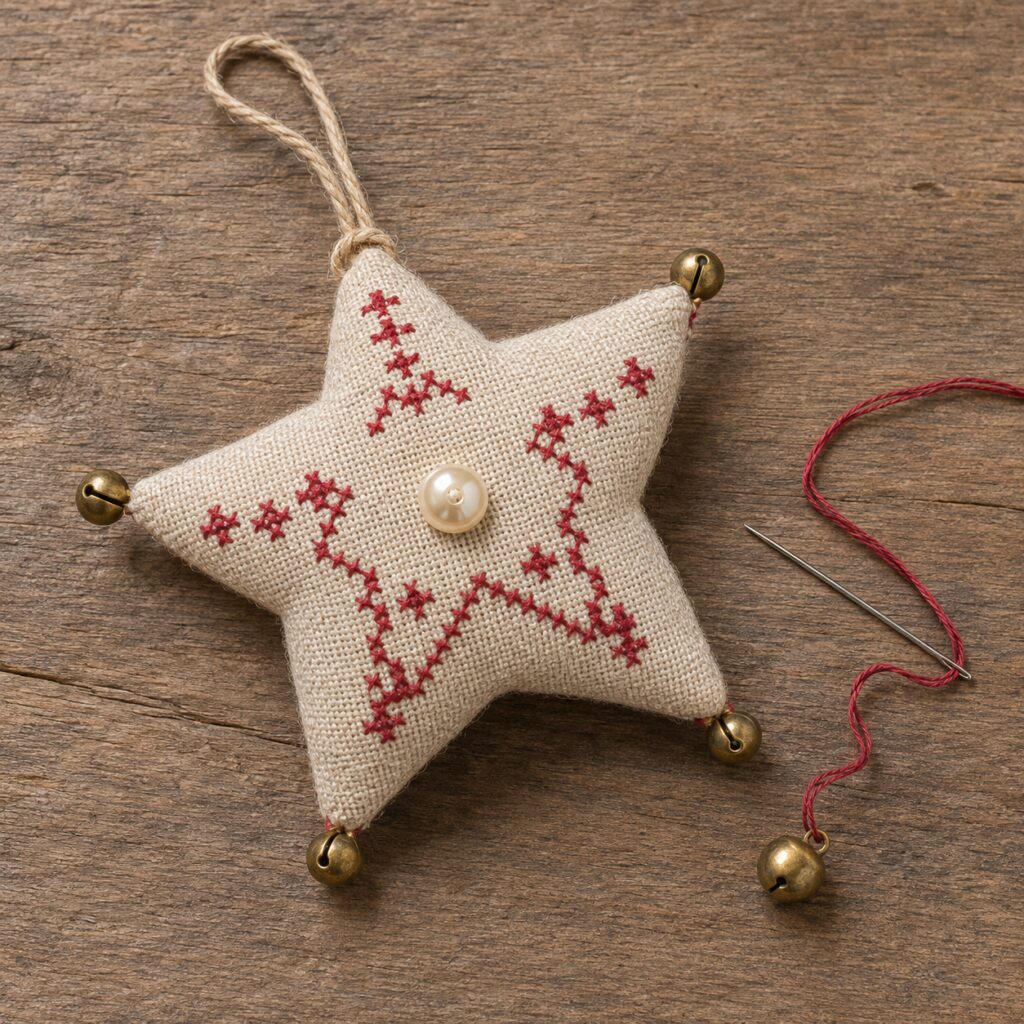
You will make a lightly stuffed five-point linen ornament, approximately 5 to 6 inches wide, with a crimson cross-stitch motif on the front, a pearl button at the center, a natural flax loop at the top, and a tiny bell at each point. Make one star as an accent or create a coordinated set with related motifs. The highly detailed stitching in the AI image is simplified into bold, repeatable X-stitch lines that preserve its vintage character without requiring a complex chart.
Materials and Supplies
Materials
- Oatmeal or natural linen with a visible, reasonably even weave
- Lightweight woven or nonwoven fusible interfacing
- Crimson pearl cotton or six-strand embroidery floss
- Matching all-purpose sewing thread
- Polyester fiberfill
- Natural flax, linen, hemp, or cotton cord, approximately 1 to 2 mm thick
- One cream pearl shank button per ornament
- Five miniature antique-brass jingle bells per ornament
- Paper or cardstock for a reusable star template
Tools
- Small embroidery hoop
- Tapestry needle sized for the linen weave
- Sharp hand-sewing needle
- Fabric scissors and small embroidery scissors
- Straight pins or sewing clips
- Washable fabric marker or tailor’s chalk
- Iron and pressing cloth
- Point turner or blunt knitting needle
- Sewing machine, optional
Want to Make These Ornaments?
I’ve put together a convenient Amazon supply list featuring hand-picked, well-rated products that complement the inspiration or DIY project shown in this post.
See My Hand-Picked Supply ListAs an Amazon Associate I earn from qualifying purchases but this doesn’t increase your price at all!
Before You Start
Make a symmetrical five-point star template about 5 1/2 inches across, or scale it to suit your display. Add a 1/4-inch seam allowance if your template represents the finished shape. Test the crimson thread on a scrap of interfaced linen. The fabric should remain flat and the stitches should sit on the surface without pulling open the weave.
Press the linen before tracing. Fuse interfacing to the wrong side according to its instructions, using a pressing cloth and good ventilation. Keep the iron and sharp tools away from children and pets. The finished bells are small parts, so these ornaments are decorative items rather than toys.
Step-by-Step Tutorial
1. Trace and Cut a Matching Star Pair
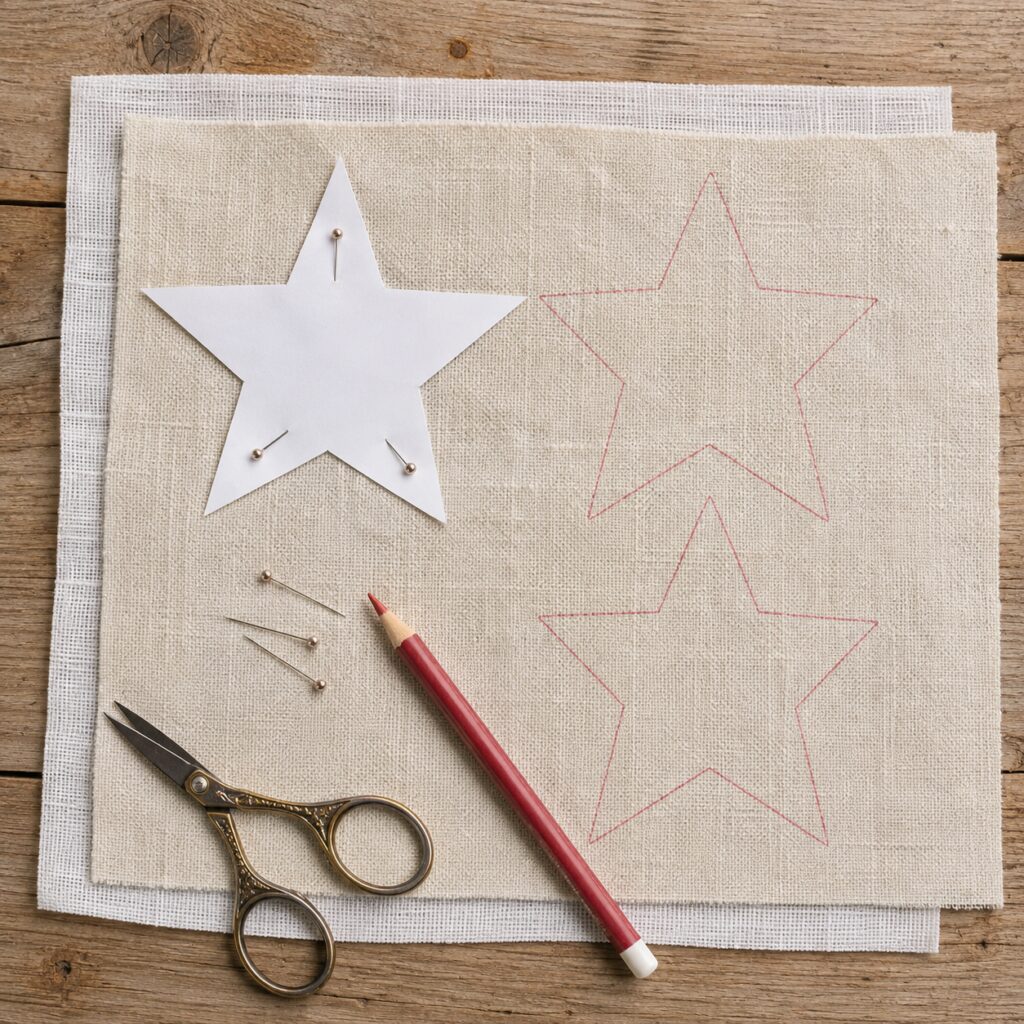
For each ornament, trace two identical stars onto the stabilized linen. Mark one as the front and one as the back. Cut carefully along the outer lines, then transfer a smaller inner star or simple geometric motif to the front panel. Keep the design at least 1/2 inch inside the seam line so the stitching will not be caught during assembly.
2. Work the Crimson Cross-Stitch Motif
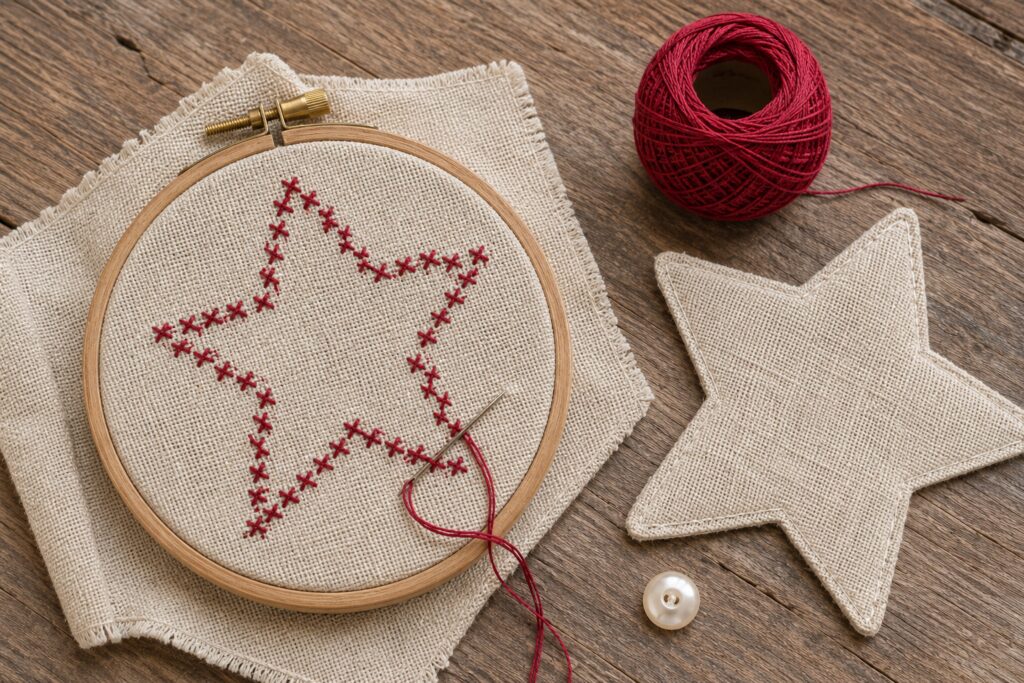
Place the front panel in a small hoop without stretching it out of shape. Work each X over the same number of linen threads so the marks stay uniform. Complete the lower diagonal of several stitches in one direction, then return across the row to finish the upper diagonals. This gives the motif a tidy rhythm.
A star outline, a centered diamond, or small scattered folk crosses all suit the design. If the linen weave is too irregular for counted work, lightly mark evenly spaced dots and use them as guides. Fasten thread ends securely on the back without bulky knots.
3. Position the Flax Hanging Loop
Cut a length of cord long enough to form the desired loop plus about an inch for anchoring. Fold it in half. Place the two cut ends at the top point between the panels if you prefer a concealed attachment, or stitch the folded loop firmly to the back panel before joining if the cord is too bulky for the seam. Tug-test the loop before continuing.
4. Join the Star Panels
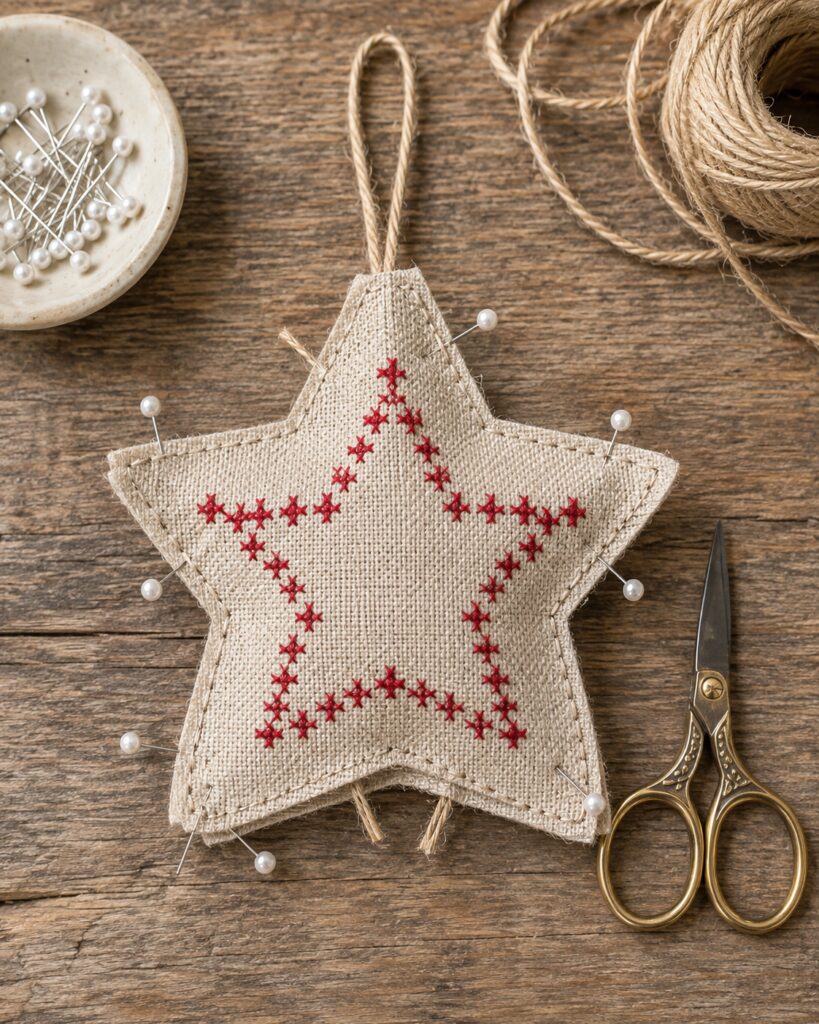
Because coarse linen and narrow star points can be difficult to turn cleanly, use a practical edge-seam construction. Align the front and back with wrong sides together and pin around the perimeter. Sew approximately 1/8 to 3/16 inch from the edge with a short straight stitch or small running backstitches. Leave a 2-inch opening along one lower side. Reinforce both ends of the opening.
5. Add a Light Layer of Stuffing
Feed small wisps of fiberfill through the opening. Begin with the five points, using a blunt point turner to guide the filling without piercing the linen. Add only enough to soften the ornament and give it a shallow pillow shape. Overstuffing will round the points and distort the embroidery.
6. Close the Opening and Add the Pearl Center
Turn the raw edges at the opening into alignment and close the gap with small ladder stitches or continue the visible edge seam. Sew the pearl shank button through both layers at the center, taking several passes and knotting securely at the back. Drawing it in only slightly creates the gentle tufted look shown in the inspiration.
7. Sew Bells to the Five Points
Thread a sharp needle with doubled crimson or matching sewing thread. Pass through the linen just inside a point, through the bell loop, and back through the fabric several times. Knot securely and bury the thread tail inside the ornament. Repeat at all five points. The bells should sit close to the tips rather than dangling on long threads.
Tips for Capturing the Vintage Look
- Choose linen with visible texture but enough weave regularity to guide the X stitches.
- Use one deep crimson rather than several reds so the folk motifs feel collected rather than busy.
- Keep the stuffing shallow. A flatter silhouette makes the stitchwork and pointed shape easier to read.
- Vary the motifs across a set while repeating the same linen, button, cord, and bells.
- Select muted antique-brass bells instead of highly reflective gold for a timeworn finish.
Easy Ways to Customize the Ornaments
For a more distinctly Halloween version, stitch tiny diamonds, crescent-inspired curves made from stepped X stitches, stylized eyes, or angular web motifs. Replace crimson with blackened plum, rust, or charcoal while retaining the oatmeal ground. You can also omit the bells at the top point, use smaller 4-inch stars for a garland, or enlarge one to create a door-hanger accent for a sheltered interior entry.
Displaying the Finished Stars
Hang the ornaments from a bare branch arrangement, an old wooden peg rail, cabinet knobs, or a tabletop display stand. They can also be spaced along a linen ribbon garland. Keep them indoors and away from open flames, moisture, and hot bulbs. If children or pets may reach the display, place it higher because the bells and buttons can become choking hazards if detached.
A Handmade Detail Worth Repeating
The charm comes from the contrast between rustic cloth and carefully chosen embellishments, not from copying every stitch in the inspiration image. Once the first star establishes your scale and seam method, a small family of related motifs becomes an approachable way to add old-world needlework character to Halloween decorating.