*This post may contain affiliate links for which I earn commissions.*
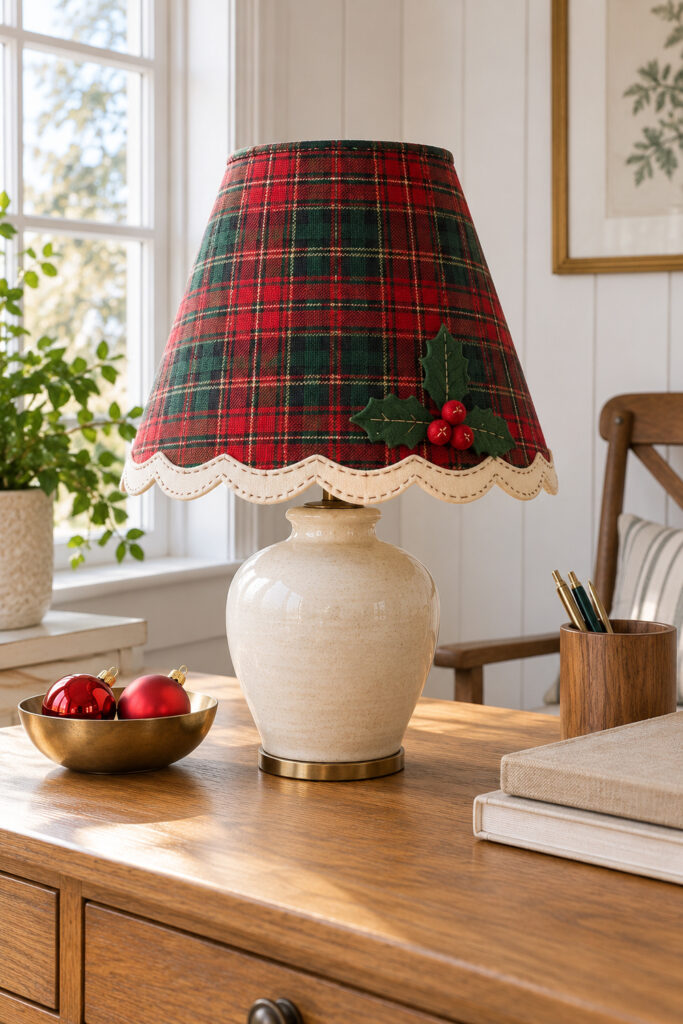
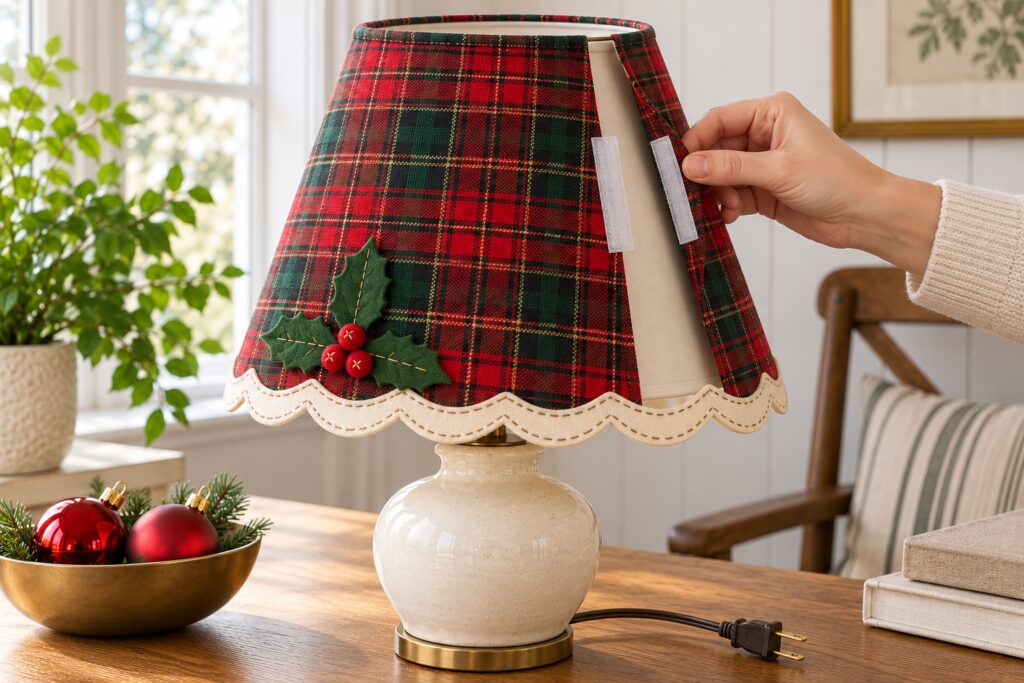
Red and green tartan makes this lampshade feel dressed for Christmas, while cream scallops and a small felt holly cluster give it a handmade finish. The plain ceramic base lets the fabric and stitching carry the idea. It’s a good example of one familiar household shape becoming the seasonal detail in a room.
This tutorial translates that look into a removable outer cover for an unplugged display lamp. Ordinary craft fabric and felt are not a tested functional lampshade assembly. Keep the lamp unplugged while the cover is fitted, and remove the entire cover before operating it. If you need the lamp for light, use a professionally made shade intended for that lamp instead.
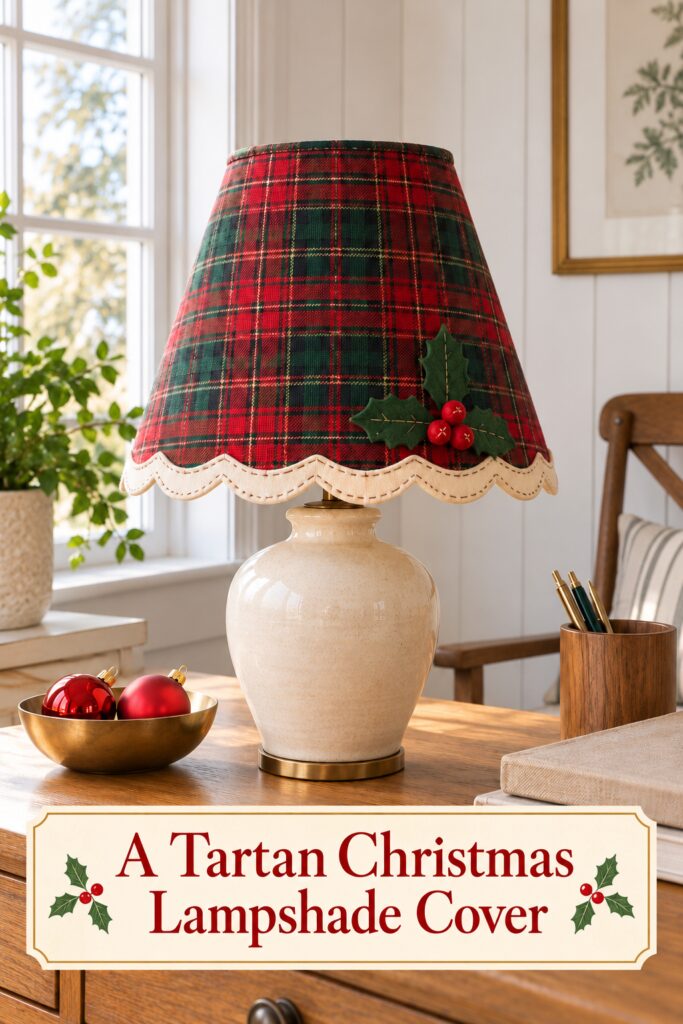
The inspiration and instructional images were created with AI. They illustrate a proposed DIY method rather than documenting a physical project being made.
What You’re Making
You’ll make a fitted tartan wrap with hemmed edges, a removable back closure, cream felt scallops, and sewn felt holly. The original shade stays intact underneath. There is no glue on the shade, no fabric tucked inside it, and no alteration to the lamp’s electrical parts.
The pattern is traced from your own tapered shade, so the cover fits its actual shape. Flat red felt circles stand in for the raised berries in the inspiration. This keeps the little decoration simple to sew and avoids needing loose beads or stuffed details.
NOTE: Unless you use heat-resistant materials rated for use with a lamp, you should only apply this shade cover to an UNPLUGGED lamp that you don’t plan on using during the holidays. However, the cover is removable so you could take it off as needed.
Materials and Supplies
- Red and green tartan woven cotton, enough for the traced panel plus hem and overlap allowances so measure your shade and draw out the required pattern before buying fabric
- Cream craft felt, enough for a curved scalloped strip around the lower edge
- Dark green felt for three holly leaves
- Red felt for three flat berry circles
- Matching sewing thread
- Tan embroidery thread
- Narrow sew on hook-and-loop tape for the back closure
Tools
- Hand sewing needle
- Pattern or regular paper
- Pencil
- Scissors
- Measuring tape
- Pins or sewing clips
- Washable fabric marker
- Iron for pressing material
A sewing machine is optional. You can hem and attach the closure by hand, then use hand stitches for the visible felt details.
Want to Recreate This Look?
I’ve put together a convenient Amazon supply list featuring hand-picked, well-rated products that match the items noted in the supply list above to save you time.
See My Hand-Picked Supply ListAs an Amazon Associate I earn from qualifying purchases but this doesn’t increase your price at all!
Before You Start
Unplug the lamp and remove its shade. Work on a clear table with enough room to roll the shade gently without crushing it. Choose a sound, fairly simple tapered shade; pleats, deep curves, and unusual frames make this pattern method less predictable. Don’t use a damaged shade as the foundation.
Prepare the cotton according to its care instructions before tracing or cutting, then press it flat. Tartan lines make wrinkles and skewed fabric easier to notice. Test a scrap with the felt and thread so you know the needle passes through comfortably. This is also a useful moment to decide how bold you want the visible running stitches.
Step by Step Tutorial
1 Trace the Tapered Shade Pattern
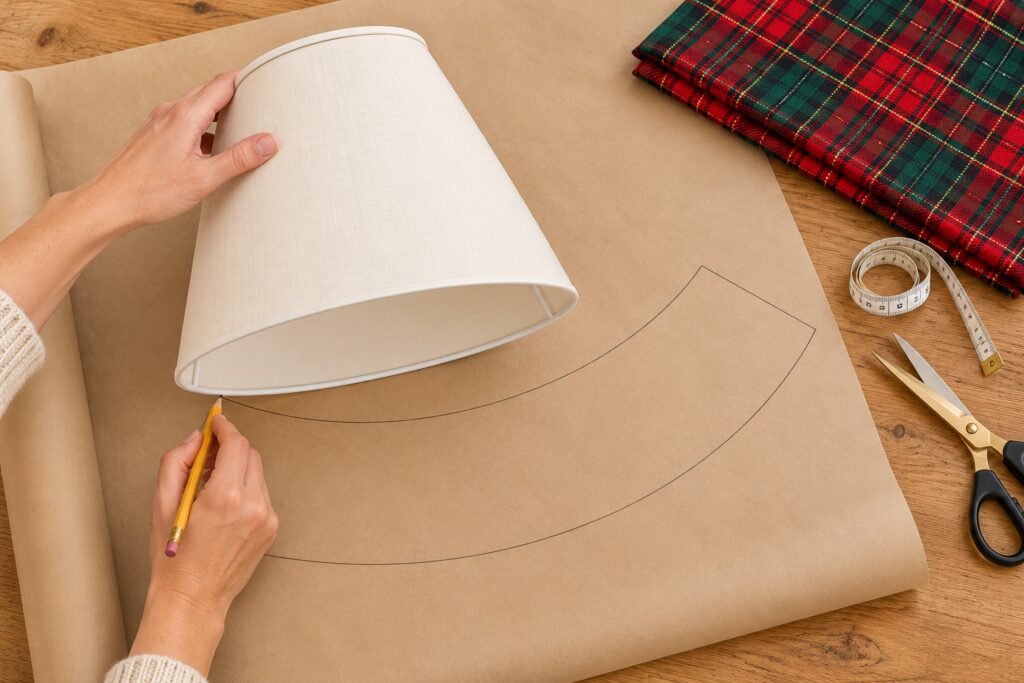
Mark the shade’s existing back seam as your starting point with a removable paper tab. Lay the shade on its side on the pattern paper. Holding it gently at the rims, roll it from that starting point until the seam comes around once. As you go, trace the upper and lower rims in short stages, keeping the shade in contact with the paper.
Join the two curved rim lines with straight end lines at the starting and finishing positions. A tapered shade produces a curved band rather than a rectangle. Cut this first paper band on the traced lines and wrap it around the shade to check it. It should meet without a large gap, with both curves following the rims. Redraw if it twists or pulls.
2 Add Allowances and Hem the Tartan
Transfer the checked pattern to fresh paper. As a suggested starting point, add about half an inch along the curved edges for small double turned hems, and about an inch at each short end for hems and an adjustable overlap. These are working allowances, not dimensions inferred from the photo. Increase them if your closure needs more room.
Lay the pattern on the tartan with the most prominent vertical stripe centered in the front area. Because the panel curves, every stripe won’t remain perfectly vertical around a tapered shade. Aim for a calm front view rather than fighting the geometry. Mark the wrong side, cut the cotton, then fold, press, and stitch the hems. Keep pins out of the iron’s path and follow the fabric’s pressing guidance.
Wrap the hemmed panel around the shade again before adding trim. The ends should overlap without stretching, and the upper edge should sit just below the top rim. Adjust now if necessary. A cover that’s too tight will pull the checks out of shape, while one that’s too loose will sag.
3 Cut and Stitch the Cream Scalloped Border
Use the lower curve of the checked paper pattern as the top line for the felt trim. Draw a narrow band beneath it, then repeat a rounded scallop along its lower edge using a small round object as a guide. Keep a continuous strip above the scallops so the trim holds together. Paper test pieces will help you choose a depth that suits the shade.
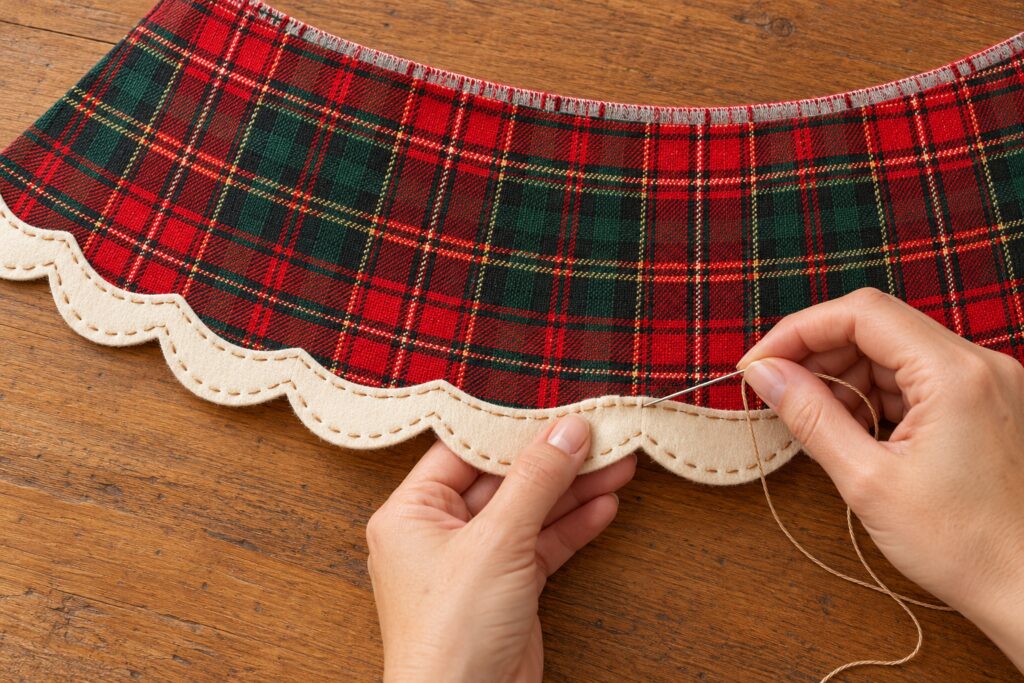
Cut the cream felt and place its straight upper edge over the outside of the tartan’s lower hem, following the curve. The scallops extend below the fabric edge. If several felt sections are needed, join them neatly at the back without a bulky pileup. Leave the closure area free to open.
Hand sew the trim through the felt and cotton near the trim’s upper edge using small tan running stitches. A running stitch simply passes in and out at regular intervals. Add a second decorative line following the scalloped edge, staying far enough from the cut felt to avoid tearing. Keep the thread relaxed enough that neither fabric puckers.
4 Sew the Felt Holly Cluster
Cut three simple holly leaves from green felt and three small red circles. Lay the cover flat and arrange the leaves near the lower front, just above the cream border. Try the placement around the shade before sewing so the cluster won’t disappear around a side or overlap the back closure.
Remove the cover and sew the leaves to the cotton with small stitches. Add a line of tan stitches along each leaf’s center and a few short side veins if you like the detail in the inspiration. Overlap the leaf bases with the red circles and stitch each circle securely through its center and around enough of its edge to hold it flat. Keep all sewing separate from the original shade.
5 Fit the Removable Back Closure
Wrap the cover around the shade and mark where the hemmed ends overlap comfortably. Remove it again. Sew short matching hook and loop sections to the mating fabric faces at the back: one on the underside of the outer flap, and the other on the outward facing surface of the underlap. Don’t sew or stick either strip to the original shade.
Use enough sections to keep the seam aligned without pulling it tight. Refit, close the overlap, and check that the cover sits smoothly, with the top and bottom openings clear. Lift the shade back onto the unplugged lamp according to its normal fitting method. Remove every pin and clip before displaying it.
Tips for Getting the Finished Look
Keep the cream trim shallow enough that it frames the tartan rather than becoming a large skirt. Even scallops and relaxed stitching will give the lower edge a clearer outline. The red and green checks already provide plenty of pattern, so the small holly cluster can remain simple.
Easy Ways to Customize It
Use a different tartan scale if your shade is much smaller, and choose oatmeal felt for a softer border. You can omit the holly and keep only the stitched scallops. Retain the removable construction whichever colors you choose.
Displaying the Finished Cover
Use the covered lamp as an unplugged seasonal decoration on a stable table. Keep it away from candles and other heat sources. The cover must come off before the lamp is plugged in or used, including with an LED bulb. This project doesn’t establish the heat suitability of any fabric, felt, or closure.
Final Encouragement
Take your time with the paper fit before cutting the tartan. A smooth front, a tidy scalloped border, and one small holly cluster will capture the inspiration without needing to duplicate every stitch in the picture.