*This post may contain affiliate links for which I earn commissions.*
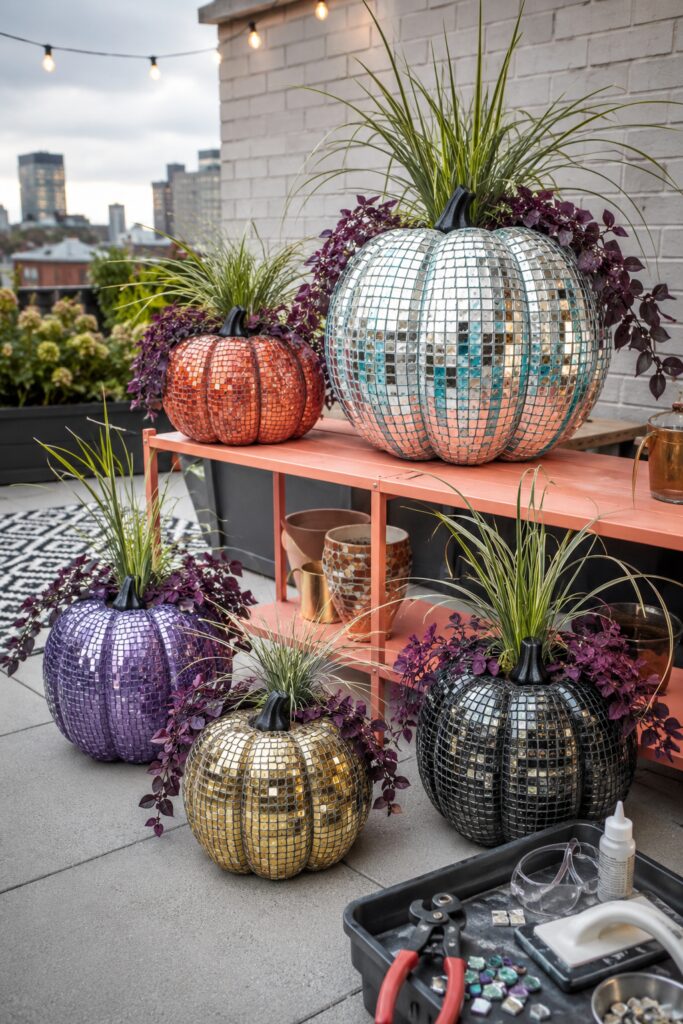
A pumpkin does not need a carved face to become a dramatic Halloween accent. Covering its curves with mirrored squares turns the familiar shape into a sparkling planter that catches daylight, patio bulbs, and city reflections.
The inspiration image for this project and the instructional images were created with AI. This tutorial translates that visual idea into a practical DIY planter you can recreate at home.
What You’re Making
This project starts with a rigid, hollow faux pumpkin approximately 14 to 18 inches wide. Its top is opened to hold a removable nursery pot, and the exterior is covered with small mirror mosaic tiles arranged around the natural ribs. Narrow grout lines retain the handmade look.
The pumpkin acts as a decorative cachepot rather than the actual planting container. Water, soil, and roots remain inside the removable pot and saucer. This makes the piece easier to maintain and helps protect the mosaic construction.
Materials and Supplies
Materials
- One rigid hollow resin, fiberglass, or similarly stiff faux pumpkin
- Plastic nursery pot sized to fit inside the opening
- Shallow waterproof saucer for the nursery pot
- Lightweight plastic riser or inverted nursery pot to support the planted pot
- Small square glass mirror mosaic tiles, preferably about 10 mm
- Exterior-rated flexible mosaic adhesive compatible with glass and the pumpkin material
- Exterior-rated non-sanded grout suitable for glass mosaic and narrow joints
- Exterior grout sealer compatible with mirrored glass
- Bonding primer suitable for the rigid shell material
- Exterior paint in a color close to the intended grout
- Painter’s tape
- Preserved moss or decorative fiber to disguise the pot rim
- Ornamental grass and trailing foliage suited to the site’s light and climate
Tools
- Flexible measuring tape
- Marker
- Drill with a small bit for a starter or drainage opening
- Fine-tooth hand saw, rotary cutting tool, or appropriate cutting tool for the form
- Medium-grit sandpaper
- Tile nippers rated for glass mosaic
- Notched adhesive spreader or small plastic applicator
- Rubber grout float
- Grout sponge and two water containers
- Nitrile or waterproof work gloves
- Safety glasses
- Dust mask suitable for sanding and dry grout mixing
Optional Finishing Supplies
- Individual colored mirror tiles for coral, violet, gold, or smoky-black accents
- Matte-black exterior paint for the saved stem
- Small decorative pick to support the stem beside the planting
- Outdoor furniture pads for the base
Before You Start
Confirm that the pumpkin shell is rigid. Press the broadest section with one hand. It should not flex noticeably. A soft carvable foam pumpkin may be easy to cut, but conventional grout can crack when that base bends. If the available form is flexible, use a grout-free tiled finish designed for flexible craft surfaces instead of this method.
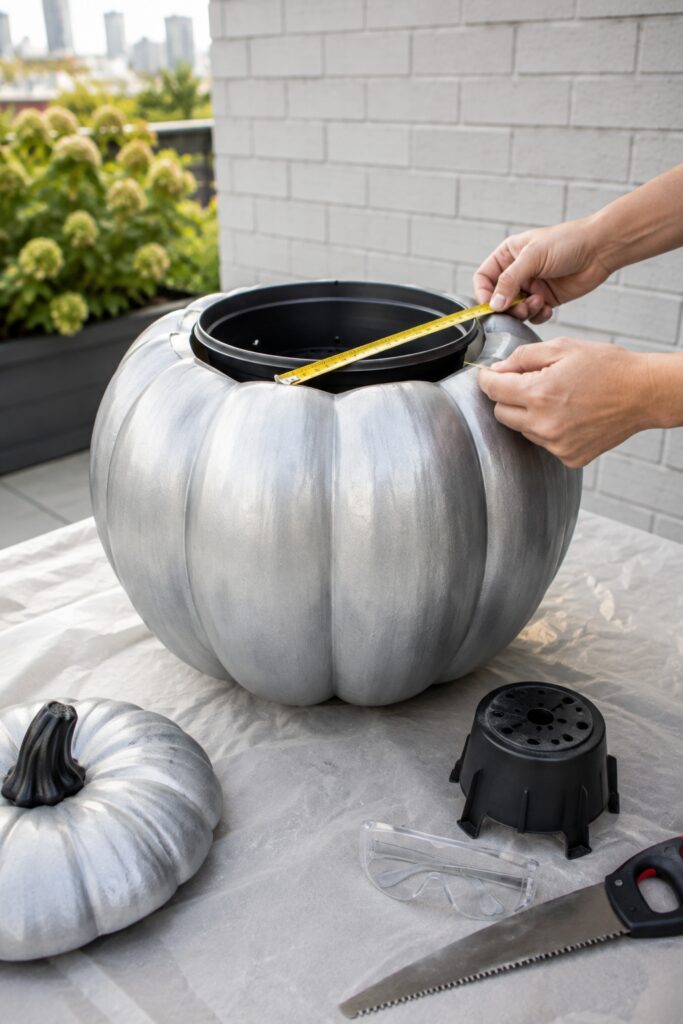
Place the nursery pot on top of the pumpkin and trace an opening slightly wider than its lower body but narrower than its rim. The rim should rest just below the finished edge rather than falling through it. Check the shell material before choosing an adhesive, primer, or cutting method. Product compatibility matters more than using a particular formula.
Work outdoors or in a ventilated area. Wear eye protection when cutting the shell or nipping glass and a suitable mask when sanding or handling dry grout. Protect the worktable and keep fragments contained. Do not work near the edge of a rooftop or elevated terrace.
Step-by-Step Tutorial
1. Cut and Test the Planter Opening
Remove the faux stem if possible and save it. Mark the planting opening around the top. Drill a starter hole inside the waste section, then cut slowly with the tool suited to the shell. Support the form so it does not roll and keep hands away from the cutting path.
Sand the cut edge until it is even and free of sharp projections. Test-fit the nursery pot, riser, and saucer. The pot should lift out without scraping the future mosaic edge. Place the riser inside the shell so the planted pot sits high enough to look full but remains stable.
Add a small drainage or air-clearance opening at the lowest point of the pumpkin shell. This is backup protection for incidental water, not permission to plant directly inside it. The saucer should catch routine drainage and be easy to remove.
2. Prepare the Rigid Shell
Wash and dry the exterior. Scuff-sand glossy areas so the primer can bond, then remove all dust. Mask the cut rim and any area that should remain free of adhesive.
Apply a bonding primer compatible with the shell material. Once it has dried according to its instructions, add an exterior base coat close to the grout color. This makes small gaps or imperfect edges less obvious. Charcoal gray works beneath silver tiles, while deep plum, rust, ochre, or black supports the colored versions.
Allow the coating to cure fully. Rushing this layer can cause the entire mosaic system to release from the shell rather than just one tile.
3. Plan the Tile Rhythm Around the Ribs
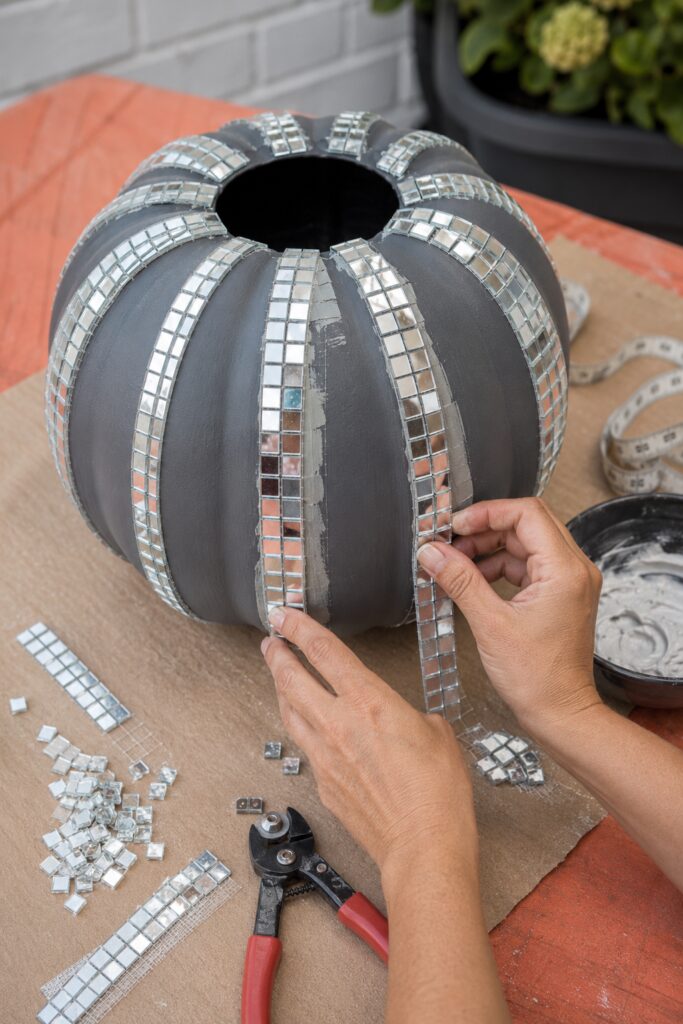
Measure from the top opening to the base along one pumpkin rib. Cut mesh-mounted tile sheets into narrow vertical strips. Dry-fit one strip down each high ridge first. These guide rows establish the curve and help keep the final grid from wandering.
Move the strips as needed so the grout gaps remain reasonably even. At the tight top and bottom curves, separate tiles from the mesh and place them individually. Slight changes in spacing are preferable to forcing flat sheets over compound curves.
Once the ridge rows look balanced, dry-fit tiles through the broad valleys between them. Stagger an occasional row or substitute a narrower piece where the circumference tightens. The goal is a handmade grid that follows the pumpkin, not a perfectly square grid forced onto a round form.
4. Adhere the Mirror Tiles
Work on one manageable section at a time. Spread a thin, even layer of exterior flexible mosaic adhesive using the applicator recommended by its maker. Do not coat more area than can be tiled before the surface skins over.
Press the guide strip along a ridge, then fill the adjacent valley with rows or individual squares. Keep adhesive below the tile faces and out of the grout joints. If it squeezes upward, remove it promptly with a narrow tool and wipe the tile without flooding the area.
Continue around the pumpkin, leaving the masked opening clean. Set the form on a padded ring or folded towel as you rotate it so finished areas are not crushed. Follow the adhesive manufacturer’s complete curing time before grouting.
5. Grout the Mosaic Surface
Protect the opening and put on gloves and eye protection. Mix only as much exterior-rated non-sanded grout as can be used within its working time. The consistency should match the product directions rather than an improvised recipe.
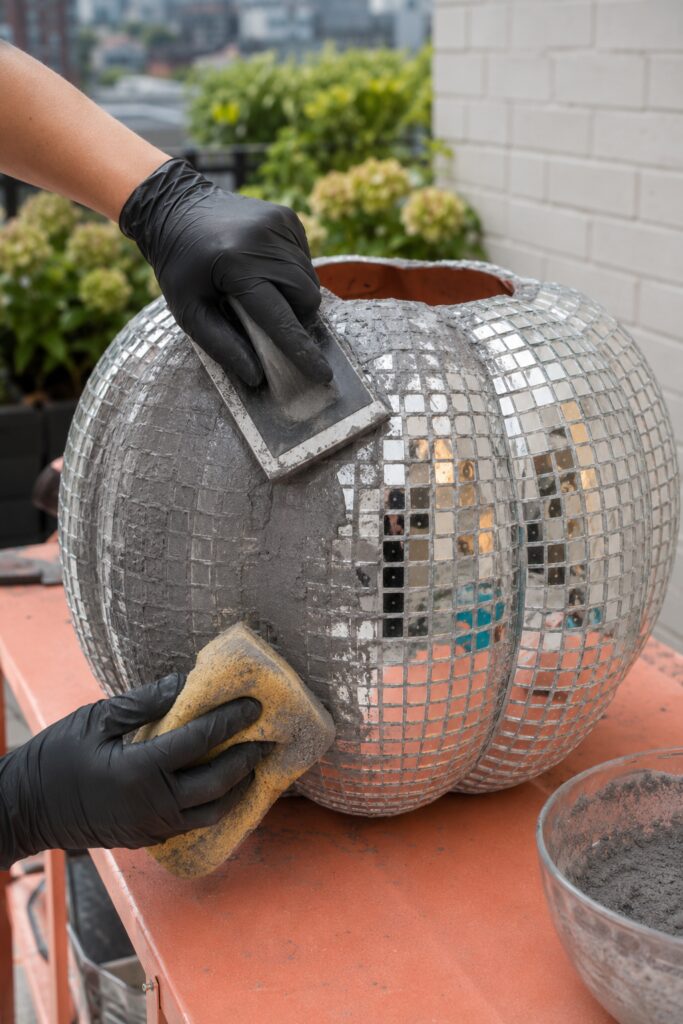
Use the rubber float to press grout diagonally across the tiles and into every joint. Work in sections around the ribs. Remove excess with the edge of the float, again moving diagonally so it does not pull material from the gaps.
When the grout has firmed for the time specified on its package, wipe the surface with a damp, well-wrung sponge. Rinse the sponge frequently and avoid saturating the shell. A light haze can be buffed away later with a soft cloth after the grout reaches the proper stage.
6. Seal and Finish the Opening
Let the grout cure for the full recommended period. Apply a compatible exterior grout sealer, wiping it from the mirror faces as directed. More sealer is not necessarily better. A thin, controlled coat protects the joints without clouding the reflective tiles.
Remove the masking from the opening. If needed, finish the cut rim with a narrow painted band rather than trying to wrap glass squares over the edge. Paint the saved stem matte black and attach it to a small decorative pick so it can stand near the plants without blocking the pot.
Place outdoor furniture pads under the pumpkin if it will sit on tile or a painted shelf. The pads reduce abrasion and keep the lowest grout lines away from standing water.
7. Plant the Removable Inner Pot
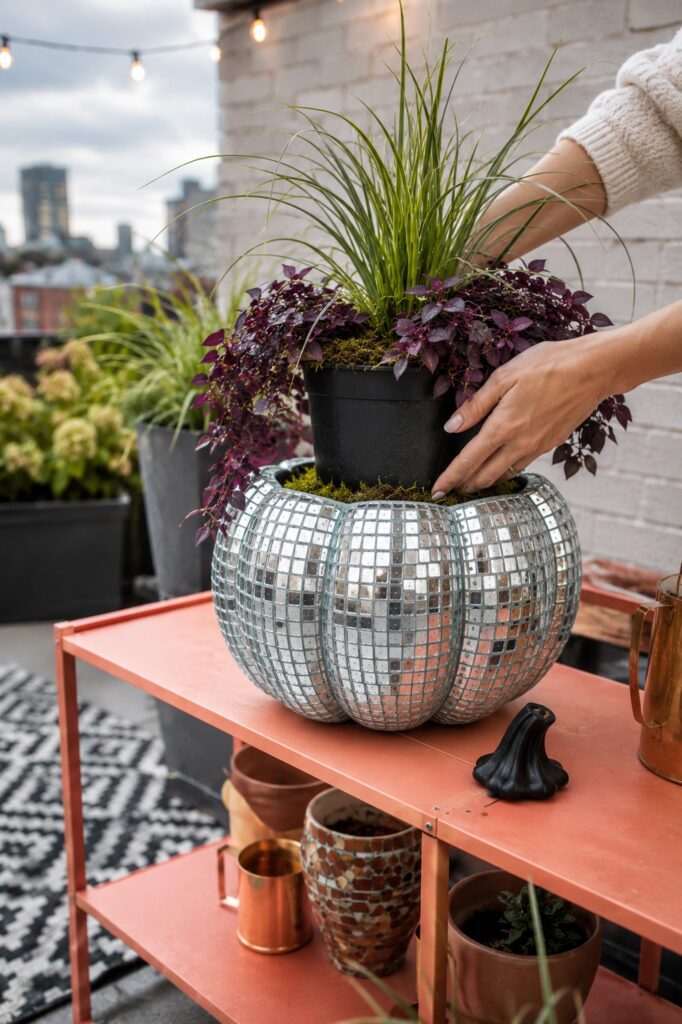
Plant the nursery container separately. Use a tall ornamental grass as the central shape and a trailing purple-leaf plant around the perimeter. Select varieties that tolerate the terrace’s sun, wind, and temperature rather than choosing by color alone.
Set the saucer and riser inside the shell, then lower the planted pot into place. Confirm that it does not tip when the grass moves in the wind. Add a small ring of preserved moss around the visible rim without packing it against wet soil.
8. Build a Coordinated Pumpkin Collection
Make the silver pumpkin first, then repeat the method in smaller sizes or alternate finishes. Coral, violet, gold, and smoky black work well together because every piece still shares the same square-tile scale, grout spacing, and black stem.
If true colored mirror tile is difficult to source, place colored reflective tiles selectively among silver rather than coating mirror faces with paint. Painted mirror often loses the crisp reflection that gives the design its disco character.
Tips for Preserving the Sparkling Handmade Look
Let the grout lines remain visible. Extremely tight joints can make the surface resemble metallic foil, while slightly wider, consistent gaps emphasize the mosaic craft. Use small tiles around deep ribs so the grid bends gradually.
Balance the shine with matte elements. Black stems, soft grasses, velvety purple foliage, and a painted console keep the display from becoming visually harsh. Arrange the largest silver planter highest, then distribute the darker and warmer finishes below it.
Clean mirror faces with a soft damp cloth rather than abrasive scrubbers. Turn the planters occasionally if intense reflected sunlight creates uncomfortable glare toward windows or seating areas.
Easy Ways to Customize the Planters
For a subtler fall version, combine antique-gold, smoke, and clear mirror tiles with olive grasses. A playful Halloween group can use violet, coral, silver, and black with small bat or crescent accents worked into a few tile rows.
The same technique can create a single tabletop planter if a small rigid shell and lightweight plant are used. Keep the removable-pot system at every size.
Displaying and Caring for the Finished Planters
These pieces are best for a covered patio, balcony, or terrace where they receive limited direct rain. Bring them indoors during freezes, severe storms, or prolonged wet weather. Even exterior materials last longer when not exposed continuously.
Water the nursery pot away from the decorative shell whenever practical. Let it drain, empty the saucer, and return it to the pumpkin. Check grout and tile adhesion before each season. Keep the planters away from ledges and secure tall grass in windy locations so the display cannot become a falling hazard.
You do not need five identical pumpkins to capture the appeal of the inspiration. One well-built mirrored planter with readable grout lines, a strong plant silhouette, and a safe removable pot creates the same unexpected Halloween sparkle.