*This post may contain affiliate links for which I earn commissions.*
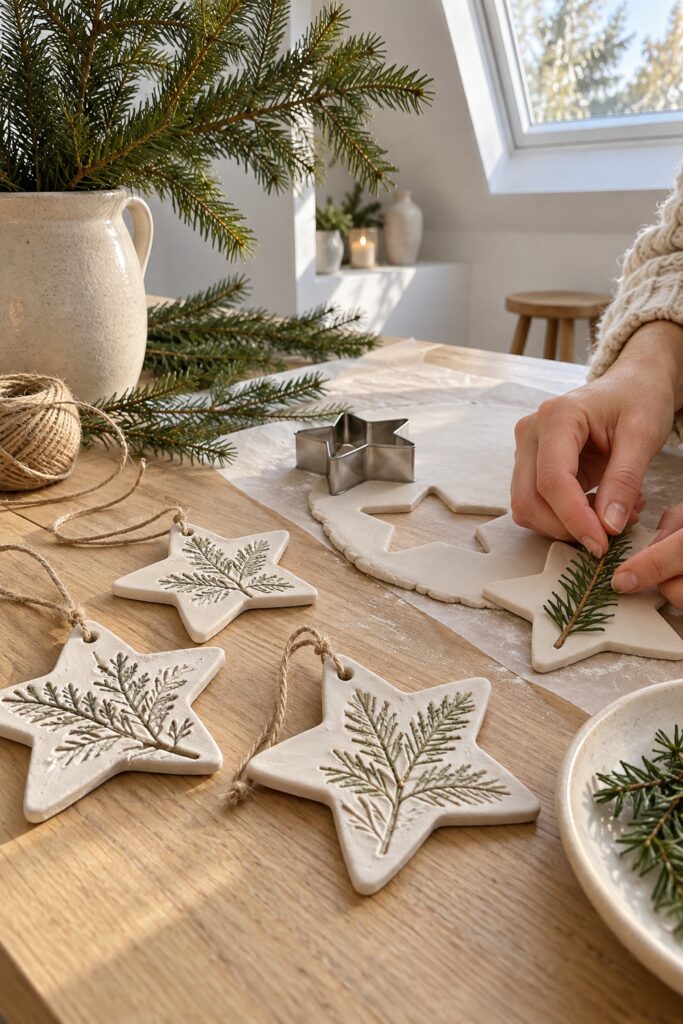
Evergreen impressions turn simple white clay stars into small ornaments with a woodland character. In the inspiration, fine needle patterns stand out in muted green against ivory surfaces, and natural cord provides uncomplicated hangers. This tutorial translates that idea into air-dry clay ornaments you can shape, imprint, and finish at home.
The practical version uses removable sprigs to make recessed patterns, then a little paint to emphasize those marks after the clay dries. No kiln or ceramic firing is involved. You can make a few stars for a tree, use them as decorative gift tags, or gather them on a branch for a modest Christmas display.
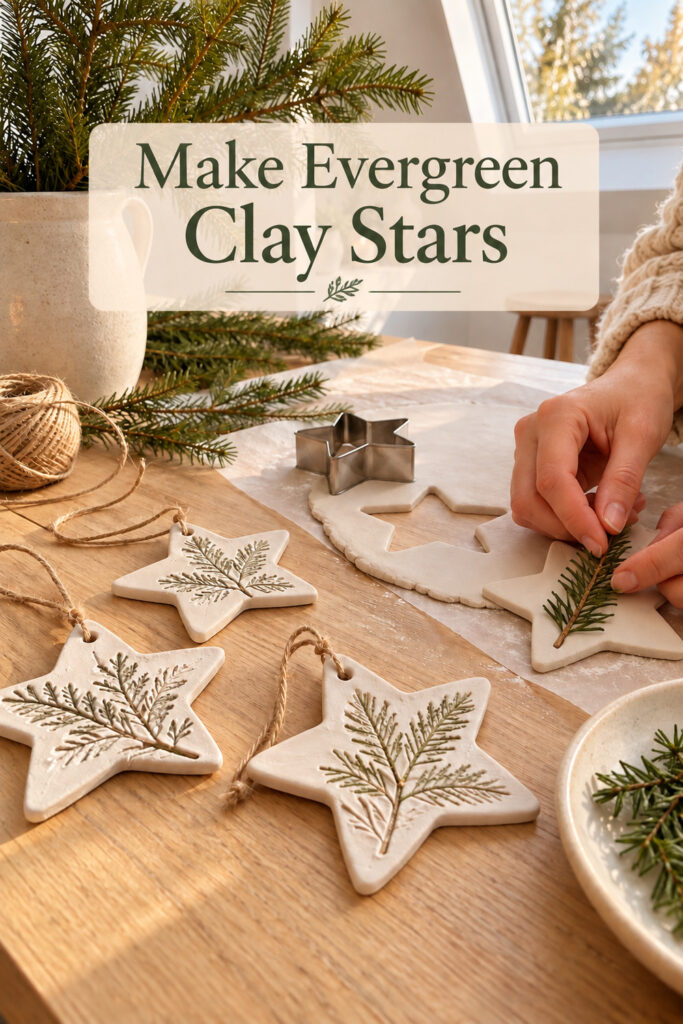
The inspiration and instructional images were created with AI and illustrate a practical DIY approach rather than document a physical project.
What You Are Making
These are five-point stars with a botanical impression on the front and one hanging hole near the top. A suggested starting size is approximately 3 to 4 inches across, with clay rolled about a quarter inch thick. Adjust that size to your cutter and clay manufacturer’s guidance, keeping enough thickness to support the points and hanging hole.
The green detail in the reference can be recreated with paint inside the impressions. Do not leave fresh plant material embedded in the clay. Removing it makes the drying and finishing process more predictable and gives you a clean pattern to color later. These ornaments are decorative indoor pieces, not waterproof ceramics.
Materials and Supplies
Main Materials
- White air-dry clay suitable for rolling and surface impressions
- A few small clean evergreen sprigs with flexible stems and relatively flat needles
- Thin natural jute twine or another cord that fits the hanging holes
- Muted olive or moss green acrylic craft paint for the recessed detail
Tools and Workspace Supplies
- A five-point star cutter approximately 3 to 4 inches wide
- A small rolling pin dedicated to craft use
- Two equal thickness guide sticks if you want help rolling an even slab
- Parchment paper on a flat board or tray
- A short drinking straw or suitable round hole tool
- A fine paintbrush and a small palette
- A soft cloth and a small container of clean water
- Scissors and optional fine abrasive paper for rough dry edges
Optional Finish
A brush-on matte finish compatible with your clay and paint can reduce surface scuffing. Test it on a spare piece and follow its instructions. Sealing does not make ordinary air-dry clay waterproof or suitable for outdoor use.
Want to Make These Ornaments?
I’ve put together a convenient Amazon supply list featuring hand-picked, well-rated products that matching the materials list for this project to save you time!
See My Hand-Picked Supply ListAs an Amazon Associate I earn from qualifying purchases but this doesn’t increase your price at all!
Before You Start
Check the clay label for recommended thickness, drying conditions, and compatible finishes. Keep unused clay sealed so it stays workable. Protect the table and choose a drying area where the ornaments can remain flat and undisturbed. Use craft-dedicated tools rather than returning clay-covered cutters and rollers to food preparation.
Trim a few sprigs small enough to fit inside your star shape. Choose a fine branching tip rather than a thick woody stem. Blot away moisture and remove loose needles. Make a test impression in a small scrap before cutting your full batch. This shows how firmly to press and whether your chosen foliage produces a readable pattern.
1. Roll an Even Slab and Cut the Stars
Knead a manageable amount of clay according to its directions, then set it on parchment. Roll outward in several directions to make an even slab. If using guide sticks, place one on each side and let the roller rest across them. About a quarter inch is a useful starting thickness for this suggested size, subject to the clay label.
Press the cutter straight down without dragging it sideways. Leave a little space between cuts and peel away the excess clay carefully. Keep the stars on their parchment so you do not stretch their points while moving them. Combine scraps gently for another small batch, stopping if the clay becomes dry or difficult to smooth.
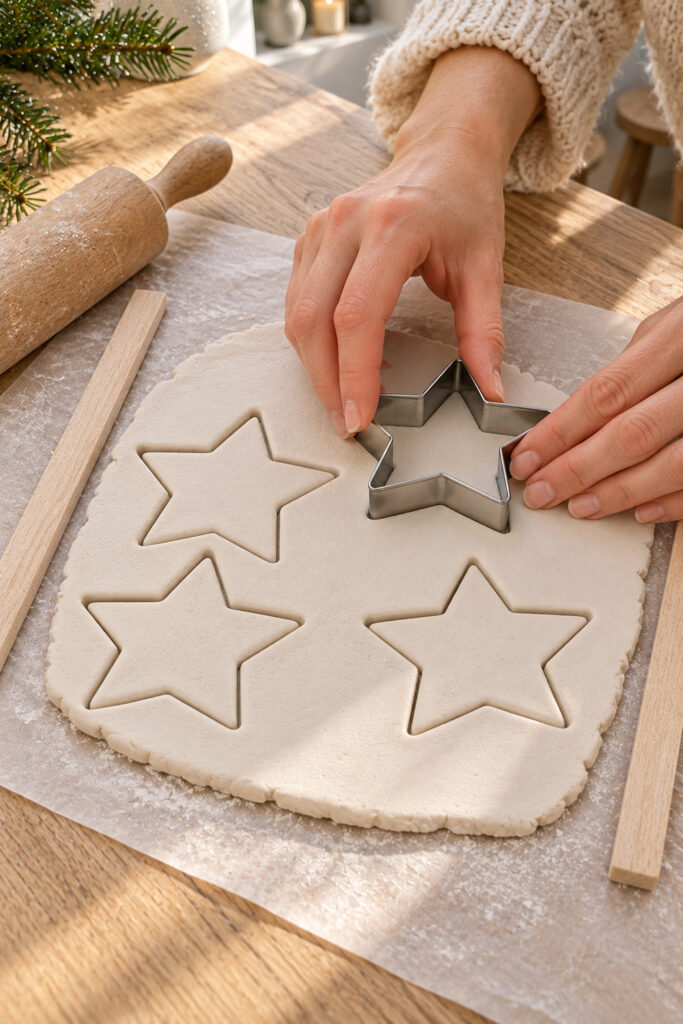
Inspect the tips before going on. Smooth small ragged edges with a barely damp fingertip, using as little water as possible. Too much water can make the surface sticky and soften the shape. If a point has become noticeably thin or torn, rework that star while the clay is still soft rather than trying to repair it after drying.
2. Press the Evergreen Pattern and Make the Hole
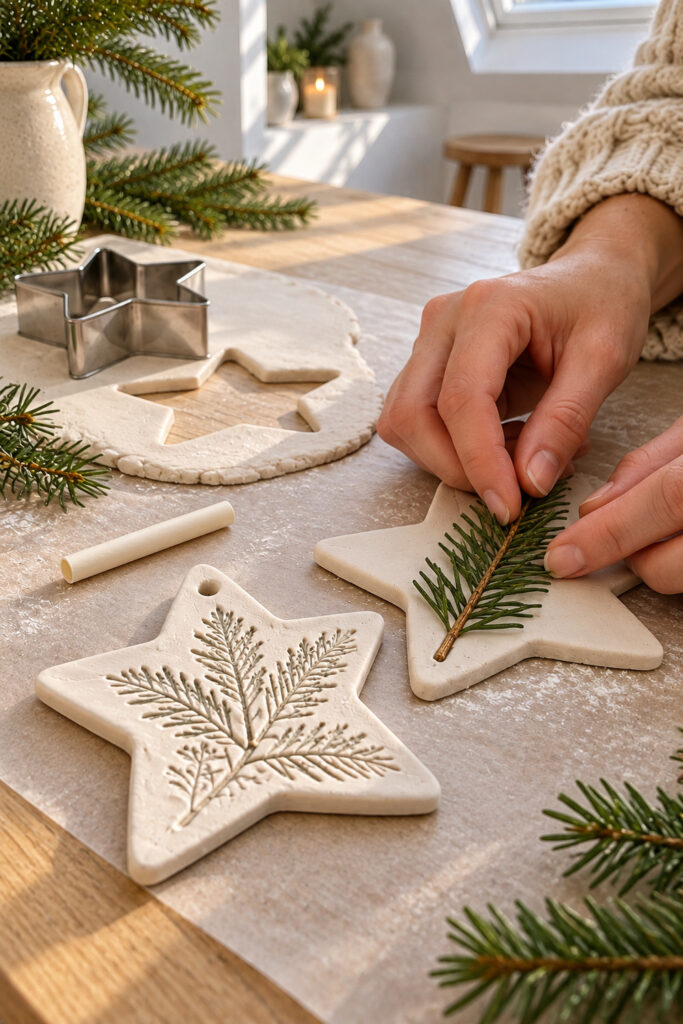
Lay a small sprig across the front of a star. Keep its thickest stem away from the narrow top point where the hanging hole will go. A diagonal placement can carry the pattern across several points while leaving some plain clay visible. Press the needles and fine stems gently into the surface with your fingertips.
Lift the sprig slowly from one end. Remove every piece of plant material without scraping away the impression. You want shallow, readable grooves, not cuts extending through the star. If the result is too faint, test firmer pressure on a scrap before trying another ornament. Avoid repeatedly shifting the same sprig across one star, which can blur the pattern.
Make one round hole near the top using the straw or hole tool. As a suggested starting position, leave roughly a quarter to three eighths of an inch of clay between the hole and the outer edge. Center it within the broad part of the point, leaving a substantial bridge of clay. Remove the little plug and check that the hole goes all the way through.
3. Let the Clay Dry Fully
Transfer the parchment and stars together to a flat tray or board. Leave them to dry under the conditions specified for your clay. Drying often takes more than a day and can take several days depending on thickness, humidity, and the product. Treat the label as your guide rather than assuming a fixed overnight schedule.
When the clay is firm enough to handle safely, follow any turning instructions supplied by its manufacturer so the underside can dry too. Support the whole star when lifting it. Do not tug on a point or lift it by the hole. Avoid ovens, microwaves, direct heaters, or improvised accelerated drying unless the product expressly permits the method.
Before painting, check both sides and the edges for remaining dampness. If a piece feels cool or looks unevenly dark compared with the others, give it more time. A cracked or weak hanging point should not be used for hanging. Save a sound spare star for testing paint and finish combinations.
4. Color the Recessed Evergreen Detail
Once the clay is fully dry, remove loose surface dust. If an edge needs light smoothing, use fine abrasive paper sparingly and wipe away the dust afterward. Keep sanding away from the thin points and hole. The softly handmade outline can remain; it does not need to be polished into a factory-perfect shape.
Use a fine brush to place a small amount of muted green acrylic paint into the botanical grooves. Work along the main stem, then the needle marks. Keep the surrounding surface mostly ivory. If paint reaches a raised area, lift it promptly with a lightly damp cloth, taking care not to scrub or soak the porous clay.
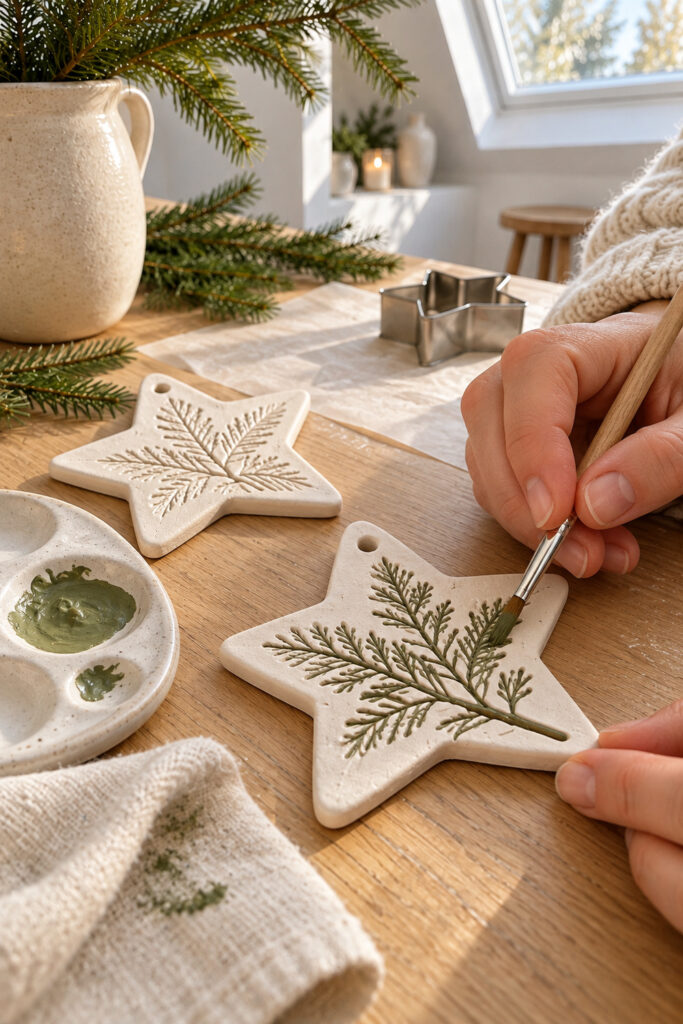
Allow the paint to dry as directed. If you choose a matte protective finish, test it first, then apply a thin compatible coat according to the product instructions. Keep the hanging hole clear and allow the finish to cure before adding cord. Unpainted white impressions are also an attractive simpler option.
5. Add the Natural Cord Hangers
Cut a length of thin twine long enough for the loop you want, with extra for tying. Thread one end through the hole, bring the two ends together, and knot the loose ends above the ornament. This gives a simple hanging loop without tightening a knot against the clay point. Trim excess cord only after checking the length.
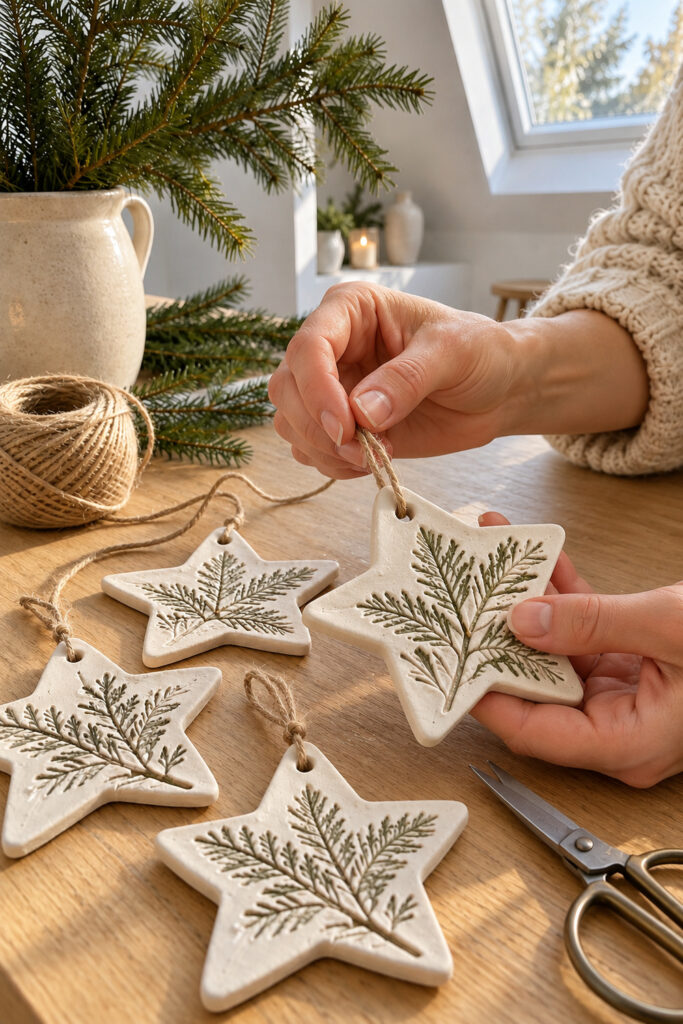
Test each ornament over a padded surface before placing it on the tree. Use a supportive branch and keep fragile pieces where they are unlikely to be knocked. If the twine will not pass through easily, use thinner cord rather than forcing or enlarging a dry hole near a delicate point.
Tips for the Finished Look
Leave plain ivory space around the botanical pattern. A single diagonal impression can look more delicate than several overlapping ones. Keep the painted color muted and concentrated in the grooves, and use similar cord on the whole batch. Those repeated details connect the ornaments even when their plant patterns differ.
Easy Ways to Customize the Stars
Try different small evergreen tips, leave some impressions unpainted, or use narrow neutral ribbon in place of twine. Keep the hole size and ornament weight in mind when changing the hanger. A smaller cutter can make decorative gift accents, while larger stars need stronger points and longer drying time.
Display and Store Them Carefully
Hang the stars indoors on supportive branches or attach them to gift wrapping as removable decorations. Keep them away from water and places where children or pets could pull them down. Wrap each dry ornament separately for storage, protecting the points and keeping the box somewhere dry.
A Small Handmade Christmas Detail
A clear impression, a pale surface, and a simple cord loop are enough to carry this idea. Your stars can have different botanical shapes from the inspiration while still sharing its quiet woodland character.