*This post may contain affiliate links for which I earn commissions.*
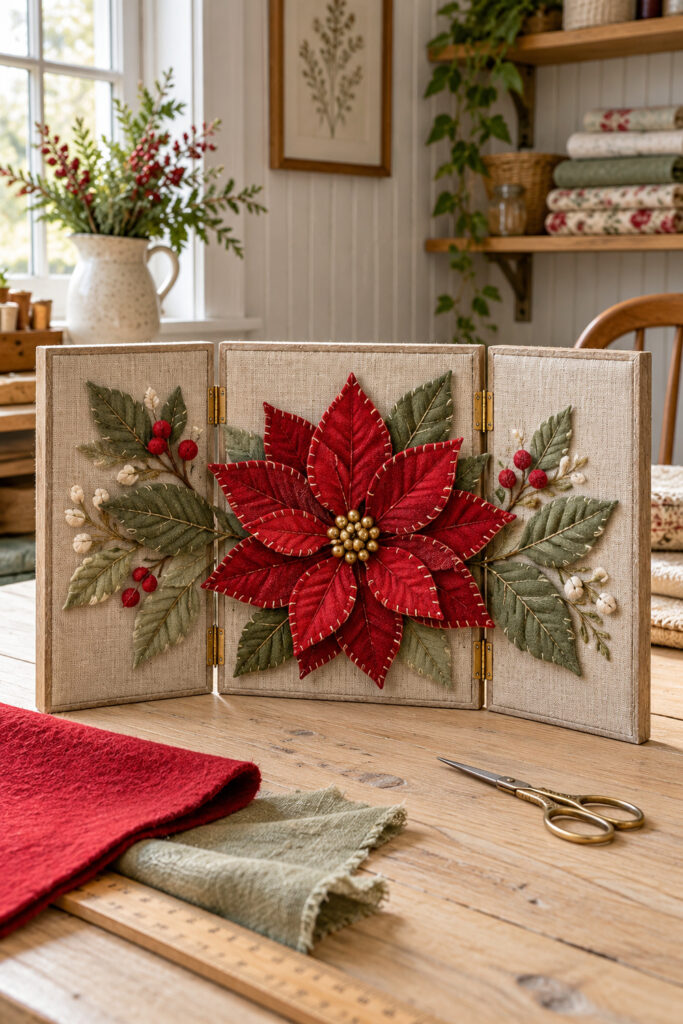
A large red fabric poinsettia gives this little folding screen its Christmas character. Pale linen, sage leaves, ivory stitches, and small brass hinges make the surrounding details worth a closer look. The flower is dimensional, but the basic project can begin with three simple wooden panels.
This tutorial proposes a practical version of the inspiration. Each panel is decorated separately, and the flower stays on the center section so the joints remain free. You can retain the layered petals and stitched edges without trying to reproduce every detail of the imagined object.
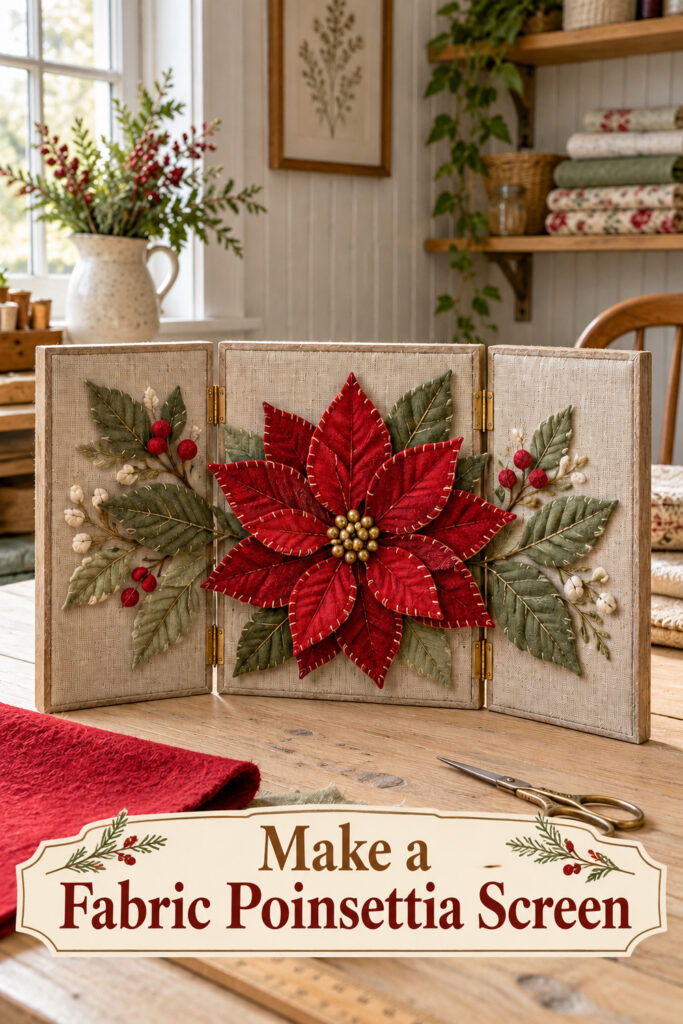
The inspiration and instructional images were created with AI to illustrate a proposed method rather than document a physically tested project.
What You’re Making
You’ll make a small freestanding tabletop triptych, which is a group of three hinged panels. The center carries one layered felt poinsettia, and the side panels carry separate leafy sprigs. A shallow zigzag makes the screen stand on a level shelf or table.
As a suggested starting size, use a central wood panel about 10 inches wide by 12 inches tall and two side panels about 5 inches wide by 12 inches tall. These are proposed dimensions, not measurements taken from the image. Choose solid wood or cradled artist panels with edges thick enough for the hinge screws.
Materials and Supplies
Materials
- Three wood panels of equal height with suitable solid edges for screws
- Four small brass butt hinges and matching short wood screws
- Natural linen or linen-look fabric sufficient to cover each front and wrap the edges
- Fabric adhesive compatible with your fabric and wood
- Red craft felt for eight large and six smaller pointed petals
- Sage green felt for leaves
- Small red and cream felt scraps for side details
- Ivory embroidery floss for edge stitches and red and muted gold floss for veins
- A small red felt backing circle and mustard felt for the flower center
- White and/or red berry sprigs
- Sewing thread and a needle suitable for felt
Want to Make this Triptych?
I’ve put together a convenient Amazon supply list featuring hand-picked, well-rated products that match the supply list shown above to save you time.
See My Hand-Picked Supply ListAs an Amazon Associate I earn from qualifying purchases but this doesn’t increase your price at all!
Tools
- Paper pencil ruler and scissors for templates
- Fabric scissors and embroidery scissors
- Manual screwdriver and a suitable small drill bit or pilot-hole tool as required by the panel material
- Protective work mat and small clips or weights for adhesive drying
Optional supplies include a wood finish for exposed edges and a felt backing for the rear. Use finishes before attaching fabric and let them dry according to their labels.
Before You Start
Dry-fit the hinges on bare panels first. Choose hardware intended for your panel thickness and desired shallow folding angle. Position two hinges at each seam so the sides can fold slightly toward the viewer, and confirm that the front edges won’t pinch the fabric.
Check screw length against the solid edge thickness; screws must not break through the panel face. Make pilot holes where the hardware instructions require them, with the work supported on a protective surface. Keep fingers clear of the bit and use hand protection appropriate to the tool. Remove the hinges while covering the panels.
Draw a pointed oval for the large petals and a shorter version for the smaller ones. On the suggested center panel, try large petals roughly 3 to 3½ inches long, then check a complete paper flower before cutting felt. Leave clear linen beside both hinge seams. Adjust the template if the flower crosses that margin.
Step-by-Step Tutorial
1. Cut and Stitch the Felt Shapes
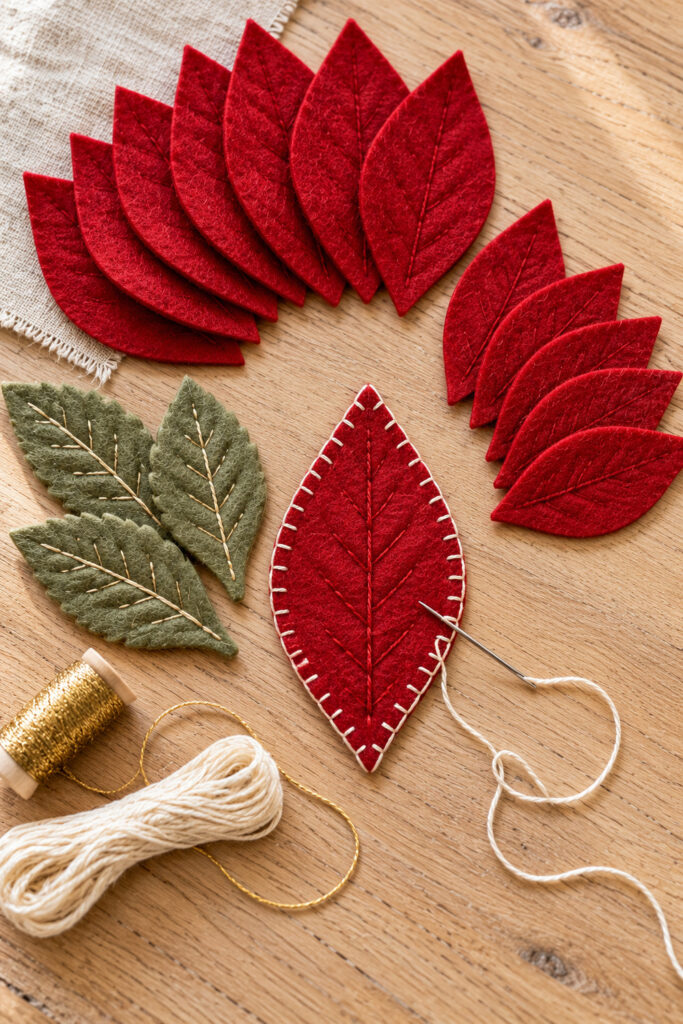
Cut eight large red petals and six smaller ones from the approved templates. Cut sage leaves in two or three sizes, plus a few small cream leaf shapes if desired. Keep offcuts for the center and side accents.
Work ivory blanket stitches around the red petal edges. Bring the needle through near the edge, pass it back through from the same side a short distance along, and catch the thread loop with the needle before tightening. Keep the loops loose enough to avoid curling the edge. Practice on a scrap first, then stitch a red vein along each petal’s center.
2. Cover the Panels with Linen
Cut a separate fabric piece for each panel, allowing enough material to wrap to its rear. Lay the fabric face down and center the panel on it. Apply the adhesive as directed, using a thin even layer compatible with the materials rather than soaking the weave.
Smooth the front, wrap the edges, and fold the corners neatly at the back. Keep the intended hinge seats free of bulky folds. Clip or weight the wrapped edges without marking the front, and allow the adhesive to dry fully before handling. Keep any fabric over hinge seats thin and flat, or trim it back so the leaves seat firmly on wood.
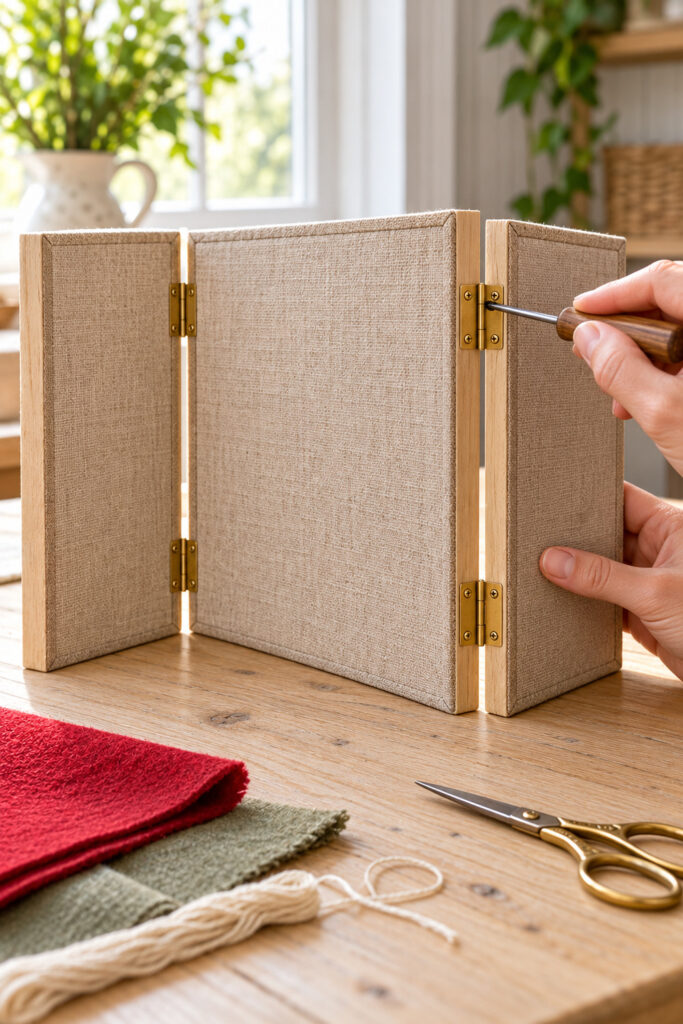
3. Reattach the Four Hinges
Reinstall the hinges in the prepared positions, with two per seam. The barrel should sit clear of the fabric-covered edges, and the screws must bite into solid wood. Tighten with a manual screwdriver until secure without crushing the wood or stripping the holes.
Stand the undecorated screen in a shallow zigzag on a level surface. Adjust the angle until all bottom edges sit evenly. Open and close each side a little to check for binding. If the chosen hardware or panels prevent smooth movement, resolve that before adding the flower.
4. Build the Poinsettia as a Separate Motif
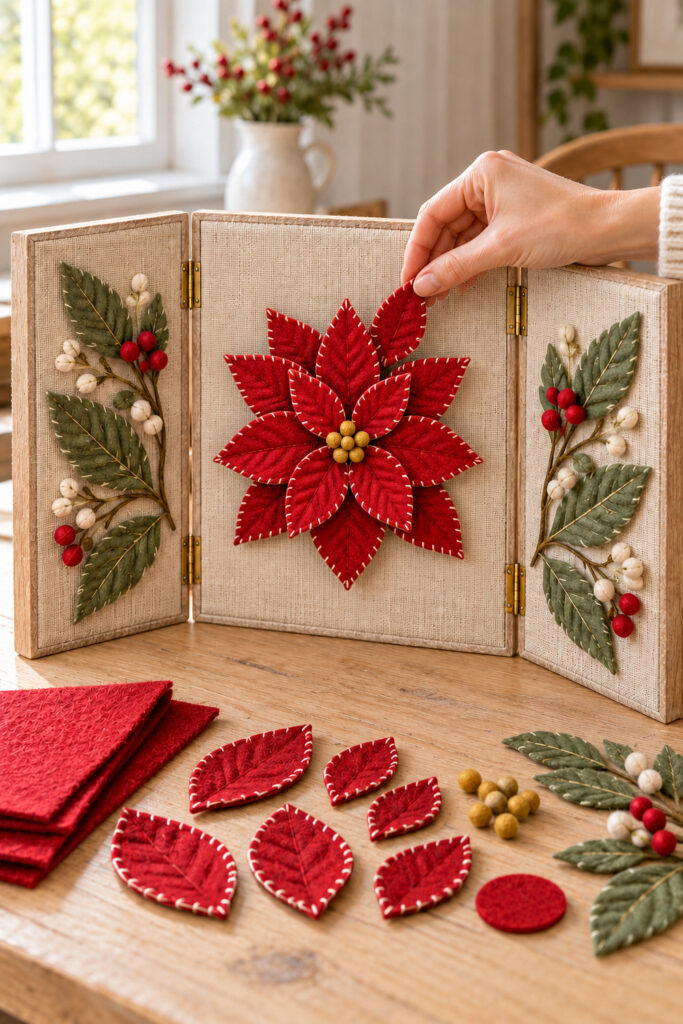
Arrange eight large petals around the small red backing circle. Overlap their bases while keeping their points distinct, and stitch through those bases into the circle. Add six smaller petals above them, turning this layer so its points fall between the larger ones where possible.
Pinch the petal bases gently as you sew if you want more lift. Leave the outer points free, without stuffing or wire. Sew several small mustard felt knots into the middle to cover the attachment stitches. Keep the back reasonably flat so it can sit securely against the linen.
5. Arrange the Leaves and Attach the Flower
Lay the screen flat enough to work without straining its hinges. Position a few sage leaves on the center panel, then place the flower over their bases. Recheck the clear margins beside the seams. Move the petals inward if they could catch when a side panel turns.
Attach the central leaves and flower backing with compatible fabric adhesive, following its directions. Apply it to the backing and petal bases rather than flattening every free tip. Add separately arranged leaf sprigs to each side panel, stitching veins before attaching them. Use lengths of muted gold floss as the branching stems for those sprigs and secure them with a thin line of compatible adhesive. Small felt berries and cream leaf shapes can finish them.
6. Dry and Check the Folding Clearance
Leave the decoration supported until the adhesive has dried or cured as its maker directs. Don’t stand the screen early if the raised flower can slide. Gently check the backing and leaf bases afterward, adding a small amount of adhesive only where needed.
Stand the panels again and move the sides through the display angle. Keep every leaf and petal clear of the joints. Treat this as a shallow-folding decorative screen; raised petals may prevent flat storage even when the hinges themselves move freely.
Tips for Getting the Finished Look
Make the center flower noticeably larger than the side sprigs. Its layered red shape should register first, with the sage leaves guiding the eye outward. Leave linen visible around each motif so the stitching doesn’t become a continuous busy surface.
Ivory edge stitches show best when their spacing is reasonably consistent. They needn’t be perfect. If one petal looks flatter than the rest, lift its free point gently rather than adding more layers across the whole flower.
Easy Ways to Customize It
Use burgundy felt for a deeper red or ivory petals for a quieter version. Keep the center and side decorations within their own panel boundaries regardless of color. For a smaller screen, shrink the paper templates before cutting so the flower still fits with clear seam margins.
Displaying the Finished Screen
Set it on a stable indoor shelf or console away from candles, heat, moisture, and the edge of a busy table. Check that the shallow zigzag supports it without rocking. Keep it out of reach of small children and pets, especially where small felt embellishments could be pulled loose.
Final Encouragement
Start with a full-size paper flower on the bare center panel. Once that outline fits comfortably between the joints, the later choices become much easier: stitch the petals, build the layers, and let a little plain linen frame your work.