*This post may contain affiliate links for which I earn commissions.*
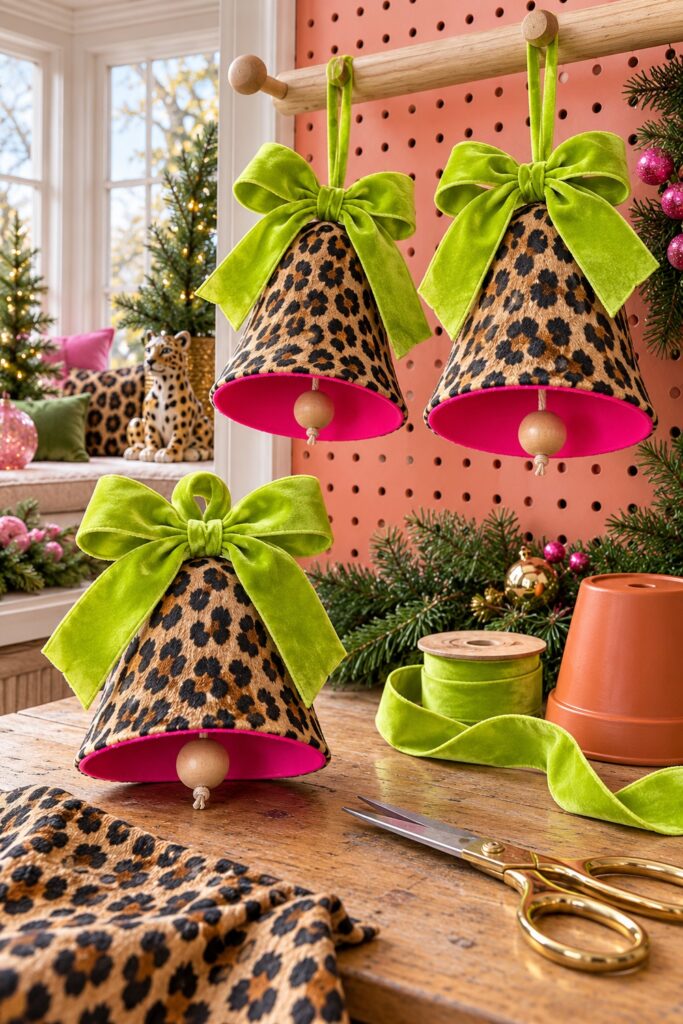
These Christmas bells get their shape from small flowerpots, with leopard fabric on the outside and hot pink showing underneath. The lime bows are deliberately generous. They make a simple bell shape look dressed for a party rather than hidden beneath ordinary holiday greenery.
This tutorial uses lightweight plastic pots and a cord hanger supported by a washer inside each pot. The fabric and bow decorate the bell, while the cord carries its weight. It’s a practical interpretation of the image rather than an attempt to copy an imaginary manufacturing process.

The inspiration and instructional images were created with AI to illustrate the concept and proposed steps rather than document a physically completed project.
What You’re Making
You’ll make decorative hanging bells with a wooden bead suspended inside each one. They aren’t intended to ring. The bead supplies the recognizable clapper shape without the weight of a metal bell.
For a starting point, choose three tapered plastic pots around 4 to 5 inches across the open rim. These are suggested craft dimensions, not measurements taken from the image. Use one pot first to establish the fabric pattern and hanger before preparing the whole group.
Materials and Supplies
Materials
- Lightweight tapered plastic flowerpots with one small central drainage hole
- Flexible leopard-print cotton fabric with enough extra for a small overlapping seam
- Hot pink paint labeled suitable for the particular plastic or an appropriate primer-and-paint system
- Clear-drying decoupage medium labeled compatible with fabric and the prepared pot surface
- Sturdy craft cord that fits through the drainage hole
- Flat washers wider than the hole with smooth edges
- Large unfinished wooden beads with holes that fit the cord
- Broad lime ribbon for bows and optional hanger sleeves
- Thin ribbon or a short cord tie for attaching each bow
Tools
- Fabric scissors and paper scissors
- Paper for a pattern plus pencil and ruler
- Paintbrush and a small foam brush
- Protective work covering
- Sandpaper only if required by the chosen coating instructions
Optional Finishing Supplies
- A narrow matching trim to conceal the lower fabric edge
- A clear topcoat compatible with the paint and decoupage medium
Want to Make These Bells?
I’ve put together a convenient Amazon supply list that matches the items in the materials list for this project to save you time.
See My Hand-Picked Supply ListAs an Amazon Associate I earn from qualifying purchases but this doesn’t increase your price at all!
Before You Start
Choose pots without multiple large drainage openings. The central hole should allow the cord through but remain smaller than the washer. Reject cracked pots or a base so thin that it flexes sharply around the hole. If your pot has no suitable existing hole, choose another pot rather than improvising with a heated tool.
Wash and dry the pots, then follow the coating manufacturer’s preparation instructions. Protect the work surface. If a product needs ventilation, use it in an appropriate area and allow the specified drying and curing time before continuing. Different plastics and coatings behave differently, so test the finish on one pot first.
Step-by-Step Tutorial
Step 1: Make a Pattern and Paint the Pink Areas
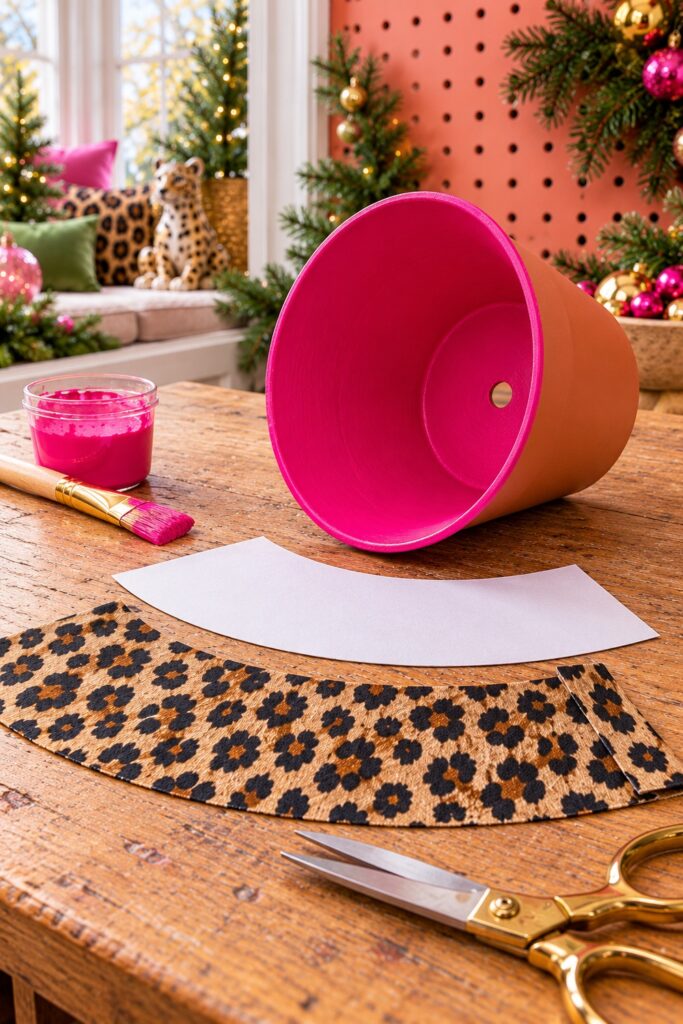
Wrap paper around the pot’s tapered side, smoothing it into place and marking the sidewall boundaries. Remove and trim the paper, then test it around the pot again. The finished pattern will be curved rather than a simple rectangle because the rim is wider than the base. Leave a small overlap at the seam.
Transfer the pattern to the leopard fabric. Add only a small allowance at the upper edge if you want it to fold onto the base; keep the lower edge just above the lip so pink can remain visible. Cut one cover and dry-fit it before cutting the others.
Paint the inside and exposed outer lip hot pink, using a coating system appropriate to the plastic. Paint the exterior sidewall too only if your fabric is thin enough for the original pot color to show through. Keep the drainage hole clear. Let the paint dry and cure as directed before applying fabric.
Step 2: Cover the Sidewall with Leopard Fabric
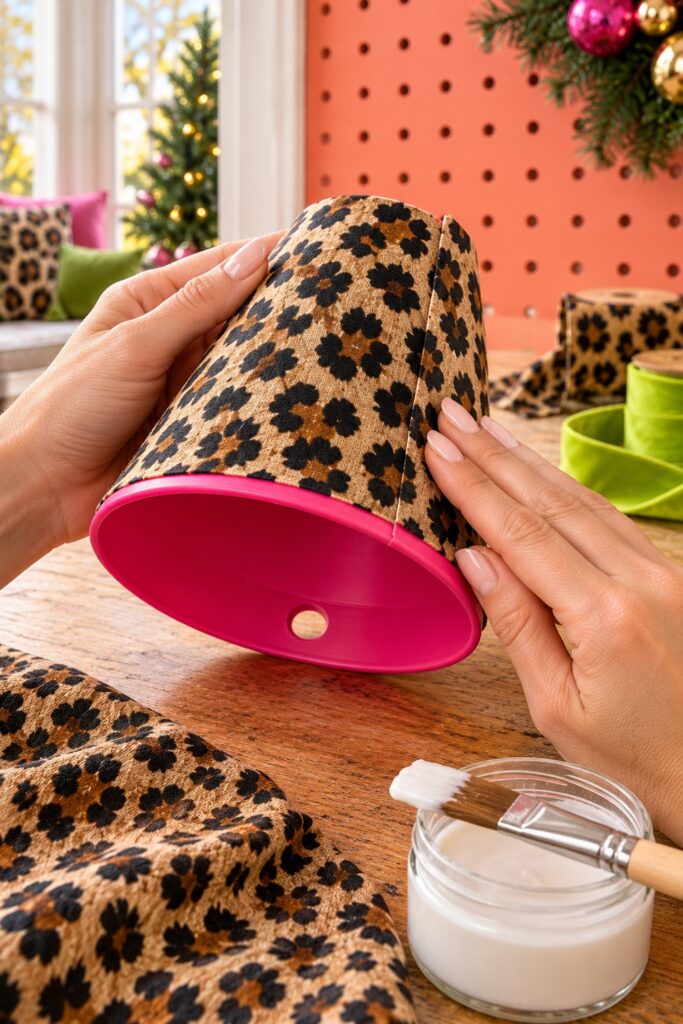
Brush a thin even layer of compatible decoupage medium over a manageable portion of the prepared sidewall. Start at the seam position and smooth the fabric around the pot a little at a time. Work outward with your fingers or a clean brush so folds don’t become trapped beneath the cloth.
Overlap the final edge slightly and press it flat. Place this seam at the back of the bell. If the fabric puckers near the smaller end, lift it while the medium is still workable and adjust the fit. A few short relief snips in the small foldover allowance can help it sit against the base without bunching.
Keep the hole uncovered and the pink lip visible. Add a thin coat over the fabric only if the medium’s directions allow it and you like the result on your test piece. Let everything dry fully. A narrow trim can hide an uneven lower edge, but avoid using trim to cover loose fabric that still needs attaching.
Step 3: Fit the Supported Cord Hanger
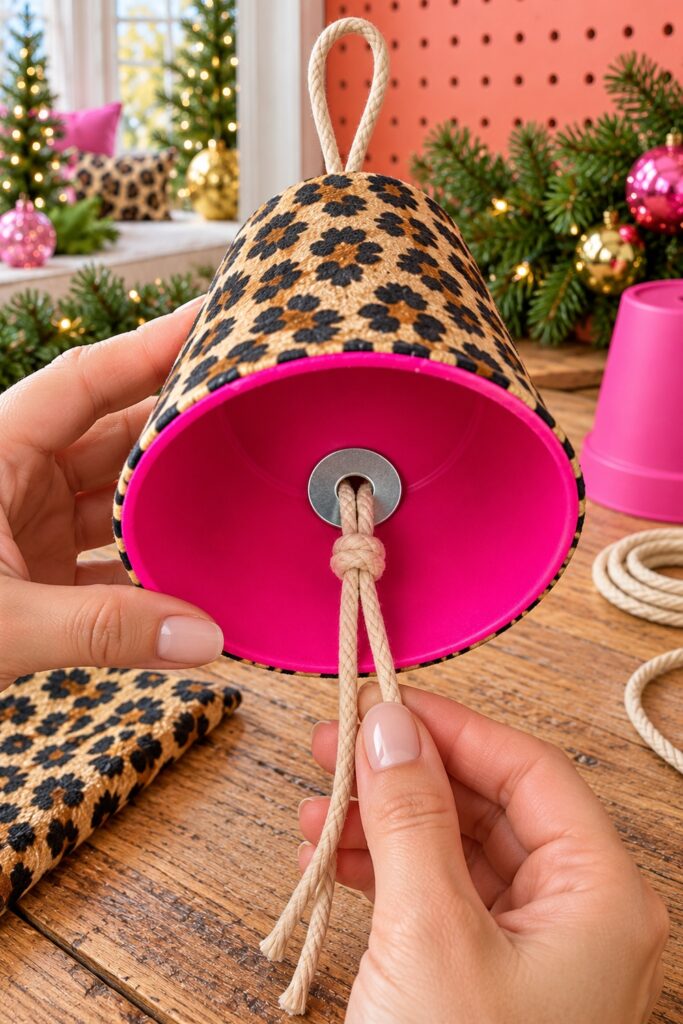
Turn the pot open side up. Cut a cord long enough for a hanging loop above the inverted pot and a bead below its rim, with extra for knots. Fold the cord to form the upper loop and push that folded section from inside the pot through the drainage hole.
Slide a washer over both free cord ends inside the pot. Move it up against the inner base, then tie the two ends together in a bulky overhand knot directly beneath the washer. Add a second knot if needed so it cannot pass through the washer opening. The washer spreads the pull across the pot base.
Turn the bell over and gently pull on the loop. The washer and knot should stay seated inside while the two loose ends hang down through the open bell. If anything slips, cracks, or pulls through, stop and correct the fit before adding the bead. Glue is not a substitute for this supported hanger.
Step 4: Add the Wooden Clapper and Lime Bow
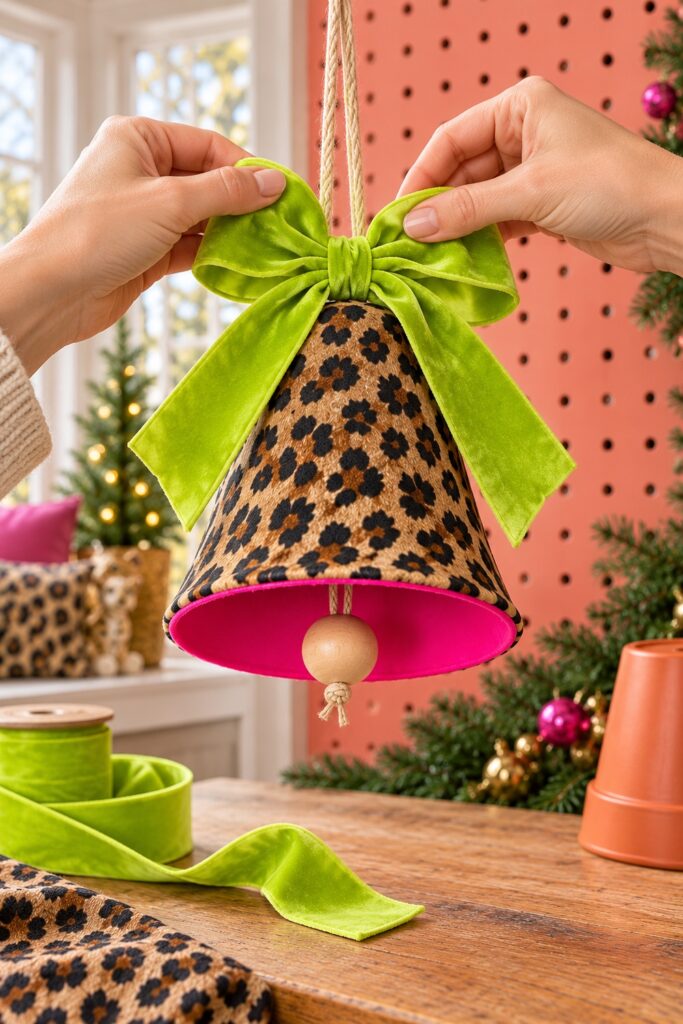
Thread both loose cord ends through one wooden bead. Position it near the open rim so it will show beneath the bell. Tie a secure knot below the bead, then trim the excess cord while leaving enough tail that the knot won’t unravel. Adjust the bead height before tightening the knot completely.
Tie a separate lime bow with broad loops and tails. Fasten its center to the hanging loop with thin ribbon or a short cord tie so it sits at the top of the inverted pot. The bow should hide the top detail without being responsible for supporting the bell.
If you want the hanger to look green like the inspiration, wrap a lime ribbon sleeve loosely around the cord loop and secure it to itself with a small tie. Keep the structural cord intact underneath. Trim the bow tails so they don’t hide the pink opening or bead.
Tips for Getting the Finished Look
Choose a fabric pattern large enough to recognize on the small pot. Thin cotton is easier to smooth around the taper than heavy fabric. Try the dry fit before committing to adhesive; that’s the best moment to correct a cover that’s too narrow.
Keep the pink lip exposed all the way around. That bright line connects the interior to the outside and makes the bell opening easy to see. The bow can be oversized, but leave some leopard fabric visible beneath its loops.
Easy Ways to Customize It
Use different pot sizes for a varied group, making a separate pattern for each taper. Change the pink to coral or the lime to another clear green if those shades suit your decorations better. A smaller bow makes the same bell easier to use on a compact display.
Displaying or Using the Finished Project
Hang the bells indoors from hooks or a rail rated for the total load. Check each hanger close to a soft surface first, then inspect the supporting point. Keep the display out of reach of young children and pets because the beads and long cords can be hazardous.
Leave the bells clear of heaters, flames, exits, and walking routes. This fabric-and-decoupage adaptation is an indoor decoration; don’t assume a plastic base makes the whole finished project weatherproof. For a tabletop photograph, rest a bell on its side or use a suitable stand so the bead isn’t trapped beneath the rim.
Final Encouragement
Finish one bell before preparing the others. Once the pattern fits and the hanger holds properly, you can repeat the useful parts and vary the bow sizes. The leopard fabric, pink rim, and lime loops are the details that preserve the original idea.