*This post may contain affiliate links for which I earn commissions.*
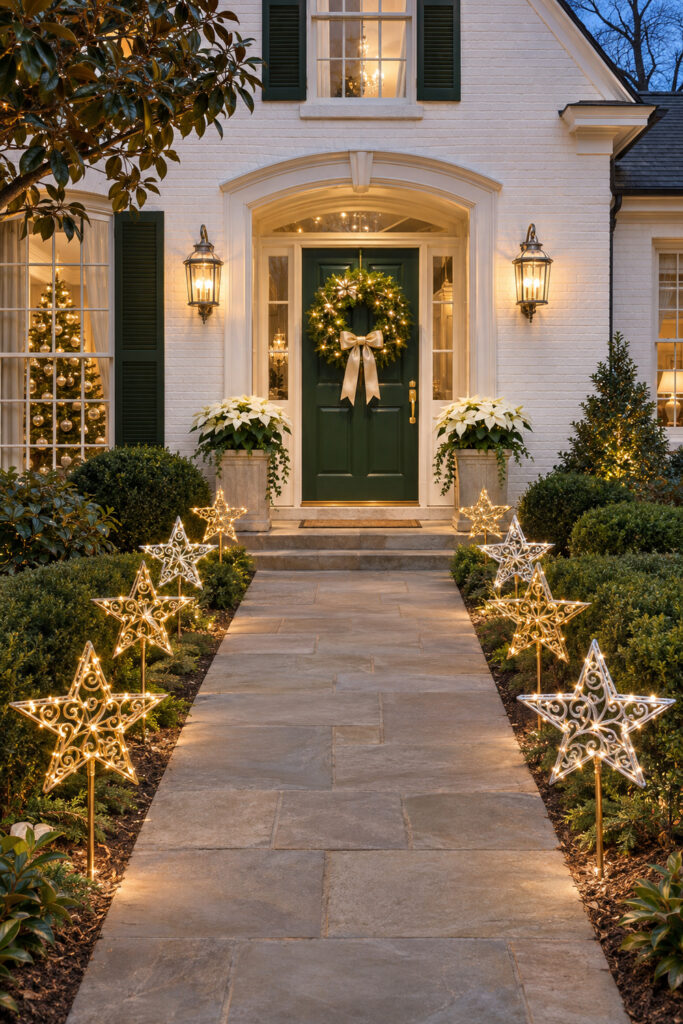
Gold and silver stars trace both edges of this Christmas walkway. Their warm lights lead toward a green front door, where a champagne bow and pale poinsettias finish the welcome. The path itself stays open, which makes the repeated stars look intentional rather than scattered across the entrance.
This is an idea to adapt with outdoor decorations made for the job. Choose a few stable stake lights, keep the wiring in the planting areas and let the house provide the background. You can use a much shorter run than the picture shows. A clear route with a consistent rhythm will carry the effect.
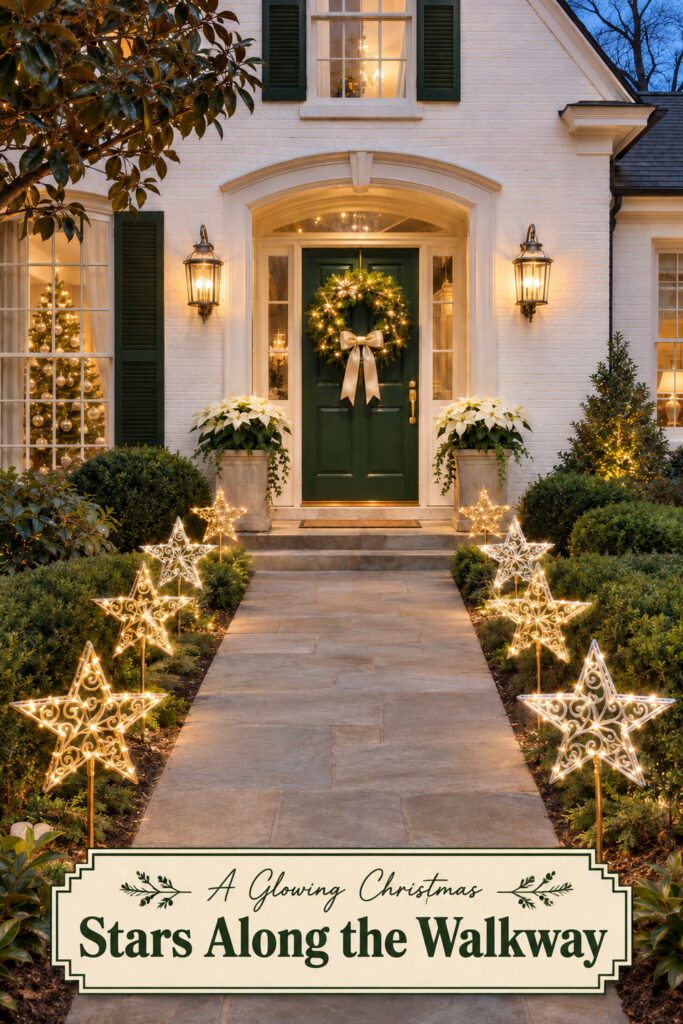
This image was generated with AI as decorating inspiration. Similar outdoor-rated pieces can recreate the look, suited to your site and conditions.
Treat the Path as the Center of the Arrangement
The stars sit in the planted borders, not on the paving. Their repeated outlines frame the walking surface and make the front door feel like a destination. The nearer stars look larger because of the view, while the same idea continues toward the steps.
Keep that relationship in your own plan. The lights belong beside the path, leaving its usable width clear. Don’t place a stake where a bag, sleeve or someone’s foot will catch it. A modest row set back from the edge is more inviting than a fuller display that makes people watch every step.
Walk the Route Before Buying Lights
Start at the street or driveway and follow the entrance as a visitor would. Notice changes in level, planting depth and the space needed to open gates or doors. Check the route in daylight and after dark.
Measure the border area where the stakes could go. Allow room around plants and existing fixtures, and check for buried services before inserting stakes. Choose a placement method suitable for the actual ground rather than forcing a pointed support into a shallow planter or hard surface.
The inspiration has a straight central path and low shrubs. A curved path can work with fewer stars following its outside edge. On a very narrow entrance, one row may be more sensible than two. Keep the sequence easy to follow rather than copying a symmetrical layout that doesn’t suit the site.
Regular path and porch lighting should still make the route safe to use. The decorative stars add atmosphere; they don’t replace a light that shows a step clearly. Test both systems together before deciding the display is finished.
Choose a Repeated Star Shape
The five-point outlines have open centers and fine scrolling metalwork. That light structure lets the shrubs show through while still giving each decoration a clear silhouette. Gold and silver alternate without changing the basic shape.
Look for outdoor stake decorations with suitable frames, supports and weather ratings. Check their overall height and width, including the stake. A large star on a short stem may project farther over the path than you expect.
Use the same main shape through the run. If some lights are stars and others are unrelated figures, the rhythm becomes less clear. You can vary the finish while keeping the size and outline related.
Set out the unpowered pieces first and look from the entrance to the path. Adjust the gaps before installing everything fully. Equal measured spacing can be a useful start, but planting and steps may require small changes. Keep the result visually steady while respecting the real border space.
Mix Gold and Silver without Adding More Colors
The warm gold stars sit comfortably with the porch lights and door hardware. Silver provides a cooler edge against the evergreen shrubs. Warm white illumination connects both finishes after dark.
Choose lights with a similar color temperature where possible. A cold blue-white star beside a warm gold one can make the difference in light more noticeable than the intended difference in metal. View sample pieces together if you can.
In daylight, the frame finish will carry more of the effect. At night, the illuminated outline takes over. Judge both views rather than choosing everything from a glowing product picture alone.
Keep additional yard colors limited. Green planting, a dark door and pale masonry already provide a background. Champagne ribbon can repeat at the door without appearing on every stake. Too many bows along the path would hide the open star shapes that make this arrangement distinctive.
Route the Power Outside the Walking Area
Follow the lights’ installation and connection directions. Use outdoor-rated equipment and an appropriate protected outdoor power source. Check limits on connected strands rather than assuming all matching-looking pieces can be joined together.
Keep leads in the border and away from walking surfaces. Secure them with suitable methods so they don’t drift across the path, while protecting connections as the manufacturer directs. Don’t hide a cable across a step beneath a loose mat.
If solar or battery versions suit your site, check the practical requirements before choosing them. A shaded border may not give a solar panel the exposure it needs. A battery compartment still needs the correct weather protection and an accessible location.
Keep lights clear of tools, watering equipment and areas where someone will shovel or sweep. Decide how you’ll maintain the path while the decorations are installed. A display that prevents ordinary cleaning can quickly become less inviting than its first evening suggests.
Finish the Door with a Quieter Group
The green door has a full lighted wreath with one pale bow. Two pale planters mark the arrival at the steps. They echo the stars’ glow without repeating the same shape at a larger size.
Use plants and containers appropriate to your climate. The pale poinsettias in the image can be interpreted with suitable faux plants where outdoor conditions would harm live ones. Keep planters stable and outside the door swing and stair width.
A decorated tree shows through the window, adding depth to the view. You can use the room’s existing holiday lights as that second layer. There is no need to add an outdoor tree solely to fill the picture.
The door grouping should feel like an end to the path. Keep it more compact than the walkway display so the stars remain the main idea. A wreath and one pair of planters may be enough.
Scale the Route to What You Have
For a small front garden, use a few stars near the approach and stop before the steps. For a long path, begin with one section rather than stretching a small number of lights so far apart that they seem unrelated.
If there is no planting border, choose decorations with stable bases made for the available surface. Don’t improvise ground stakes in loose pots where the wind can tip them toward the path. Change the display type when the setting requires it.
Look for Pieces Built for the Location
Decide on the route and power plan before selecting decorative details. Suitability outdoors matters more than an exact filigree pattern.
Shop Similar Outdoor Star Stake Lights
Check dimensions, support depth and weather guidance. Use a consistent shape to build the repeated line.
Look for Champagne Outdoor Ribbon
Choose ribbon suited to the door’s exposure. A small structured bow will show against dark greenery without needing long trailing tails.
Look for Stable Porch Planters
Match the footprint to the landing and plants. Keep clear walking width as the first measure of whether a pair will fit.
Check from the Street and the Steps
Switch on the display and walk the whole route. Look for glare, a projecting star point or a loose lead, then check the view from a distance. Adjust individual pieces before adding more lights.
Final Styling Tip
Keep every star inside the planting line. The clear strip of paving between the lights is what makes the entrance feel welcoming rather than crowded.