*This post may contain affiliate links for which I earn commissions.*
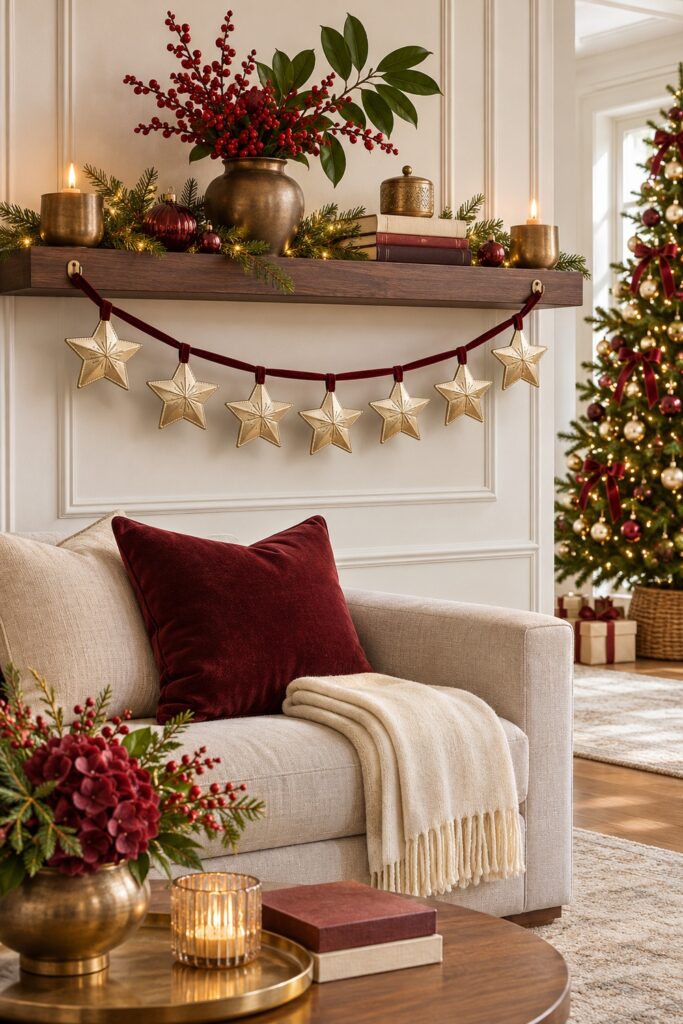
Seven gold stars hang from burgundy velvet beneath the walnut shelf in this Christmas room. The raised lines on the stars catch light from one angle and nearly disappear from another. That’s the detail I would keep if you only make a short garland. This version uses soft craft aluminum in a champagne gold finish to get a pressed tin look with a simple hand tool.
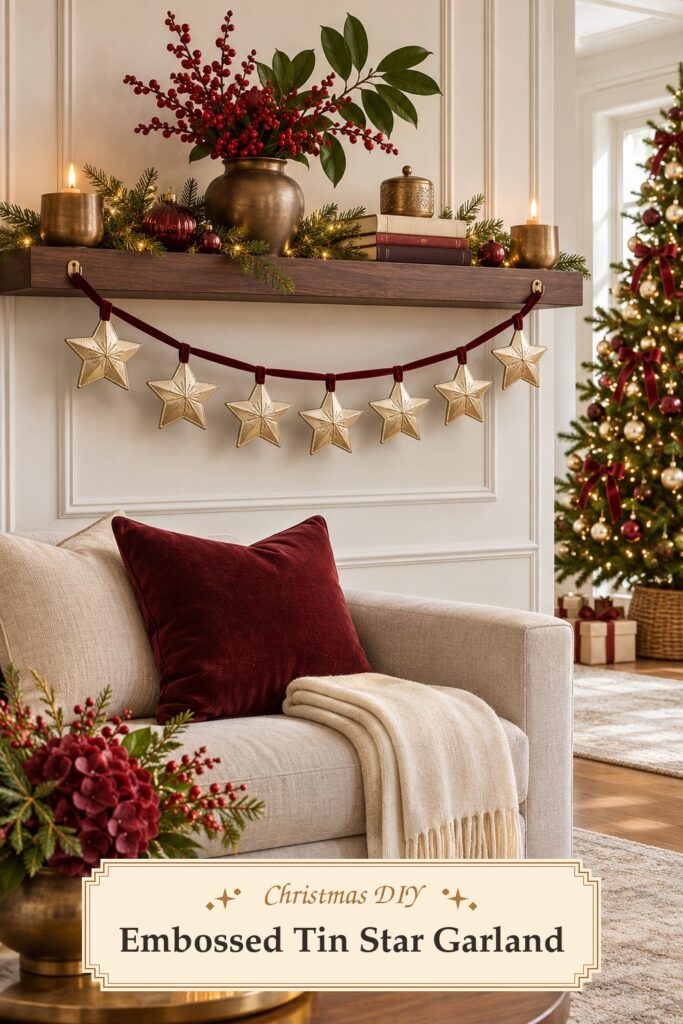
The inspiration and instructional images were created with AI. The steps describe a practical way to make a similar garland at home.
What You’re Making
The garland has seven flat five-point stars, each about four inches across, hung in a shallow curve from velvet ribbon. A narrow ribbon loop at the top of each star lets it hang without a hole in the metal. The design uses a simple burst of lines and a dotted border. A little variation between stars looks right here, especially once they are hanging.
Materials and Supplies
- Soft champagne gold aluminum embossing foil sold for hand tooling
- Burgundy velvet ribbon for the main strand
- Narrow burgundy grosgrain ribbon for the loops
- Clear craft tape suitable for fabric and metal
- Cardstock for a five-point star template
- A rounded embossing stylus and a thin craft foam pad
- Craft scissors suitable for the foil
- Two hooks suited to your shelf or display surface and the weight of the finished garland
Before You Start
Measure the distance between the places you can safely hang the ribbon. A cord makes a useful stand-in. Hold it between the two points and let it dip until you like the curve. Measure that length, then add enough extra ribbon at each end to attach it to your hooks. Try seven paper stars if the shelf is long. A short shelf may look better with five.
Cut one symmetrical five-point paper star about four inches across, with gently rounded tips. Use a paper template you like or draw around a star-shaped object on cardstock. Make one point the top and use it consistently as you trace. Test the foil and tape on offcuts first. The foil should take a shallow mark without tearing. The tape should hold a small loop in place once you press it down and give it a light tug.
Step 1. Trace the Star Shapes
Set a small sheet of foil on the foam pad with the side that will face the room turned down. Place the template on the sheet and trace around it with a rounded tool, using just enough pressure to make the outline visible. Space the stars so you have room to turn the scissors between them. If the sheet is awkward to handle, trim it into smaller rectangles with one star on each.
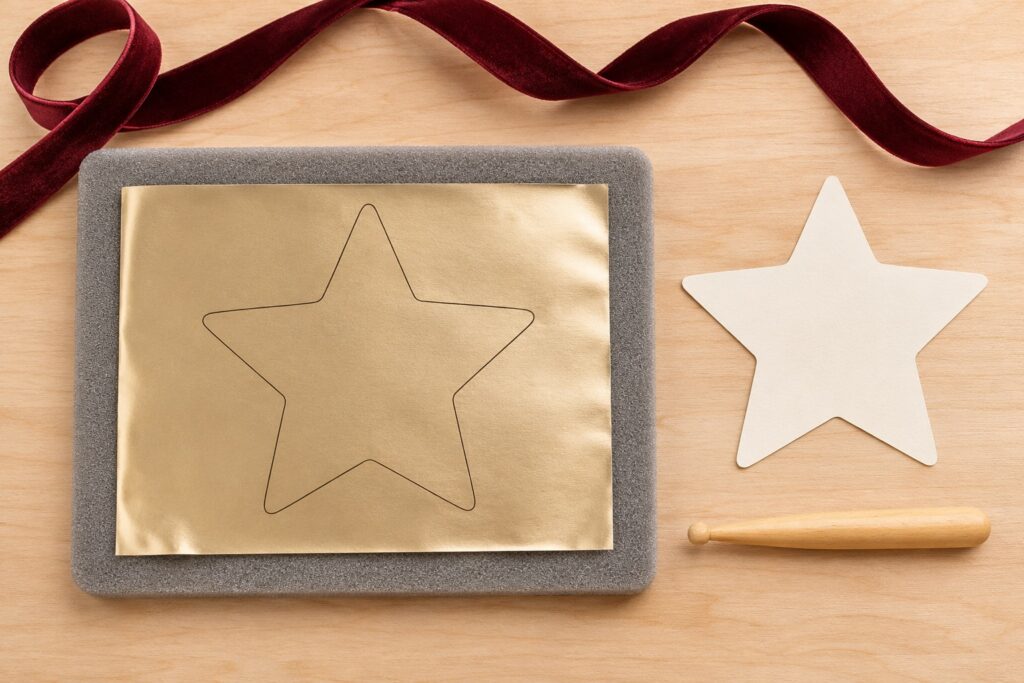
Cut just inside the outline with suitable craft scissors. Take your time at the inward corners. Turn the foil as you cut instead of twisting the tips out of shape. Work with the cut edges facing away from your fingers and keep scraps in a container. If a tip or edge catches on cloth, trim it smooth before you go on. Use only soft tooling foil for this method.
Step 2. Press In the Starburst
Put the first cut star face down on the foam. Mark the center lightly, then draw a line toward each of the five tips, stopping short of the cut edge. Add a shorter line between each pair of long ones if you want a fuller burst. Work in several light passes if the foil needs more definition. A shallow raised line is easier to control than a deep groove.
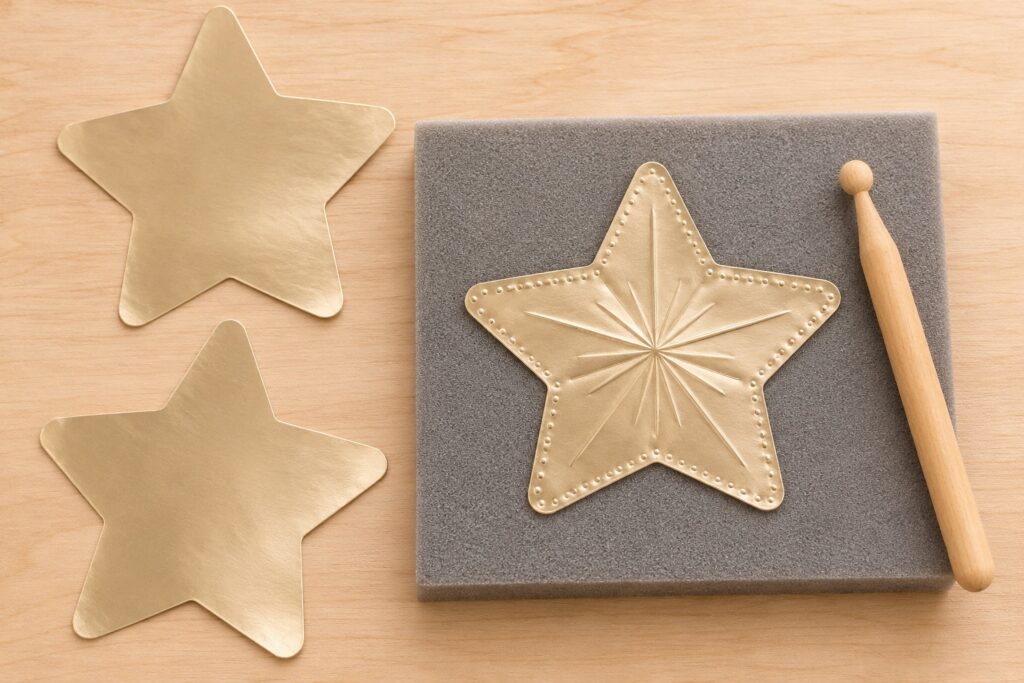
Make a row of small dots just inside the outline, leaving an even margin. Press with the rounded tip and turn the star as you go so your hand stays at a comfortable angle. Flip it to check the front. If the dots near the tips are hard to place, leave a small gap there. The pattern will still read as a border from across the room.
Step 3. Attach the Ribbon Loops
Lay the long velvet ribbon on the worktable, with the velvet side turned the way you want it to face when hung. Place the embossed stars face down below it. Cut one short length of narrow grosgrain ribbon and bring it around the main strand. Bring its two ends together on the back near the top point of the star. Tape both ends down with a small piece of clear craft tape, leaving enough tape on either side to grip the metal. Keep the tape clear of the star edges.

Test one star before you make the rest. Lift the main ribbon a few inches over the work surface and check that the star hangs upright. If the loop turns to one side, move the tape toward the center of the top point. The loop should slide on the strand with light pressure but sit snugly enough to hold its place when the ribbon curves. Make the remaining loops to match once you like the way the first one hangs.
Step 4. Hang the Garland and Set the Spacing
Hang the ribbon on two secure hooks and find the lowest part of the curve. Place one star there. Slide the next three stars to each side and adjust them in pairs, working outward. Look at the gaps between the points. Aim for gaps that appear similar when you see the garland from the front. If the ribbon is pitched more steeply near the ends, those stars may need a little extra room.
Before you finish the ends, look at the back of the strand. If a loop shows above the ribbon, turn its seam toward the shelf and check the star again. Keep enough spare ribbon at both hooks to adjust the curve without taking the whole garland down.
Tips for Getting the Finished Look
Champagne gold looks warm next to a dark wood shelf. If you have a white shelf, a deeper gold or a more visible ribbon will give the stars a clearer outline. Pick one or two finishes for the shelf above. Fir sprigs, a few burgundy ornaments and a small light are plenty. Leave the area directly behind the stars plain so you can see the dotted edges and the shapes of the points.
Easy Ways to Customize It
Try five stars on a short bookshelf or use the same shape in two sizes for a longer display. If the foil you find is very shiny, keep the dotted border and use fewer lines in the middle. Deep red velvet gives the garland its Christmas color here, but forest green would work with brass ornaments already in the room.
If a star keeps turning, check the loop before you change the spacing. A short loop brings the star close to the main ribbon and gives it less room to twist. Reposition the tape on the back if the star hangs at an angle. You can make the loops on the outer stars a little shorter if their tips crowd the shelf edge.
Displaying the Finished Garland
Use the garland indoors across a shelf or an unused mantel. Keep the ribbon and foil clear of flames and heat, and use flameless candles if you want a glow among the greenery. Hang it where children and pets cannot pull on it. To store the stars, unhook the strand and lay it flat in a shallow box so the embossed pattern does not get crushed.
Finish one star completely before you cut the rest. Once you see how the lines catch the light and how the loop sits, you can repeat the parts that work and leave the little differences that make each star look handmade.