*This post may contain affiliate links for which I earn commissions.*
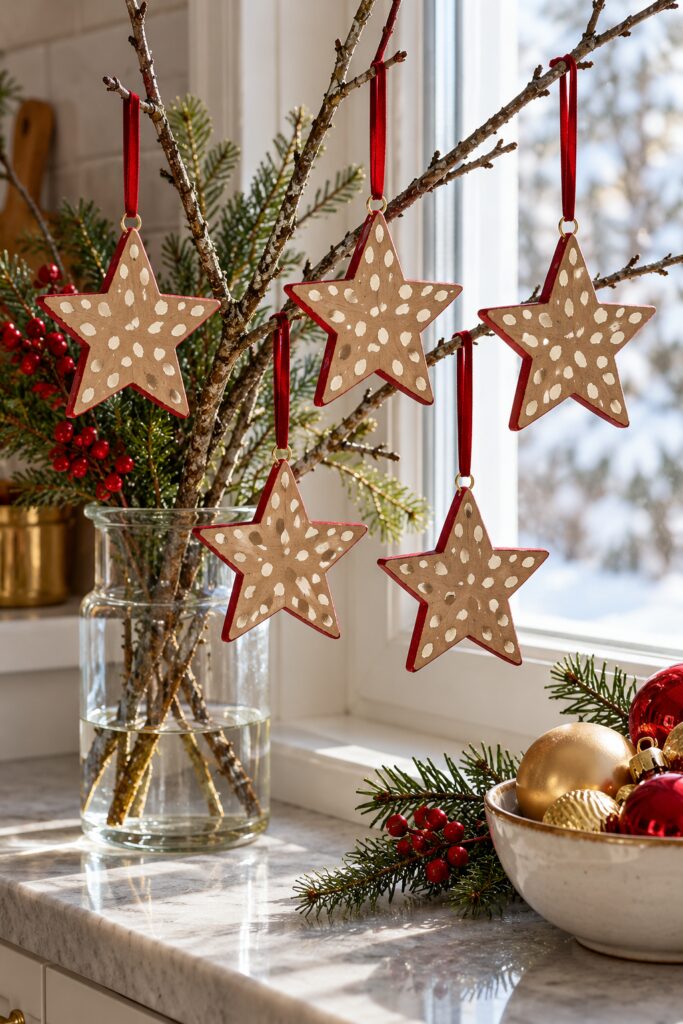
Five wooden stars with tan faces, ivory fawn spots and slim red edges hang at different heights from bare branches in the inspiration image. The contrast is charming, but the technique is simple enough for an afternoon project. This tutorial uses predrilled wooden blanks, layered acrylic paint and ribbon to make a practical version of that visual idea.
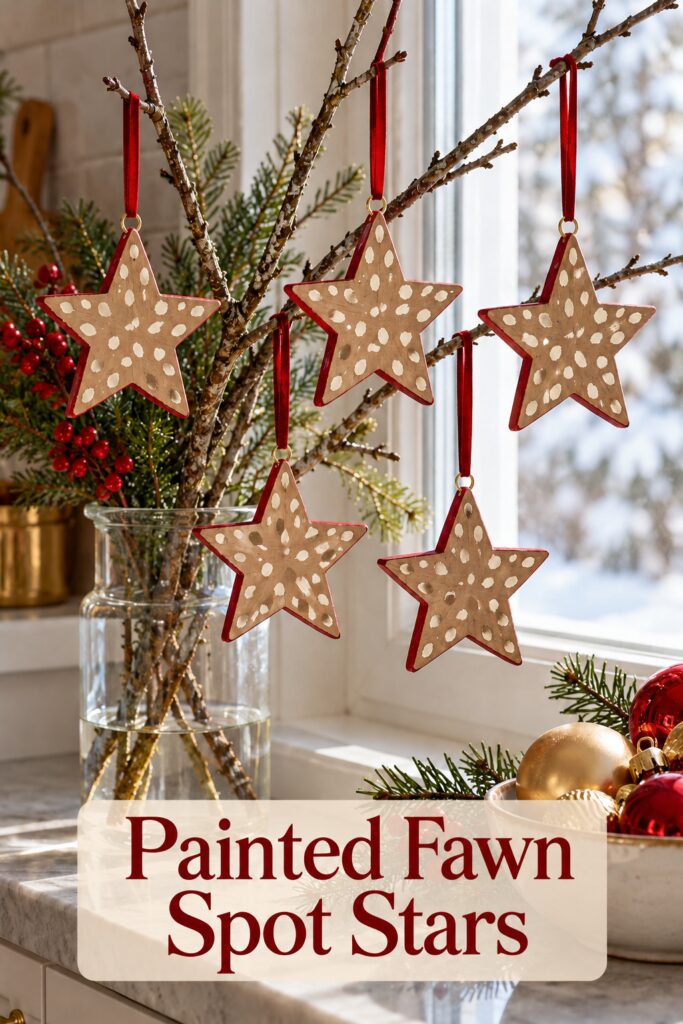
The inspiration and instructional demonstration images were created with AI. The instructions below describe a practical way to make similar ornaments, rather than a photographed construction process.
What You Will Make
Make a small coordinated set of five flat wooden stars, each about palm size. Their warm tan base carries scattered irregular ivory marks; narrow deep red edges and matching ribbon loops connect the set to Christmas colors. Premade star blanks make the silhouette consistent and avoid a cutting step. A star shaped template and thin craft wood can work if you already have safe cutting equipment, but it is not required here.
Materials and Tools
- Five flat predrilled wooden star ornament blanks of similar size (See Note below)
- Fine grit sandpaper and a clean dry cloth
- Warm tan matte acrylic craft paint (this comes in small 2oz sizes but is very affordable – you may need more than one bottle)
- Ivory matte acrylic craft paint
- Deep red acrylic craft paint
- A medium flat brush and a small round detail brush or craft brush set
- Water cup and palette or shallow paint dishes
- Red ribbon narrow enough to fit the holes (many star blanks are drilled through a point from front to back so you wouldn’t need the small gold jump rings in the image but if you drill your own holes you could choose to mirror this look – just get the right size rings for a very fine hole you might drill through a point from side to side)
- Protective paper for the work surface
Note: Getting the right size stars can be a challenge. Blanks that are 2-4″ wide are an ideal size but thickness matters, too. If you get very thin ones, you won’t be able to make the red sides stand out very well. A thickness of 3/16″ to 1/4″ works well but these thicknesses aren’t always predrilled. If you have a drill, go for thicker blanks and drill your own holes. If you don’t have a drill but want the thicker red sides, you might buy thinner blanks that are predrilled and glue 2-3 together to make them thicker. Just line up the holes before gluing.
Optional: clear water based craft sealer compatible with your paint, a small piece of wire or toothpick for clearing the holes, and a ruler if you want ribbon loops of matching length. Follow the paint and sealer labels for drying and curing. No hot glue is needed.
Want to Make These Star Ornaments?
I’ve put together a convenient Amazon supply list featuring hand-picked, highly-rated products that match the materials list in this post to save you time.
See My Hand-Picked Supply ListAs an Amazon Associate I earn from qualifying purchases but this doesn’t increase your price at all!
Before You Paint
Cover a level work surface and check that each star has a clean hanging hole near one upper point. Arrange all five with that point at the top. The reference shows stars at slightly different heights, so the ribbon lengths may vary later. Keep the paint thin around the holes and allow each side to dry before turning it over.
1. Smooth the Wooden Blanks
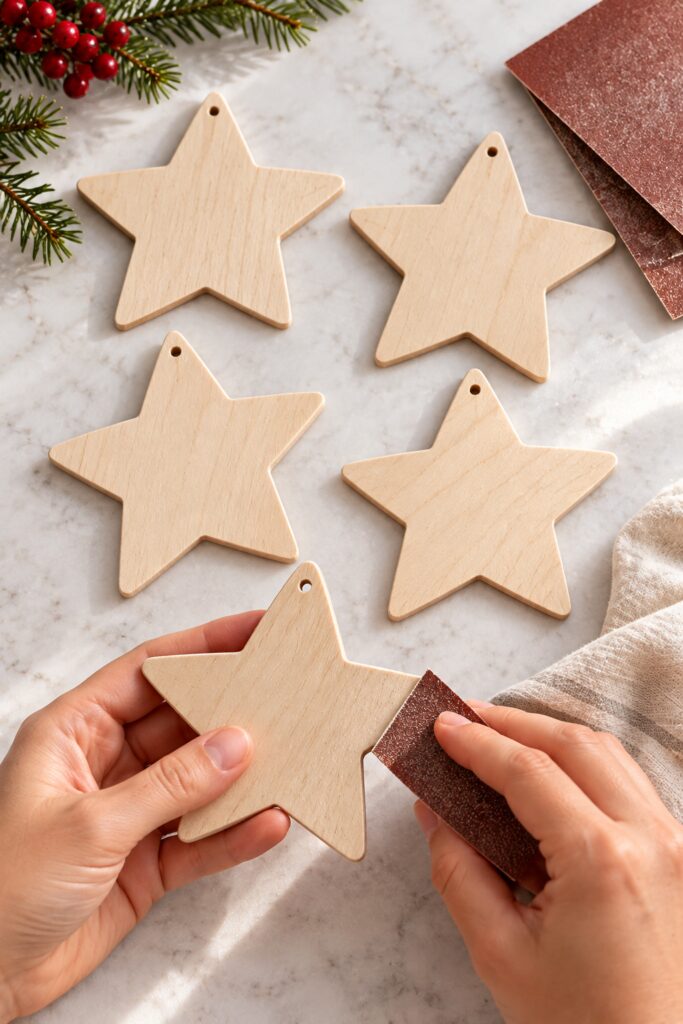
Lightly sand the front, back and cut edges to remove rough fibers. Work along the grain where possible and soften sharp corners without changing the five point shape. Wipe away every bit of sanding dust with a dry cloth. If a hole is rough, gently clear it with a toothpick rather than enlarging it excessively.
2. Paint a Warm Tan Base
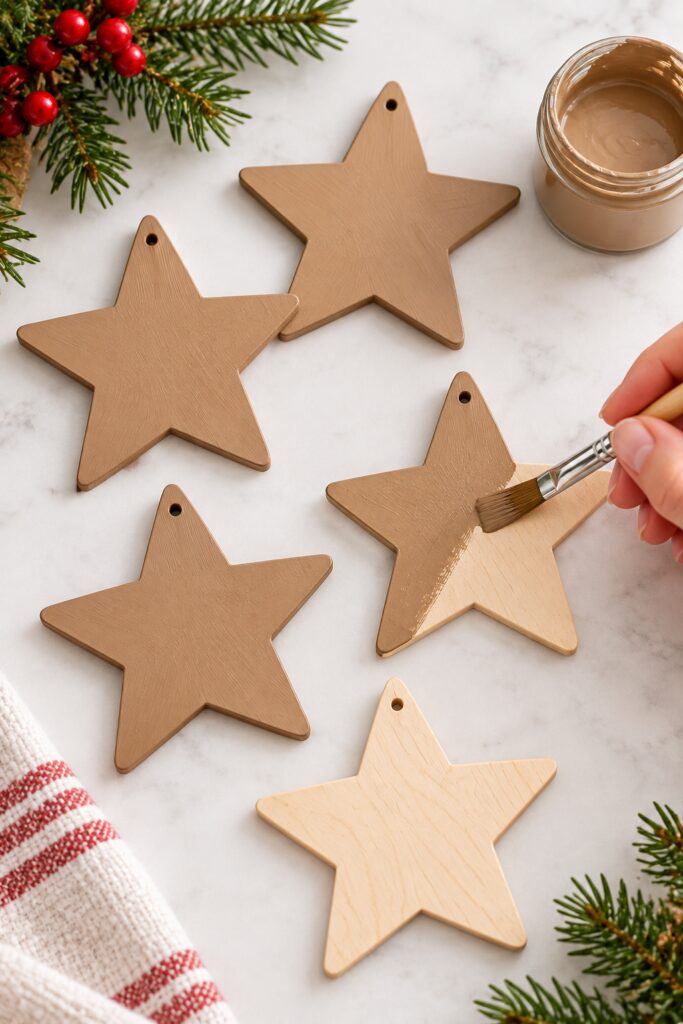
Brush a thin, even layer of tan paint across the front face. Move from the center toward each point, lifting the brush before paint pools at the tips. Paint the back and edges after the front is dry to the touch. Add a second thin coat if the wood grain shows more than you want. Let all surfaces dry fully according to the paint label before making the spots; wet layers will blur the crisp ivory marks.
3. Add Irregular Ivory Spots
Use a small round brush and ivory paint to dab short, uneven oval marks on the dry front face. Vary their sizes and turn some in different directions. Leave tan space between spots and keep a few smaller marks near the points. The aim is a loose fawn inspired pattern, not identical polka dots. Step back occasionally to check that all five stars feel related without having the exact same placement. Let the marks dry, then repeat the pattern on the backs if the ornaments may turn freely.
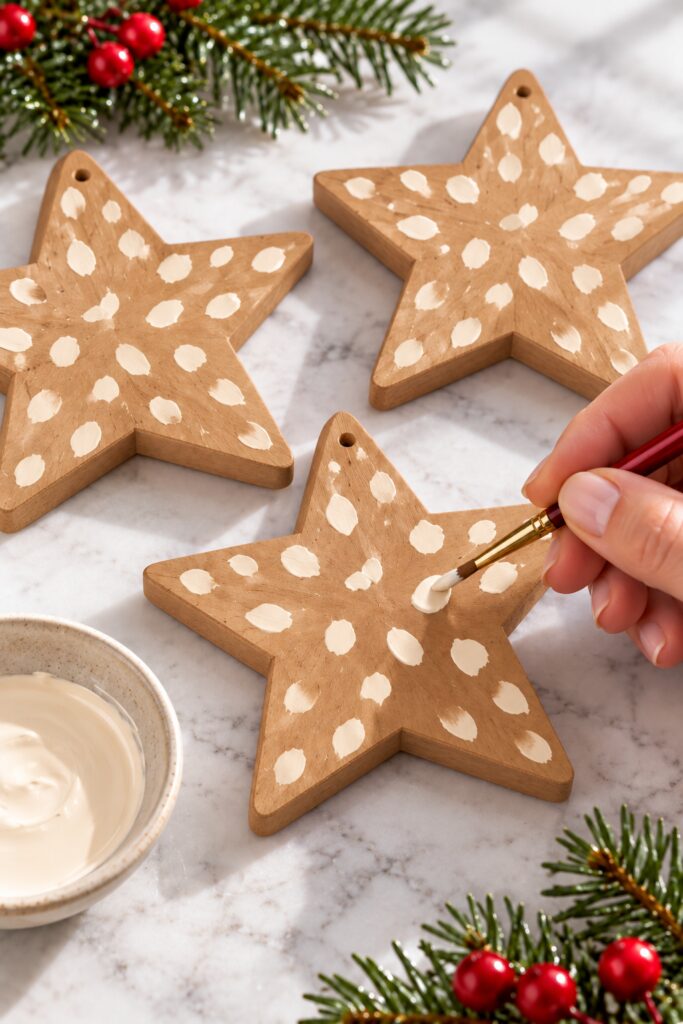
4. Paint the Red Edges
With a fine brush, paint the narrow cut edge of each star deep red. Hold the star by an unpainted dry area or rest it on a protected surface and rotate it as you work. Keep the red line on the side rather than drawing a thick border over the spotted face. A second thin coat may be needed for a saturated finish. Let one side dry before handling the opposite edge. Clear any paint from the hanging hole while still workable.
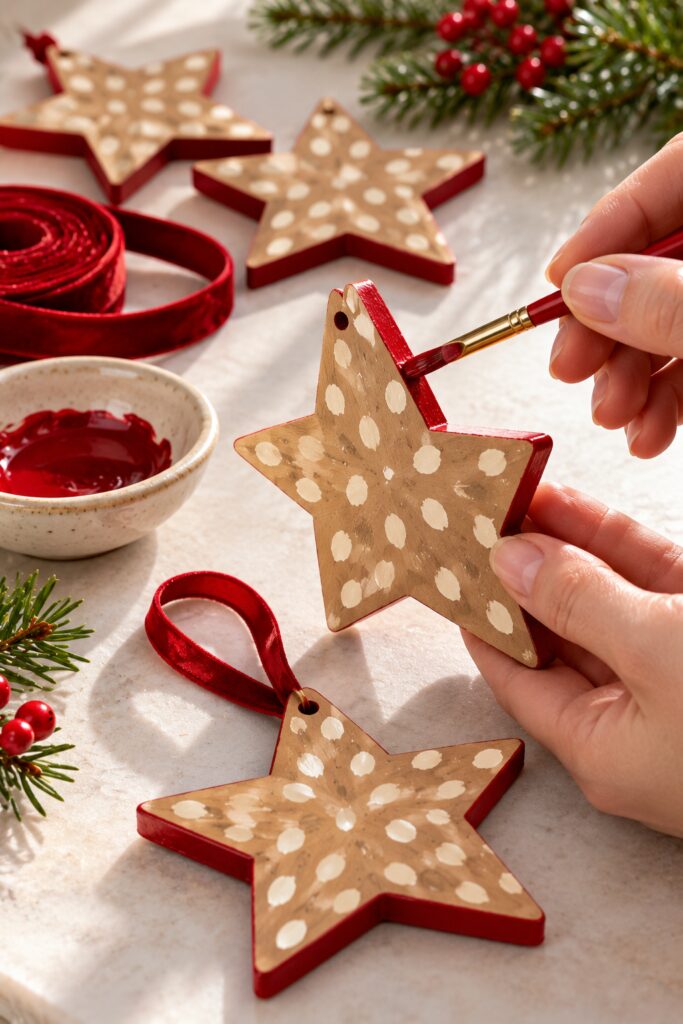
5. Add Ribbon Loops and Hang
Cut five lengths of red ribbon, allowing enough for a loop and a secure knot. Thread one through each dry hole and tie the ends together. A small knot at the top of the loop lets the star hang freely. Pull each knot gently to check it before displaying. Use a few different ribbon lengths to create the staggered arrangement in the image, but keep enough clearance so neighboring stars do not knock together.
If you plan to use a sealer, apply it before threading ribbon and follow the product instructions. Allow the finish to cure fully. Hang the stars on sturdy branches in a stable vase or on secure Christmas tree branches, away from flame, heat sources and places where small children or pets may pull them down.
Tips for the Fawn Spot Finish
The pattern is strongest when the ivory marks are slightly uneven. Test a few dabs on scrap paper before painting the first star. If a spot becomes too round, add a smaller stroke to one edge after it dries. Use the same tan and red on all five ornaments for unity, while letting the spots vary naturally.
The red edge is a slim accent. If it spreads onto the face, let it dry and touch up the tan before replacing any ivory marks. Matte paint keeps the soft woodland feel; a very glossy all over finish would change the character of the image.
Simple Variations
Make a larger single star for a cabinet knob or a smaller set for a compact tree, using ribbon proportions that suit the scale. For a subtler Christmas palette, choose a deeper burgundy edge and ribbon. Keep the ivory spots and tan base so the fawn inspired motif remains recognizable.
Displaying the Stars
In a vase of sturdy branches, space the loops so all five stars show against the window or wall. Add a few evergreen sprigs and a bowl of red and gold ornaments nearby if you want the fuller vignette in the inspiration image. The stars also work on a tree, a shelf branch display or individual wrapped gifts. Keep painted wood dry unless your materials and finish are specifically rated for outdoor exposure.
A Finish You Can Make Your Own
The stars need not match the AI image spot for spot. The warm tan faces, loose ivory marks and fine red edges carry the idea, and small differences make a handmade set feel lively.