*This post may contain affiliate links for which I earn commissions.*
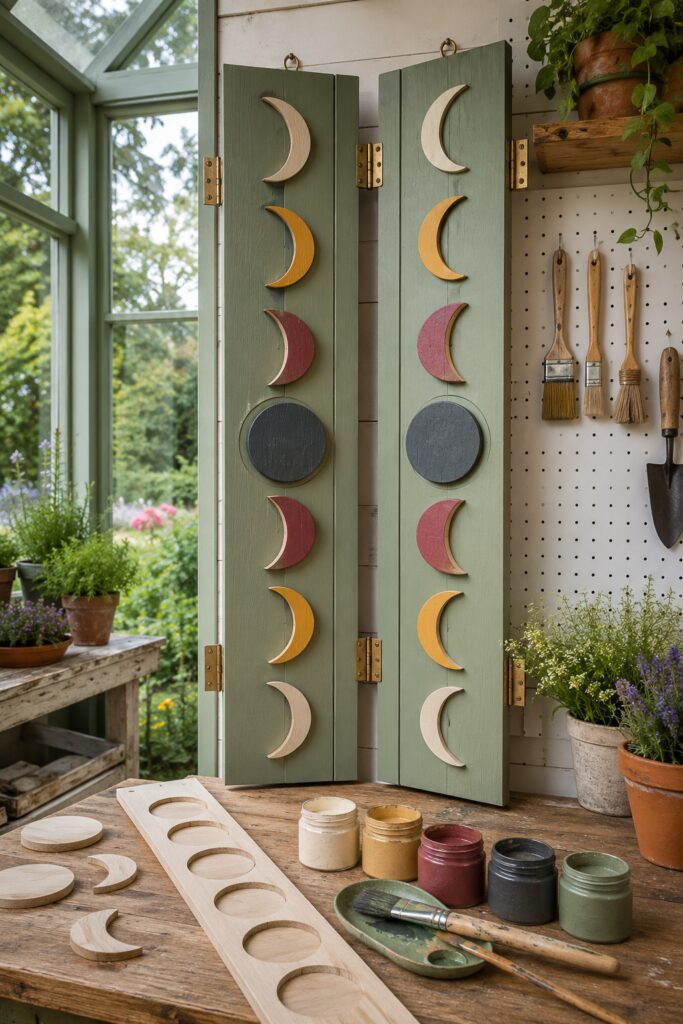
These decorative shutters turn a simple pair of wood panels into an earthy celestial accent for Halloween. Raised moons move from pale crescents through ochre and berry phases to a charcoal full moon, all set against muted sage green.
The inspiration resembles hinged shutters, but this tutorial adapts the idea into two lightweight decorative wall panels. They provide the same dimensional appearance without requiring exterior-grade construction or installation beside a working window.
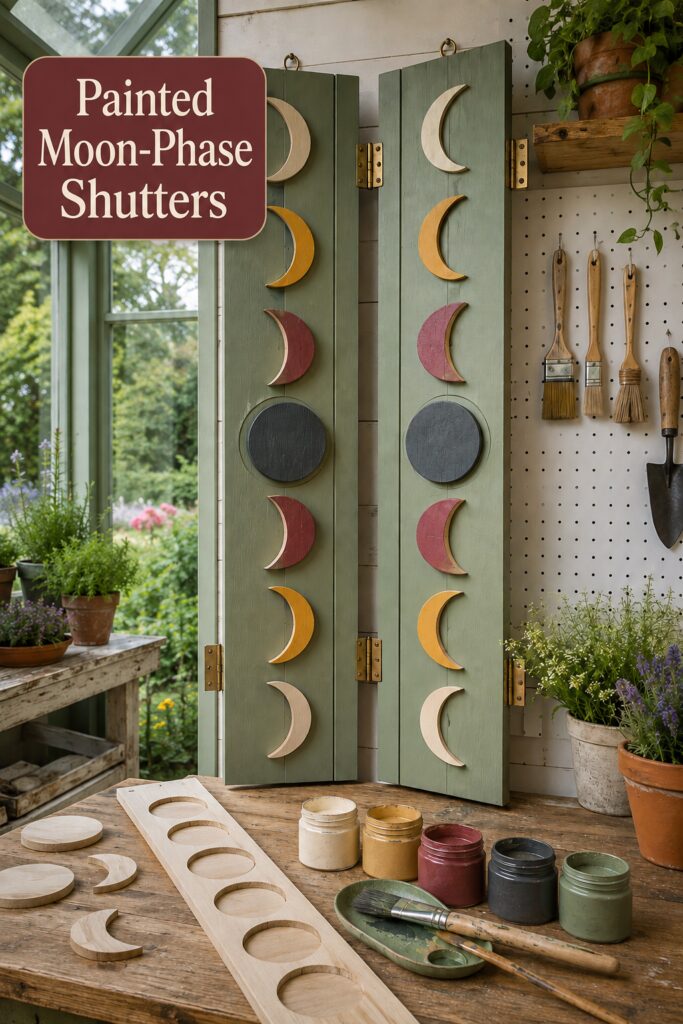
The inspiration image and instructional demonstration images for this project were created with AI. This tutorial translates the visual concept into a practical project you can recreate at home.
What You’re Making
You will make two tall, narrow wood panels decorated with seven raised moon shapes apiece. Thin trim gives each panel a framed-shutter appearance, while decorative hinges help visually connect the pair.
Suggested panels can be approximately 10 to 14 inches wide and 36 to 48 inches tall. Adjust those measurements to suit your display area.
The moon pieces are cut from thin plywood so they are dimensional without making the panels unnecessarily heavy. The shutters are intended as decorative wall art, not as functional window coverings.
Materials and Supplies
Materials
- Two narrow plywood or project-board panels
- Slim pine lattice or flat trim for framing the panel edges
- Thin birch plywood, approximately 1/8 to 1/4 inch thick, for the moons
- Wood glue
- Small brads or finish nails
- Sandpaper in medium and fine grits
- Paintable wood filler
- Muted sage green paint
- Cream, ochre, muted berry and charcoal craft paints
- Matte clear protective finish
- Four decorative hinges with appropriate screws
- Two D-ring hangers per panel
- Wall anchors and screws rated for the completed weight
Tools
- Measuring tape
- Pencil
- Combination square or straightedge
- Compass, circle template or round household object
- Jigsaw with a fine-tooth wood blade
- Drill and small drill bits
- Clamps
- Brad nailer or hammer
- Foam roller
- Small paintbrushes
- Eye protection and hearing protection
A scroll saw may be used instead of a jigsaw if one is available. Readers who do not want to cut the moons themselves can begin with unfinished wooden circles and cut only the inner crescent curves.
Before You Start
Choose the intended display location before deciding on the panel dimensions. Allow enough space between the panels for the inner decorative hinges, but do not install them across a door, window or other opening that must remain accessible.
Cut the two backing panels to matching dimensions. Cut four trim strips for each panel, mitering the corners if desired. Simple square joints are easier and look equally appropriate for this rustic design.
Plan on seven moon positions per panel:
- Cream crescent
- Ochre crescent
- Berry crescent
- Charcoal full moon
- Berry crescent
- Ochre crescent
- Cream crescent
Mirroring the crescent directions on the second panel creates the balanced appearance seen in the inspiration.
Step-by-Step Tutorial
1. Build the Framed Wood Panels
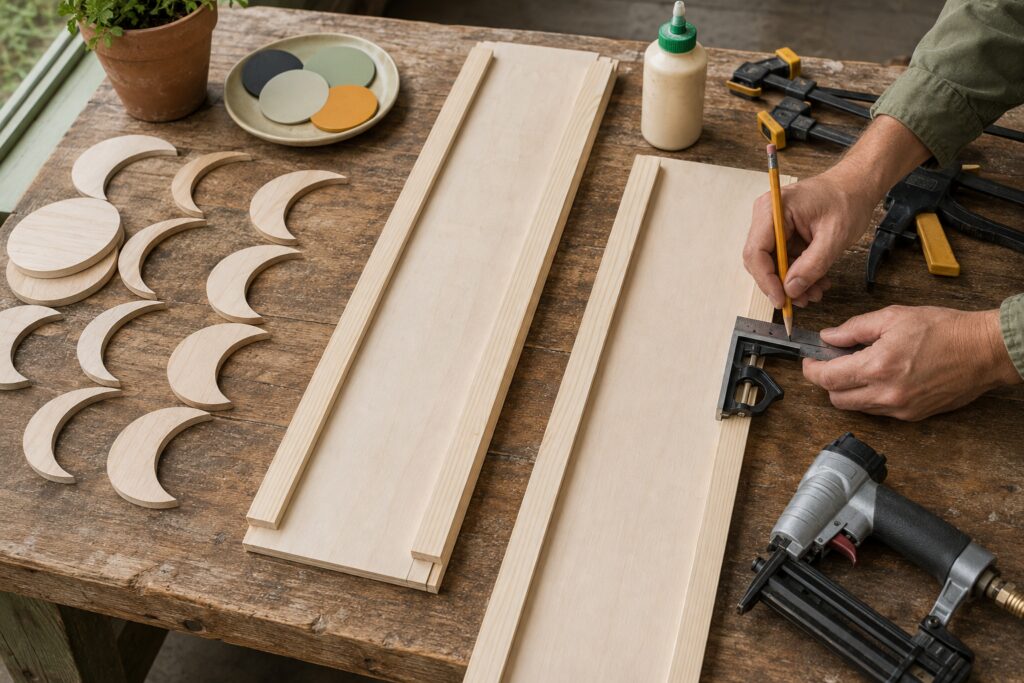
Lay one backing panel flat on a level work surface. Arrange two long trim strips along the sides and two shorter pieces across the top and bottom. Check the corners with a square before attaching anything.
Apply a thin bead of wood glue beneath each strip. Clamp the pieces in position, then secure them with small brads. Keep the nails far enough from the ends of the trim to reduce splitting.
Repeat the process on the second panel, frequently comparing the two so their frames remain consistent. Let the glue dry according to its instructions.
Fill visible nail holes and any distracting gaps with paintable wood filler. Once it is dry, sand both panels smooth and soften any sharp outer corners.
2. Draw a Reusable Moon Template
Decide how wide the moons should be by measuring the open center of one panel. A moon about half to two-thirds the width of that area usually looks well proportioned.
Trace a circle onto sturdy paper or cardboard and cut it out. This becomes the outer template for every moon, which keeps the shapes consistent.
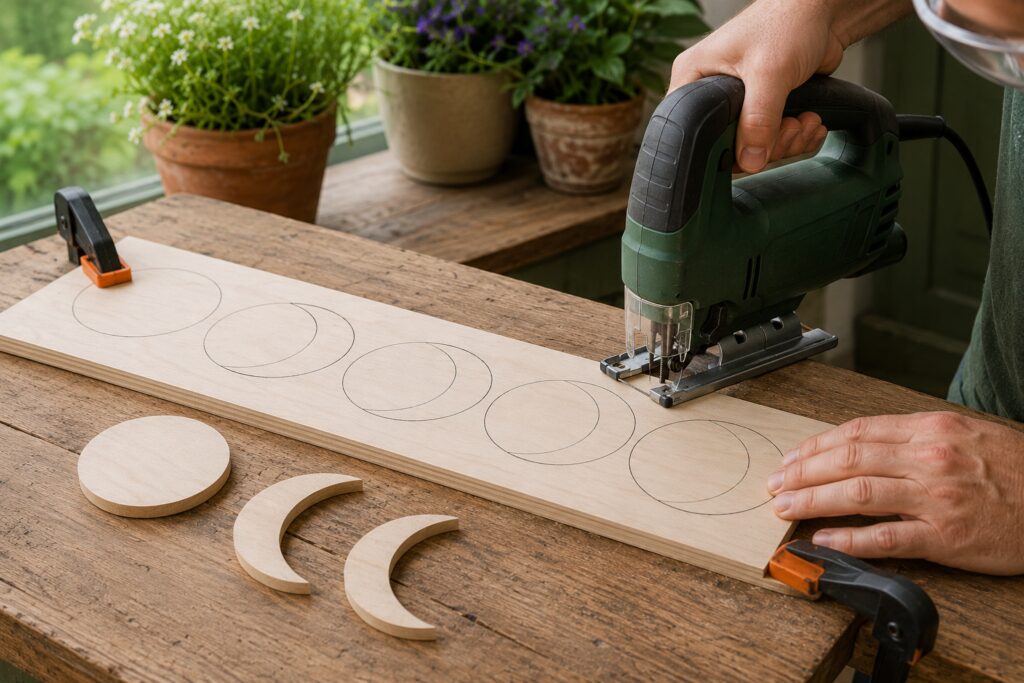
For a crescent, trace the full circle onto the thin plywood. Move the template approximately one-quarter to one-third of its width to one side and trace it again. The overlapping lines create the curved inner edge.
Changing the amount of offset changes the moon phase. A small offset produces a slender crescent, while a larger offset leaves a broader moon. Make a few paper tests before marking the wood.
Trace twelve crescents and two full circles for the pair of panels.
3. Cut and Smooth the Moon Shapes
Clamp the thin plywood securely over a supported work surface. Drill a starter hole inside each area that will be removed from a crescent. Make the hole large enough to insert the jigsaw blade without touching the finished edge.
Wearing eye and hearing protection, cut around each outer circle first. Then insert the blade into the starter hole and cut the inner curve. Move slowly and let the blade do the work, especially around the narrow tips.
Keep both hands away from the blade path and never hold a small piece loose while cutting it. Reposition the clamps as necessary instead of reaching across the saw.
Sand the cut edges with medium-grit paper followed by fine-grit paper. Slightly rounding the front edges gives the moons a softer, hand-finished appearance.
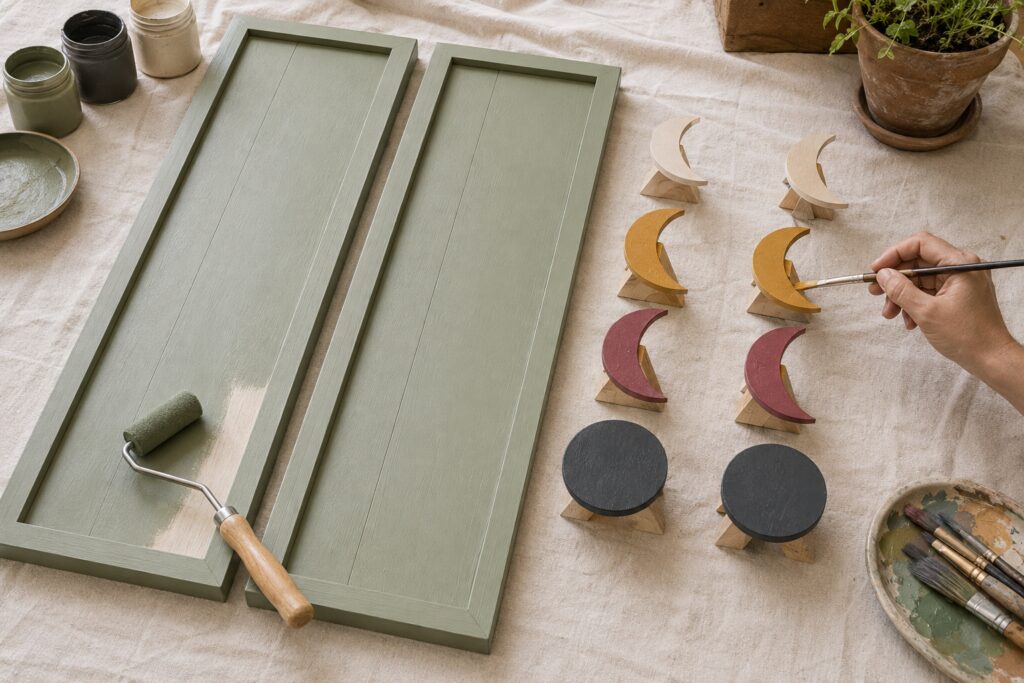
4. Paint the Panels and Moons Separately
Remove all sanding dust with a dry cloth. Paint the panels muted sage using a small foam roller, then use a brush to reach the inside edges of the trim.
Two thin coats will look smoother than one heavy coat. Let the first coat dry completely before applying the second.
Divide the moon pieces by color. Paint four cream crescents, four ochre crescents, four berry crescents and two charcoal full moons. Paint the fronts and visible edges so unfinished plywood will not show after mounting.
For the gently aged character seen in the inspiration, do not aim for a perfectly sprayed finish. A small amount of visible brush texture complements the simple wood construction. Avoid heavy distressing that would compete with the moon shapes.
5. Plan the Moon Progression
Once the paint is thoroughly dry, position the two panels side by side. Run a removable strip of painter’s tape down the vertical center of each panel.
Arrange seven shapes on each panel with the full moon at the midpoint. Place three colored crescents above it and three below it. Point the crescents on the left panel inward or outward according to your preference, then reverse the direction on the right panel.
Measure the spaces between the shapes rather than relying only on sight. The top and bottom margins should match, and the full moons should sit at the same height.
Stand several feet away and inspect the arrangement. This is the best time to correct spacing or rotate a crescent that feels visually awkward.
6. Attach the Raised Moon Pieces
Mark the top and bottom point of each shape lightly with pencil. Remove the moons one at a time while leaving the remaining arrangement intact.
Apply a modest amount of wood glue or construction adhesive to the back of the first piece. Keep the adhesive away from the edges so it does not squeeze onto the painted panel.
Return the moon to its marks and press it firmly in place. For additional security, add one or two short brads through the moon into the backing panel. Choose brads short enough that they cannot protrude through the rear surface.
Continue until all fourteen pieces are attached. Remove the painter’s tape carefully and allow the adhesive to cure with the panels lying flat.
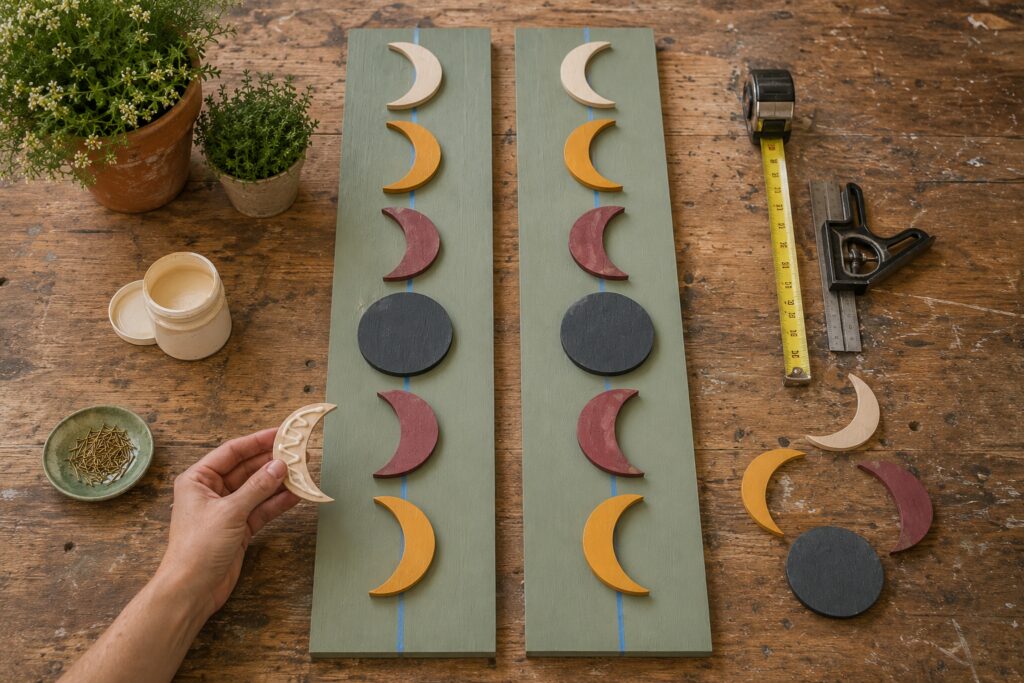
[STEP IMAGE 4: Place after this paragraph. Show both sage panels with measured centerlines and evenly arranged moons, plus adhesive being applied sparingly to the back of the final cream crescent.]
7. Add the Decorative Hinges
Arrange the panels side by side with a small, even gap between them. Position two hinges along the inner edges to suggest that the shutters could fold together. Add a second pair along the outside edges if you want to echo the hardware-rich appearance of the inspiration.
Mark the screw holes and drill shallow pilot holes. Check the screw length first. It must be shorter than the combined depth of the trim and panel so it does not break through the back.
The inner hinges may be attached to both panels if you want the pair to fold. For two independently hung panels, attach each hinge to only one side and treat it as decorative hardware.
8. Seal and Prepare the Panels for Hanging
When the paint and adhesive have cured, apply a light matte clear finish. Test it on a painted scrap first to make sure it does not alter the colors.
Attach two D-ring hangers to the back of each panel, placing them at equal heights. Using two hanging points helps keep long, narrow panels from shifting out of level.
Weigh the finished panels and use wall anchors appropriate for both that weight and the wall material. Do not rely on decorative picture hooks of unknown capacity.
Tips for Capturing the Finished Look
Keep the green quiet and slightly gray rather than using a vivid botanical shade. It should act as a calm background for the cream, ochre, berry and charcoal accents.
Make the full moons slightly wider or visually heavier than the crescents. Their dark circular forms create a strong center point and keep the multicolored arrangement from feeling scattered.
The narrow moon tips do not need to match perfectly. Small variations support the handcrafted character, but consistent outer diameters and measured spacing will keep the overall project polished.
Antique-brass or softly aged hinges pair particularly well with the warm paint palette. If new hardware looks too shiny, choose a matte or rubbed finish instead of trying to distress plated metal aggressively.
Easy Ways to Customize It
For a softer year-round version, substitute dusty blue or warm white for the sage background. A rust, pumpkin and plum palette will make it feel more distinctly autumnal.
One tall panel can be used where a pair would be too wide. Reduce the arrangement to five phases, with a full moon in the middle and two crescents above and below it.
For a more dramatic Halloween treatment, paint the background charcoal and use cream, aged gold and muted copper for the moons. Keep the finish matte so the raised silhouettes remain easy to see.
Small wooden stars can be added between phases, but use them sparingly. The changing moon shapes should remain the primary feature.
Displaying the Finished Shutters
Hang the pair above a console, beside a covered interior doorway or as a seasonal focal point in a craft room. They can also lean against a wall on a sturdy mantel or wide shelf if they are secured against tipping.
The materials described here are best suited to indoor or protected-porch use. Outdoor display would require exterior-rated wood, adhesive, paint, hardware and protective finish. Keep the panels away from open flames, heaters and areas where they could obstruct movement.
These shutters do not need to reproduce every detail in the AI inspiration to carry the same character. The combination of raised moons, gentle color progression and humble wood texture is what makes the design recognizable.