*This post may contain affiliate links for which I earn commissions.*
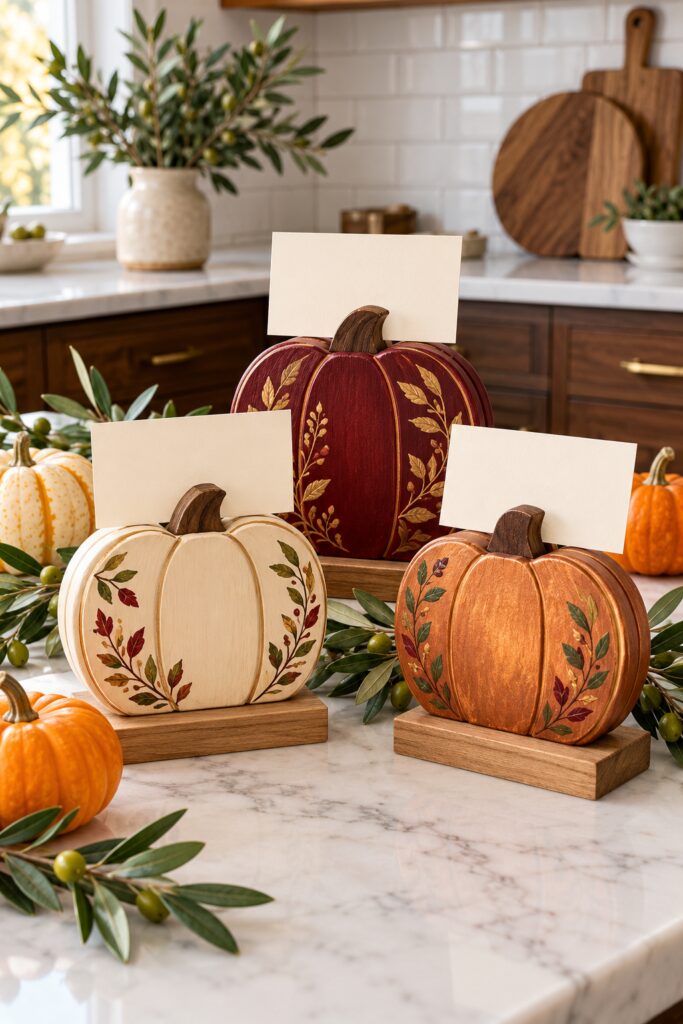
Three painted pumpkins hold cream cards above their stems in this Thanksgiving inspiration. Burgundy, ivory, and copper fronts carry delicate botanical sprigs, and natural wood bases give the pieces a finished edge. They would make interesting place markers or small buffet labels, with the same colors repeated across a table.
This tutorial proposes a practical version using flat wooden pumpkin cutouts. You will paint the fronts, attach them to broad wood bases, and conceal a small card clip behind each stem. The finished holders keep the illustrated color and leaf detail without depending on an unexplained slot inside a solid pumpkin.
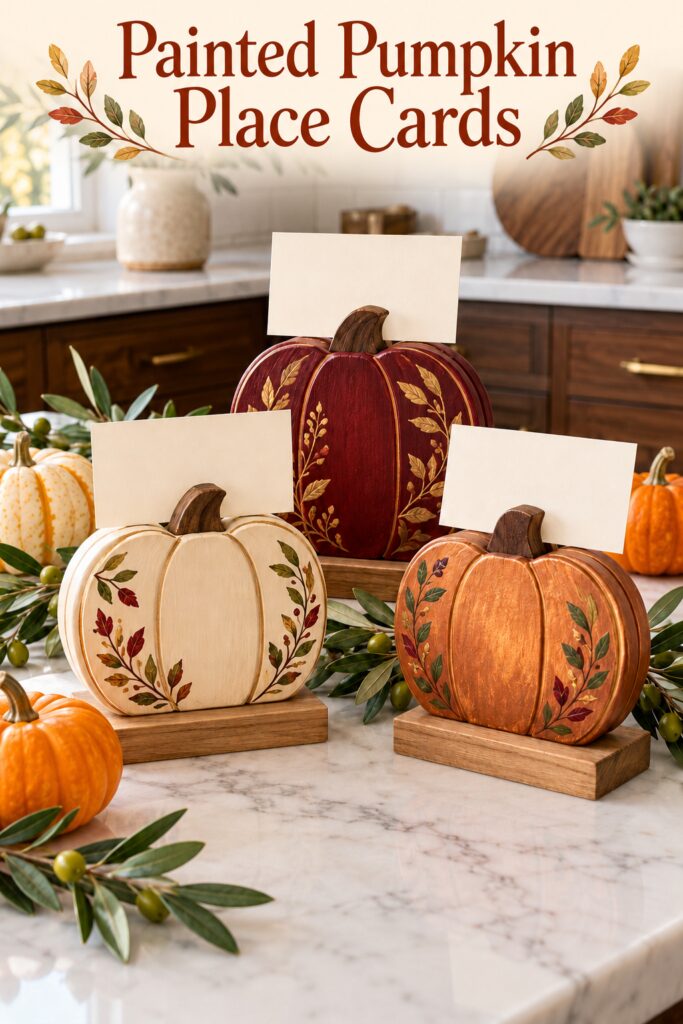
The inspiration and demonstration images were created with AI to illustrate a proposed DIY method and do not document a tested physical project.
What You’re Making
Each holder consists of a flat wooden pumpkin standing upright on a rectangular wood base. A miniature wooden clothespin on the back grips a removable cream card. The pumpkin hides most of the clip from the front, leaving the name or label visible above its stem.
The inspiration appears fairly substantial, but exact dimensions are not available. As a suggested starting point, choose cutouts around four to six inches wide for generous place markers, then size the bases and cards to suit. Make a paper mockup before buying materials if your table is compact.
Materials and Supplies
Materials
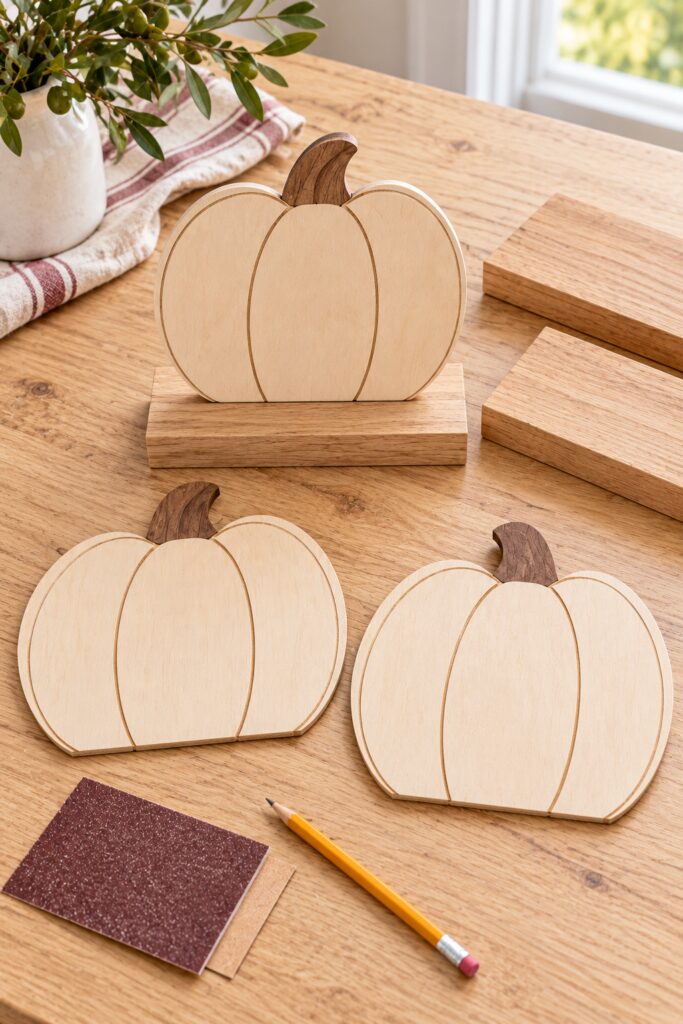
- Three unfinished wooden pumpkin cutouts with straight lower edges and broad stems
- Three flat rectangular wood bases wide enough to support the cutouts
- Small wooden clothespins with working springs
- Wood glue suitable for the bare wood joints
- Acrylic craft paint in burgundy, ivory, copper, brown, olive, and muted gold
- Cream cardstock for the names or food labels
Want to Make These Pumpkins?
I’ve put together a quick list of the supplies listed above so you only have to go to one place to find them. Doesn’t include separate tools like brushes but everything else you’d need.
See My Hand-Picked Supply ListAs an Amazon Associate I earn from qualifying purchases but this doesn’t increase your price at all!
Tools
- Fine sandpaper and a dust cloth
- Flat paintbrush and fine detail brush
- Pencil ruler and scrap paper
- Scissors or a paper trimmer for cardstock
- Masking tape and supports or clamps appropriate for holding the joints steady
- A protected work surface and scrap cardboard for brush practice
Optional Finishing Supplies
A compatible clear finish can protect the painted surfaces if desired. Follow its label for compatibility, ventilation, and curing. The card holders are decorative indoor pieces, not food-contact surfaces, so keep them separate from unwrapped food even when you use them as buffet labels.
Before You Start
Choose pre-cut pumpkins rather than introducing a cutting step. Their lower edges need enough straight contact with the bases to form a sound joint. If a cutout has a narrow point or strongly curved bottom, select a different shape or saw off the bottoms for a flat surface (if you’re able) instead of trying to balance it upright.
Dry fit each pumpkin on its base. The base should extend forward and backward beyond the thickness of the cutout, forming a broad footprint. Try a blank paper card behind the stem and check that the assembled proportions will fit beside a plate.
Lightly sand rough areas and remove the dust. Mark the contact line on the base and the matching lower edge of the cutout. Leave those glue surfaces bare during painting. Also reserve a small unpainted patch on the back behind the stem for the clothespin.
Step by Step Tutorial
1. Paint the Pumpkin Colors
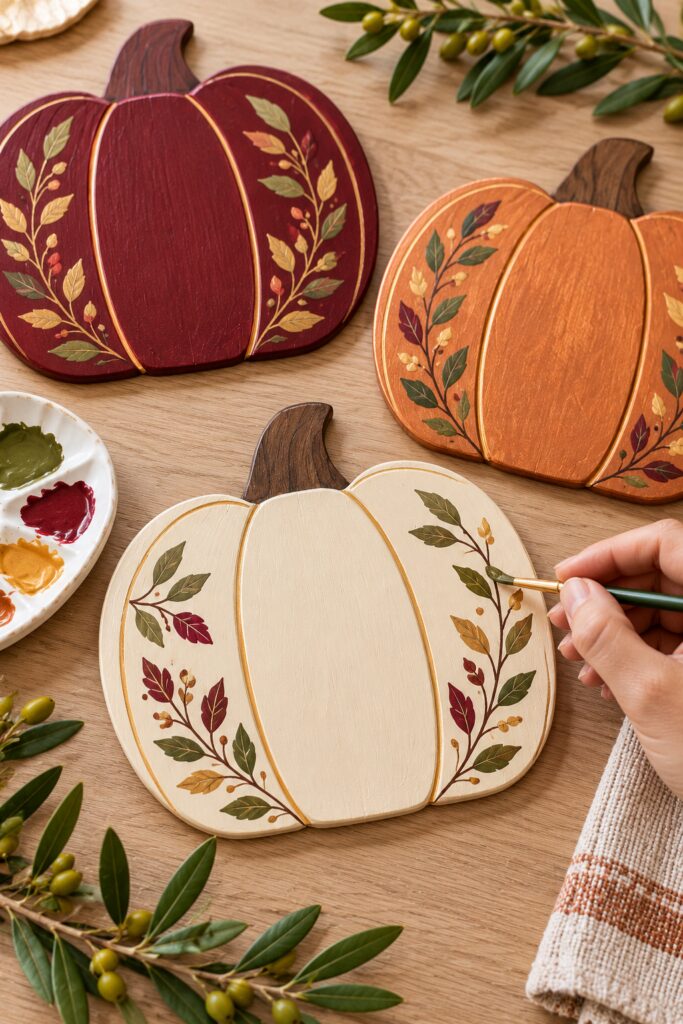
Paint one front burgundy, one ivory, and one copper. Use thin coats rather than a heavy layer that collects along the edges. Allow each coat to dry according to the paint instructions before adding another. Paint the backs in their corresponding colors, keeping the reserved attachment patches bare.
Paint the stems brown, allowing a little of the wood texture to remain visible if you like that effect. Keep the bases natural for the contrast shown in the inspiration. If you choose a clear finish for them, keep the marked glue area unfinished.
2. Suggest the Lobes with Fine Lines
Follow any shallow lobe guides already present on the cutout or lightly sketch a few curved lines from near the stem toward the lower edge. These indicate the pumpkin’s lobes without adding separate raised sections. Follow with a thin line of muted gold or a slightly darker version of the base color.
Test the line on scrap cardboard first. It should be narrow enough to describe the shape without dividing the pumpkin into heavy stripes. Let the painted lines dry before resting your hand near them to add the botanical detail.
3. Paint the Botanical Sprigs
Sketch a thin curved stem along each outer lobe, keeping the middle comparatively open. Add small paired leaves, varying their angle slightly as they follow the curve. On the ivory pumpkin, use olive and burgundy accents; on burgundy, let muted gold provide the strongest contrast.
For the copper pumpkin, use olive leaves with a few burgundy touches. Make a leaf with a small brush press and a lift toward its tip, or draw the outline and fill it if that feels easier. Practice several on scrap before working on the cutout. The sprigs can differ while keeping the same general placement.
4. Join Each Pumpkin to Its Base
Once the paint is dry, apply wood glue to the bare lower contact edge and the corresponding bare area on the base. Use the amount and application method recommended by the adhesive manufacturer. Center the pumpkin and hold it upright with suitable supports or clamps without marking the painted face.
Wipe away excess glue as directed before it sets. Check the front and side views so the pumpkin stands squarely rather than leaning. Leave the assembly undisturbed for the full stated curing period. If the joint has too little contact to hold securely, change the cutout or base instead of relying on a thick bead of glue.
5. Attach the Hidden Card Clip
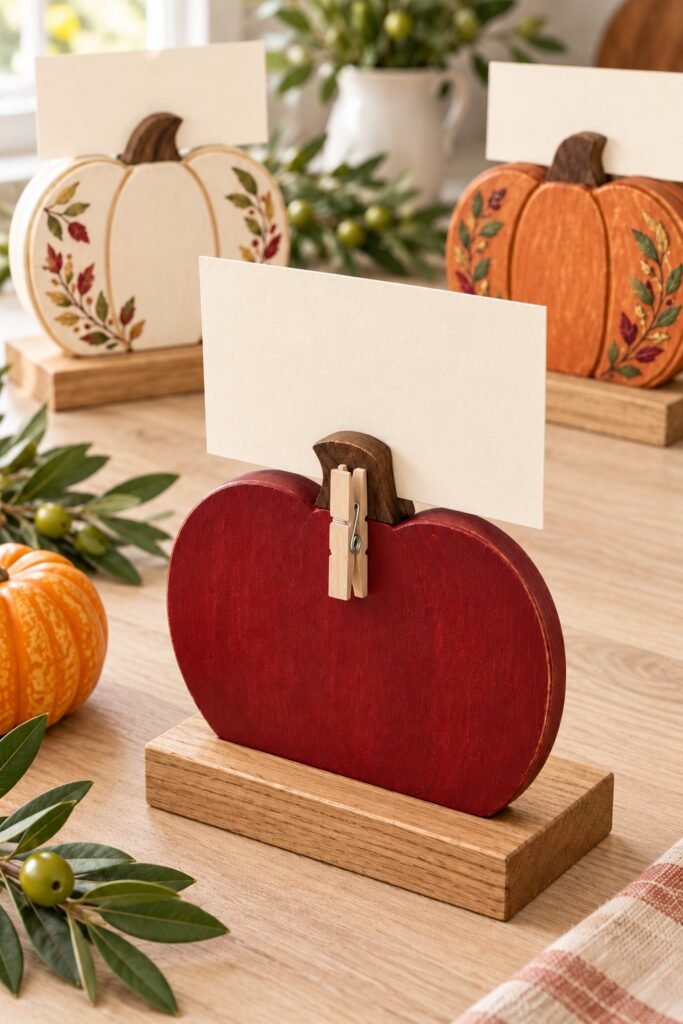
Position a small wooden clothespin vertically on the back, with its opening jaws at the top. The lower outer face of one wooden arm attaches to the bare patch behind the stem. Keep glue away from the spring, pivot, and jaws so the clip can still open and close.
Check the location with an unglued clip and card first. The card’s lower edge should sit behind the upper part of the pumpkin, while its writing area extends above the stem. When the position works, remove the card, glue the clip in place, and support it until the adhesive has cured as instructed.
6. Fit the Cards and Test Stability
Cut the cardstock after testing a paper sample in the clip. Write names or food labels where the stem will not hide them. Slide each card into the jaws and check that it remains upright without making the holder top-heavy.
Set the holder on a flat surface and gently check whether it rocks or tips. Use a smaller card or broader base if necessary. Do not put an unstable piece on the table and expect surrounding dishes to hold it in place.
Tips for Getting the Finished Look
Keep the botanical detail mostly along the outer lobes. That leaves the central color visible and allows the three finishes to look different from a distance. A few careful leaves will communicate the idea better than a dense pattern painted in a hurry.
The natural bases connect the three colors, so use a similar wood tone and proportion throughout the set. Their widths can follow the cutout sizes without being identical. Keep the cards in one cream shade to give the decorative fronts a common backdrop.
Easy Ways to Customize It
Use just the ivory and burgundy versions if copper does not suit your table. You can also paint a single sprig on one side for a simpler finish. Retain the lobe lines and natural base so the connection to the inspiration remains clear.
For smaller place settings, reduce the cutout and card together, then reassess the base footprint. Do not shrink the support automatically. A compact pumpkin can still need a reasonably broad base to stand securely when the card is inserted.
Displaying the Finished Holders
Place one beside each setting or use the group to identify dishes on a buffet. Keep the wood and paint away from direct food contact, moisture, and heat. These are indoor decorative holders, and the small clips are not toys for young children.
Remove the cards before storing the pieces. Pack them so the painted faces cannot rub against the metal springs of neighboring clips. If a clip loosens later, repair the bare wood joint and allow it to cure before using the holder again.
Final Encouragement
Make one holder before completing the set. It will let you settle the card height, base size, and amount of painted detail. Once those choices work together, repeat the construction and enjoy varying the little sprigs across the three colors.