*This post may contain affiliate links for which I earn commissions.*
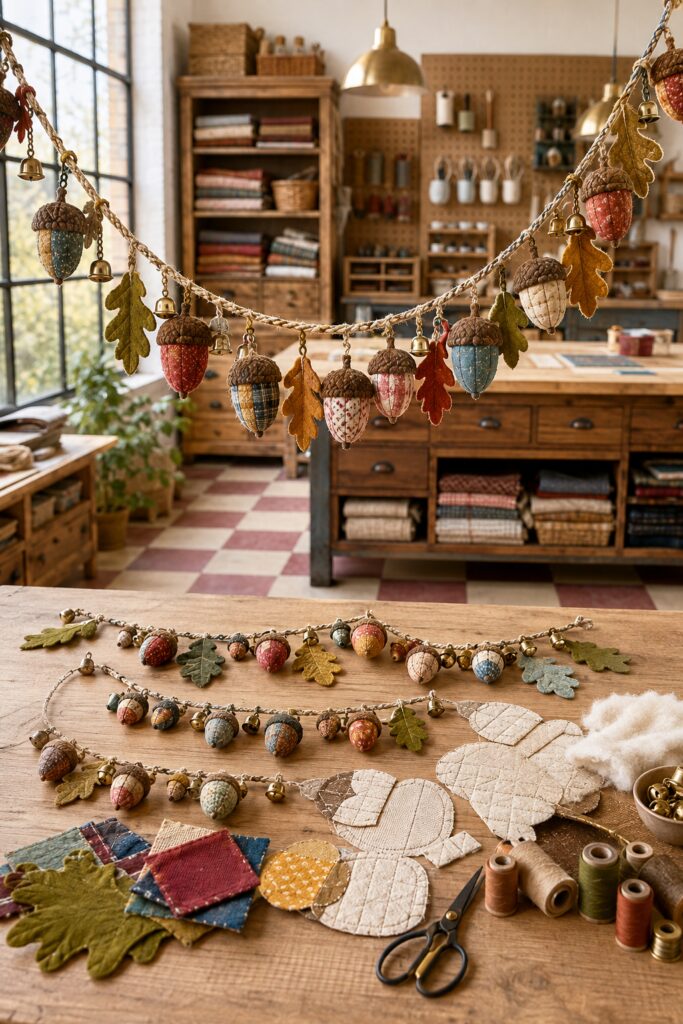
A strand of patchwork acorns can make a mantel, shelf, or sewing room feel ready for fall without relying on pumpkins or faux foliage. This version pairs softly stuffed fabric acorns with stitched wool-felt oak leaves, braided linen-look cord, and little brass bells. The varied fabrics give every acorn a collected quality, while repeating the same shapes and spacing keeps the garland polished.
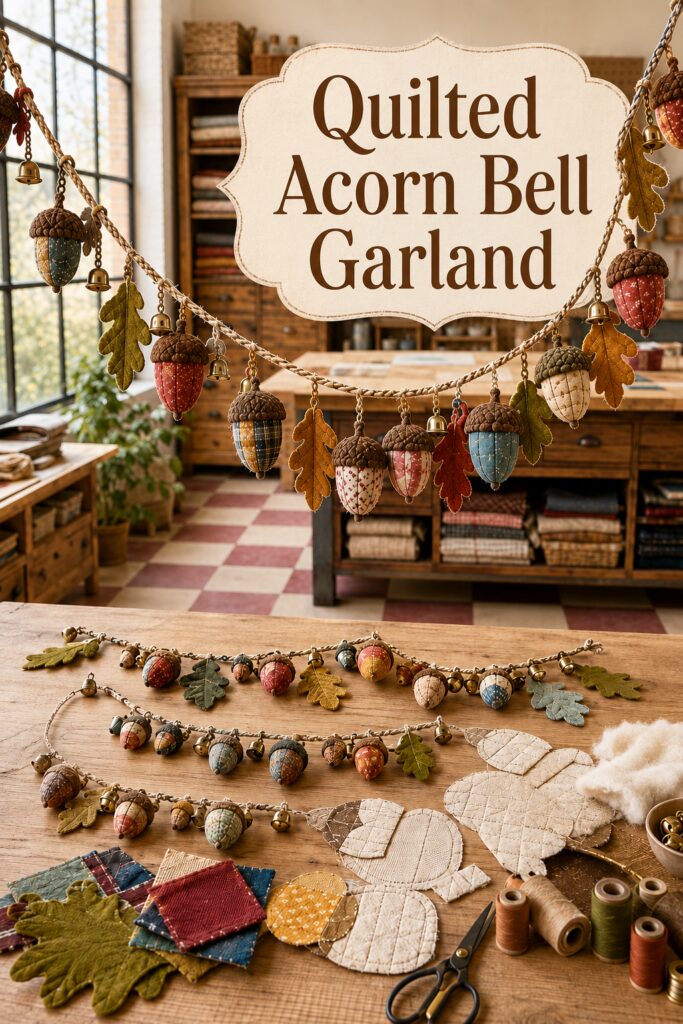
The inspiration and instructional images for this project were created with AI. This tutorial translates their visual idea into a practical sewing project you can recreate at home; the instructional images are visual guides rather than photographs of a physically completed project.
What You’re Making
You will make a lightweight indoor garland about 5 to 6 feet long, with roughly 7 to 9 stuffed acorns, 6 to 8 felt leaves, and a scattering of small bells. Each acorn is pieced from scraps, sewn into a three-dimensional body, and topped with an embroidered felt cap. The ornaments hang from short loops tied to a braided main cord. The count and length are flexible, so the design can fit a narrow shelf or a broad mantel.
The highly sculpted acorn caps in the inspiration are simplified into layered felt. Crosshatch embroidery and a scalloped edge create the same textured impression without requiring molds or specialized equipment.
Materials and Supplies
Materials
- Cotton quilting scraps, lightweight velvet scraps, or both
- Medium-weight fusible interfacing for very soft or stretchy fabrics
- Wool or wool-blend felt in olive, moss, ochre, rust, and brown
- Dark brown felt or low-pile velvet for the acorn caps
- Polyester fiberfill
- Embroidery floss in brown and coordinating autumn shades
- All-purpose sewing thread
- Natural braided cotton, linen-look, or jute cord, about 3 mm thick
- Small antique-brass-tone craft bells, preferably about 12 to 20 mm
- Thin cord, strong embroidery floss, or waxed thread for hanging loops
Tools
- Sewing machine, or a hand-sewing needle for a fully hand-stitched version
- Fabric scissors and small detail scissors
- Pins or sewing clips
- Hand-sewing and embroidery needles
- Iron and pressing surface
- Removable fabric marker or tailor’s chalk
- Paper, pencil, and ruler for templates
- Turning tool, blunt chopstick, or knitting needle
Optional finishing supplies
- Pinking shears
- Fray-preventing liquid for fabrics that shed heavily
- Small clear removable hooks for display
Before You Start
Choose a finished garland length and add about 12 inches so there is room for end loops and a relaxed drape. For a 5 to 6 foot strand, prepare 7 to 9 acorns and 6 to 8 leaves. A useful acorn-body template is a symmetrical pointed oval or leaf shape about 3½ to 4½ inches tall before sewing. Make the middle broad and the top slightly narrower. You will need three identical body pieces per acorn.
Draw one oak leaf in a scale that balances the acorns, usually a little longer and flatter than a finished acorn. Draw a cap template as a shallow curved band with a scalloped lower edge. Test one complete acorn before cutting the entire batch, especially if you mix cotton and velvet. Press cotton on its normal setting, but protect velvet with a pressing cloth and avoid crushing its pile.
1. Build Small Patchwork Panels
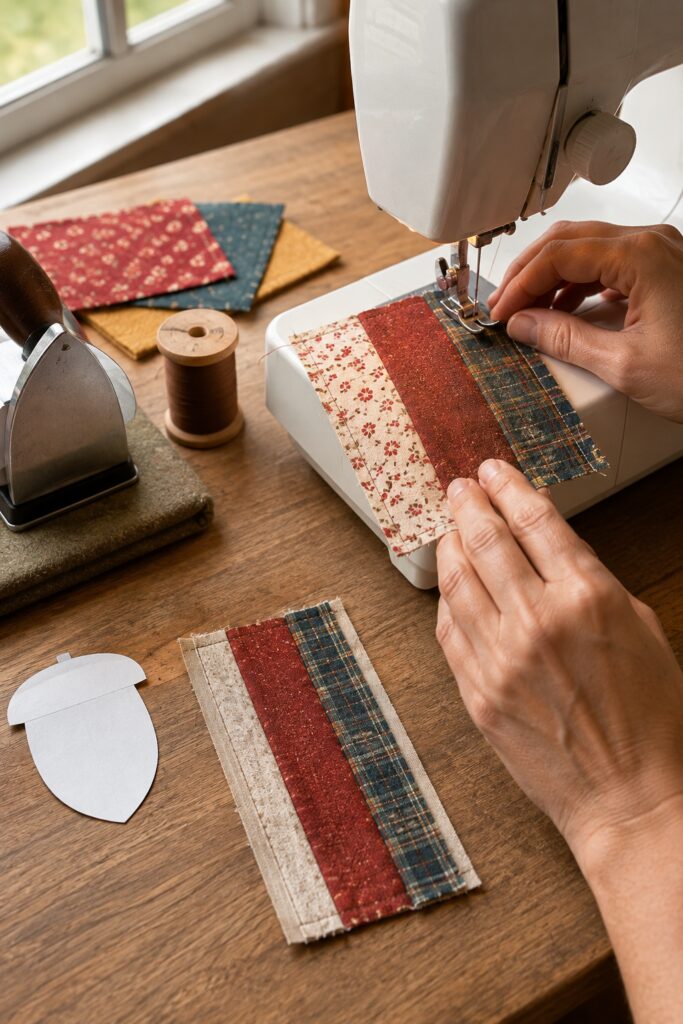
Sort the scraps into loose color families rather than trying to make every acorn match. Join two or three pieces with a ¼-inch seam allowance to make a flat panel large enough for one or more body templates. Press each seam to one side. For lightweight or stretchy velvet, fuse interfacing to the wrong side before cutting. Keep the patchwork simple so the small acorn shape does not become visually busy.
2. Cut the Acorn Bodies
Trace and cut three matching body pieces for each acorn. Shift the template across the patchwork seams so each body has a different arrangement. Mark the top and bottom points on the wrong side. If a fabric frays easily, handle it gently and keep the pieces in labeled sets. Sew a few plain-fabric acorns among the patchwork ones to give the eye places to rest.
3. Sew, Turn, and Stuff Each Body
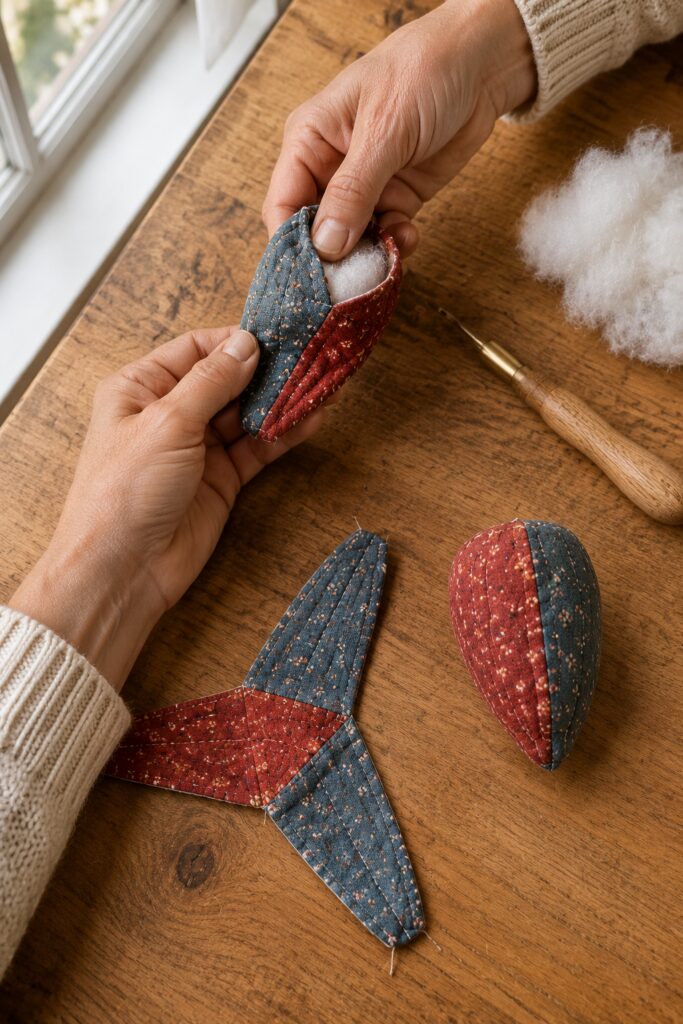
Place two body pieces right sides together and sew along one long edge using about a ¼-inch seam allowance. Add the third piece to one free edge, then sew the remaining sides together. Leave a 1½-inch opening near the top of the final seam. Backstitch at both ends of the opening.
Trim the bottom point, clip the curved seam allowances without cutting the stitches, and turn the body right side out. Push out the point with a blunt turning tool. Add small pinches of fiberfill, working first into the bottom. Stop when the acorn is softly rounded but still compressible. Firm stuffing can distort the seams. Fold the opening inward and close it with ladder stitch.
4. Make the Textured Acorn Caps
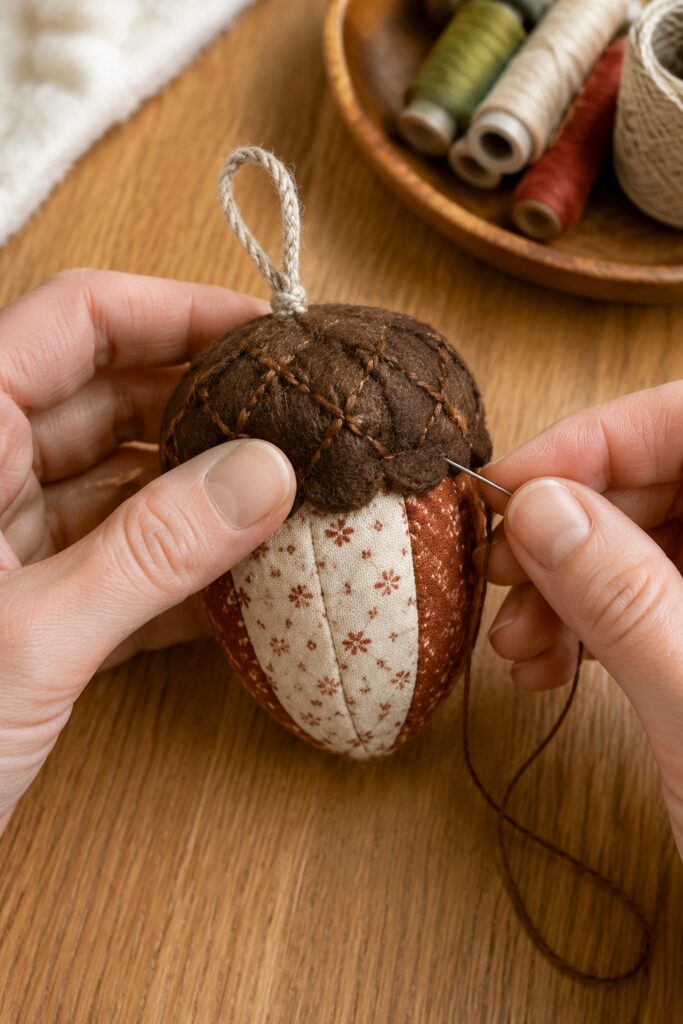
Cut one scalloped cap band from dark brown felt for each acorn. Wrap it around the upper third of the stuffed body and overlap the short ends slightly at the back. Trim the band until it sits snugly without squeezing the body. Before attaching it, embroider crossed diagonal lines or small seed stitches across the felt. Uneven hand stitching suits the folk-art look.
Form a 3-inch hanging loop from thin cord. Knot the ends together and place the knot at the acorn’s top, under the cap. Wrap the cap around the body, stitch its back overlap closed, then whipstitch the scalloped edge to the fabric. Take a few hidden stitches through the hanging-loop knot so the acorn’s weight is carried by the stitching, not only by friction.
5. Stitch the Oak Leaves
Cut each leaf twice from wool felt. A double layer gives the leaf enough body to hang neatly. Place the layers together and work a small running stitch or blanket stitch around the perimeter. Use three strands of embroidery floss to stitch a central vein and several angled side veins. Keep the vein pattern loose and organic.
At the stem end, sandwich the knotted ends of a short hanging loop between the felt layers before completing the edge stitching. Vary olive, golden brown, muted rust, and dusty green leaves across the collection. Make one or two leaves slightly smaller to prevent the arrangement from looking overly uniform.
6. Prepare the Main Cord
Cut the main cord to the planned length plus 12 inches. Tie a secure loop at each end. Lay the cord on a table or floor in a shallow curve that resembles its final drape. Mark the center, then place the largest or most detailed acorn slightly off center for a relaxed composition.
7. Arrange and Attach the Components
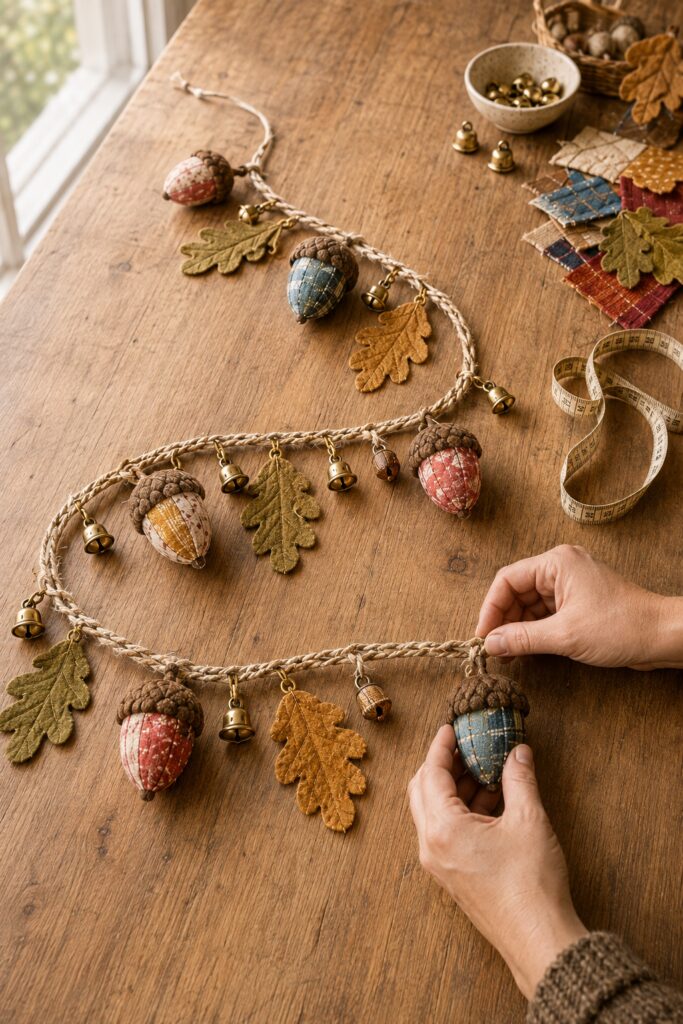
Lay out all the acorns, leaves, and bells before tying anything. Begin with spacing of about 4 to 6 inches, alternating object types without following a rigid sequence. Distribute reds, blues, creams, plaids, and warm neutrals across the whole strand. Keep two highly patterned acorns from touching, and let a calmer felt leaf separate them.
Attach each ornament with a lark’s-head knot: fold its hanging loop over the main cord, pass the ornament through the loop, and pull gently. Tie bells with short doubled lengths of strong thread or thin cord. Use fewer bells than acorns so the sound remains subtle. Once the arrangement feels balanced, add a small hand stitch or discreet knot at attachments that tend to slide.
8. Hang and Adjust the Garland
Support the end loops with hooks rated for more than the garland’s weight. For a wide mantel, add a hidden support at the center so the cord does not stretch or sag too deeply. Step back and rotate any acorns that show their back seams. Slide or retie pieces until the visual weight is balanced.
This garland is intended for indoor decorative use. Keep the small bells and stuffed ornaments away from children and pets, secure every support, and do not hang the strand over a walkway, heat source, or open flame. Use care with sharp needles, scissors, and a hot iron while sewing.
Tips for Getting the Finished Look
- Mix texture before adding more pattern. Pair plaid cotton with solid velvet, nubby felt, and smooth thread. Too many tiny prints can flatten the design.
- Repeat colors at intervals. Let each main shade appear at least twice across a long garland so no section feels isolated.
- Stuff lightly. A little softness makes the seams and patchwork more visible and gives the acorns a handmade silhouette.
- Keep the metal restrained. Warm brass-tone bells work as small glints between the larger textile shapes.
- Allow irregularity. Slight differences in leaf size, cap stitching, and hanging length make the collection feel handcrafted, while consistent acorn proportions keep it coherent.
Easy Ways to Customize It
For a quieter traditional palette, use indigo, oatmeal, tobacco brown, and muted cranberry. A woodland version could combine moss felt with neutral linen and tiny mushroom prints. To turn the garland into a Thanksgiving accent, add a few narrow ribbon tags embroidered with simple words such as gather or grateful.
If machine sewing is not your preference, work the body seams by hand with a small backstitch. For a no-bell version, replace the metal accents with wood beads or tiny felt balls. You can also make a short strand of three acorns and two leaves for a cabinet, basket handle, or seasonal wall hook.
Display Ideas
Drape the finished garland across a mantel, open shelf, vintage cupboard, or craft-room peg rail. It also looks inviting along the front of a fall buffet, provided the cord is secured away from serving dishes and candles. Pair it with plain pottery, folded quilts, or branches in a crock so the small textile details remain the focal point.
The project is especially satisfying as a scrap-friendly make: every acorn can preserve a favorite bit of fabric, yet the repeated caps, leaves, and braided cord turn those remnants into one complete fall decoration.