*This post may contain affiliate links for which I earn commissions.*
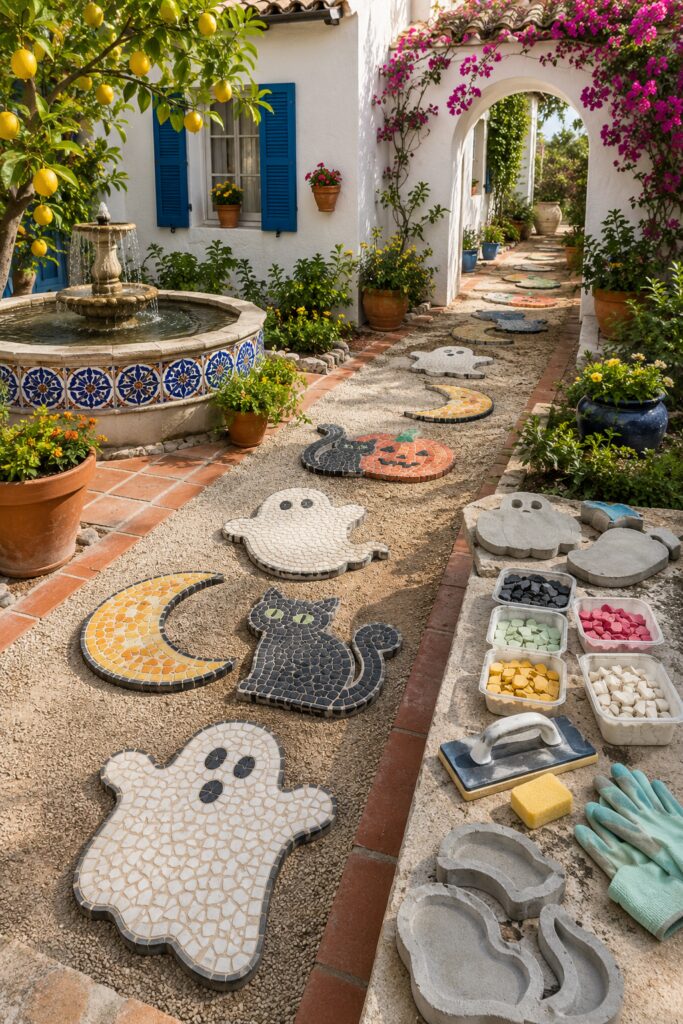
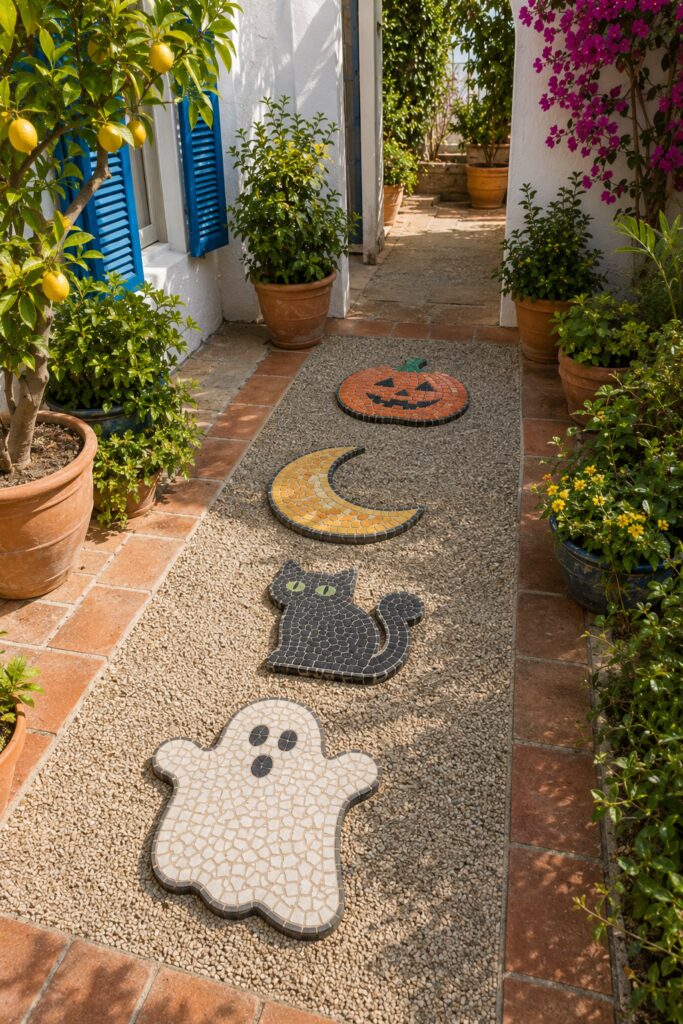
A winding path of friendly ghosts, crescent moons, black cats, and pumpkins turns an ordinary garden walk into a playful Halloween feature. The inspiration image pairs handmade-looking mosaic surfaces with a sunlit citrus courtyard, using raspberry, coral, mint, yellow, cream, cobalt, and charcoal pieces separated by visible grout lines.
This tutorial adapts that visual idea into a practical set of reinforced concrete pavers. Instead of trying to duplicate every fanciful detail, you will cast sturdy shapes, attach exterior-safe mosaic pieces to the cured surfaces, grout them, seal them, and install them level with the surrounding path.
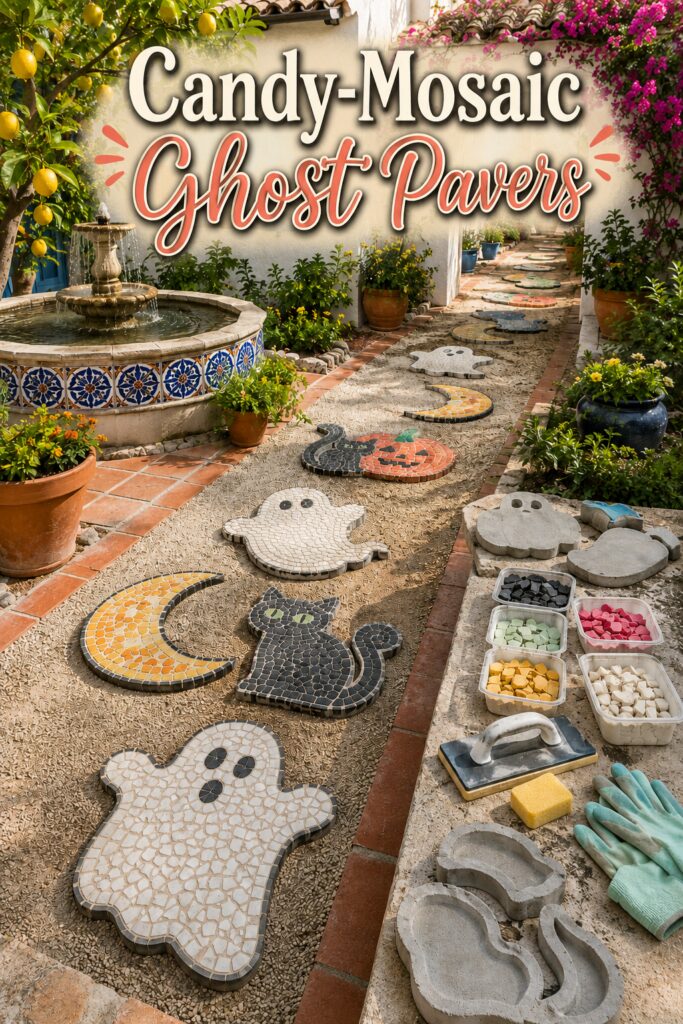
The inspiration image and the instructional demonstration images for this project were created with AI. They communicate the design and construction concept rather than documenting a physically completed project.
What You’re Making
You are making a coordinated group of decorative Halloween stepping stones, ideally four to six pieces measuring roughly 12 to 18 inches across. A ghost, moon, cat, and pumpkin create enough variety for a short garden path without requiring a different technique for every stone. The image suggests deeply sculpted custom forms, but this version uses shallow molds or sealed forms, reinforced concrete, and surface-applied mosaic. That keeps the shapes achievable and the walking surfaces reasonably flat.
These can serve as actual stepping accents only when they are thick enough for their span, fully supported underneath, level, and made with slip-conscious mosaic surfaces. Otherwise, place them beside a path as decorative garden plaques.
Materials and Supplies
Materials
- Exterior-grade concrete or sand-topping mix suitable for small pavers; quantity depends on mold size and number of forms
- Reusable stepping-stone molds, flexible Halloween molds, or sealed melamine forms with gently curved inner dividers
- Alkali-resistant fiberglass mesh cut about 1 inch smaller than each paver
- Exterior-rated polymer-modified thinset mortar
- Frost-resistant ceramic, porcelain, or glass mosaic pieces in raspberry, coral, mint, yellow, cream, cobalt, and charcoal
- Exterior-rated, polymer-modified sanded grout appropriate for the chosen joint width
- Penetrating outdoor masonry, stone, and grout sealer with a natural or low-sheen finish
- Paver base and leveling sand or compactable fine gravel for installation
- Mold release compatible with the mold material, if the mold instructions require it
Tools
- Dust mask or respirator rated for cement dust, safety glasses, waterproof gloves, and hearing protection if using power tools
- Mixing tubs, measuring container, margin trowel, and sturdy mixing paddle
- Rubber mallet and short straightedge
- Tile nippers for shaping mosaic pieces
- Notched margin trowel or mosaic adhesive spreader
- Grout float, grout sponge, two clean buckets, and lint-free cloths
- Paper, marker, scissors, and flexible ruler for templates
- Tamper or hand compactor for the path base
Optional Finishing Supplies
- Fine artist brush and exterior masonry colorant for small grout corrections
- Cobalt edge pieces for an occasional accent border
- Non-slip additive only if approved for the selected sealer and walking surface
Before You Start
Choose a dry work area protected from strong sun and rain. Cement products can irritate skin and lungs, so wear the protection specified on the package and avoid creating dust. Review each product’s temperature range, water ratio, open time, cure time, and outdoor-use directions before mixing.
Make full-size paper templates first. Keep arms, ears, tails, moon tips, and pumpkin stems broad rather than delicate. Narrow projections are the likeliest areas to crack. For walkable pieces, use a thickness appropriate for the size and product instructions, commonly around 2 inches for small garden forms, and support the entire underside during installation. When in doubt, use the finished pieces as decorative accents instead of load-bearing steps.
1. Simplify the Halloween Silhouettes
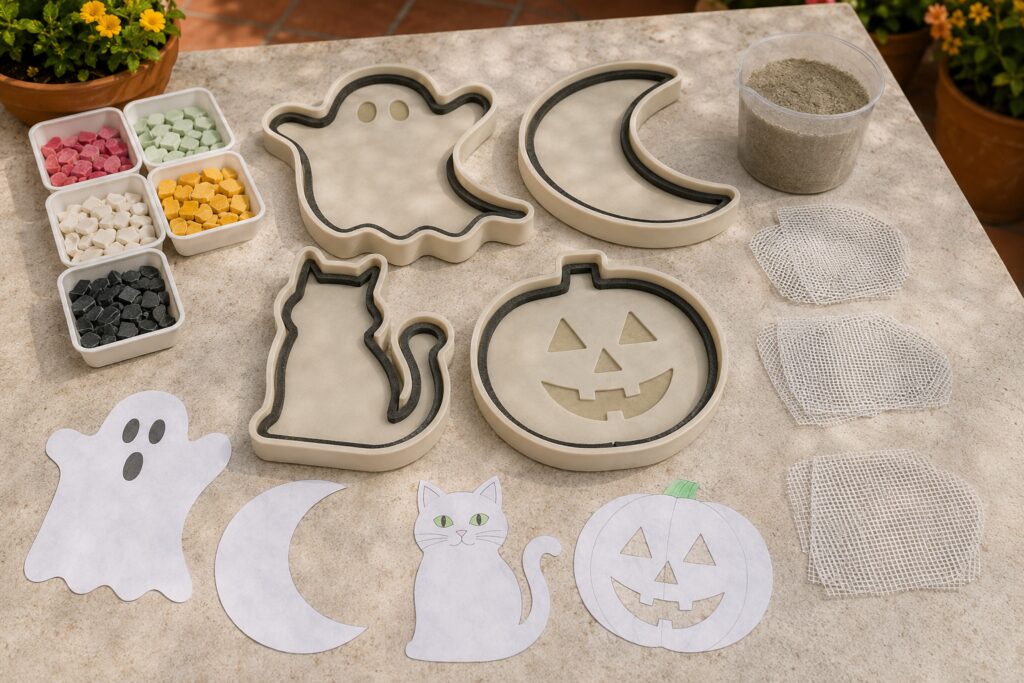
Draw a rounded ghost, a thick crescent, a compact seated cat, and a nearly round pumpkin. Avoid tight inside corners. Tape each paper shape to the work surface and compare the set. Repeat a similar border width and keep the motifs within the same visual scale so they read as one collection.
2. Prepare the Molds and Reinforcement
Use ready-made flexible molds when suitable shapes are available. For custom forms, build shallow sealed melamine trays and create smooth interior curves with securely fastened flexible plastic divider strips. Seal joints so wet mix cannot escape. Apply mold release only if recommended. Cut fiberglass mesh so it stays about 1 inch away from every outer edge. It should lie flat without extending through the surface.
3. Cast the Concrete Paver Blanks
Mix a manageable batch according to the manufacturer’s water ratio. A soupy mixture is weaker and more likely to shrink, so do not add extra water simply to make it easier to pour. Pack the mold halfway, tap the sides to release trapped air, and level the mix. Lay the reinforcement mesh flat in the middle, then add the remaining concrete to the planned depth. Screed the back level and tap the mold gently again.
Cover the forms loosely to slow moisture loss and leave them undisturbed for the initial cure specified by the mix. Demold only when the concrete can support itself. Set the blanks on a flat surface and allow the longer cure required before adding tile or placing them outdoors.
4. Plan the Candy-Mosaic Designs
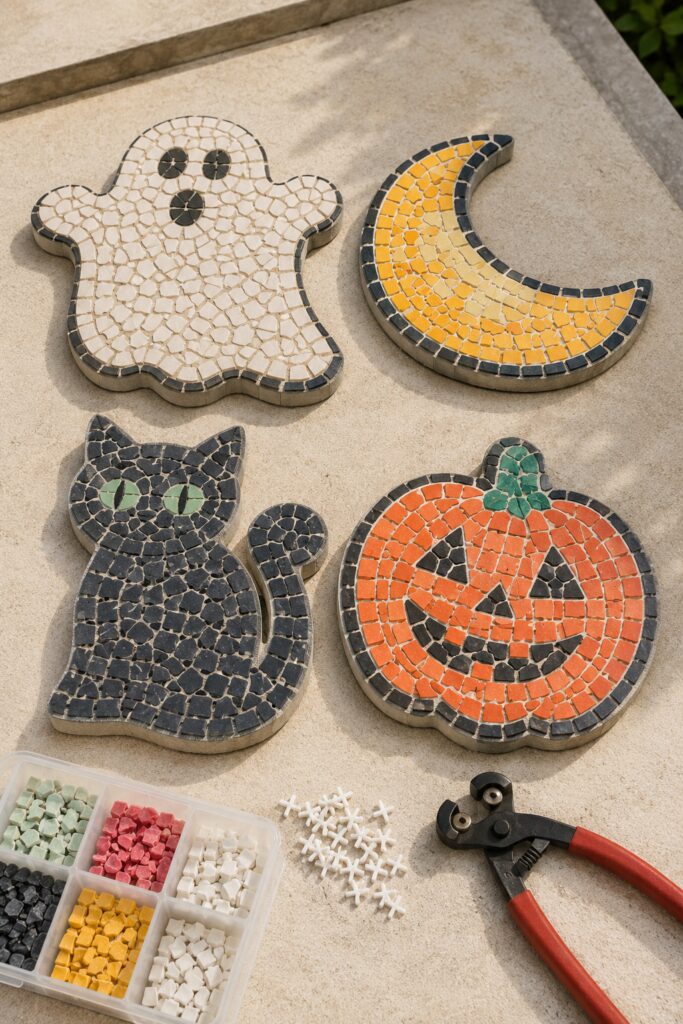
Trace each cured blank onto paper, then sketch the tile pattern. Give the cream ghost a charcoal face and border. Use yellow for the moon, charcoal for the cat with mint eyes, and coral or raspberry for the pumpkin with a mint leaf. Add cobalt sparingly as a border or small accent so it does not compete with the main motifs.
Dry-lay the pieces on each blank. Leave consistent joints and a narrow bare margin around the outside edge. Tile nippers can soften sharp corners and help irregular pieces follow a curve. Wear eye protection, cut away from your body, and contain small chips.
5. Bond the Mosaic Pieces
Work on one paver at a time. Mix a small amount of exterior-rated thinset and spread a thin, even bed over only the area you can cover within its open time. Comb it lightly, then flatten the ridges enough to prevent mortar from squeezing high into the grout joints. Press each piece firmly and keep the top surfaces as even as possible.
Check the design from several angles as you work. Remove excess mortar from joints before it hardens, and wipe the tile faces without flooding the surface. Let the bonded mosaics cure for the full period stated on the mortar package.
6. Grout and Clean the Surfaces
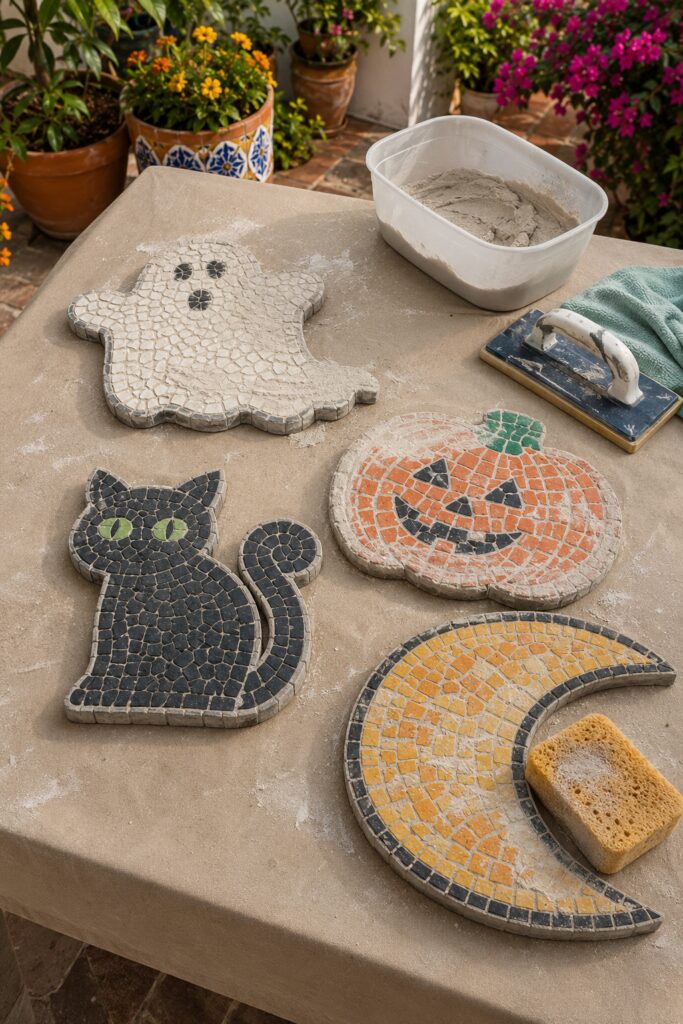
Mix exterior grout to the recommended consistency. Force it diagonally across the mosaic with a float so every joint is packed, including the narrow spaces around facial features and borders. Scrape away excess while holding the float at a steep angle.
After the grout firms enough to resist being pulled from the joints, wipe with a barely damp sponge using light diagonal passes. Rinse the sponge frequently and avoid overworking the grout. Buff the remaining haze with a dry cloth after the surface is ready. Keep the exposed concrete edge clean for a crisp profile.
7. Cure and Seal the Pavers
Protect the pavers from rain, freezing temperatures, harsh sun, and foot traffic while the grout cures. Once the concrete, mortar, and grout have all reached the sealer-ready stage, test the penetrating sealer on an inconspicuous area. Apply thin coats according to its directions and prevent puddles. A natural or low-sheen finish usually preserves the handmade look and is less likely to appear slick than a heavy gloss.
8. Install a Stable Garden Path
Mark the path and arrange the pavers before digging. Comfortable step spacing varies by person, so walk the route and adjust the layout rather than relying on one fixed distance. Excavate each location deeply enough for compacted paver base, a thin leveling layer, and the stone itself. Compact the base thoroughly.
Set each paver fully supported and level with the surrounding finished surface. Tap only through a protective wood block or rubber pad. Pack gravel or soil firmly around the edges, then test every piece for rocking. Do not leave raised lips, unstable points, or narrow projections where someone could catch a shoe.
Tips for Capturing the Candy-Mosaic Look
- Use charcoal borders to give pale and saturated colors a shared outline.
- Keep most grout joints similar, but allow gentle variation so the pieces feel hand-set.
- Repeat mint in two small places, such as the cat eyes and pumpkin leaf, to connect the collection.
- Use coral and raspberry as separate tones instead of blending them everywhere.
- Choose matte or softly reflective pieces. Highly polished tile can look slippery and produce harsh glare outdoors.
- Let cream dominate the ghost so its expression remains readable from the far end of the path.
Easy Ways to Customize It
For a softer palette, replace charcoal borders with warm gray and use dusty rose, butter yellow, and pale sage. For a night-sky version, make the moon cobalt with cream stars and give the cat raspberry eyes. A smaller set of 8- to 10-inch forms can become decorative bed markers rather than stepping stones. You can also replace the pumpkin with a candy apple or add a simple candy-corn triangle, provided the form keeps broad corners and a sturdy silhouette.
Displaying and Using the Finished Pavers
A short run beside a porch, through a courtyard, or between container gardens gives the motifs enough room to be noticed individually. Keep them out of primary walkways if they are thin, purely decorative, or likely to become slick when wet. Inspect them seasonally for movement, cracks, loose tile, or worn sealer. In freeze-thaw climates, exterior-rated materials and a well-draining base matter especially.
A Handmade Halloween Path
The charm comes from the repeated palette, friendly silhouettes, and visible hand-set texture, not from copying every tile in the inspiration image. Start with one ghost or moon to learn the process, then build a coordinated path once you know how your concrete, mortar, grout, and sealer behave together.