*This post may contain affiliate links for which I earn commissions.*
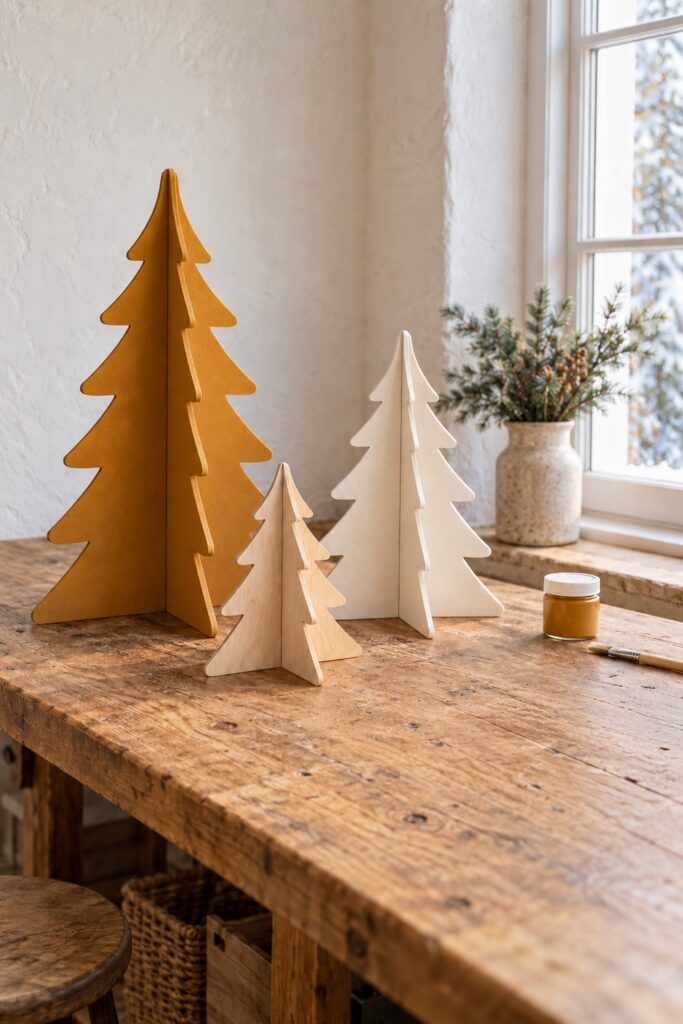
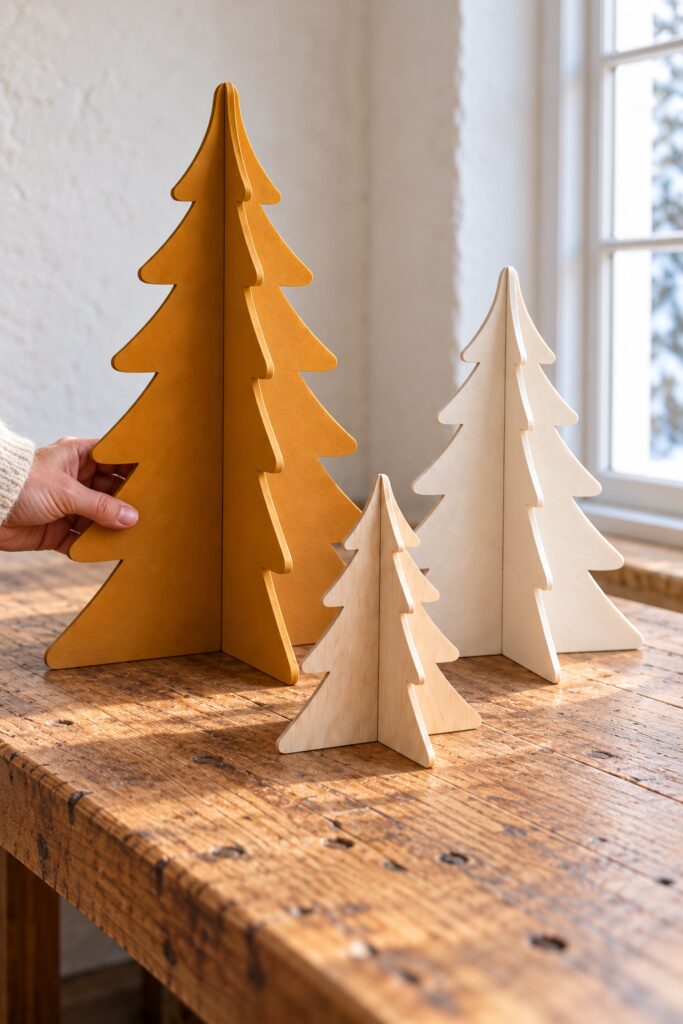
These little trees keep their construction on show. Two flat profiles cross at the center of each one, creating a freestanding shape without a separate base. The amber, ivory, and natural wood finishes make a small group interesting before a single ornament is added.
This tutorial proposes a practical plywood version of that idea. The important part is the slot fit, so you’ll make and test one tree before cutting a whole collection. Suggested dimensions below are starting points for a tabletop project, not measurements taken from the image.
The inspiration and instructional images were created with AI to illustrate a proposed DIY method rather than document a physically completed project.
What You’re Making
Each tree uses two identical outer silhouettes cut from the same plywood. One has a slot from the tip down to the midpoint; the other has a slot from the base up to the midpoint. The slots slide together at right angles, making a crossed shape with four flat lower edges touching the table.
My dad has been a woodworking hobbyist for most of my life so when I walked through the instructions ChatGPT gave me for this project, I knew my dad could cut these tree pieces pretty quickly and from scrap wood already in his garage.
But if you don’t have the right tools, this project gets really expensive. Fortunately, I did find that you can buy pre-cut pieces like this:

If you’re going to cut these yourself, consider a tree about 12 inches tall and 8 inches wide at its lowest branches, using nominal quarter inch plywood. Make a smaller or larger pair only after checking the first tree’s fit and stability. The amber tree can be the tallest, with an ivory companion and a smaller natural wood tree.
Materials and Supplies
Materials
- Smooth craft plywood sufficient for two profiles per tree
- Paper or card for a symmetrical tree template
- Matte amber and ivory paint suitable for wood
- Primer if required by the paint and plywood combination
- Painter tape for protecting the slot contact surfaces
Tools
- Pencil ruler and square for the centerline and slot ends
- Calipers or another accurate way to measure actual plywood thickness
- A scroll saw or jigsaw with a suitable fine wood blade
- Clamps and a supported cutting surface
- Sandpaper and a small flat file for fitting the slots
- A paintbrush clean cloth and protective work surface
- Eye protection and appropriate dust protection for cutting and sanding
Optional Finish
- Compatible matte clear finish for the natural wood tree or extra surface protection
No glue is needed for a correctly fitted removable joint. This method lets the trees come apart for storage. If you prefer pre-cut blanks, they must have matching profiles and opposing slots designed for the actual material thickness.
Before You Start
Use flat plywood without obvious warping or loose surface layers. Measure its thickness rather than relying on the label: nominal sizes can differ from the actual sheet. The slot width needs to accommodate the other profile, and the paint should not turn a usable joint into a forced fit.
Make a slot test in two offcuts first. Cut narrow, then widen gradually until the pieces cross with gentle hand pressure and stay upright without rocking. Keep this test as your reference while cutting the tree profiles. Follow your tool instructions, clamp work securely, and keep hands clear of the cutting path.
Step 1: Draw Two Matching Tree Profiles
Fold paper along a vertical centerline and draw half a tree with three or four broad branch tiers. Keep the shape symmetrical and avoid very thin tips. Make the lowest edge straight across so both profiles can sit level when assembled.
Cut out the paper shape, unfold it, and trace it twice on the same plywood.
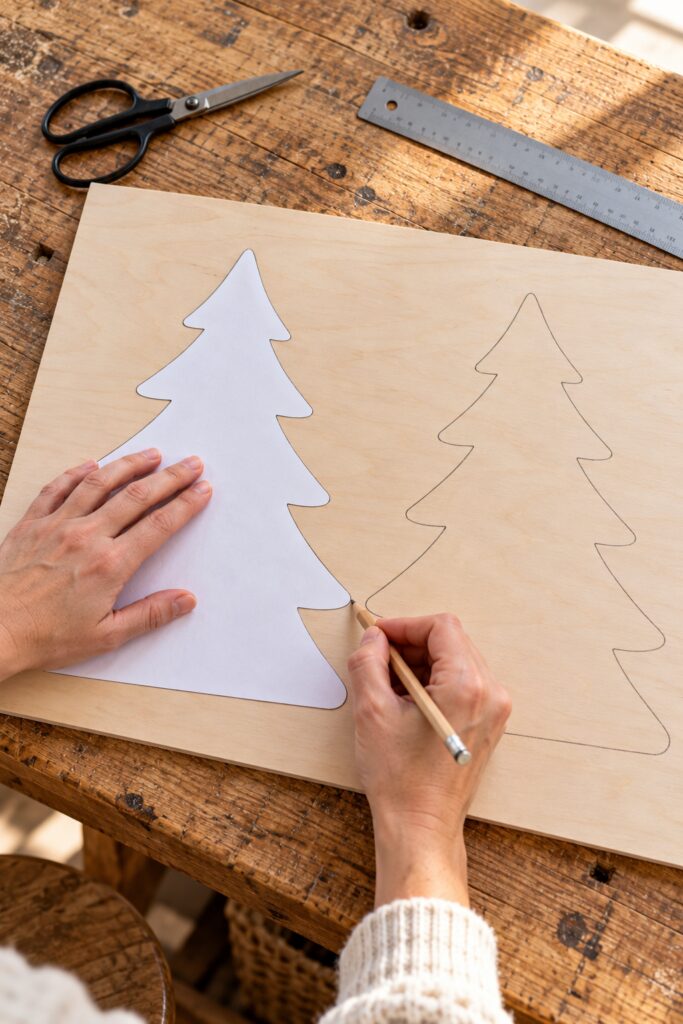
Mark the centerline and halfway point on both drawings. For the suggested 12 inch tree, the midpoint is 6 inches from either the tip or the base.
Mark a narrow rectangular slot centered on each centerline. On one profile it runs down from the top to the midpoint; on the other it runs up from the bottom to the midpoint. The slot ends must meet at that same halfway level. Start with the width established by your offcut test, allowing adjustment during sanding.
Step 2: Cut the Profiles and Opposing Slots
Cut each outer silhouette with the plywood supported and clamped appropriately. Work steadily around the branch tips rather than forcing the blade around a sharp corner. A simpler outline with rounded branch ends is easier to cut and fits the inspiration well.
Cut the two sides of each marked slot and remove the narrow strip between them. Finish the closed end using a method appropriate for your saw, following its instructions. Keep the slot walls parallel and stop at the marked midpoint; avoid extending the cut beyond it.
Check that one profile has only the top slot and the other only the bottom slot. Cutting both slots in each piece would divide the profiles and spoil the joint. Sand splinters from the outer edges without rounding away the straight lower edges.
Step 3: Dry Fit the Crossed Tree
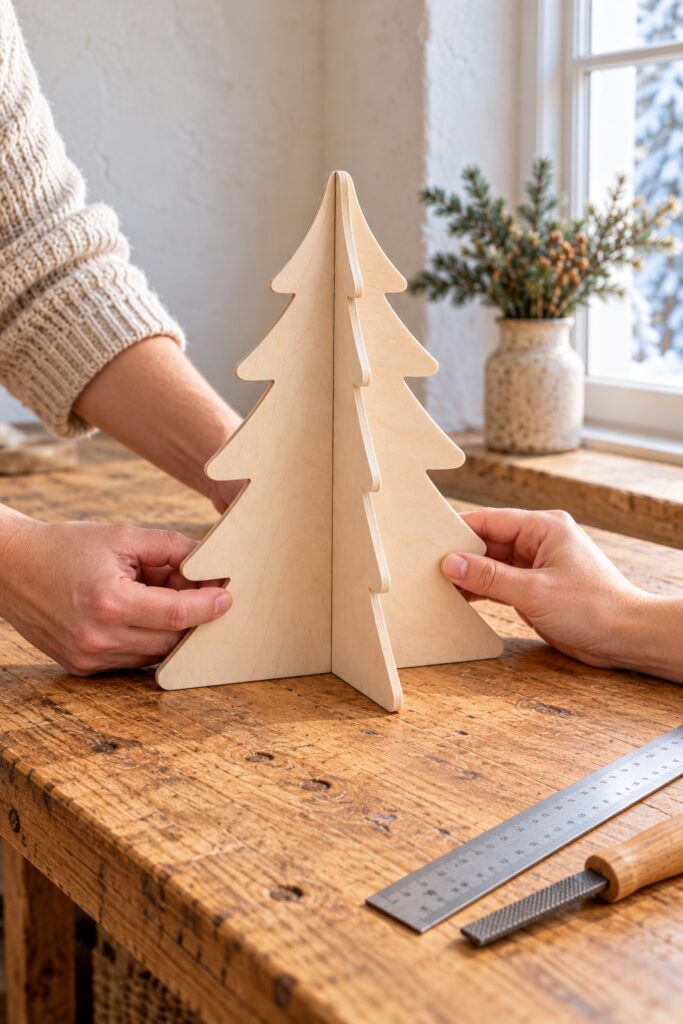
Stand the top slotted profile upright. Turn the bottom slotted profile at right angles and lower it onto the first piece, aligning the two slots. Slide gently until the closed slot ends meet and both bottom edges sit on the same level.
If the joint stops early, take the pieces apart and check for rough slot walls or an uneven closed end. Use a flat file or sandpaper to remove a small amount from the tight area, then try again. Do not hammer the pieces together; narrow plywood can split or lose a surface layer.
Set the assembled tree on a flat table and check for rocking. Confirm that the slots reach the same midpoint and that the lower edges are straight. If the joint is loose enough to wobble, remake the affected profile or adjust the design rather than hiding the problem with paint.
Step 4: Paint the Pieces Separately
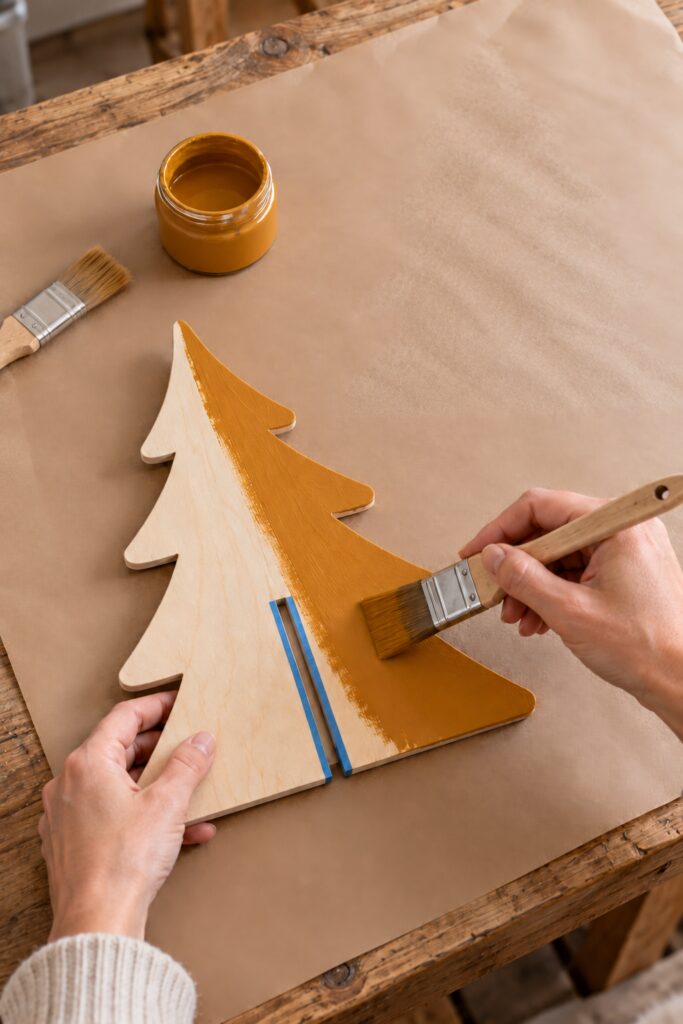
Take the tree apart and remove sanding dust. Protect the inside slot contact surfaces with narrow tape, keeping paint buildup out of the joint. Apply primer where your chosen paint system requires it, then coat the broad faces and outer edges in thin even layers.
Use amber on both profiles of the largest tree and ivory on both profiles of its companion. Leave the smallest pair natural if you like the image’s mix of finishes. Allow each side to dry before turning the pieces, following the paint’s instructions rather than guessing a drying time.
Remove the tape carefully and check the slots. Keep any touch-up near their openings thin enough that the pieces still fit. If you use an optional clear finish, follow its compatibility and curing guidance and protect the slot surfaces again.
Step 5: Reassemble and Check the Finished Group
Wait until the finish is ready for handling and assembly according to its instructions. Refit the paired profiles with gentle pressure, keeping them at right angles. If a trace of paint has tightened the joint, remove the buildup carefully rather than forcing the pieces.
Set each tree on a level surface and check that it stands steadily. Arrange the tallest amber tree slightly behind the smaller natural one, with the ivory tree to the side. Leave visible gaps between the branch outlines so their crossed construction is easy to see.
Tips for Getting the Finished Look
Use broad branch tiers and modestly rounded ends. They make the trees look more like the inspiration and are less delicate than long needle-like points. Keep the matte finish smooth enough to show the shapes without covering the wood in thick paint.
Change the height between trees while keeping each individual pair identical. Two different profiles in one tree can leave uneven feet or mismatched branches. The variation belongs between the finished trees, not between the two halves of a single joint.
Easy Ways to Customize It
Try warm beige instead of ivory or a softer ochre instead of amber. You can also make a matching pair in natural wood if you prefer the grain. Keep the same simple outline so color remains the main difference in the group.
A wider lower tier can help a smaller tree stand more comfortably. Test any size change with an assembled sample before cutting several pairs, especially if you change plywood thickness. Enlarging the template alone doesn’t guarantee that the finished tree will be stable.
Displaying the Finished Trees
Use these as indoor tabletop or shelf decorations on a level surface. Keep them away from edges, open flames, and places where children or pets could knock them down. A light evergreen accent nearby is enough; the trees don’t need hanging ornaments that could pull them off balance.
For storage, separate each pair and wrap painted faces so they don’t rub together. Keep matching halves together. If a tree has become loose or damaged, repair or remake the joint before displaying it again.
Final Encouragement
Make the first pair slowly and give the slot fit your attention. Once that tree stands level and comes apart cleanly, you have a useful pattern for the rest of the group. The quiet shapes and three finishes will carry the idea without copying every detail of the inspiration.