*This post may contain affiliate links for which I earn commissions.*
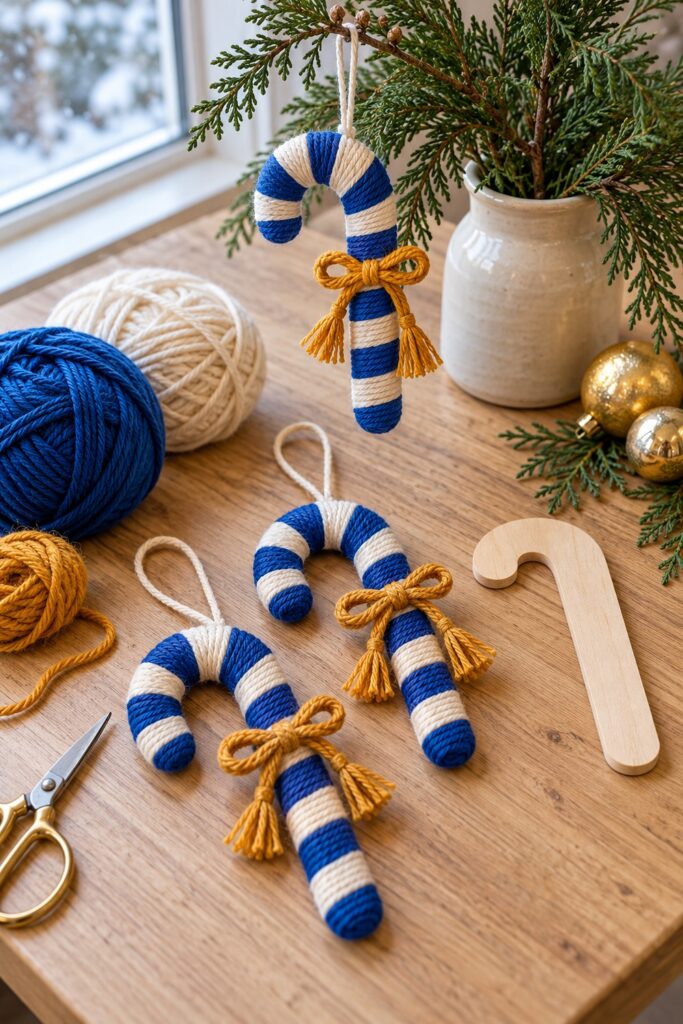
Blue and cream stripes give these candy canes a different Christmas look, and the little saffron bows add a soft finish. The yarn covers the wooden shapes closely enough that they look padded, while the curved outlines still read clearly as candy canes.
This tutorial uses flat wooden blanks as a practical base. You’ll wrap them in separate color bands, hide the ends on the back, and add a small bow with unraveled tails. The curve takes more attention than the straight stem, but working a few turns at a time makes it easier to control.
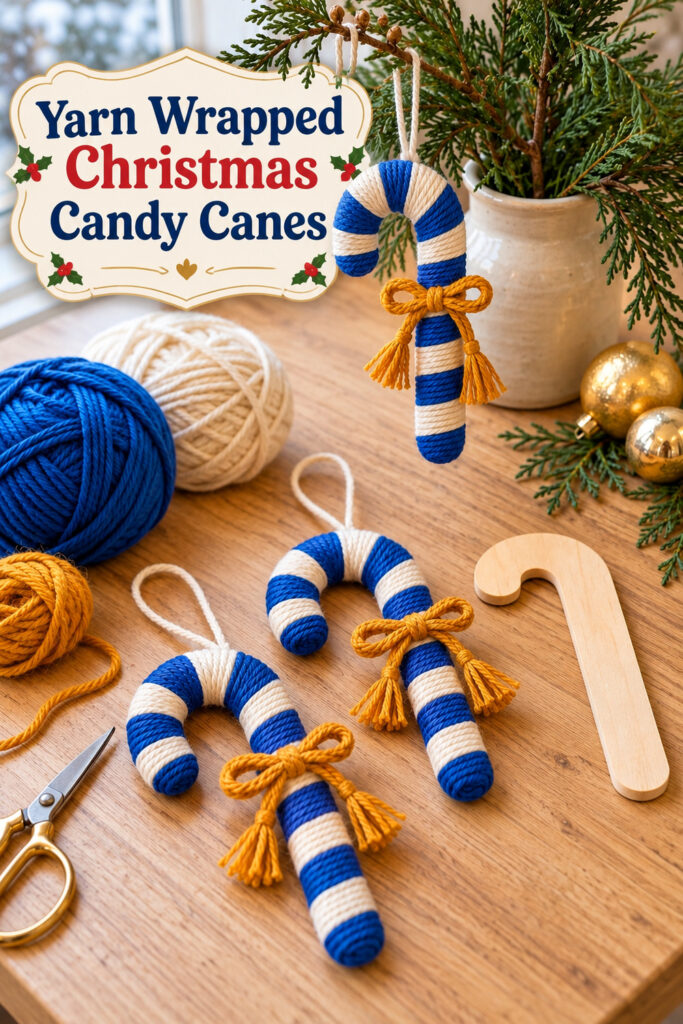
The inspiration and instructional images were created with AI to illustrate a proposed DIY method rather than document a completed physical project.
What You’re Making
You’re making lightweight indoor Christmas ornaments with cobalt and cream yarn stripes, a thin cream hanging loop, and a saffron bow. A blank around four to six inches tall is a suggested starting size, not a measurement taken from the image. Choose a broad single candy cane shape with a rounded hook rather than two crossed canes.
The inspiration has very smooth coverage around the curve. Real wrapping may leave small irregularities there, so the method uses short sections and a little adhesive to keep the turns in place. Slightly different stripe widths are fine as long as the colors remain distinct and the wood is covered.
Materials and Supplies
Materials
- Flat unfinished wooden candy cane blanks with reasonably smooth edges
- Cobalt blue and cream yarn of similar thickness (I linked to Red Heart blue yarn – it’s not exactly “cobalt” but it’s close enough and cheaper than most)
- Saffron yarn with plies that can be separated for the bow tails
- Thin cream cotton cord for the hanging loops
- Clear drying tacky craft glue suitable for yarn and unfinished wood
Tools
- Small sharp scissors
- Fine sanding paper for rough spots on the blanks
- A scrap of paper or a small protective mat for the work surface
- A toothpick or similar applicator for tiny amounts of glue
Optional Finishing Supplies
A blunt tapestry needle can help tuck a stubborn yarn end beneath nearby turns. Small clips may help hold the cord ends while the glue sets, provided they don’t mark the wood or crush the fibers. You won’t need paint or a surface sealer for this indoor textile finish.
Want to Make These Ornaments?
I’ve put together a convenient Amazon supply list featuring hand-picked, well-rated products that match the materials you need to get started.
See My Hand-Picked Supply ListAs an Amazon Associate I earn from qualifying purchases but this doesn’t increase your price at all!
Before You Start
Check that each wooden blank has enough width through the hook to support several yarn turns. An extremely narrow inside curve is harder to cover neatly. Smooth any snagging edges, wipe away the dust, and test a few dry wraps before adding glue. The yarn should sit snugly without requiring so much tension that you bend the blank.
Use the same yarn thickness for both stripe colors. A bulky cream yarn beside a very fine blue one would make the bands uneven. Cut manageable working lengths as you go rather than carrying two whole balls around the ornament. Follow the glue label for setting and drying times; don’t hang the ornaments while the attachment points are still soft.
Step by Step Tutorial
Step 1: Attach the Hanging Loop
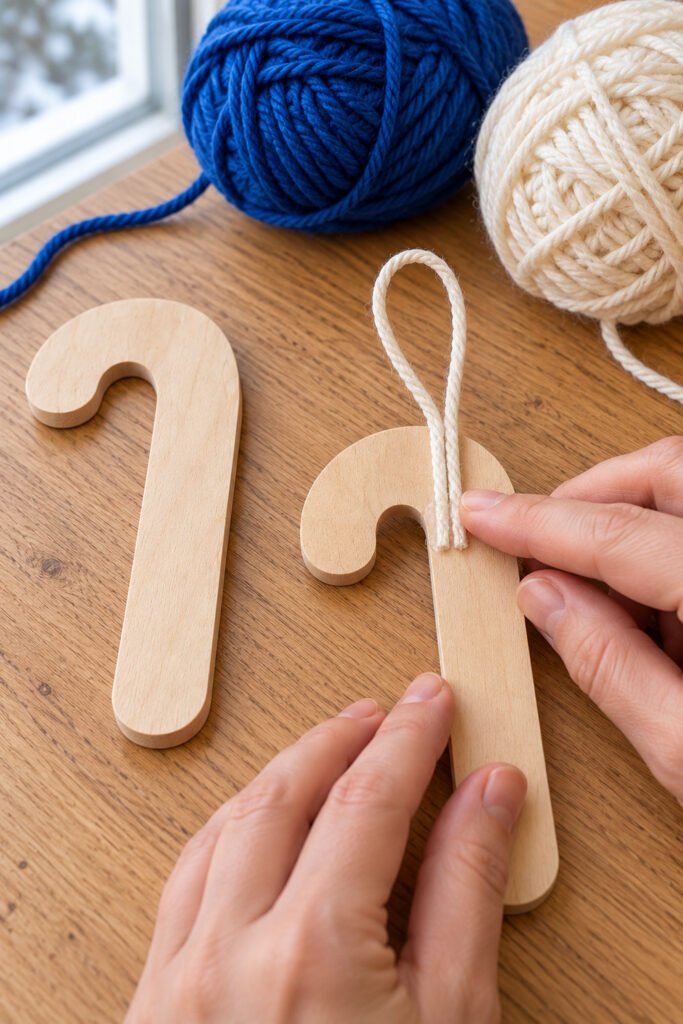
Turn the blank over so you’re working on the back. Cut a short length of thin cream cord and fold it into a loop large enough to slip over your intended branch or hook. Lay the two cut ends side by side down the back of the upper curve, leaving the loop projecting above the candy cane.
Attach the ends with a small amount of craft glue and let them set. Keep them flat so they won’t make a bulky lump under the yarn. Later wraps will cover this glued section and help hold it against the blank. Keep the top of the loop free throughout the wrapping.
Step 2: Wrap the Straight Stem in Color Bands
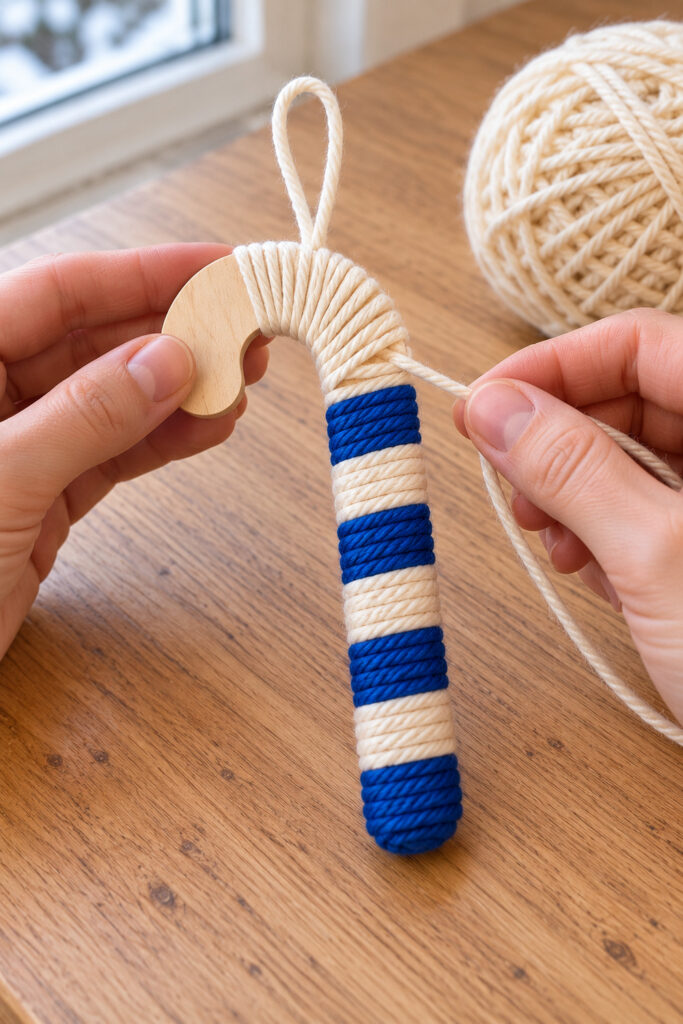
Begin near the rounded bottom end with blue yarn. Glue its short starting tail to the back, then bring the working strand around the end in closely placed turns to cover the exposed tip. Continue upward around the stem. Keep each turn beside the last rather than piling turns on top of one another.
Four to six turns per stripe is a suggested starting point; the actual width depends on your yarn and blank. When the blue band looks right, take the working end to the back, trim it, and secure it with a tiny dab of glue. Start the cream band immediately beside it, keeping both cut ends on the back. Alternate the colors up the stem.
Step 3: Work Around the Hook Slowly
At the curve, put a thin smear of glue beneath only the next few turns. The inside edge has less room than the outside, so let the yarn fan slightly toward the outer edge while keeping it close together on the inner one. Rotate the blank in your hand as you work, checking both faces for exposed wood.
Avoid pulling tight enough to drag the turns toward the narrowest part of the hook. If a gap appears, nudge the neighboring strands while the glue is still workable. A few closer turns are more useful than crossing one strand diagonally over the front to hide the gap. Keep alternating short color bands and work around the hanger ends without catching the free loop.
Step 4: Cover the Last Tip and Secure the Back
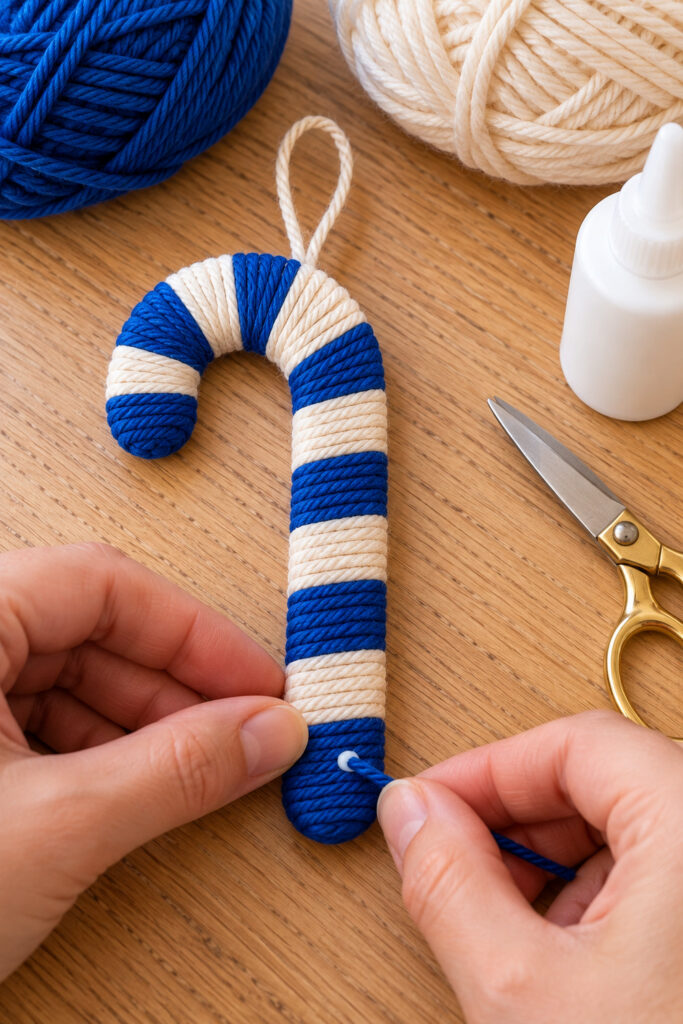
At the hook tip, use a little glue to hold the final turns over the rounded wood, just as you did at the bottom. Turn the ornament over and secure the short final yarn tail against its matching band. Check the earlier color changes and press down any loose ends with another tiny amount of glue.
Set the ornament on its protected work surface until the adhesive has dried as directed. Don’t coat the whole yarn surface with glue. Keeping adhesive at the attachment points and tricky sections preserves the soft woven appearance. Once dry, gently test the hanging loop close over the table before adding the bow.
Step 5: Tie the Bow and Unravel Its Tails
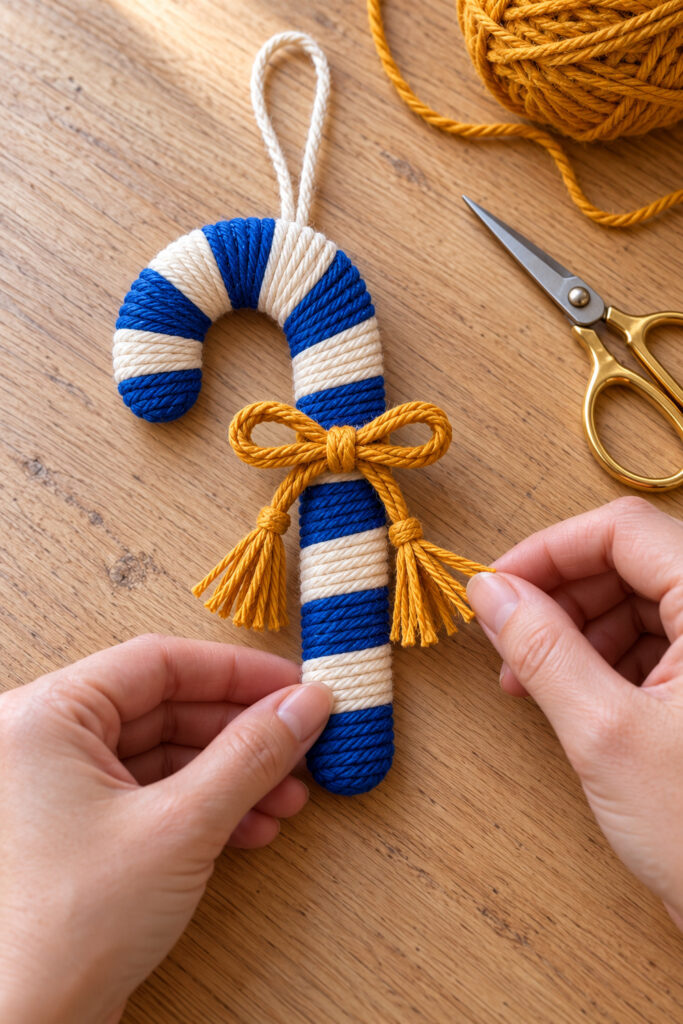
Use a doubled length of saffron cotton yarn for a fuller bow. Wrap it around the upper straight stem just below the hook, tie it securely, and form two small loops. Adjust the loops before tightening the final knot. Leave enough tail length to make short tassels without covering most of the stripes.
Tie a small overhand stop knot in each tail roughly three quarters of an inch above its end, adjusting that suggested distance to suit your ornament. Below each knot, untwist the yarn plies with your fingertips to make the loose fringe. The knots keep the unraveling from traveling into the bow. Trim the fringe ends lightly, and let the ornament dry fully if you used a tiny glue dot behind the bow to keep it from sliding.
Tips for Getting the Finished Look
Keep the blue and cream bands broad enough to see from across the room. Very narrow changes can make the surface look speckled instead of striped. Check the front after every color change so a raised join doesn’t slowly work its way around from the back.
The saffron bow is a small accent. If yours covers the whole curve, shorten the loops or move it slightly farther down the straight stem. Use ordinary plied cotton yarn for tails you can untwist; fuzzy yarn or a firmly braided cord may not separate into the same soft fringe.
Easy Ways to Customize It
You can change the blue to teal or use rust and cream for a warmer version. Keep a light and a darker stripe so the wrapped pattern remains readable. For a group of three, use the same yarns and bow size but let the bands vary slightly instead of trying to count every turn identically.
If your blank has a suitable predrilled hanging hole, you can tie the cord through it before wrapping rather than using glued ends. Keep that opening accessible and plan the adjacent turns around the cord. The demonstrated version uses a loop attached on the back, so there’s no need to drill a new hole.
Displaying the Finished Ornaments
Hang them on an indoor tree, a small branch arrangement, or gift wrapping where they won’t be exposed to dampness. Keep the yarn and cord away from heat and flame. These are decorations rather than toys; place small pieces and loose fibers out of reach of young children and pets. Scissors and adhesives need ordinary adult supervision during crafting.
Final Encouragement
Make the first cane before wrapping the rest. It will show you how wide your bands should be and where the curve needs a little extra attention. Once those choices are settled, the remaining ornaments can share the same blue, cream, and saffron combination without matching every yarn turn.