*This post may contain affiliate links for which I earn commissions.*
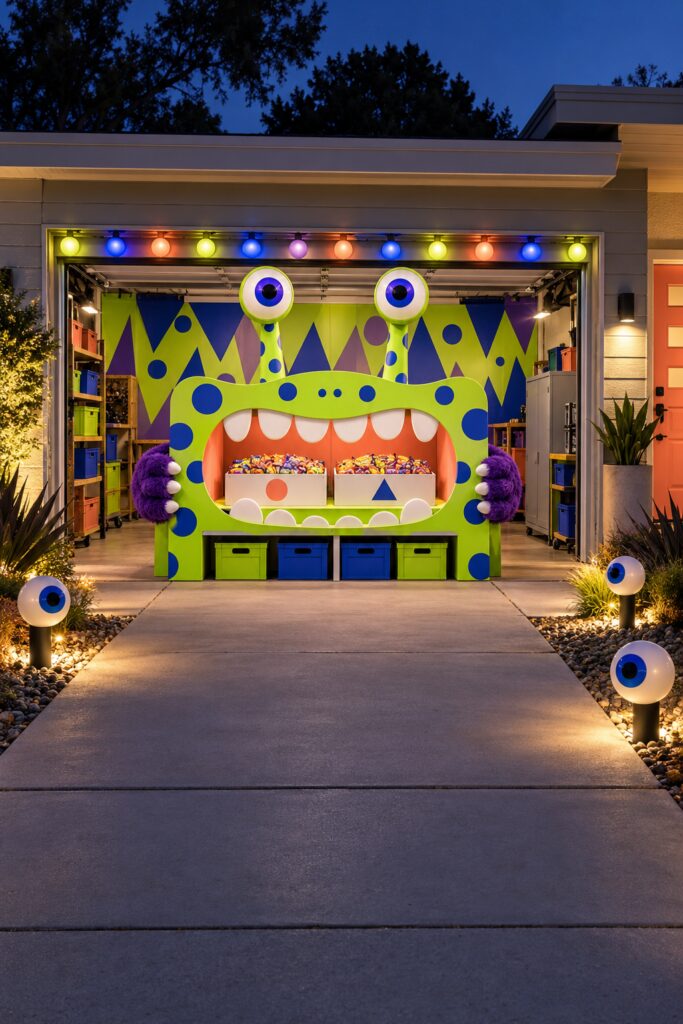
This playful garage candy station looks as though a giant friendly monster has opened its mouth to serve Halloween treats. A waist-high workbench becomes the bottom of the creature’s face, while two shallow candy trays sit inside its coral-colored mouth. Oversized teeth, tall eyeball stalks, fuzzy purple paws, and bold geometric panels complete the transformation.
The display is large enough to make an impact from the sidewalk, but the actual handout area remains simple and organized. Children can walk along the open driveway, select candy from one of two trays, and return to the sidewalk without entering the garage or reaching around complicated decorations.
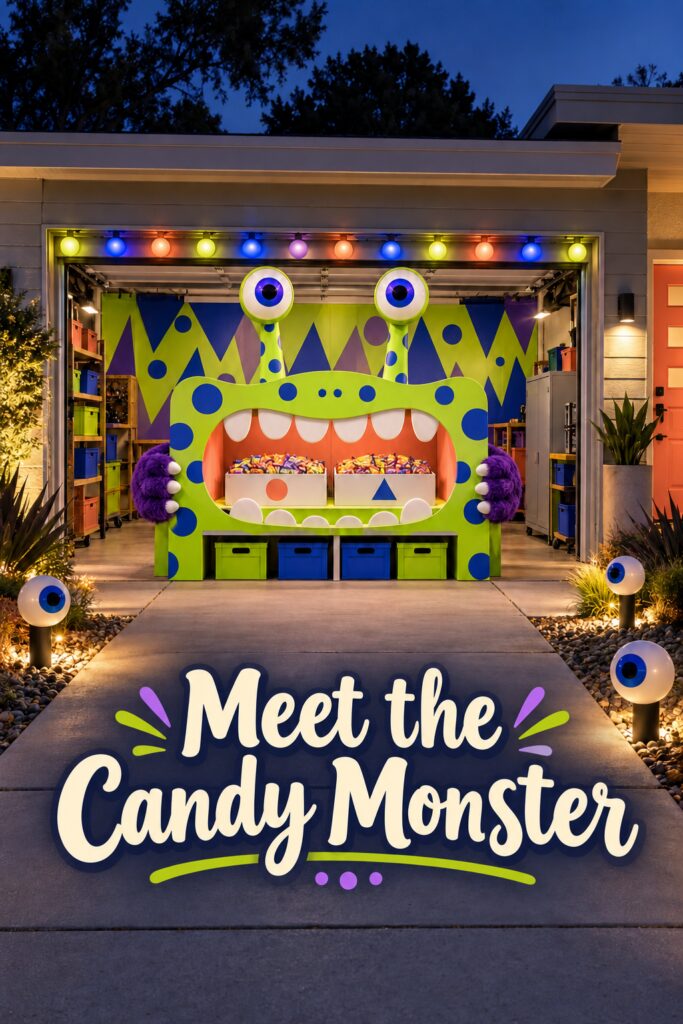
This inspiration image was created with AI.
The Candy Counter Becomes Part of the Monster
The cleverest feature is the way the existing workbench has been incorporated into the design. Instead of placing a bowl in front of a backdrop, the decorating concept turns the entire counter into the monster’s lower face.
The mouth opening surrounds the candy rather than competing with it. White teeth across the top and bottom define the shape, but the shallow treat trays remain easy to see. The orange and coral interior also provides contrast against the wrappers.
This arrangement gives the display one clear destination. Even young visitors can immediately recognize where the candy is located and which direction they should approach.
Build the Face Around a Reachable Surface
A garage workbench, folding table, sturdy console, or temporary counter could provide the foundation for a similar setup. The surface should be low enough for children to reach without stretching, climbing, or leaning into the display.
The monster face can be constructed as a lightweight frame that surrounds the table. Painted foam board, corrugated plastic, cardboard, or thin plywood could create the large lime green shape. Blue circles in several sizes break up the surface and make the character feel more animated.
Keep the mouth opening wide. The side panels and teeth should frame the candy rather than narrowing access to it. Any lightweight pieces near the opening need to be firmly attached so they cannot fall forward when someone reaches for a treat.
Give the Monster an Expressive Face
The tall eyeball stalks make the monster visible above the candy counter and help establish its friendly personality. Large round eyes with blue and purple irises echo the spots on the face.
Find Large Inflatable Eyeballs
Browse current Amazon options that can help you recreate this look.
Browse Suitable Eyeballs on Amazon →As an Amazon Associate I earn from qualifying purchases.
Lightweight spheres, round paper lanterns, or foam shapes could be adapted into oversized eyes. Long decorated tubes or narrow posts can form the stalks. Each support should be anchored behind the main face rather than extending into the candy area.
The wide smile also prevents the monster from feeling frightening. Rounded teeth, uneven spots, and exaggerated eyes communicate silliness rather than danger. This makes the design suitable for younger trick-or-treaters while still feeling unmistakably Halloween themed.
Add Fuzzy Paws for Texture
The purple paws on either side of the mouth provide an important change in texture. Most of the display consists of smooth painted panels, so the shaggy material makes the character feel more dimensional.
Faux fur can be wrapped around lightweight hand-shaped forms or attached to padded side pieces. Small cream claws can be added along the inner edges. Keep the paws outside the treat opening so children do not have to reach through or beneath them.
Purple works especially well because it contrasts with the lime face and connects to the geometric background. Another accent color could work, but repeating a shade already used elsewhere will make the finished display feel more intentional.
Extend the Design with Geometric Wall Panels
The back wall is covered with oversized triangles and circles in lime, navy, purple, and blue. These shapes fill the garage interior without introducing another character or theme.
Large paper panels, removable fabric backdrops, painted foam boards, or temporary wall coverings could create a similar effect. The shapes do not need to be perfectly even. Their varied sizes make the background feel lively and help disguise ordinary garage storage.
Position the tallest triangles behind the eyeball stalks to draw attention upward. Smaller circles can repeat the monster’s spots and connect the backdrop to the face.
If the full garage wall cannot be covered, concentrate the pattern directly behind the candy counter. A smaller backdrop can still frame the monster and reduce visual distractions.
Use Two Candy Trays to Keep Things Moving
The two shallow trays make the serving area look balanced and can help several children collect treats without reaching into one deep container.
Choose containers with low front edges so the contents remain visible. The trays can be lined, painted, or placed inside decorated boxes that coordinate with the monster. Simple geometric symbols on the front can continue the circle-and-triangle pattern.
Dividing the candy between two trays also allows one container to be refilled while the other remains available. Extra supplies can be stored in bins beneath the counter where they are accessible to the person supervising the station but concealed from the main view.
Guide Visitors with Eyeball Pathway Markers
The illuminated eyeballs beside the driveway are not just decorations. They form a visual path between the sidewalk and the candy counter.
To recreate the effect, use lightweight round eyeball decorations on short stakes or stable bases. Place them beside the driveway rather than on the walking surface. Low landscape lights can illuminate the markers and make the edges of the route easier to see.
The pathway should remain wide and free of cords. If electric lighting is used, run outdoor-rated cords along protected edges and secure them where guests cannot trip over them.
Frame the Garage with Playful Lighting
A row of glowing bulbs across the garage opening introduces the monster palette before visitors even notice the smaller details. Lime, blue, orange, and purple bulbs repeat colors found in the face and backdrop.
Interior work lights illuminate the candy area from both sides. This is especially important because an open garage can become shadowy after sunset, even when the driveway appears well lit.
Combine overhead decorative lights with focused lighting near the counter. Avoid aiming strong lights directly toward approaching visitors. The goal is to illuminate the monster and candy without producing glare.
Keep the Garage Functional and Visitor Friendly
Before decorating, remove tools, chemicals, cords, sharp objects, and unstable storage from the visible visitor area. Side shelving can remain if everything is secure, but the candy counter should feel clearly separated from normal garage storage.
Leave the center of the driveway open. Place pathway decorations in the landscaping or along the outer edges instead of creating an obstacle course.
Secure the large face panels, teeth, paws, and eyeball stalks before the event begins. Test the display from a child’s height to confirm that the candy is reachable and no edges project into the handout opening.
Shop Similar Pieces for the Monster Candy Station
Look for a Folding Workbench or Serving Table
Choose a stable surface at a comfortable handout height. Storage bins underneath can hold additional candy and supplies.
Add Lightweight Panels for the Monster Face
Foam board, corrugated plastic, cardboard, or thin wood can form the mouth, cheeks, and spotted outer frame.
Shop Similar Shallow Candy Trays
Wide containers with low sides keep the treats visible and reduce the need for children to reach deeply into the display.
Look for Oversized Eyeball Decorations
Use large eyes for the stalks and smaller outdoor versions as pathway markers.
Add Purple Faux Fur for Monster Paws
A small amount of shaggy fabric can introduce texture and help the hands stand out against the smooth painted panels.
Shop Similar Outdoor Decorative Lights
Multicolored bulbs, small spotlights, and low pathway lights can keep the entire setup visible after sunset.
A Final Styling Tip
Design the candy handout area first, then construct the monster around it. If the trays stay reachable, the driveway remains open, and the face is recognizable from the sidewalk, the supporting decorations can be as simple or elaborate as the space allows.