*This post may contain affiliate links for which I earn commissions.*
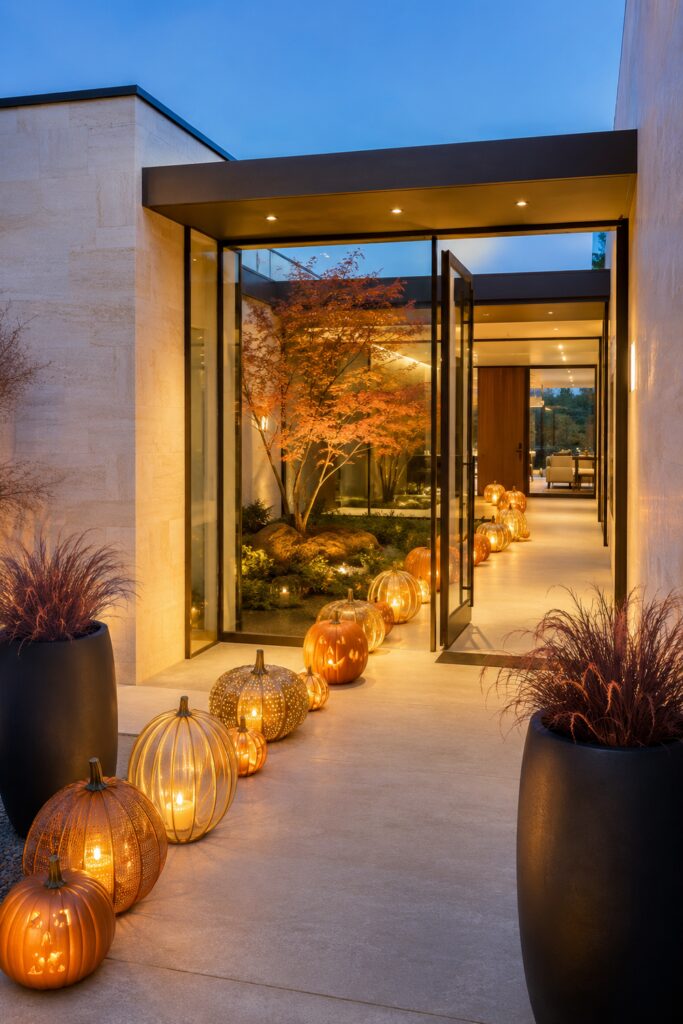
This modern glass breezeway turns a familiar Halloween decoration into an illuminated procession. Pumpkins begin near the exterior walkway, continue through the open glass doors, and disappear into the house in a long ribbon of warm light.
The concept feels dramatic because the lanterns do more than decorate the front step. They lead the eye and the visitor through the architecture. Perforated metal pumpkins cast pinpoints of light, translucent ribbed designs glow from within, and carved jack-o’-lanterns add just enough traditional Halloween character.
Large black planters and burgundy ornamental grasses frame the pathway, while the amber-lit tree beyond the glass makes the whole entrance feel enveloped in autumn.
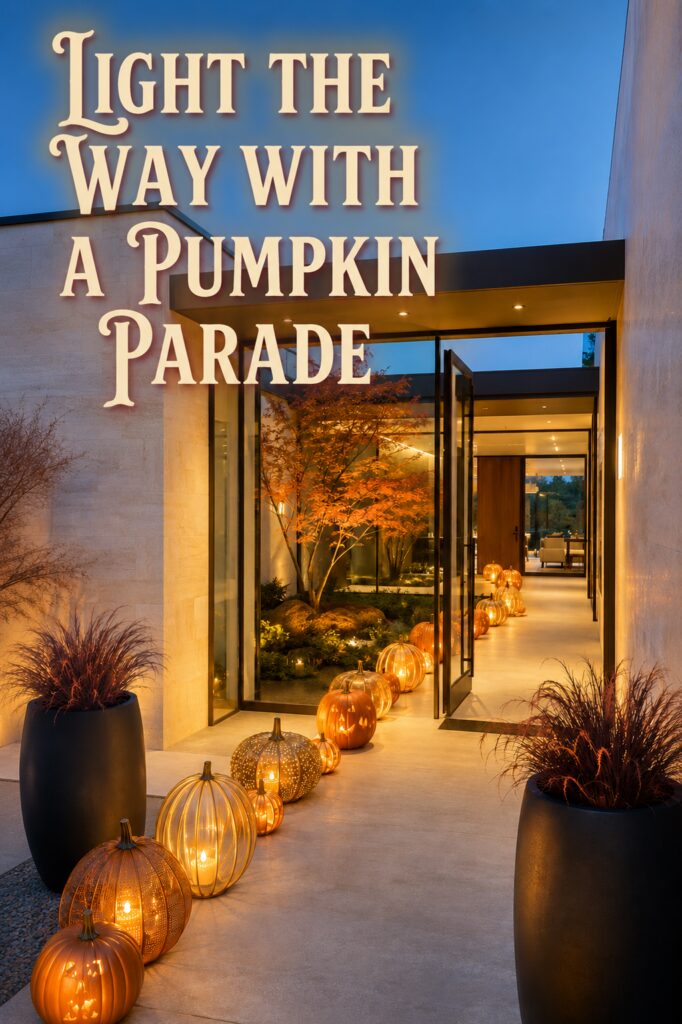
Image disclosure: This inspiration image was created with AI. It is intended to inspire a decorating effect that readers can recreate with similar lanterns, pumpkins, lighting, and planters.
Why This Pumpkin Procession Feels So Dramatic
The glowing line works as both decoration and visual direction. It begins with larger lanterns in the foreground and gradually becomes smaller as it moves through the breezeway. This natural change in scale emphasizes the depth of the entry.
The pumpkins also share a warm amber glow even though their surfaces are different. Some have pierced metal shells, some resemble ribbed glass, and others have carved faces. The consistent light color prevents the varied designs from feeling disconnected.
Cool blue evening light provides contrast around the building. Against that quiet background, the amber lanterns become the clear focal point.
Establish One Continuous Route
The most important step is choosing where the procession will begin and end. It might start beside a driveway, continue across a covered porch, pass through an entry, and finish near a console table.
The line does not need to be perfectly straight. A gentle curve looks more natural and allows the pumpkins to follow the edges of the architecture.
Before adding decorations, determine how much walking width the route requires. Keep pumpkins, cords, and lighting safely outside that area. Doors should open completely, and steps, thresholds, railings, and changes in floor level must remain easy to see.
In a home without a breezeway, the procession could follow one side of a porch, curve around an entry garden, or lead from a front gate to the door.
Mix Pumpkin Lanterns With Different Surfaces
The display gains much of its beauty from the way each pumpkin releases light.
Pierced metal lanterns create hundreds of small glowing dots. Ribbed translucent pumpkins produce broader bands of light. Carved designs introduce recognizable faces and irregular openings.
Include all three effects if possible, but keep the palette controlled. Copper, aged brass, amber, clear ribbed glass, and natural orange will coordinate more easily than a mixture of unrelated painted finishes.
Repeating each material at least twice will help the arrangement feel intentional. For example, place one perforated lantern near the beginning and another several feet farther along the route.
Look for Pierced Metal Pumpkin Lanterns
Choose designs with openwork or perforations that allow the internal light to create visible patterns. A warm copper, bronze, or aged metal finish will suit the image particularly well.
Add Ribbed or Mercury-Glass Pumpkin Lights
Translucent pumpkins introduce a more refined alternative to a traditional jack-o’-lantern. Select several sizes if available and look for internal lights with a warm rather than cool white tone.
Include a Few Carved Faces
The jack-o’-lantern faces appear only occasionally, which keeps the procession elegant while making its Halloween theme unmistakable.
A small number of carvable faux pumpkins offers more control than relying on fresh pumpkins for the entire display. Faux versions can be prepared in advance, reused in later years, and paired with battery-operated lighting.
Vary the faces rather than repeating one stencil. One can be friendly, another surprised, and a third more traditional. Keep the openings large enough for the internal light to show clearly from the walkway.
Find Carvable Faux Pumpkins
Look for realistic shapes, several sizes, and materials specifically described as carvable. Follow the product’s cutting directions and use appropriate tools and hand protection.
Use Flameless Lighting Throughout
The number of lanterns and their proximity to doors, plants, and a walking route make flameless lights the practical choice.
Battery-operated LED candles can provide the flickering effect of real candlelight without open flames. Waterproof or weather-resistant models are preferable for exposed outdoor areas. A timer or remote control will make a large collection easier to operate.
Confirm that each light and decorative container is approved for its intended indoor or outdoor location. Protect battery compartments from moisture, and never assume a covered porch remains completely dry during wind-driven rain.
Use only lights that fit comfortably inside the pumpkin without touching or overheating its shell.
Add Outdoor-Rated Flameless Candles
Choose warm amber LEDs, automatic timers, and weather-resistant housings. Smaller candles or tea lights may work better inside compact pumpkins, while larger lanterns can hold taller pillar-style lights.
Vary the Spacing and Scale
The pumpkins in the foreground are large and widely spaced. Farther inside, the spacing becomes tighter and the objects appear smaller. This creates a stronger perspective than a row of identical lanterns would.
Begin with one substantial pumpkin near the entrance to the path. Follow it with a medium lantern, then a smaller piece. Repeat that general rhythm without making it exact.
Occasional pairs can add interest, but avoid creating clusters so large that the procession loses its continuous shape. Empty space is part of the design because it allows each glow to register separately.
Let Glass Multiply the Light
The breezeway’s glass walls reflect the pumpkins, making the display appear fuller than it actually is. Similar results can happen beside windows, glass doors, glossy tile, or polished stone.
Place a few lanterns near reflective surfaces and view them from the main approach after sunset. A slight adjustment in position may produce a stronger reflection.
Be careful not to place hard metal or glass decorations where they could strike a door panel. Preserve enough clearance for doors to swing and for people to enter without brushing the display.
Frame the Procession With Dark Planters
The two oversized black planters mark the threshold and give the narrow trail of lanterns visual boundaries. Their matte surfaces also provide contrast against the warm light and pale stone.
Tall tapered or rounded planters will reproduce this architectural effect. Fill them with burgundy ornamental grass, dark foliage, or another airy plant that catches the surrounding light.
The planters should be substantial enough to remain stable outdoors. Follow drainage and planting recommendations, and consider the mature size and climate needs of live grasses before selecting them.
Look for Tall Matte-Black Planters
Choose clean shapes, outdoor-rated materials, drainage provisions, and a scale that suits the entry without narrowing the walking path.
Add Burgundy Ornamental Grass
Live grasses provide natural movement, while UV-resistant artificial stems offer a low-maintenance seasonal option. Deep burgundy or near-black foliage will relate more closely to the image than vivid green plants.
Light One Nearby Tree or Planting Bed
The illuminated tree gives the center of the breezeway a second layer of amber light. It makes the procession feel integrated with the landscape instead of placed on an empty floor.
If the property already has a small ornamental tree near the entry, a warm outdoor-rated landscape spotlight can reveal its branching structure. Aim the fixture carefully to avoid glare through windows or toward neighbors and streets.
This layer is optional. The pumpkin path remains effective on its own, particularly when porch or entry lighting already provides a warm background.
Adapt the Parade to a Standard Porch
A long glass passage is not required. Six to eight pumpkins can form a convincing procession along one side of a front walk.
Start with the largest lantern near the public end of the path and finish with two smaller glowing pumpkins near the door. Add one black planter at the entrance or use matching planters to frame the doorway.
The important ingredients are a visible route, varied pumpkin textures, a consistent warm glow, and generous clearance for visitors.
Final Styling Tip
Test the entire arrangement from the sidewalk or driveway after sunset. Move any lantern that merges visually with another, interrupts the route, or creates a tripping hazard. The strongest procession will feel continuous while every pumpkin remains easy to distinguish.