*This post may contain affiliate links for which I earn commissions.*
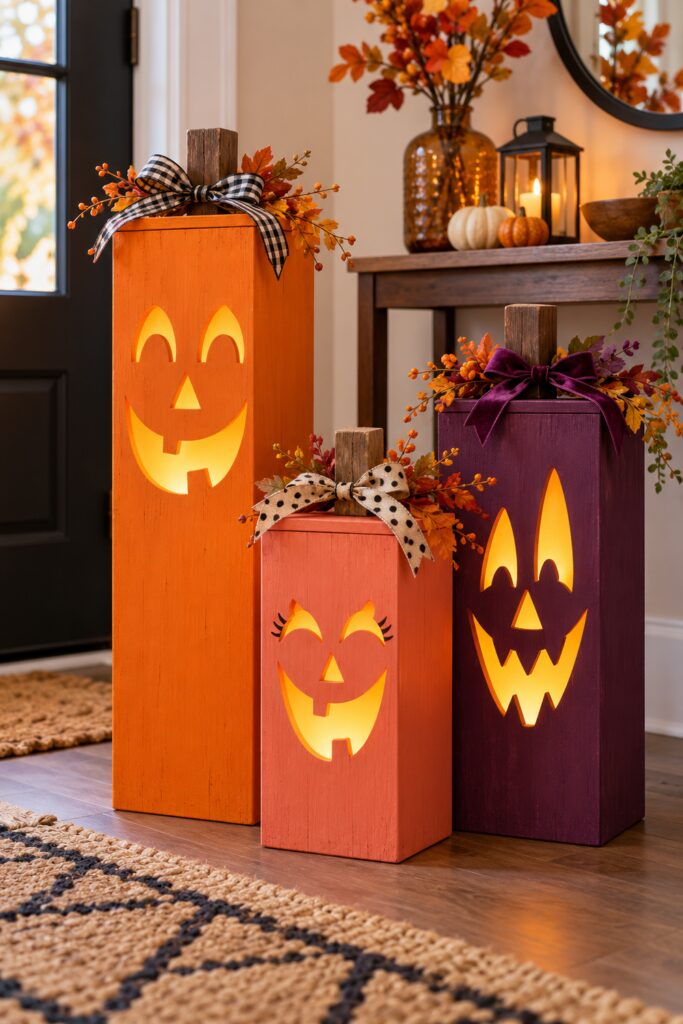
Three differently sized jack o lantern columns make a lively Halloween entry display. The inspiration image combines an orange smiling face, a coral face with lashes and a plum toothy grin, each lit from within and topped with a rustic wood stem and ribbon. This tutorial adapts that visual into freestanding hollow wood boxes with battery powered lights.

The inspiration image and instructional demonstrations were created with AI. The directions below describe a practical construction plan rather than a photographed build.
What You Are Making
Make three lightweight rectangular plywood columns with face openings on the front, a removable back for light access and a broader base for stability. Suggested heights are 36, 25 and 29 inches, but keep each box shallow enough for its footprint. Display them indoors on a level floor, with the shorter, coral box slightly forward so all three faces remain visible.
Materials and Supplies
- Quarter inch plywood for fronts sides tops and backs plus thicker plywood for stable bases (I’d get this from Home Depot)
- Wood glue
- Brad nails or small countersunk wood screws for the front and side panels
- Small screws for the removable back panels and wood stem blocks
- Amber translucent plastic sheet, vellum, or gel diffuser sheets to put behind the faces
- Sturdy tape, removable clips or small screws with washers to hold the amber sheets in place
- Battery operated LED puck lights or battery light strings (lights that have a remote control might make it easier to use these rather than having to remove the backs every time to turn on the internal lights)
- Primer
- Orange, coral, and deep plum spray, craft or furniture paint
- Black craft paint for eyelashes
- Black and white checked ribbon, spotted ribbon, and plum velvet ribbon
- Faux autumn leaves and small berry stems
- Sandpaper
- OPTIONAL: felt pads or internal base weights to keep the bottom from scratching flooring surfaces
Tools
- Measuring tape pencil square and clamps
- Saw for cutting the panels
- Jigsaw with a fine wood blade for faces
- Drill with starter bit and screwdriver
- Paint brushes
- Eye protection
Want to Make These Pumpkin Columns?
I’ve put together a convenient Amazon supply list featuring hand-picked, highly rated products that match the materials list for this project to save you time.
See My Hand-Picked Supply ListAs an Amazon Associate I earn from qualifying purchases but this doesn’t increase your price at all!
Making the Columns
Read the instructions all the way through first to make sure you have a thorough inventory and materials list that suits the way you want to build and use these columns.
When you’re ready, gather all of your supplies, set up your work space, and make sure you have sufficient ventilation when you use glue, primer, and paint.
Step 1: Plan three faces and cut the panels
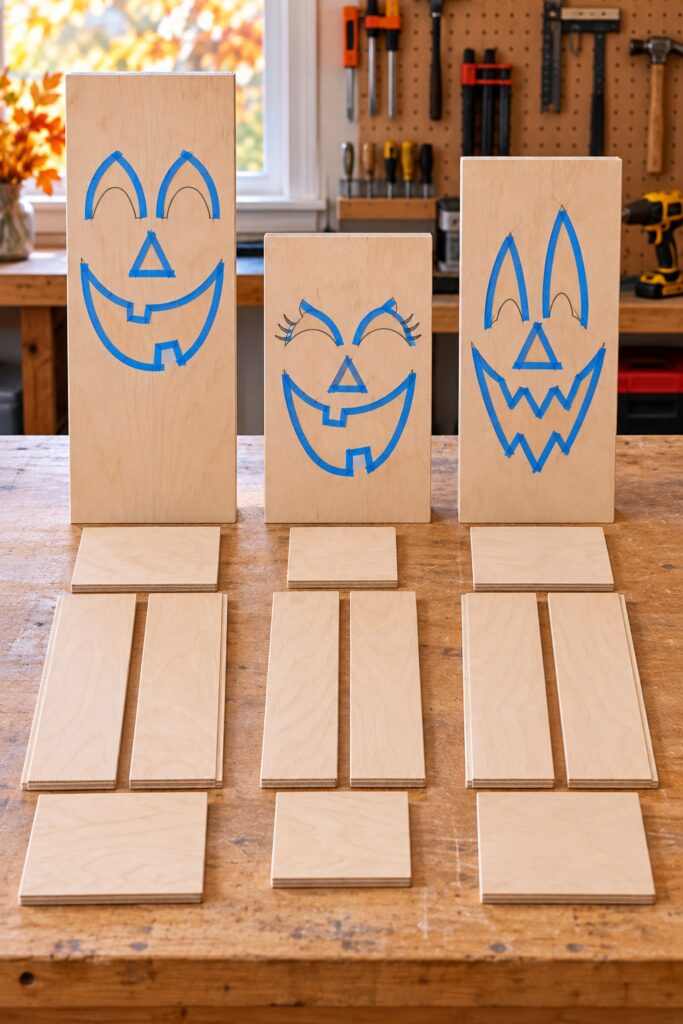
Choose finished sizes of about 12 by 36 inches, 11 by 25 inches and 10 by 29 inches, adjusting to your space. You can make your columns square or rectangular. What you decide might be best based on the size of your plywood sheets.
Cut a plywood front, two sides, a top and a slightly wider base for each box.
Using a pencil, draw out the face you want to carve into the front panel. You can print out designs you find online to help with this if you’re not particularly artistic.
Make sure you leave enough room around the edges of the face that you don’t weaken the wood panels. This means you should not draw your faces all the way to the panel edges.
(Note: in the image below it looks like the panels are cut as tongue and groove to slot into one another – feel free to do this if you’re comfortable doing so but you can also just cut square edges and use screws, nails or glue to complete the project.)
Step 2: Cut and sand the glowing openings
Clamp each front to a stable bench. Drill starter holes inside the eyes, nose and mouth, then use a jigsaw to cut the openings. (You don’t need to cut the eyelashes. Those can be painted on.)
The cheerful orange face, coral face with eyelashes and toothy plum face can be simplified to shapes you can cut cleanly. Use eye protection and follow the tool instructions; keep hands clear of the blade.
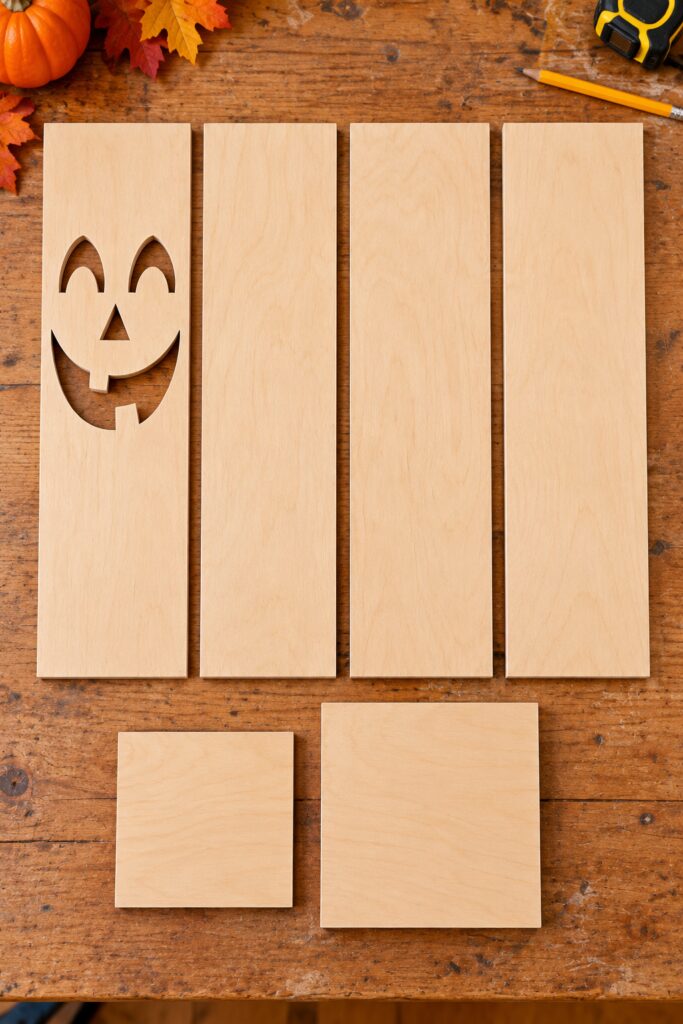
Once everything has been cut, sand the edges and every exposed corner.
Step 3: Assemble stable hollow boxes
You need to have a way to access the battery operated lights inside. To do this, you’re going to attach the back panel differently than the other pieces. You’re going to use small screws so that you can use a screwdriver or drill to remove them.
To make it easier to get the back panel out, you can also cut it slightly shorter than the other panels so that there’s a gap at the top where you can fit your hand in and pull it out OR you could drill a large hole towards the top so that you can reach a finger into the hole and pull the back panel out after it has been unscrewed.
Choose which method you prefer and then either cut a couple of inches off of the top of your back panel or drill a 1-2″ hole about 2-3 inches from the top of the back panel.
Dry fit each front, side and top to make sure everything fits as it should.
Join the side panels to the front with wood glue and brad nails or countersunk screws, then attach a base wider than the box.
Set the top aside until the lighting is installed.
Keep the bottom flat, check each box for rocking and add weight inside the base if the finished column is top heavy. Do not permanently seal the light compartment.
You’ll use screws to secure the back panel only after you’ve finished adding the amber sheet, vellum, or diffuser to the backs of the faces.
Step 4: Paint three coordinated colors
Prime the bare wood, then paint the tallest box orange, the shortest coral and the remaining one deep plum.
Apply thin coats and allow the finish to dry according to the paint instructions. A slightly textured finish can resemble the inspiration image, but keep the edges of the face openings clean so the glow looks crisp.
Remember to paint the tops and backs even though they are not yet secured to the columns.
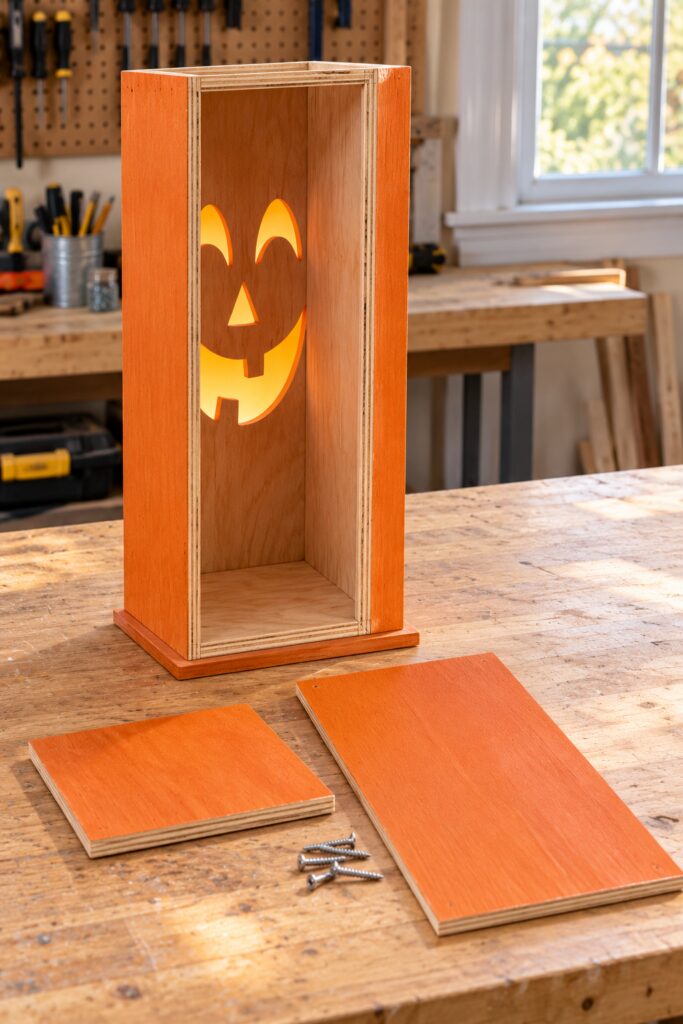
Step 5: Diffuse and light each face
Cut amber translucent plastic larger than each set of face openings. Attach it to the inside of the front panel with small removable clips or short screws and washers, keeping it flat and clear of the light.
Place a battery operated LED puck or short battery string inside each box and test the glow.
Test that the lights work and that you get the glow you want from the front of each column and then secure the backs with removable screws.
Never use a flame or a hot lamp inside wood. Follow the light manufacturer’s clearance and battery guidance.
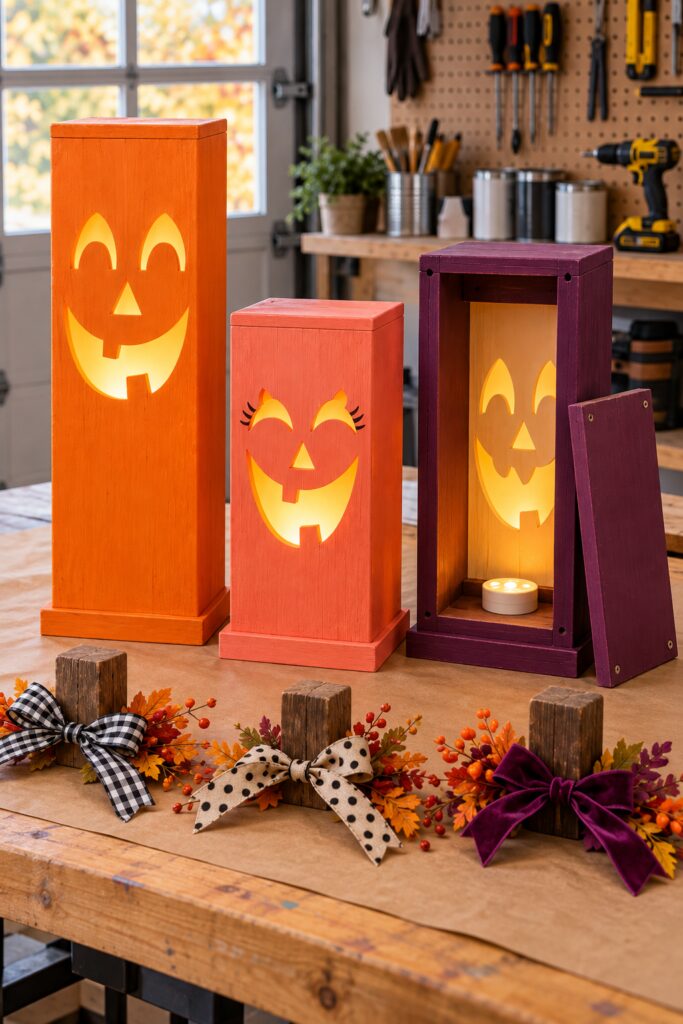
Step 6: Add stems ribbons and foliage
Attach a short wood block to each top from underneath with a screw and glue before finishing, or use a predrilled top with a secure fastener.
Tie checked, spotted and plum ribbon around the stems. Tuck a small bunch of faux autumn leaves beneath each bow, fixing it to the top with a suitable craft adhesive like hot glue.
Keep the trim away from any light compartment and do not cover the removable back.
Use brad nails to secure the tops to each column but remember NOT to nail into the back panel as you want that to be removable!
Tips for Getting the Finished Look
Vary the three face expressions as well as the heights. Use a pale amber diffuser for a warm glow and test it in the room before deciding whether it needs a second battery light.
Keep the floral trim clustered near the stems so it does not hide the faces. Let the wood stems be slightly rough, but sand any touchable edges.
Easy Ways to Customize the Columns
Use a narrower footprint for a console display, provided the base remains stable, or make a single column before committing to all three.
Change the ribbons to suit the room where you plan on using the columns.
If cutting three faces is beyond your tools or comfort, a local wood shop can cut the panels from your clearly marked drawings; you can then finish and assemble them yourself.
Displaying and Using Them
Place the boxes on a flat indoor floor away from door swings, walkways, curtains and heaters.
Check that the bases do not tip when lightly nudged and that the backs open without moving the display into traffic.
Switch off the lights when unattended and inspect batteries as directed by the manufacturer. For a covered porch, use suitable exterior materials and weather rated lights; this indoor version is not built for rain.
The trio works because its scale, color and different expressions make the simple box forms feel like characters. Make the faces clean and the bases secure first; ribbons and leaves can be adjusted after you see the columns glowing together.