*This post may contain affiliate links for which I earn commissions.*
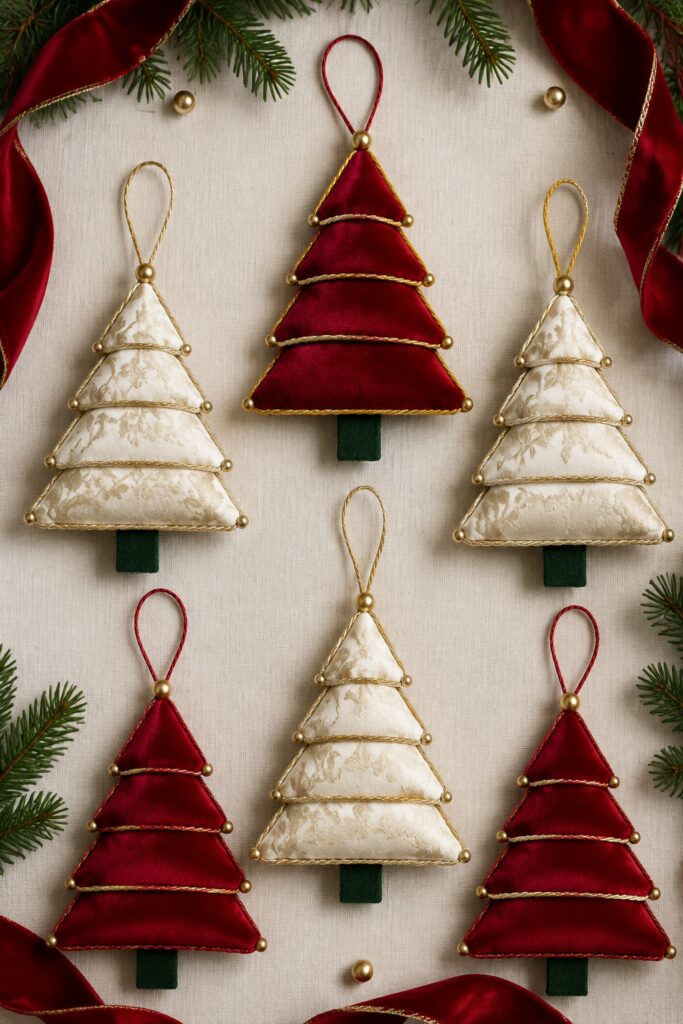
Softly padded fabric tiers give these handmade tree ornaments their distinctive dimensional shape. Deep red velvet creates a rich traditional look, while ivory damask offers a lighter alternative that still feels festive. Narrow gold cord and small gold beads bring the separate layers together visually.
The inspiration shows four graduated sections forming each tree. This tutorial turns that idea into a practical sewing project by constructing the sections as individual padded triangles and securing them to a felt backing. You can make one ornament first or prepare several assembly-line style for a coordinated set.
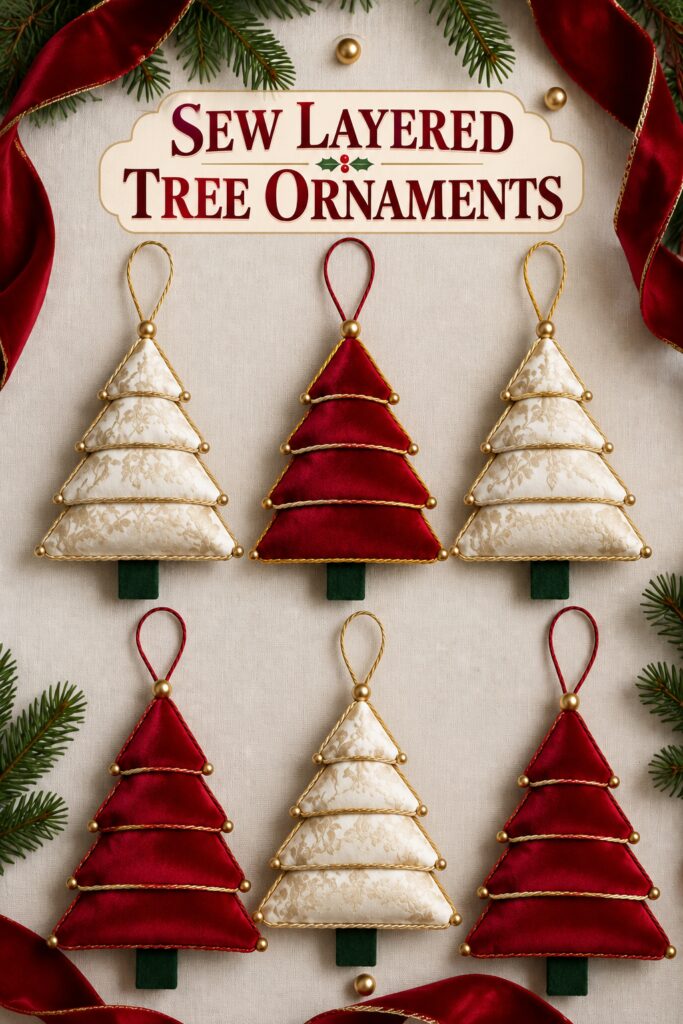
The inspiration and instructional images for this project were created with AI. This tutorial translates the visual idea into a practical project you can recreate at home.
What You’re Making
Each ornament consists of four lightly padded fabric triangles arranged from smallest to largest. The sections overlap to form a tree approximately 6 to 8 inches tall, depending on your templates.
Gold cord follows the edges of the tiers, while small beads accent selected corners. A dark green felt backing stabilizes the ornament, forms the trunk and supports the hanging loop.
The AI inspiration suggests nearly seamless padded sections. The practical version uses small hand stitches and a concealed felt spine to keep the tree secure without flattening its softly rounded shape.
Materials and Supplies
Materials
- Red velvet, ivory damask or another medium-weight decorative fabric
- Lightweight cotton fabric for the backs of the tiers, if you do not want to use decorative fabric on both sides
- Lightweight fusible interfacing, especially for slippery or loosely woven fabric
- Dark evergreen craft felt or wool-blend felt
- Polyester fiberfill
- Narrow gold twisted cord, approximately 1/8 inch wide
- Small gold beads, approximately 8 to 10 millimeters
- Narrow cord or ribbon for the hanging loop
- Coordinating all-purpose thread
- Hand-sewing thread matching the red fabric
- Paper or lightweight cardstock for templates
Tools
- Sewing machine
- Hand-sewing needle
- Fabric scissors or rotary cutter and cutting mat
- Straight pins or sewing clips
- Fabric marking pen or pencil
- Ruler
- Point turner or blunt wooden tool
- Iron and pressing cloth
- Optional fabric-safe adhesive for controlling the gold trim
Want to Make These Christmas Trees?
I’ve put together a convenient Amazon supply list featuring hand-picked, well-rated products that match the materials list for this project.
See My Hand-Picked Supply ListAs an Amazon Associate I earn from qualifying purchases but this doesn’t increase your price at all!
Before You Start
Choose the finished height of your ornament before drawing the templates. For a tree approximately 7 inches tall, make four triangles with suggested base widths of about 2½, 3½, 4½ and 5½ inches. These measurements are flexible. What matters most is an even increase from one tier to the next.
Allow approximately ¼ inch around every triangle for seam allowances. Cut test templates from paper and overlap them before cutting fabric. About one-quarter of each lower tier should disappear beneath the tier above it.
If you are working with velvet, determine the direction of the nap and cut every front piece with the nap running the same way. Press velvet carefully from the back with a pressing cloth rather than placing the iron directly against the pile.
Step-by-Step Tutorial
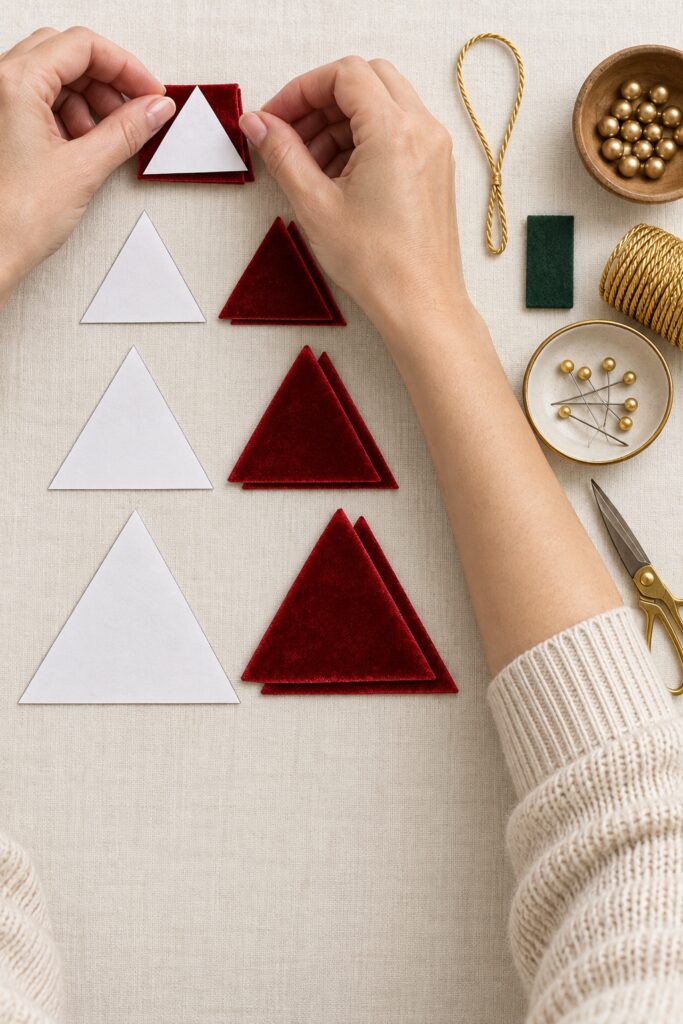
1. Draw four graduated triangle templates
Draw an isosceles triangle for the lowest tier, then create three progressively smaller versions. Keep the height-to-width proportions similar so the assembled sections form one balanced tree rather than four unrelated triangles.
Label the templates from smallest to largest. Stack them temporarily with the smaller pieces overlapping the upper portions of the larger ones. Adjust the shapes until the outside edges create a pleasing tree silhouette.
2. Cut the fabric pieces
For each tier, cut one front and one back triangle. An ornament made with decorative fabric on both sides will look finished from any angle. To conserve velvet or damask, you can use a coordinating cotton for the backs.
Cut lightweight interfacing for the velvet or damask pieces if the fabric stretches, shifts or frays easily. Trim the interfacing so it stops just inside the seam allowance, then fuse it in place according to its instructions.
Cut a dark green felt strip approximately 1 to 1½ inches wide. It should extend from behind the top tier to the bottom of the tree, with enough felt showing below the final tier to form the trunk.
3. Prepare the gold-edged tiers
Cut enough gold cord to follow the three edges of each triangle, plus a little extra for joining the ends.
Pin or clip the cord around the right side of each front triangle. Position it so the decorative portion will remain visible just beyond the completed seam. Begin and end along the bottom edge rather than at the pointed top.
Baste the cord to the front piece using a zipper foot if that makes it easier to stitch close to the trim. Keep the cord relaxed as you sew. Pulling it tightly can cause the finished triangle to curl.
Place the corresponding back triangle over the front with right sides together. Stitch around the shape, following the previous basting line and leaving a 1½-inch opening along the bottom.
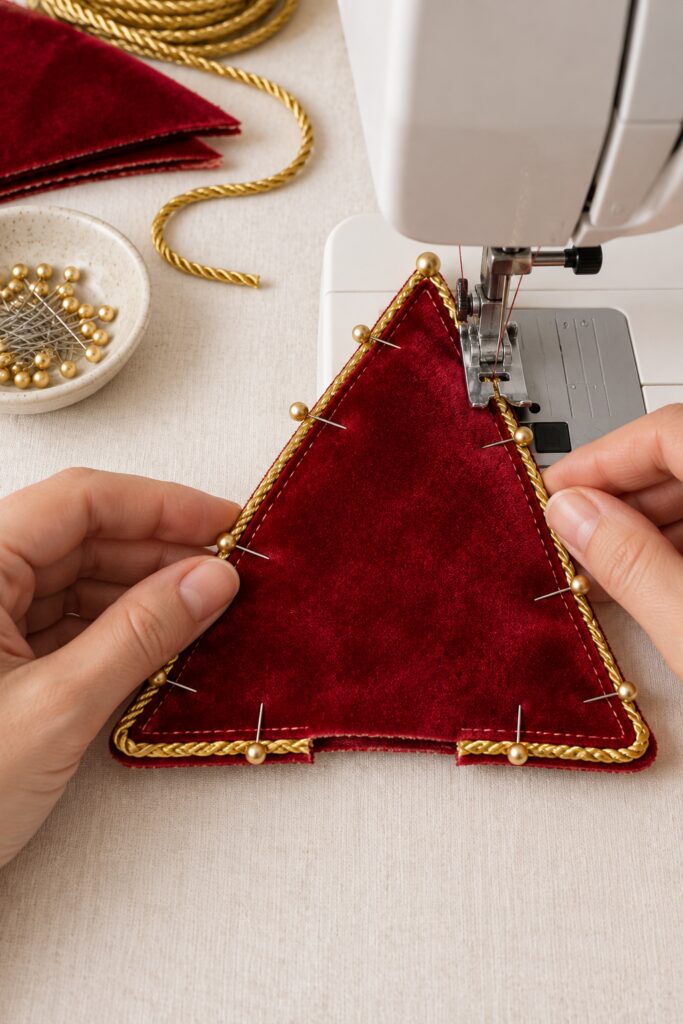
If your cord does not have a sewing lip, sew the triangle first and attach the decorative cord after turning. Small hand stitches are the most controlled option. A tiny amount of fabric-safe adhesive can hold the cord temporarily while you sew it permanently.
4. Turn and shape the triangles
Clip across the seam allowance near each corner without cutting through the stitching. Turn every triangle right side out through the bottom opening.
Use a point turner or another blunt tool to ease out the corners. Avoid pushing sharply because velvet and damask can be damaged or punctured. Finger-press the seams, then use a carefully controlled iron if the fabric permits.
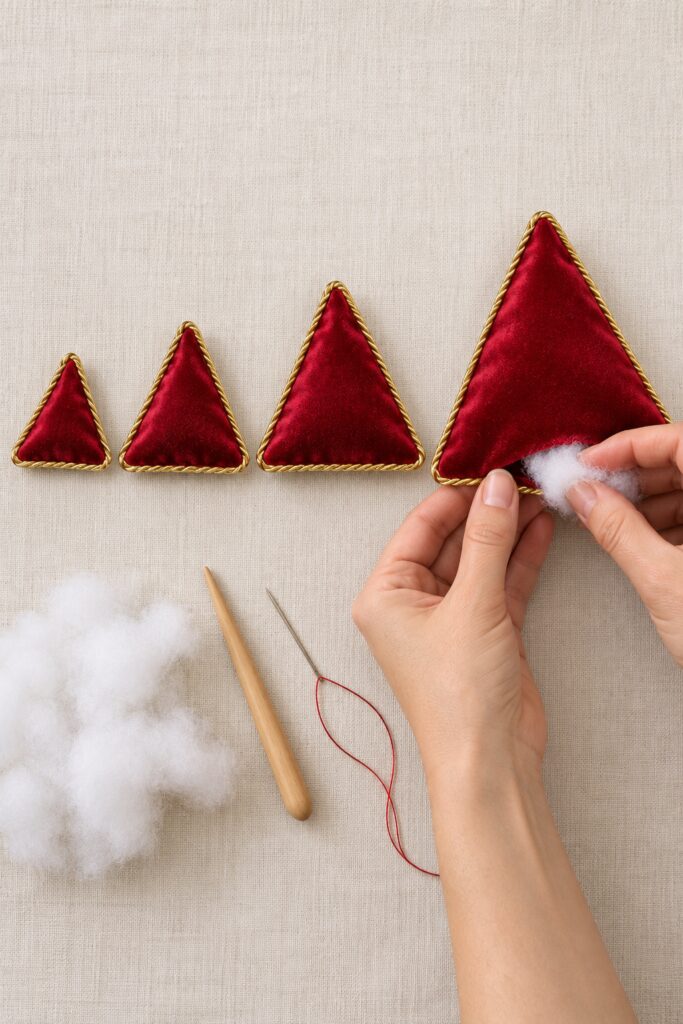
5. Add a small amount of padding
Insert polyester fiberfill through the opening. Begin by working a tiny amount into the corners, then fill the center.
The tiers should be softly dimensional rather than firmly stuffed. Too much filling will make them look like pillows and prevent the sections from overlapping neatly.
Test each triangle on a flat surface. Add or remove filling until the fabric appears smooth without becoming round or rigid. Slip-stitch the openings closed.
6. Build the felt support
Lay the felt strip vertically on your work surface. Position the largest triangle near the bottom, allowing a short section of felt to extend beneath it as the trunk.
Place the next triangle above it so its lower edge overlaps the top portion of the largest tier. Continue with the two smaller sections. The felt should remain hidden behind the padded pieces except for the trunk.
Adjust the overlaps until the outside edges create one continuous tree shape. Check that the tips are centered along the felt spine before sewing anything permanently.
Fold a 6- to 8-inch length of narrow cord or ribbon into a loop. Place its cut ends behind the smallest tier and secure them to the felt with several strong stitches.
7. Secure the tiers to the backing
Starting with the largest tier, hand-sew each triangle to the felt spine. Place the stitches through the fabric backing rather than all the way through the decorative front.
Add stitches near the center and toward both upper corners of each tier. These hidden attachment points prevent the sections from twisting while allowing the edges to remain softly raised.
Work upward one tier at a time. Maintain the planned overlap and check the alignment after attaching every section.
8. Add the gold bead accents
Sew a gold bead at each visible outer tip, passing the needle through the bead more than once. Tie the thread securely on the back.
The inspiration uses beads generously, but you can simplify the arrangement by placing them only on the two outer corners of each tier and at the top of the tree. Avoid heavy glass beads that could pull the fabric out of shape.
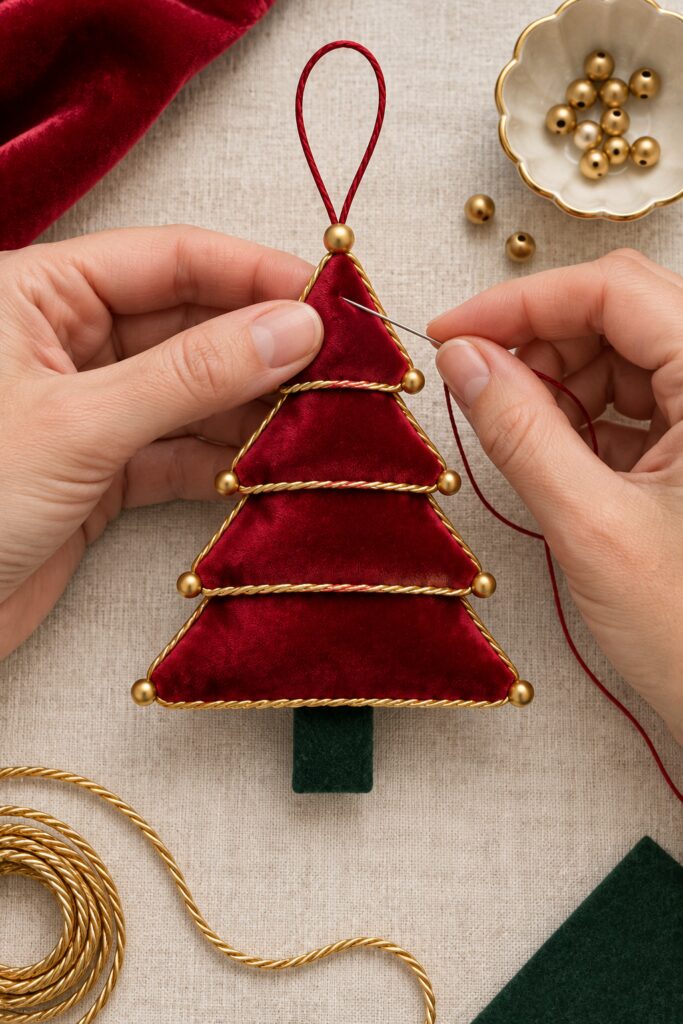
Inspect the gold cord and secure any loose areas with small hand stitches. If the ornament leans when suspended, move the hanging loop slightly or add another stabilizing stitch between the upper tier and felt backing.
Tips for Getting the Finished Look
Use very little fiberfill. The gently padded surface is important, but the clean graduated silhouette matters more than fullness.
Velvet and damask reflect light differently. Keeping all velvet pieces aligned with the same nap prevents one tier from appearing darker for no apparent reason.
Choose warm antique gold rather than highly reflective yellow gold if you want the ornaments to resemble the inspiration more closely. Matte beads and softly twisted cord provide definition without overpowering the fabric.
Lay the tree flat and view it from several feet away before attaching the tiers. Small alignment differences become more noticeable once it is hanging.
Easy Ways to Customize the Ornaments
Create a mixed set using burgundy velvet, ivory damask and deep green brocade. Keep the same gold trim across every ornament to make the collection feel coordinated.
For a simpler version, use cotton holiday fabric with felt backs and skip the cord around the sloping edges. Add it only along the lower edge of each tier.
Small pearl beads can replace the gold accents for an ivory-and-champagne palette. You could also omit beads entirely when making ornaments for homes with pets or very young children.
To turn the design into a gift decoration, make a smaller three-tier version and attach it to ribbon around a wrapped package.
Displaying the Finished Ornaments
Hang the ornaments from sturdy tree branches that can support their lightly padded construction. They can also decorate garlands, cabinet knobs, wreaths or wrapped gifts.
Store them flat in a rigid container so the tiers and gold cord are not crushed. Keep velvet ornaments away from moisture, and do not use them outdoors unless all materials were specifically selected for protected outdoor conditions.
A Handmade Design You Can Make Your Own
The charm of these ornaments comes from the repeated padded layers, rich fabric and fine gold detailing. The triangles do not need to duplicate the AI inspiration perfectly. Careful proportions, restrained padding and secure hand stitching will produce the same elegant tiered-tree effect.