*This post may contain affiliate links for which I earn commissions.*
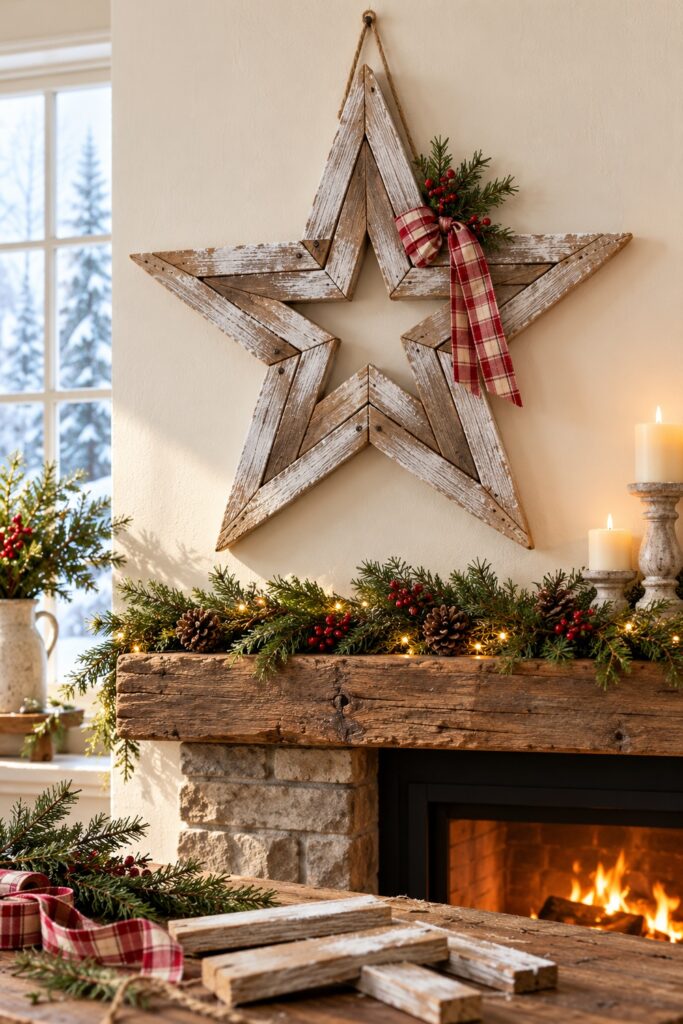
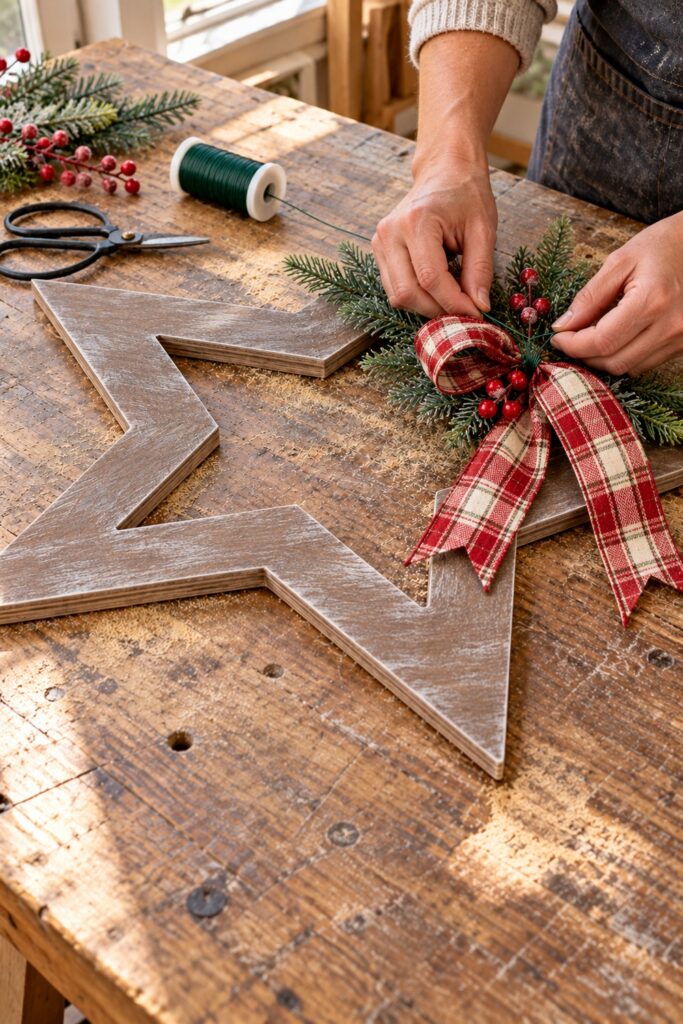
An open wooden star with a lightly frosted finish creates a substantial Christmas accent without covering the wall behind it. The inspiration pairs weathered brown wood, streaks of white, and one red and cream plaid bow. A small evergreen sprig supplies the holiday detail while leaving the star’s outline easy to see.
This tutorial adapts the apparent slatted construction into a single plywood frame. You will cut an outer star and remove a smaller star from its center, then use stain and dry brushing to suggest aged wood. That approach keeps the silhouette while avoiding a series of difficult angled joints.
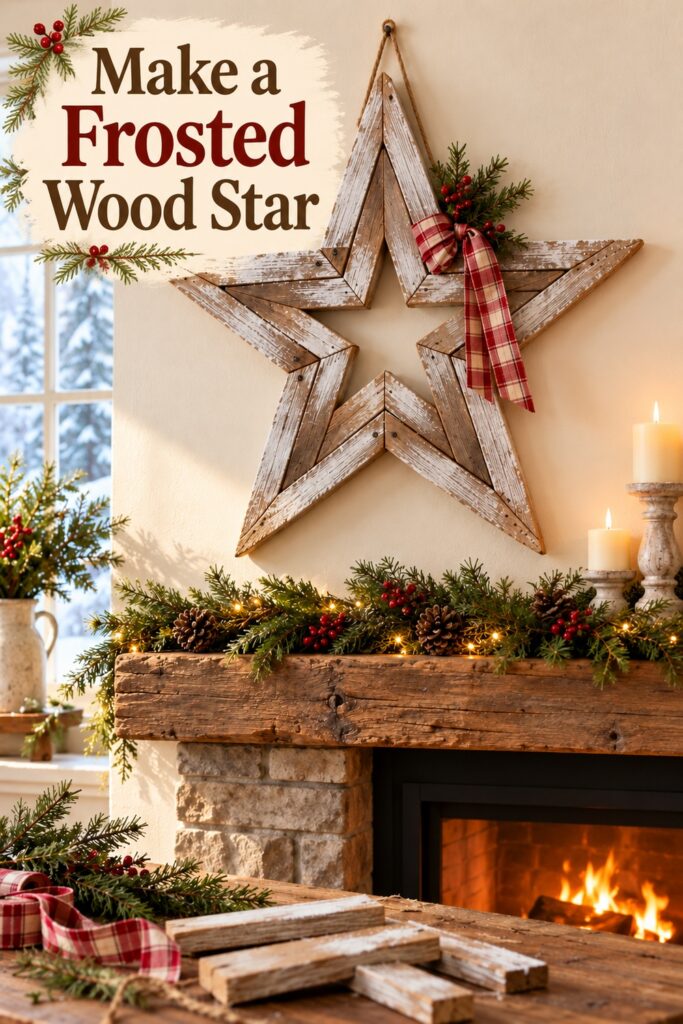
The inspiration and demonstration images were created with AI. They illustrate the decorating idea and planned steps rather than document a physically completed project.
What You Are Making
The finished piece is an open five-point star for indoor wall display. A suggested size is about 24 inches across, with a continuous band roughly 2 inches wide around the opening. Those dimensions are a starting point, not measurements taken from the image. Adjust the template to your wall and keep the band substantial enough to handle comfortably.
Use one piece of approximately half-inch plywood with an attractive, sound face. The completed frame will be flatter than the layered boards in the inspiration, but its brown base, irregular white streaks, and asymmetrical bow preserve the main visual idea. The greenery belongs on the upper right band, leaving most of the opening unobstructed.
Materials and Supplies
Main Materials
- A sound plywood panel large enough for the template with spare space around it (I’d suggest Home Depot)
- A paper template showing an outer five-point star and a smaller centered star
- Water-based brown or gray-brown wood stain suitable for the plywood
- White water-based craft or furniture paint compatible with the dried stain
- Red and cream wired plaid ribbon about one and a half to two and a half inches wide
- A small artificial evergreen and berries floral pick
- Green floral wire
- Strong twine for hanging loop
- A wall fixing, hook, or screw suitable for the wall material and total hanging load
Tools
- Pencil and ruler
- Clamps and a stable cutting surface
- Drill and a bit that makes a starter hole large enough for the jigsaw blade
- Jigsaw with a blade suitable for plywood
- Sanding sponge or sandpaper in medium and fine grits
- Flat paintbrush and stain applicator
- Wire cutters and scissors
- Eye protection hearing protection and appropriate dust protection for cutting and sanding
A premade open wooden star frame can replace the cutting stage if you prefer a project focused on finishing. Check that it is sturdy enough for hanging and has a suitable surface for your chosen coatings.
Before You Start
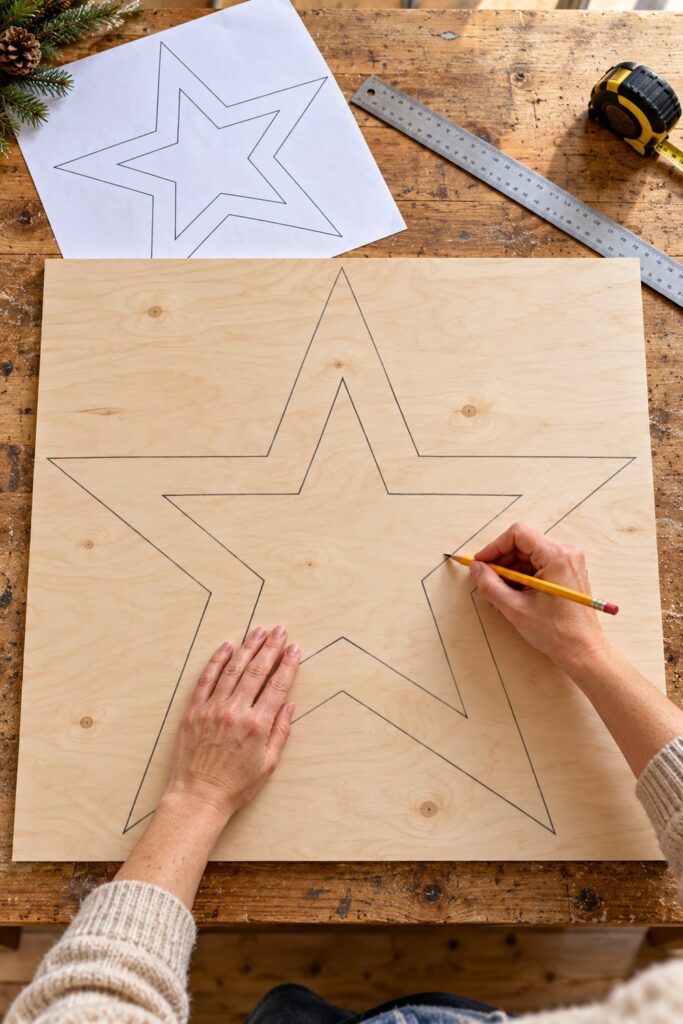
Make the paper pattern first. Print or draw a symmetrical outer star, then add a smaller centered star inside it. Check the narrowest parts of the band, particularly around the inner valleys. Aim for a sturdy, visually even border rather than forcing an exact width everywhere on the angled shape.
Cut out the paper opening so you can hold the template against the wall and judge its size. Leave room above the star for the hanging fitting and around the right side for the bow. Select sound plywood without loose layers, deep voids, or damaged edges. Protect the workbench and arrange support so neither the panel nor the eventual center offcut can drop during cutting.
1. Trace the Outer Star and Center Opening
Place the template on the plywood and trace both boundaries. Keep the top point upright and mark a small pencil note on the back so you retain that orientation through finishing. Remove the template and check that the inner shape sits centrally inside the outer one.
Look carefully at every narrow section before cutting. If one band looks too thin, redraw the inner boundary to give it more material. The frame should remain a single connected piece after the center is removed. Do not trace separate overlapping stars or individual boards for this method.
2. Cut the Frame and Smooth Its Edges
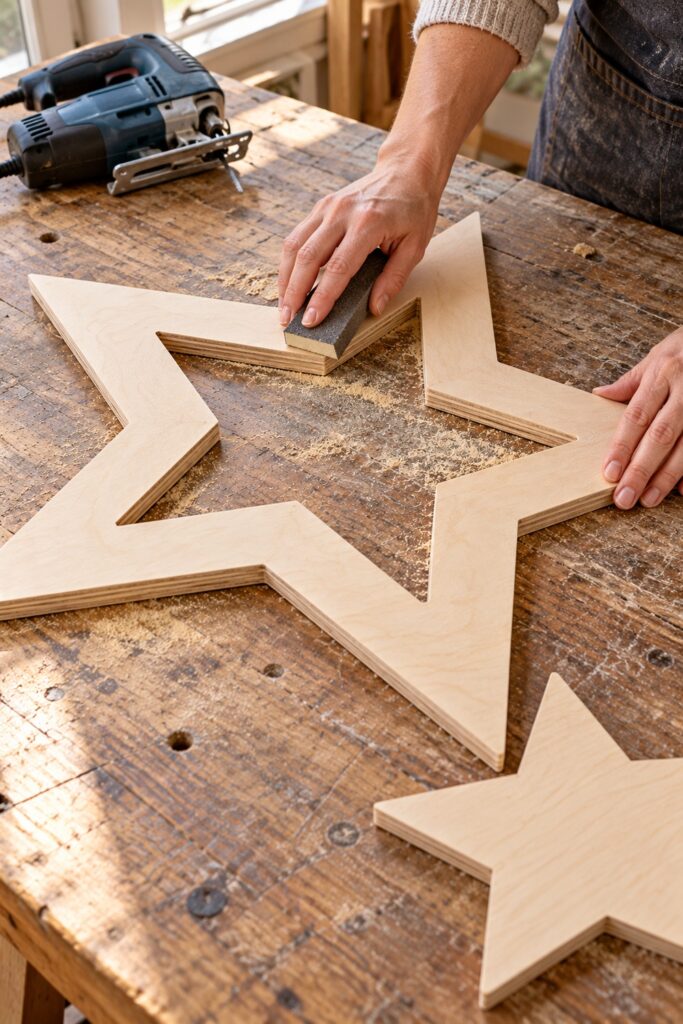
Clamp the panel securely with the cut area supported and the blade path clear of the bench. Follow your tool’s instructions and keep hands away from the blade. Cut the outer boundary slowly, turning at the points without forcing the blade sideways. Support the star as the final outer cut separates it from the surrounding panel.
To begin the center opening, drill a starter hole inside the waste area, clear of the boundary. With the tool stopped, insert the blade through that hole, then cut toward and around the inner line. Reposition the clamps as needed with the tool switched off. Support the center offcut before completing the last section so it does not tear the plywood face.
Sand the outside and inside edges until they are smooth to the touch. Ease sharp tips slightly without changing the star’s shape. Sand the face lightly, following the plywood’s grain, then remove dust. Do not deepen grooves or add fake construction screws; the finish will supply the weathered character.
3. Apply the Weathered Brown Base
Test the stain on a scrap from the same panel. Plywood can absorb color unevenly, so use the test to judge how much product and drying time the surface needs. Apply the stain according to its directions, using a thin controlled coat. Treat the edges as well as the front so the pale plywood layers do not dominate the finished outline.
Let the stain dry fully before adding white paint. Use its specified recoat interval rather than assuming the surface is ready when it merely feels dry. If a second coat is needed, keep the color moderate; you want enough brown visible to contrast with the frost effect. Finish the back neatly as well and let everything dry before turning it onto a clean surface.
4. Dry Brush the White Frost Effect
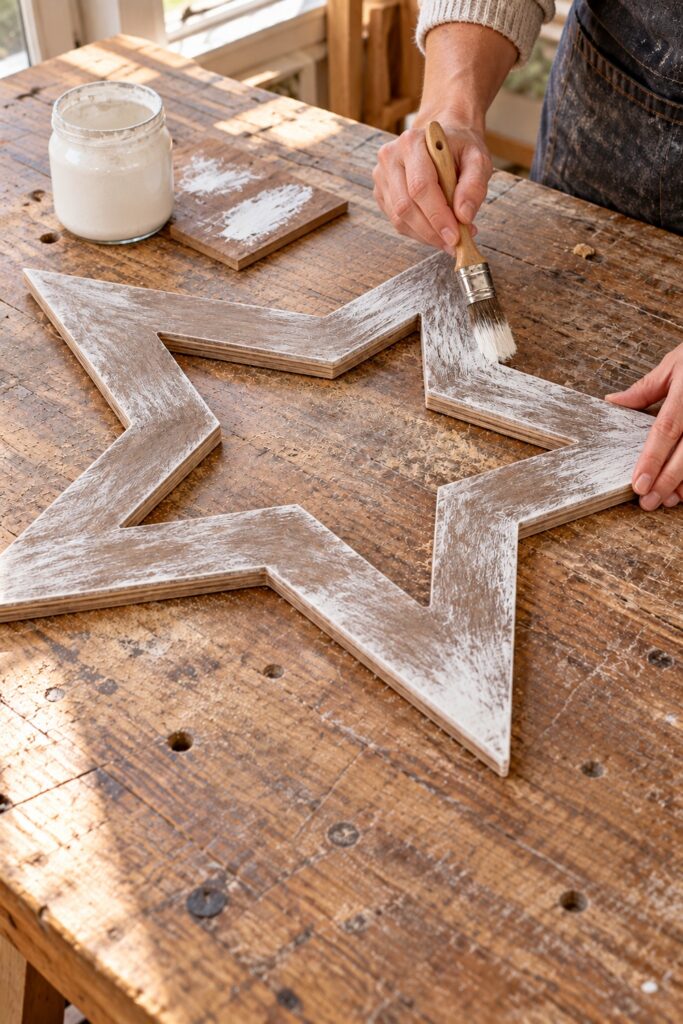
Dip the ends of a dry flat brush into white paint, then wipe almost all of it off on a scrap. Drag the bristles lightly along a section of the star band. The first strokes should look broken and sparse, with plenty of brown showing through. Test again whenever you reload the brush.
Work around the frame in short areas, following each band’s direction. Concentrate a little extra white near the edges while keeping some darker patches toward the middle. Step back occasionally to compare all five points. If one area becomes too white, let it dry and soften it with a small amount of the base color before adding a lighter pass.
5. Attach the Greenery and Plaid Bow
Once the paint is dry, place a small evergreen sprig on the upper right band. Angle the tips upward and outward, keeping the stems together near the bow position. Add the berry pick, then wrap floral wire around the stems and the frame band. Twist the ends together at the back and bend the trimmed ends inward so they cannot scratch the wall.
Tie a compact bow from the plaid ribbon and secure it over the wire attachment. Arrange two tails down the right side, trimming them so they do not cover the lower point. Shape the wired loops gently. Keep the embellishment light enough that it cannot pull the star sideways or strain the hanging fitting.
Tips for the Frosted Finish
The brown background is essential to the weathered effect. Stop painting while it still shows clearly between white streaks. A matte finish suits the rustic texture better than a glossy layer. If you add a protective coating, test compatibility on the scrap and choose one intended for the existing stain and paint.
Easy Ways to Customize the Star
Use a smaller template for a narrow wall or a cream and tan ribbon for a quieter palette. You can omit the berries and retain the evergreen sprig, or leave the star unembellished after Christmas. Keep the open center visible so the silhouette remains the main feature.
Hanging and Displaying Your Project
Install screw-mounted hanging hardware where the band has adequate width and thickness, following its directions and using screws that will not emerge through the front. Weigh the finished piece and choose compatible wall hardware rated for the load. If one centered fitting is unsuitable, use two balanced fittings with matching wall attachment points.
Hang it on a cool indoor wall away from heat and real flames. Do not use the decorative ribbon or floral wire as the structural hanger. The inspiration places the star above a hearth, but your fireplace’s clearances determine whether that location is suitable. An adjacent wall can preserve the mood while providing a safer display position.
The open outline and frosted texture create the character even when your version differs from the image’s apparent boards. Take your time with the template and the dry brushing, and the simple plywood adaptation can become a distinctive seasonal accent.