*This post may contain affiliate links for which I earn commissions.*
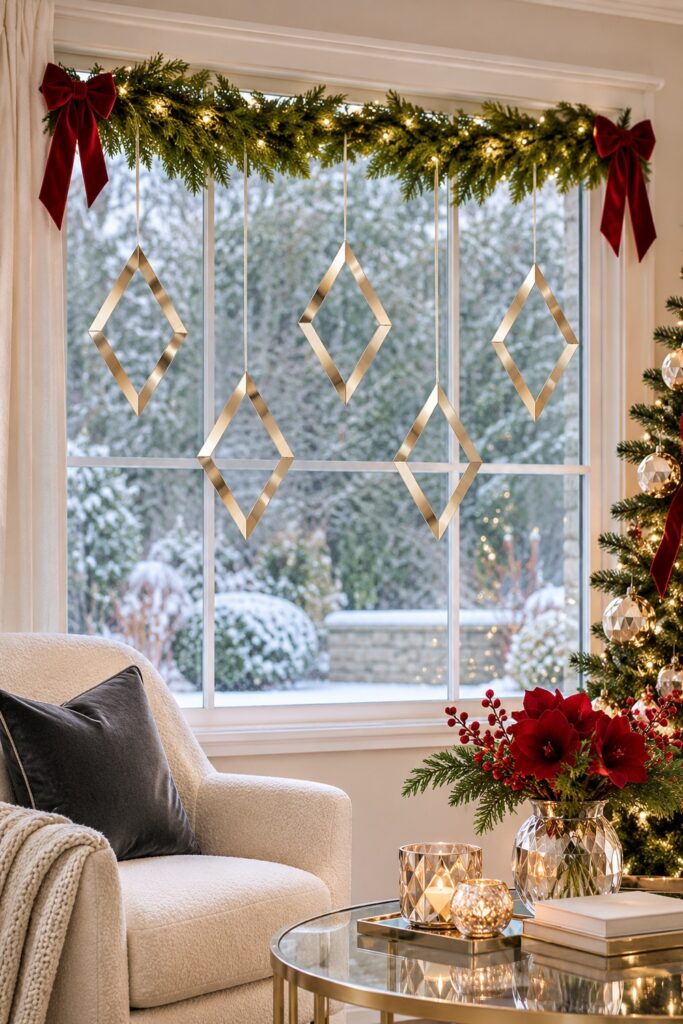
Open champagne diamonds catch the light beneath the greenery in this Christmas window. You can see through each shape to the snowy garden, so the decoration adds detail without covering the view. This tutorial uses four straight cardstock strips joined into a flat frame. It is a practical way to make a similar open shape with small, hidden supports at the corners.
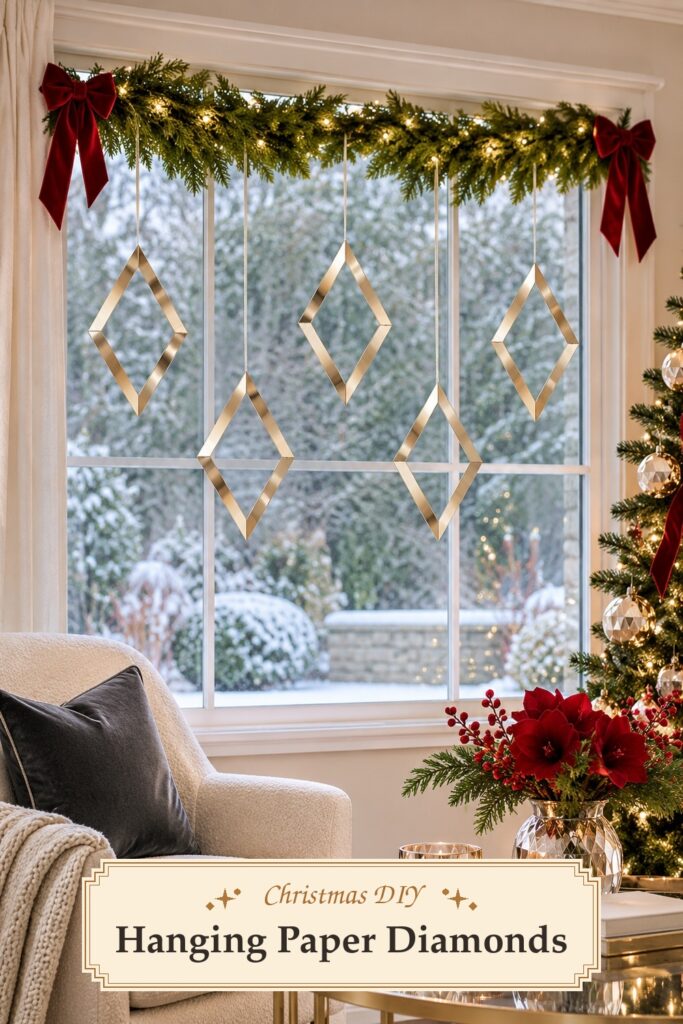
The inspiration and instructional images were created with AI. The steps describe a practical way to make a similar garland at home.
What You’re Making
Make five lightweight rhombus frames and hang them at two or three different heights. Each frame has four equal sides, with a narrower width than height. Suggested starting dimensions are about five inches tall and three inches wide. You can make a plain paper sample first and adjust the shape to suit your window.
The mirror effect comes from metallic or mirror-look cardstock. It will reflect softly and may vary with the room light. Choose a flexible sheet that can be cut cleanly, with a plain reverse for attaching the little corner patches.
Materials and Supplies
- Champagne mirror-look or metallic cardstock
- Plain firm cardstock for small backing patches
- Double-sided craft tape suited to paper
- Fine cream hanging thread
- A ruler, pencil and craft scissors
- A small craft hole punch
- Plain paper for a guide
- A suitable existing rod or other secure display support
Choose paper and thread light enough for the supports you plan to use. Keep any lights separate in the greenery and follow their placement directions. This paper decoration belongs away from flames, heaters and hot light fittings.
Before You Start
Draw a tall diamond on plain paper as a guide. Mark a top and bottom point about five inches apart, then a left and right point about three inches apart, centered between them. Join the four points with straight lines. The guide gives you a shape to follow while the separate strips are attached.
Cut a test strip about half an inch wide. Try it against one side of the guide and see how much overlap you need at the corners. The starting strip length is about three inches, but the exact fit depends on the width and shape you choose. Make one full test frame before cutting enough strips for all five.
Step 1. Cut Four Matching Strips
Cut four narrow strips with straight edges and equal lengths. Keep the mirror finish facing up while you check them for scratches. Lay them beside one another on the table to compare the widths. A small difference is easier to trim now than after the corners are joined.
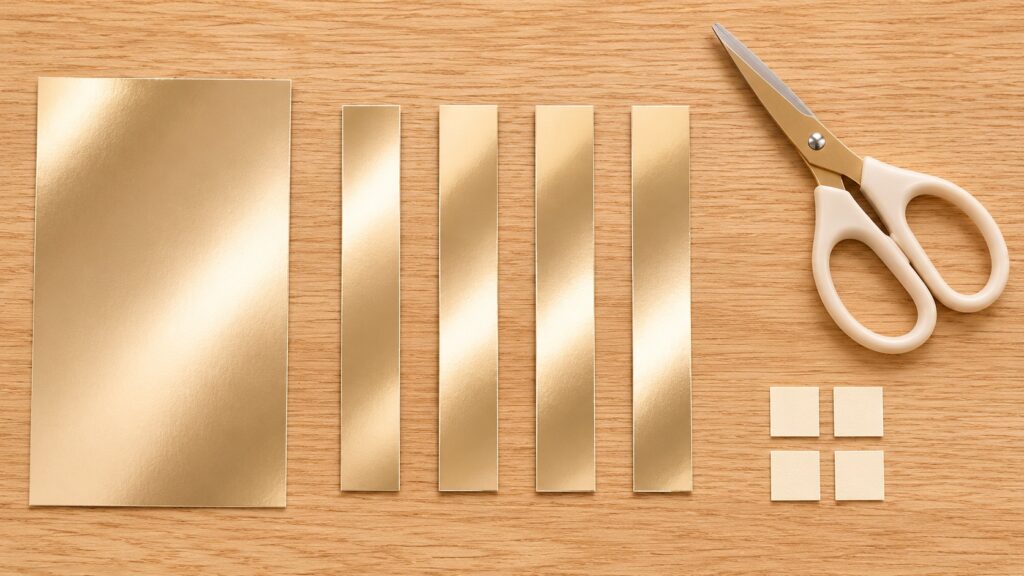
Cut four tiny backing patches from plain cardstock. Each should fit behind a corner without showing outside the finished outline. A small square turned to follow the point is useful. Test one beneath the strips at the top of your guide and trim it if an edge sticks out.
Step 2. Join the Flat Diamond Frame
Lay the strips along the guide with the reflective faces down. Let the ends overlap slightly at each point. Adjust the four sides until the frame follows the guide and the center stays open. Keep all four strips flat on the work surface.
Put a small piece of double-sided tape on a backing patch. Press the patch across the overlapping ends at one corner, joining the two strips from behind. Repeat at the other corners. Hold the paper flat while you press, then lift the frame carefully and check the front.
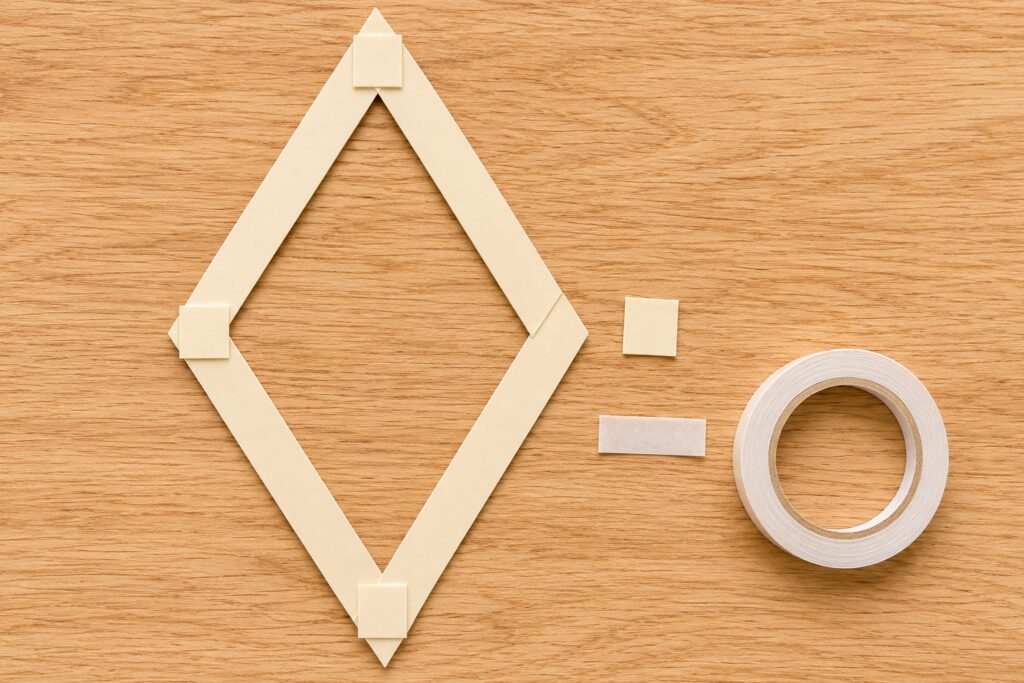
If a joint looks too bulky, trim only the part of the overlapping end that shows beyond the outline. Keep enough overlap for the patch to hold both strips. You can make a small angled trim to neaten a corner, but test the cut on the sample first. The open shape matters more than a perfect pointed tip.
Step 3. Reinforce the Hanging Point
The top corner needs enough backing to take the thread. Check that its patch covers both strip ends securely. Punch one small hole within that reinforced area, leaving enough paper around the hole so it will not tear at the edge.
Pass a length of cream thread through the hole and tie the ends together above it. Lift the frame a few inches over the table to test the balance. If it twists strongly, check that the hole sits near the center of the top corner and that the four sides lie flat.
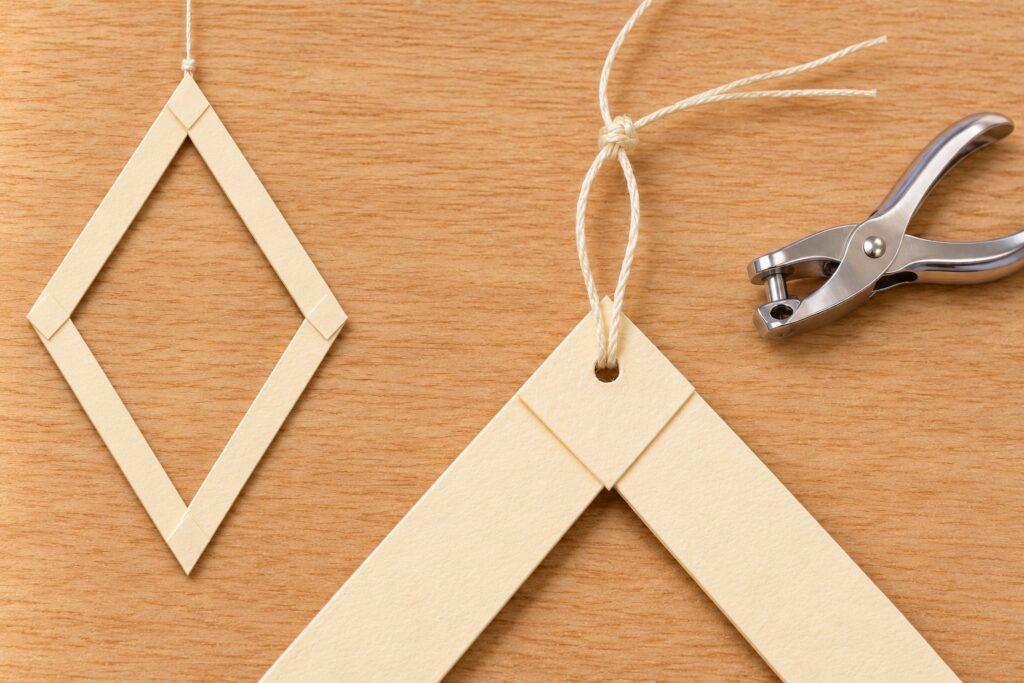
Make the remaining frames using the same guide. You can keep them all the same size or make one slightly larger for the middle. Use the same strip width across the set so they look related. Check each corner before you add the hanging thread.
Step 4. Hang the Frames at Staggered Heights
Set the frames out on the floor or a large table in the order you want them to hang. Start with the center one, then put two higher and two lower beside it. Look for clear gaps between their outlines. They should not overlap so much that one shape disappears behind another.
Attach the threads to a secure support suited to the window and the light weight of the decorations. Keep the frames clear of window handles, curtain cords and the walking route. Test the arrangement before adding any greenery around the support, so you can see each attachment.
Tips for Getting the Finished Look
Champagne paper looks warmer beside dark green branches and a deep red bow. The empty centers are part of the appeal, so leave the shapes plain. Extra beads or small ornaments inside them would make the outline harder to read.
Turn the reflective faces toward the room and check them in daylight and with the lamps on. A frame may need a tiny change in angle to catch the light. Keep any adjustments gentle so the corner patches stay flat.
A clean paper guide will help the frames look related even if the cardstock has a slightly different sheen from sheet to sheet. Mark the center of each side on the guide if you find it useful, then keep those marks on the plain paper beneath the work. The finished reflective strips can stay free of pencil lines.
Check the backing patches before you repeat the design. They should hold both ends securely without making the corner stiff enough to bend the neighboring sides. If your cardstock is thin, a slightly larger patch may help. If it is very heavy, try a lighter sheet for the visible frame and keep the firm card just at the joints. This gives you a light decoration that hangs more easily from fine thread.
Easy Ways to Customize It
Use shorter sides for a narrow window or make three frames instead of five. A silver or pale gold finish can work with decorations you already own. Keep the strips broad enough to see from the doorway, especially if the garden beyond the glass is busy.
Displaying and Storing the Diamonds
Hang the frames indoors where they will stay dry and out of reach of small children and pets. Fine threads should stay clear of play areas and curtain controls. Keep paper away from heat and check the corner joints before rehanging the decorations.
For storage, lay the frames flat between sheets of plain paper in a shallow box. Coil each thread separately so it does not pull on a corner. A flat frame is easy to protect as long as heavier decorations stay out of the same box.
Final Encouragement
Make one diamond and hang it in the window before cutting the full set. You will quickly see whether the strip width and paper finish give you the outline you want, and the remaining frames can follow that sample.