*This post may contain affiliate links for which I earn commissions.*
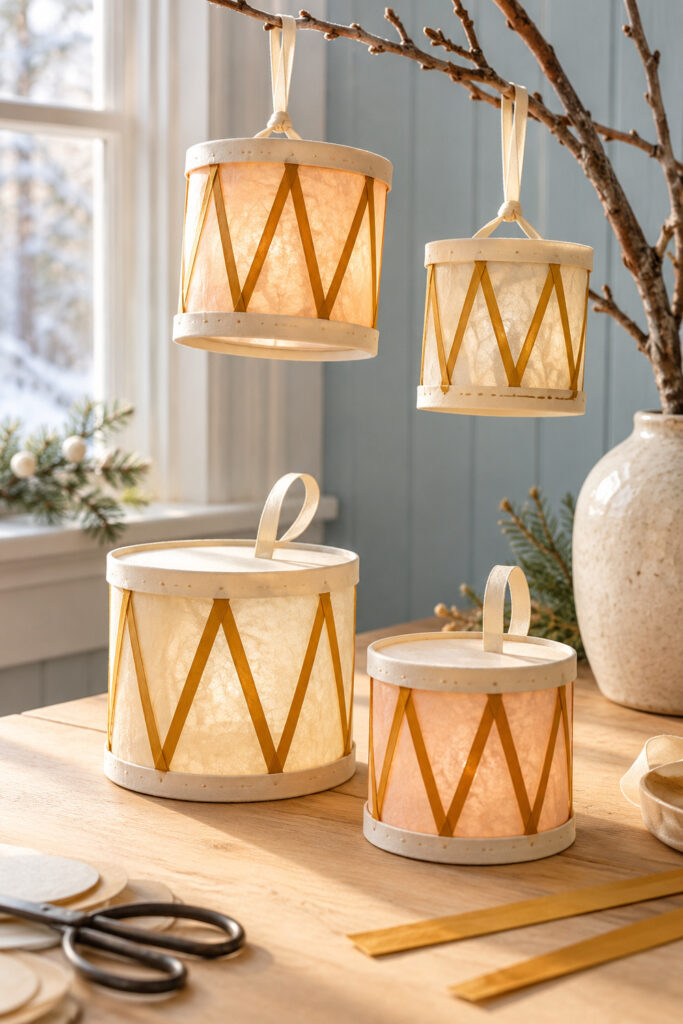
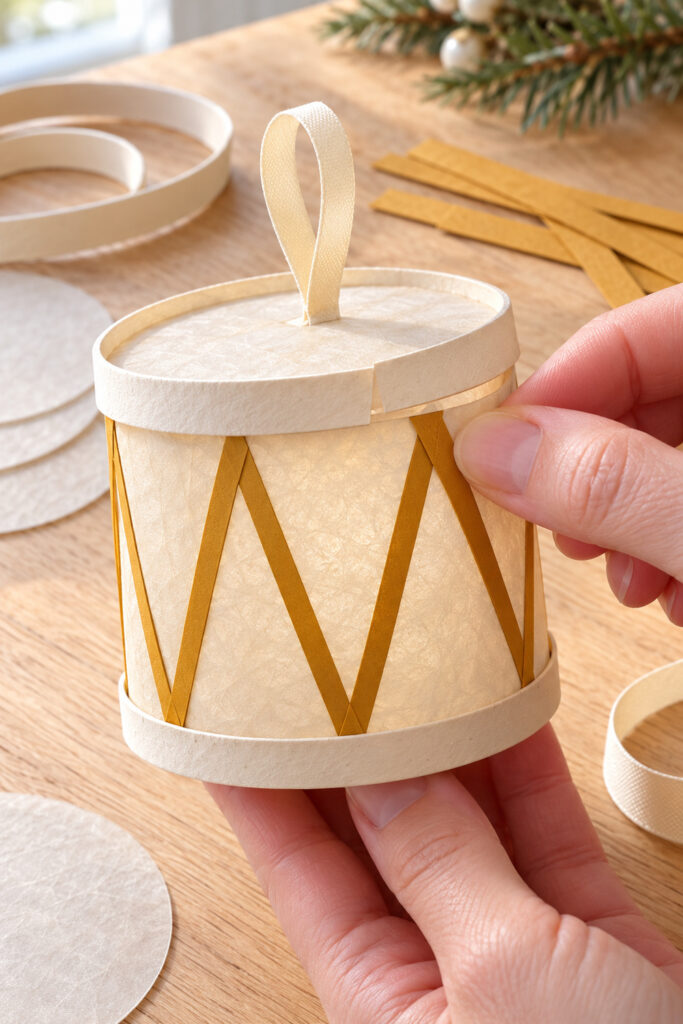
These little drums get their character from translucent walls, pale rims, and ochre zigzags. The inspiration combines cream and peach ornaments, with some resting on a table and others hanging from ribbon loops. Light passes through the paperlike surfaces so the construction becomes part of the decoration.
The method below uses cardstock support rings, vellum end skins, and flat paper strips. It is a proposed practical interpretation of the inspiration rather than a tested reconstruction of an existing ornament. Start with one small drum so you can check your paper and adhesive before making a collection.
The inspiration and instructional images were created with AI and illustrate a proposed construction method rather than a documented build.
What You’re Making
You’ll make a hollow decorative cylinder with a vellum sidewall and closed vellum ends. Cardstock rings support the circular edges, while narrow finishing bands hide the tabs and strip ends. The zigzag lacing is glued paper, not actual cord pulled under tension.
For a suggested starting size, try a drum about 8 cm across and 6 cm tall. These are planning dimensions, not measurements taken from the picture. Once that version works with your supplies, adjust the proportions for a coordinated group.
Materials and Supplies
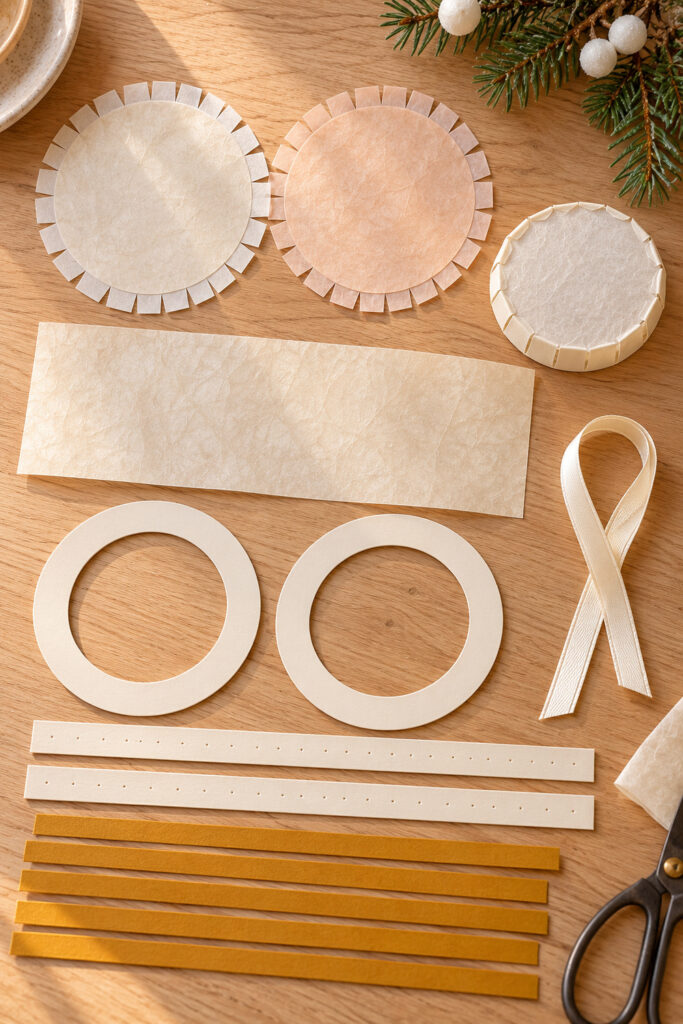
- Cream or pale peach translucent craft vellum for one sidewall and two end skins
- Sturdy cream cardstock for two support rings and narrow finishing bands
- Ochre paper or lightweight cardstock for the diagonal strips
- Ivory ribbon for a hanging loop
- Narrow double sided craft tape suitable for vellum
- Paper craft adhesive suitable for cardstock and ribbon attachment
- Scissors and a ruler
- Pencil and a compass or two round tracing guides
- Craft knife and cutting mat for the ring centers if needed
- Optional scoring tool for the finishing bands
Choose paper that bends without cracking. Vellum varies in stiffness and transparency, so test scraps with your adhesive. Use the narrow tape where seams will be covered, and reserve small amounts of liquid adhesive for hidden cardstock joins. Too much moisture can wrinkle the translucent walls.
Want to Make Your Own Drum Ornaments?
I’ve put together a convenient Amazon supply list featuring hand-picked, well-rated products that match the supply list above to save you time.
See My Hand-Picked Supply ListAs an Amazon Associate I earn from qualifying purchases but this doesn’t increase your price at all!
Before You Start
Draw two cardstock circles at your chosen drum diameter. Inside each, draw a smaller circle to leave an annular ring about 8 to 10 mm wide. Cut out the centers on a protected surface. A craft knife should always travel away from your fingers; scissors can finish an opening once safely started.
For an 8 cm diameter cylinder, the circumference is approximately 25.1 cm. Add a narrow overlap of about 1 cm to plan the sidewall length, then confirm the fit around your actual rings. A longer sheet may be needed for larger drums; don’t assume every size fits standard paper.
Cut two vellum circles slightly larger than the ring diameter, allowing roughly 8 mm of extra paper around each edge for tabs. Snip the extra margin into small tabs, stopping at the intended circle. That gives the paper somewhere to fold without trying to stretch it around a curve.
Step by Step Tutorial
1. Form the Supported Cylinder
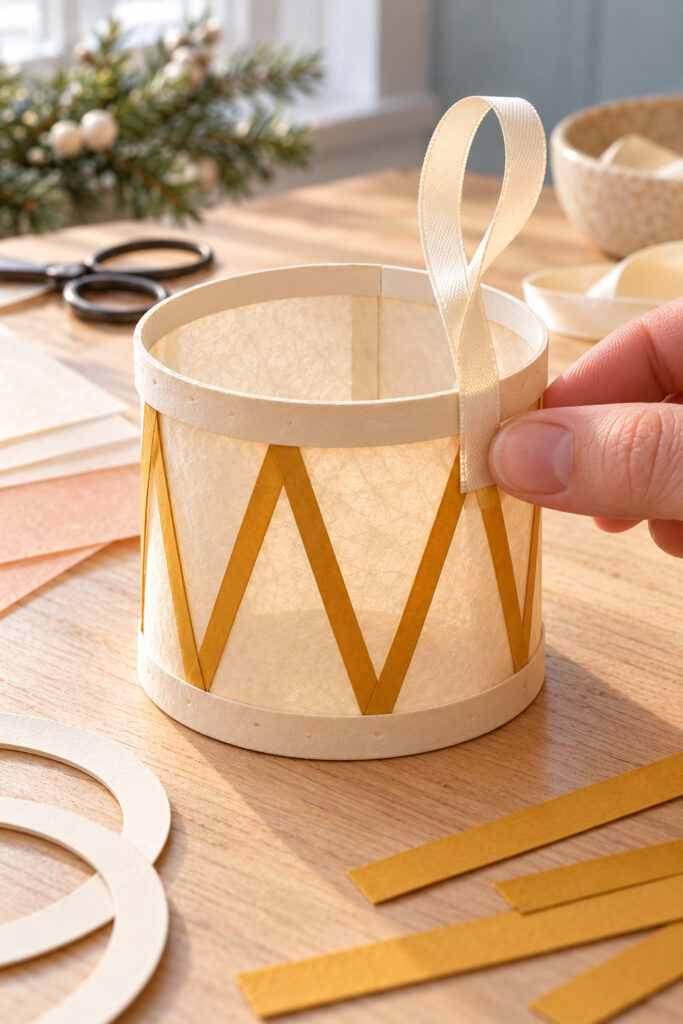
Cut the vellum sidewall to your planned height and fitted length. Curve it gently with your hands, bringing the short ends together. Dry fit a support ring just inside each end of the cylinder, with the ring faces lying flat across the circular openings.
Use narrow tape along the inside overlap to join the sidewall. Keep the overlap straight from top to bottom so the drum doesn’t twist. Check that both rings fit snugly without forcing the cylinder outward, then tack them to the inside wall with small folded cardstock tabs and paper adhesive.
To make those support tabs, cut short cardstock rectangles, fold each into a small right angle, and glue one leg against the inner sidewall and the other onto the ring. Space several around each end. Let the adhesive set according to its instructions before continuing. These hidden supports help keep the cylinder round.
2. Close the Lower End
Center one vellum end skin over the bottom ring with the excess tabs extending beyond the sidewall. Secure the flat margin to the ring, then fold the tabs gently up against the outside of the cylinder. Attach them with small pieces of narrow tape where a finishing band will later cover them.
Work around the circle a few tabs at a time rather than pulling one side tightly. The end should look reasonably smooth without being stretched like a real drumhead. This ornament is decorative, so the vellum doesn’t need to carry tension or make a sound.
3. Add the Ochre Zigzags
Cut narrow strips of ochre paper, roughly 3 to 5 mm wide as a starting point. Hold one diagonally between the upper and lower rim zones and trim it to fit. Use it to plan a series of connected V shapes around the cylinder, leaving the center of each vellum panel visible.
Dry fit the spacing before attaching all the strips. Their ends should land in the areas the cream bands will hide. Use a little adhesive along each strip so it rests flat, supporting the wall gently from inside while the top is still open. Avoid pulling the strips taut across the paper.
The joins don’t need to imitate real drum lacing hardware. Flat paper diagonals preserve the visual pattern without sewing through thin vellum. If the last space near the seam is slightly narrower, adjust two or three neighboring strips so the change looks gradual.
4. Secure the Ribbon Loop
Cut enough ivory ribbon for a comfortable loop plus two attachment ends. Bring the ends together at the back seam, placing one beside the other against the outside wall just below the upper edge. Keep both ends within the area the upper finishing band will cover.
Glue the ribbon ends flat over the reinforced seam area and let the adhesive set fully. The open top lets you support that joint from inside while pressing. Don’t attach the ribbon only to the thin upper end skin. The loop should transfer the small ornament’s weight into the reinforced sidewall and rim area.
5. Fit the Upper End Skin
Center the second vellum circle over the top ring. Ease its edge around the ribbon attachment, making a small relief slit only if necessary so the paper lies flat without trapping the loop. Keep the ribbon standing clear of the opening as you secure the flat margin to the ring.
Fold the outer tabs downward and attach them against the sidewall. Check that the top remains level. A few small folds are normal around the curved edge, and the finishing band will cover them. If the circle buckles badly, release and reposition it before the adhesive sets.
6. Wrap and Finish the Rims
Cut cream cardstock bands wide enough to cover the folded tabs, zigzag ends, and ribbon attachment. Curve each band gently before fitting it around the drum. Test the length on the actual cylinder, then trim to leave a small overlap at the back.
Attach the lower band first, keeping its edge level with the bottom. Wrap the upper band next and press the last diagonal strip ends flat before closing it. Keep adhesive away from exposed vellum panels. Optional shallow scored dots can suggest the inspiration’s rim detail without punching holes through the structure.
Tips for Getting the Finished Look
Use soft cream at the rims so the ochre diagonals stay clear. A very wide band can make a small drum look squat, while a very narrow one may fail to hide the joins. Make a trial paper band before cutting the final cardstock.
Let the completed ornament rest until all adhesive has set. Then test the loop gently over the table rather than hanging it immediately over a hard floor. Repair any lifting ribbon or loose seam before displaying it. Don’t use the loop if its attachment remains uncertain.
Easy Ways to Customize It
Alternate cream and peach vellum while keeping the same rim and zigzag colors. Once your first drum holds its shape, vary the diameter or height slightly. Keep the larger sizes light and test them individually rather than assuming a construction that works small will scale indefinitely.
You can also omit the loop on drums intended only for a tabletop. Finish the upper rim in the same way and let a few standing ornaments accompany the hanging ones. That echoes the inspiration without requiring every piece to serve the same purpose.
Displaying the Finished Drums
Use these indoors in a dry spot, away from candles, heaters, and damp windows. The warm effect should come from ordinary daylight, not an internal light or flame. If using a branch display, secure the branch in a stable holder before adding the lightweight ornaments.
Hang them where they won’t be grabbed or brushed repeatedly. For storage, place them loosely in a box with support around the sides rather than stacking heavy decorations on top. Their hollow shape is part of the appeal and needs a little room.
Final Encouragement
Make one drum, check its joins, and decide what to adjust before cutting the rest. Clear zigzags, a supported round shape, and neat pale rims will communicate the idea even when your papers and proportions differ from the inspiration.