*This post may contain affiliate links for which I earn commissions.*
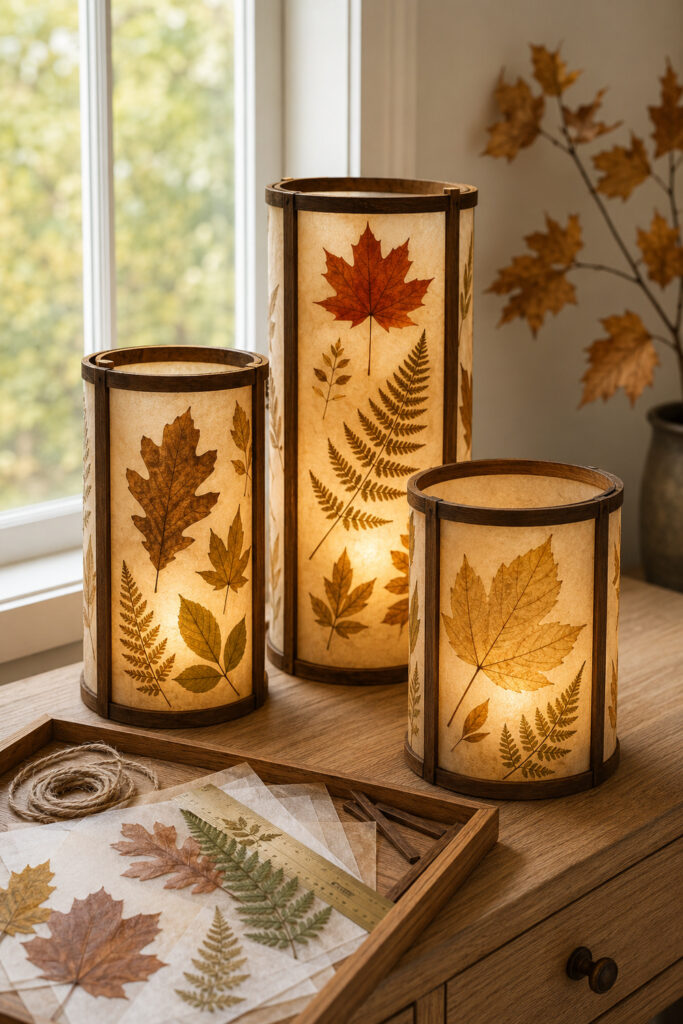
Autumn leaves are beautiful on their own, but placing them against softly glowing vellum turns every vein and irregular edge into part of the display. These pressed-leaf lanterns combine translucent botanical panels with slender, dark wood frames for a warm fall accent that feels both natural and carefully finished.
The original image suggests rounded lanterns with curved wooden rims. This tutorial translates that idea into practical six-sided frames made from straight craft-wood strips. The faceted shape is much easier to build at home, yet it still reads as softly rounded once all six panels are illuminated.
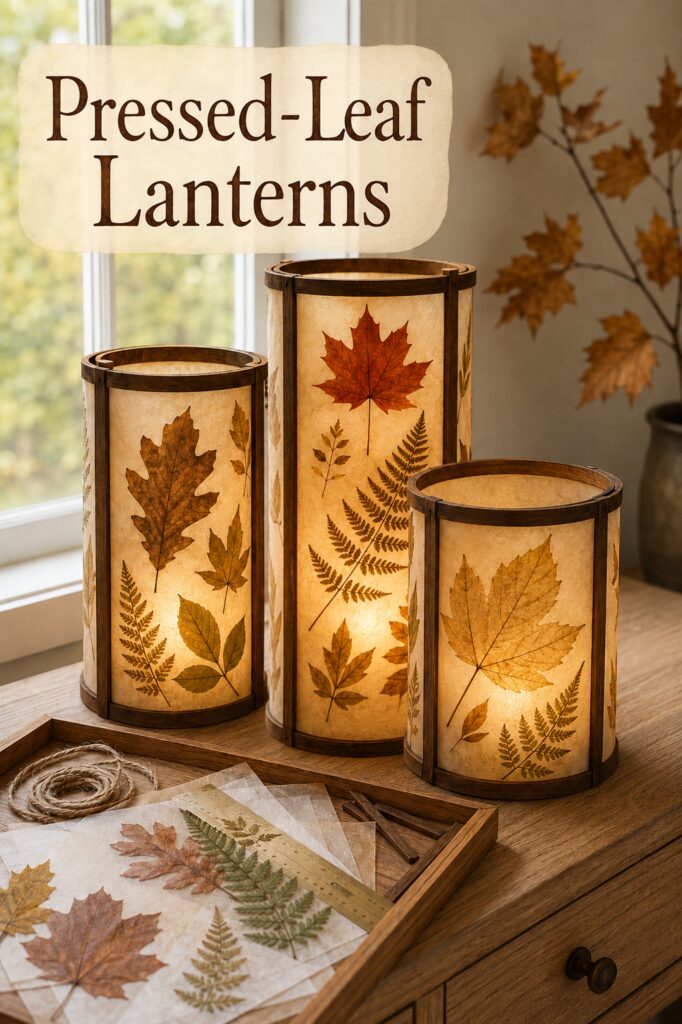
The inspiration image and the instructional demonstration images for this project were created with AI.
This tutorial translates the visual idea into a practical DIY method you can recreate at home; the demonstration images are visual guides rather than photographs of an actually completed project.
What You’re Making
You will make an open-top, six-sided tabletop lantern with pressed botanical material sealed between translucent sheets. Slim wood strips form the upper and lower rings and the vertical seams. A removable base insert holds a flameless LED pillar candle safely inside.
A lantern about 10 to 12 inches tall makes a useful starting size, although you can shorten or lengthen the uprights. Make one lantern for a small table or create a staggered group of three. Keep each one wide enough to leave generous airspace around the LED candle and to let the leaf designs show.
Materials and Supplies
Materials
- Fully dried, pressed maple, oak, fern, and small compound leaves
- Translucent vellum sheets, preferably medium-weight
- Slim square basswood or pine craft strips, approximately 1/4 inch thick
- A thin wood panel or craft plywood for the removable base insert
- Wood glue
- Clear-drying decoupage medium or archival paper adhesive
- Narrow clear double-sided craft tape
- Fine-grit sandpaper
- Water-based wood stain or acrylic craft paint in a walnut-brown shade
- Clear water-based matte sealer, optional
- Battery-operated flameless LED pillar candle
Tools
- Metal ruler and pencil
- Craft knife and cutting mat
- Fine-tooth craft saw or small miter box and saw
- Small clamps or spring clips
- Small square
- Flat soft-bristle brush
- Scissors
- Heavy books or a botanical press
- Wax paper or a nonstick craft sheet
Before You Start
Collect fresh, undamaged leaves in a range of shapes and sizes. Dry them thoroughly in a press or between absorbent paper under heavy books. Replace damp paper as needed. The leaves should be completely flat and crisp-dry before they are enclosed, or trapped moisture may cloud the panel or cause discoloration.
Decide the height and width of one lantern before cutting anything. A practical test size uses six equal panels about 3 to 4 inches wide. Make a paper mockup by taping six rectangles edge to edge and wrapping them into a hexagon. Set the intended LED candle inside the mockup and confirm that it has comfortable clearance on every side.
Protect the table before staining, gluing, or applying decoupage medium. If using a craft knife or saw, cut away from your hands and work on a stable surface.
Step-by-Step Tutorial
1. Plan Six Botanical Panels
Cut twelve identical vellum rectangles, two for each side of the lantern. Make them slightly smaller than the openings in the wood frame so their edges can sit behind the rails without buckling.
Lay six rectangles on the table and arrange dried leaves on them. Alternate large maple or oak silhouettes with smaller ferns and delicate sprigs. Keep at least a narrow margin around every edge for sealing and attachment. Allow some panels to feel airy. The glow is more attractive when every available space is not filled.
2. Seal the Pressed Leaves Between Vellum
Work on one panel at a time. Brush a very thin coat of clear-drying medium onto the first vellum sheet, concentrating beneath and immediately around the leaves. Position each botanical piece and smooth it gently from its center toward its edges with a clean, dry brush.
Apply a second light coat where needed, then place the matching vellum sheet on top. Cover the panel with wax paper and press it flat beneath a book while it dries. Avoid saturating the vellum, which can wrinkle or turn patchy. Repeat for all six panels.
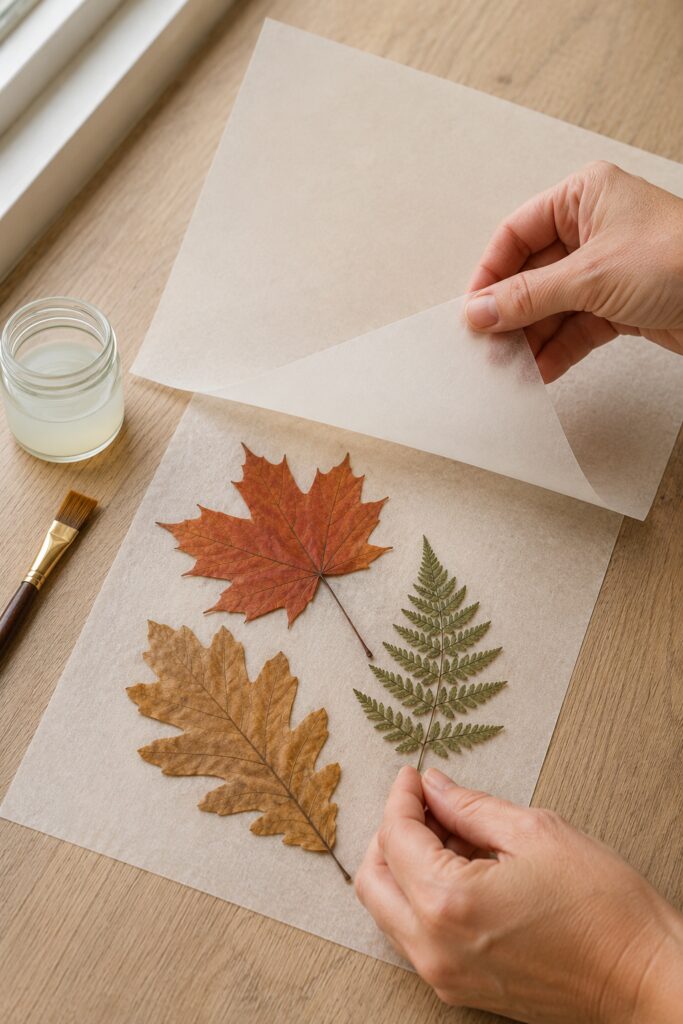
Once dry, trim the six panels to matching dimensions. If any leaf edge lifts, slip a tiny amount of adhesive underneath it and press the panel again.
3. Cut the Wood for Two Hexagonal Rings
Each ring needs six equal short rails. Cut twelve pieces in total. For true mitered hexagons, cut each end at a 30-degree angle. If precise angled cuts feel intimidating, make simple butt-jointed rings and cover each corner later with a narrow vertical upright. The finished seams will still look intentional.
Dry-fit six pieces around the paper mockup. Check that opposite sides are parallel and that the ring sits flat. Use this first ring as the pattern for the second so the top and bottom match.
Glue each ring on a protected flat surface. Hold the joints with clips or low-tack tape until set according to the adhesive directions.
4. Add the Vertical Uprights
Cut six identical uprights to the desired lantern height. Sand every piece lightly, especially the cut ends. Stain or paint the two rings and uprights before assembly, then let them dry completely. This prevents pale unfinished slivers from showing beside the translucent panels.
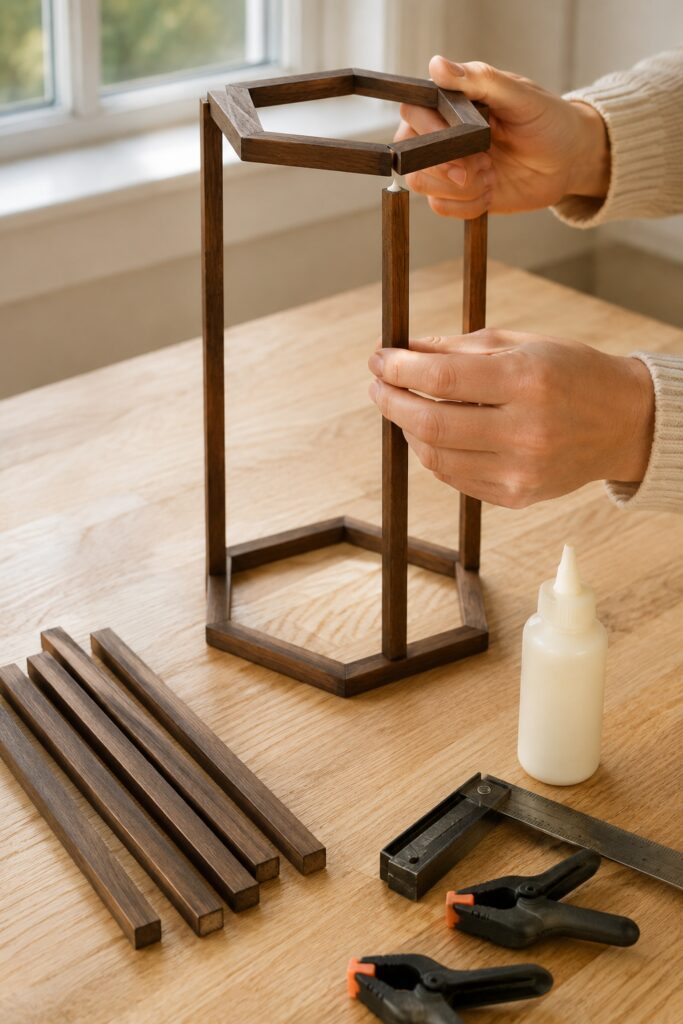
Stand the bottom ring flat. Glue one upright at each corner, using a small square to keep it perpendicular. Temporary clips, blocks, or painter’s tape can stabilize the pieces. When the lower joints are firm enough to handle, position the top ring over the uprights and attach it in the same way.
Let the frame cure on a level surface. Do not rush this stage. Uneven uprights will make the panels difficult to fit.
5. Make a Removable Candle Base
Trace the inside of the bottom ring onto thin craft plywood. Cut a flat hexagonal insert that rests just inside the frame without forcing the joints apart. Sand its edges and finish it to match the rails.
The insert does not need to be permanently glued in place. Keeping it removable makes it easier to lift out the candle, change batteries, or clean the lantern.
6. Fit the Leaf Panels Inside the Frame
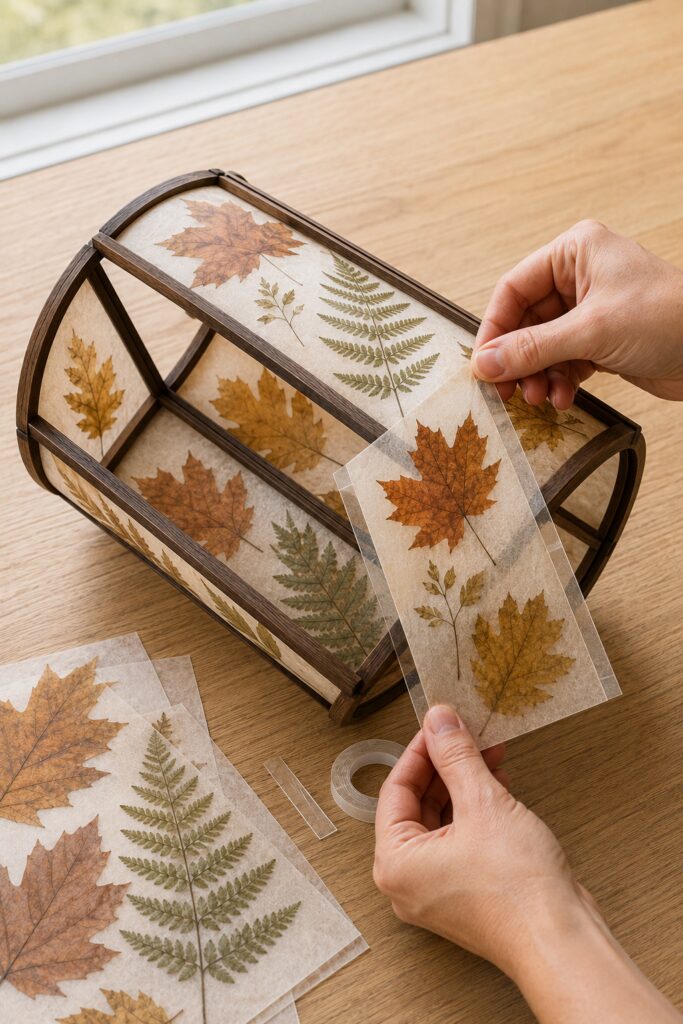
Test every panel before adding tape. Position each one against the inside of a frame opening with its botanical design facing outward. Trim tiny amounts from the sides if necessary, but leave enough overlap for the panel to sit behind the wood.
Apply narrow clear double-sided tape to the inside faces of the upper rail, lower rail, and vertical uprights. Press the panel into place from the center outward, keeping it smooth but not stretched. Install the panel opposite it next, then continue around the lantern. Alternating sides helps prevent the frame from twisting.
Inspect the corners from outside. If a pale vellum edge is visible beyond a rail, trim it carefully with a sharp craft knife rather than trying to hide it with more stain.
7. Finish and Light the Lantern
Touch up small exposed wood areas with stain or paint. If desired, brush a clear matte water-based sealer onto the wood only. Keep the finish off the vellum so it remains evenly translucent.
Set the removable base insert into the bottom ring and place a battery-operated LED pillar candle at its center. Reach through the open top to switch the light on and off. A timer-operated candle is especially useful in a taller lantern.
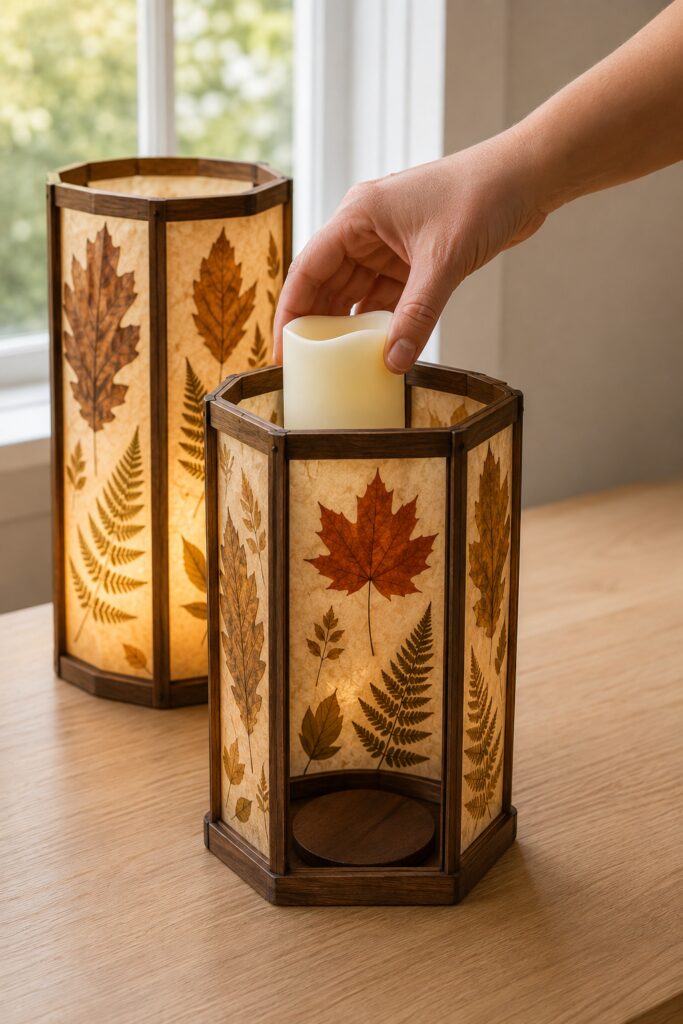
Use only a cool flameless light. Vellum, dried leaves, adhesive, and wood are combustible, so a wax candle, tea light, or any other open flame is not safe for this project.
Details That Create the Stained-Glass Effect
Choose leaves with distinct silhouettes and visible veins. A single red maple leaf makes a stronger focal point than several overlapping leaves. Ferns introduce fine texture, while small compound sprigs connect larger shapes without making the panel heavy.
Repeat the same palette around the lantern rather than repeating the same arrangement. Rust, tobacco brown, soft gold, and muted olive look especially rich against warm ivory vellum. Dark walnut rails provide enough contrast to make the pale panels appear more luminous.
Keep the interior light below the visual center of the lantern. The glow will spread upward and reveal the botanical details without creating one harsh spot. For a group, use lanterns in two or three heights but keep the panel width and wood finish consistent.
Easy Ways to Customize It
For a softer woodland version, use pale grasses, seed heads, and delicate fern fronds with natural wood frames. A more dramatic Thanksgiving arrangement could emphasize copper maple leaves and deep brown oak leaves. You can also replace the dark stain with a honey-toned finish for a lighter cottage look.
If real pressed leaves are not available, use dried botanical inclusions sold for paper crafts. Avoid thick, brittle pieces that prevent the vellum layers from lying flat. Smaller lanterns can hold a flameless votive instead of a pillar light, provided the frame still gives the light ample clearance.
Displaying the Finished Lanterns
Place a single lantern on an entry table, kitchen shelf, or covered fall mantel. A trio in staggered heights can fill a sideboard without needing extra garland or figurines. Keep the lanterns indoors, away from damp windows, heaters, direct sun, and areas where pets or children could knock them over. Direct sunlight will gradually fade real leaves, so store the lanterns in a dry, dark place after the season.
The beauty of this project comes from the contrast between precise dark framing and imperfect natural leaves. Your panels do not need to duplicate the AI inspiration leaf for leaf. Careful pressing, open spacing, and a gentle amber LED glow are enough to carry the same handmade fall character.