*This post may contain affiliate links for which I earn commissions.*
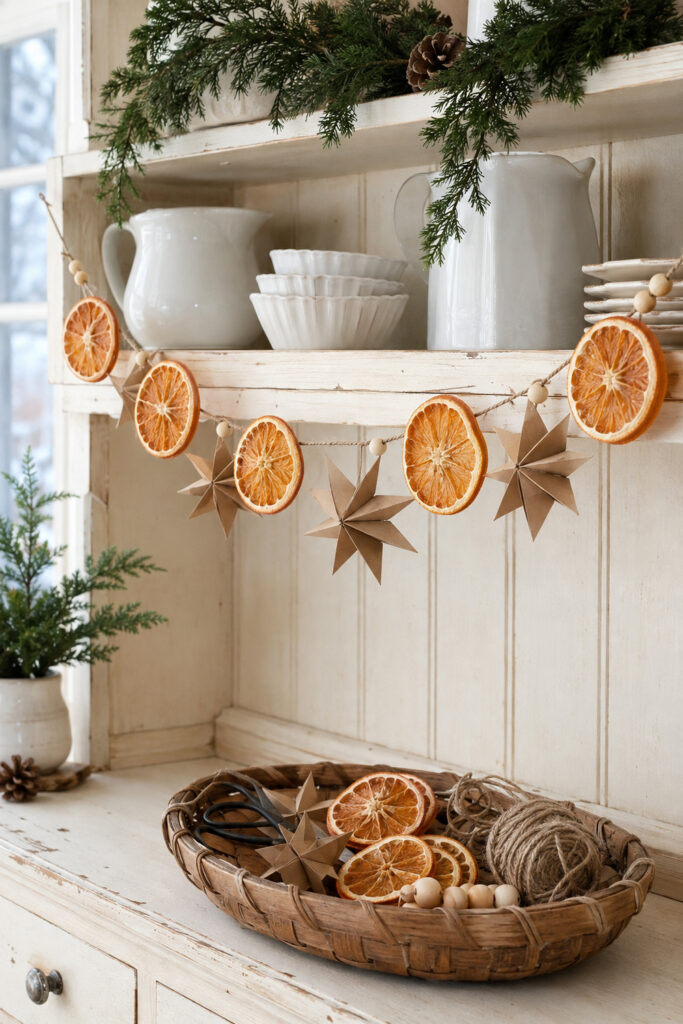
Fresh evergreen branches and simple white dishes make the amber orange slices and folded kraft-paper stars in the inspiration image especially striking. The combination feels natural, nostalgic, and relaxed enough to suit a farmhouse hutch, mantel, open shelving, or kitchen window.
This tutorial turns that visual concept into a practical garland using fully dried citrus, dimensional paper stars, unfinished wooden beads, and natural twine. The components are attached individually, which makes spacing easier and prevents one damaged orange slice from ruining the entire strand.
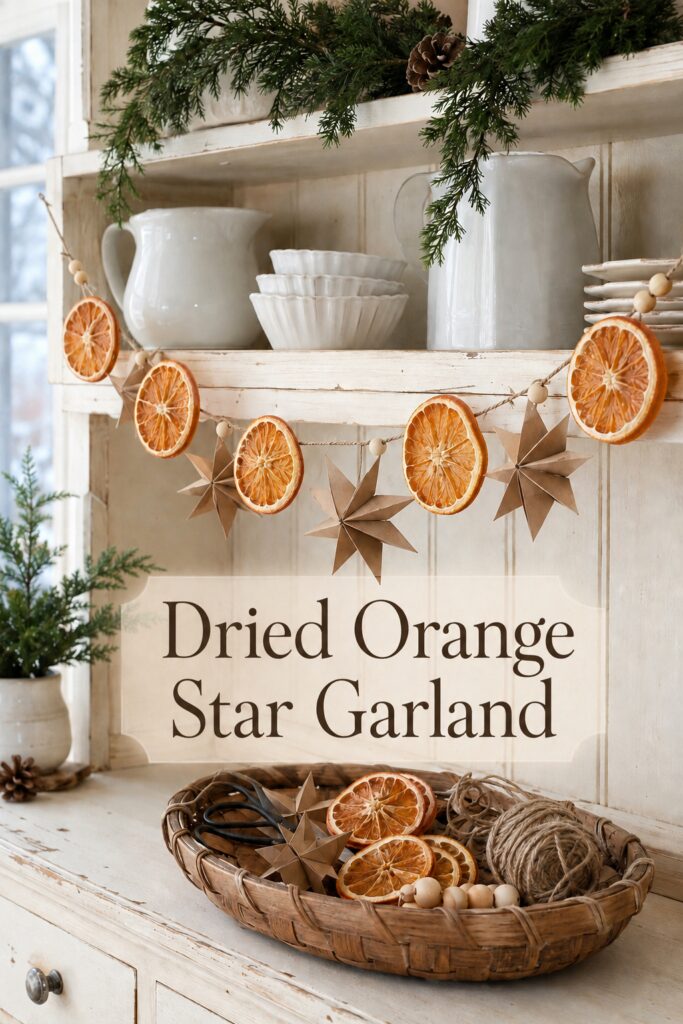
The inspiration and instructional images for this project were created with AI. They illustrate the concept and a practical construction method rather than documenting a physical project as it was made.
What You’re Making
The finished project is a lightweight indoor Christmas garland featuring alternating dried orange slices and three-dimensional kraft-paper stars. Small wooden beads break up the shapes and add a pale, natural accent.
A strand between 4 and 6 feet long works well for most hutches and mantels. The orange slices and stars hang from short twine loops attached to a separate base cord. This is a practical adaptation of the inspiration image because it allows the ornaments to face forward and move independently.
Materials and Supplies
Materials
- 3 to 5 medium oranges, depending on the desired garland length
- Medium-weight kraft paper or kraft cardstock
- Natural jute twine, approximately 1.5 to 2 millimeters thick
- Unfinished round wooden beads with holes large enough for the twine
- Parchment paper or reusable silicone baking mats
- Clear-drying tacky craft glue
- Optional small amount of low-temperature hot glue
- Optional clear matte craft sealer for the paper stars only
Tools
- Sharp kitchen knife and cutting board, or an adjustable food slicer
- Baking sheets
- Paper trimmer or scissors
- Ruler
- Pencil
- Bone folder or other blunt paper-folding tool
- Large-eye tapestry needle
- Awl, embroidery needle, or small pointed tool
- Glue applicator or toothpick
- Oven mitts
- Optional dehydrator
Before You Begin
Measure the place where the garland will hang, then add approximately 12 to 18 inches for drape and end ties. Cut the main cord only after deciding how deeply you want it to swag.
Plan on an orange slice or star approximately every 4 to 6 inches. You do not need perfect mathematical spacing, but arranging all the components on a table before assembly will help you avoid an unbalanced cluster of large shapes.
Protect the work surface before using glue. If children are helping, an adult should handle the oven, sharp knife, food slicer, awl, and any hot-glue work.
Step 1: Cut Even Orange Slices
Wash and thoroughly dry the oranges. Cut them crosswise into slices approximately 1/8 inch thick. Consistency matters more than hitting an exact measurement. Thick and thin slices placed on the same tray will dry at different rates.
A sharp knife works well if you cut slowly. An adjustable slicer can produce more uniform rounds, but always use its food holder and keep hands away from the blade.
Blot both sides of every slice with a clean towel to remove excess juice. Discard badly torn end pieces or save them for another use.
Step 2: Dry the Citrus Completely
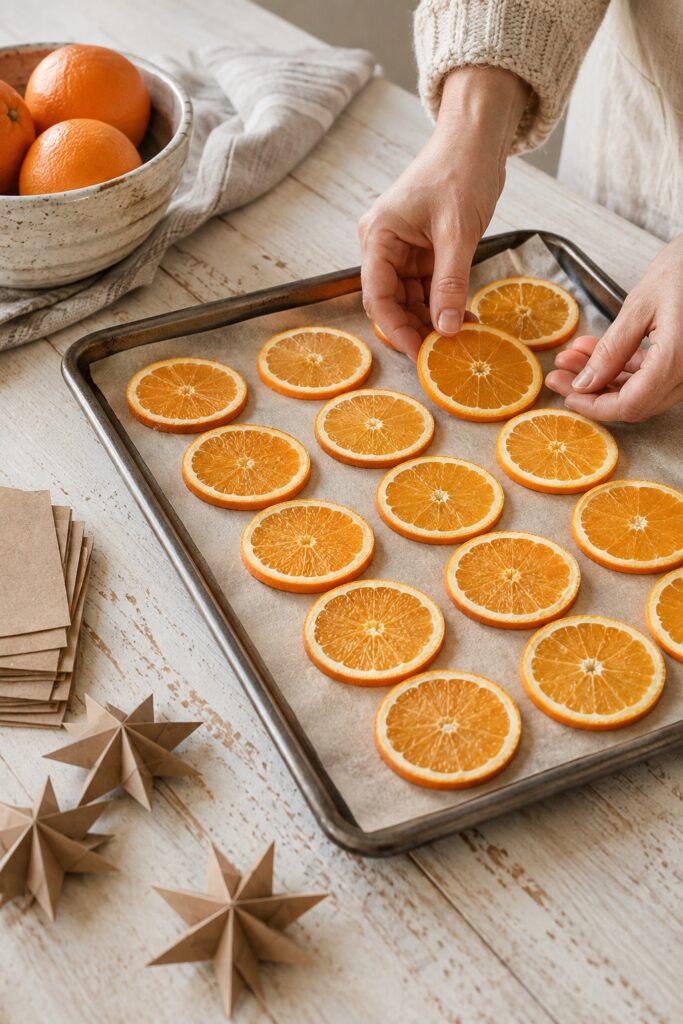
Cover the baking sheets with parchment paper or silicone baking mats. Arrange the slices in a single layer without overlapping them.
Dry the slices in an oven set to its lowest practical temperature, commonly around 200°F. Turn them every 45 to 60 minutes so the two sides dry evenly. Depending on their thickness and moisture content, they may require approximately 3 to 5 hours.
Remove individual slices as they become dry and firm. Their centers should no longer feel wet or sticky, although they may remain slightly flexible while warm. Let them cool completely on a rack.
If any slices still feel damp after cooling, return them to the oven. Trapped moisture can lead to mold later. A dehydrator may also be used according to its instructions.
Step 3: Cut the Kraft-Paper Squares
While the citrus dries, cut an even number of kraft-paper squares. Squares measuring approximately 4 to 5 inches will create stars proportioned well to average orange slices.
Each finished eight-point star uses two matching four-point star sections. Make all the squares the same size if you want a quiet, regular look, or use two nearby sizes for subtle variation.
Medium-weight paper is easier to fold than very heavy cardstock but holds its shape better than thin wrapping paper. Test one star before cutting the entire batch.
Step 4: Fold the Dimensional Star Sections
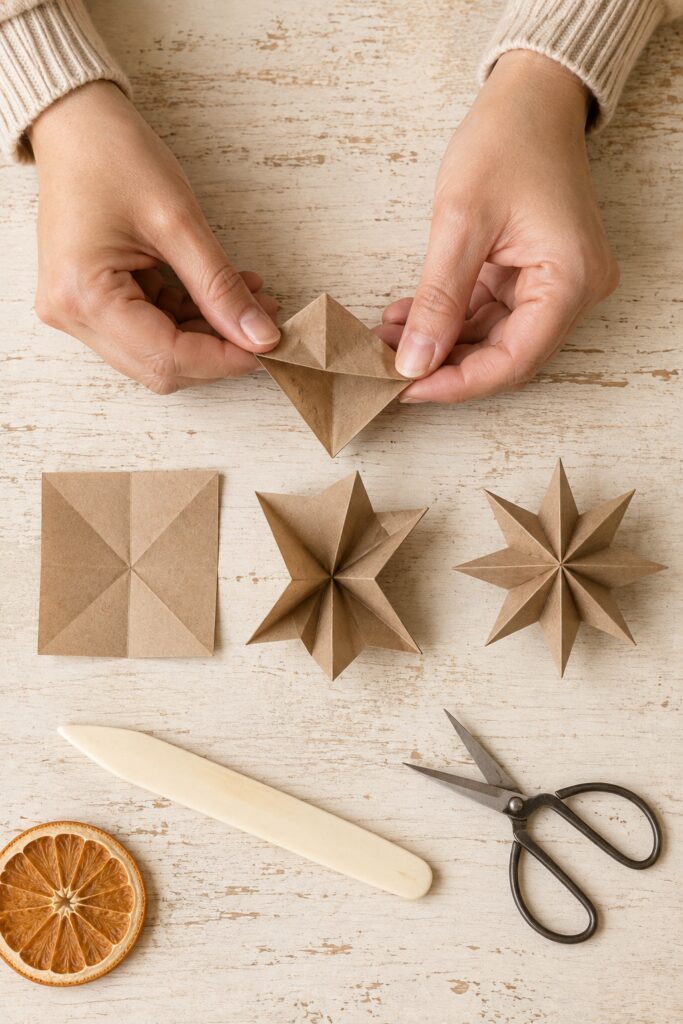
Fold one square in half horizontally and vertically, opening it after each crease. Turn the square over, then fold it diagonally in both directions. Use a bone folder to make the lines crisp.
With the paper opened flat, make a short cut inward along each of the four straight center creases. Stop roughly halfway between the outside edge and the center. Do not cut along the diagonal creases.
Fold the paper on either side of each cut toward the diagonal crease. This forms four pointed sections. On the back of each point, overlap the two small flaps and secure them with a thin line of craft glue. The overlap pulls the point forward and gives the star its dimension.
Repeat with a second square. Once both four-point sections are dry, place one on top of the other with the points offset. The result should resemble an eight-point star. Glue their flat centers together.
Avoid using too much glue. Excess moisture can buckle kraft paper or leave dark marks. A toothpick helps apply a narrow, controlled line.
Step 5: Add Hanging Loops to the Stars
Cut one short piece of twine for each paper star. A loop approximately 5 to 7 inches long before tying provides enough room for adjustment.
Glue the ends of the loop to the back of the star near its upper point. Cover the ends with a small kraft-paper patch and let the glue dry completely. This patch spreads the weight across the paper and is neater than forcing a large needle through the folded center.
If the stars will hang where both sides are visible, make two flatter star sections and sandwich the loop between them.
Step 6: Prepare the Orange Hanging Loops
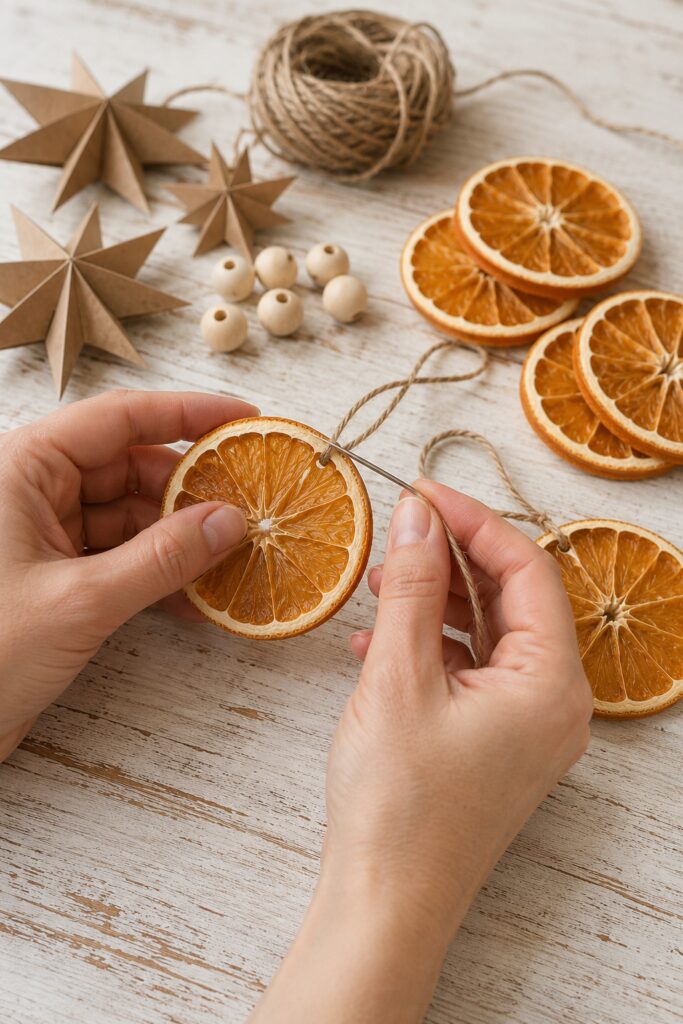
Only pierce citrus slices that are fully dry and cool. Place each slice on a folded towel and use an awl or sturdy needle to make a small hole just inside the rind. Keep enough rind above the hole to prevent tearing.
Thread a short piece of twine through the hole with a large-eye tapestry needle. Tie the ends together to form a loop. Keep the knot small and position it behind the slice.
Do not make the hole through the delicate center of the fruit. The rind provides the strongest attachment point.
Step 7: Lay Out the Garland Pattern
Stretch the base cord across a large table or clean floor. Place the orange slices, stars, and beads beneath it before tying anything in place.
Try an alternating rhythm such as orange, bead, star, bead, orange. Let some stars hang slightly lower than the citrus so the design has movement. The arrangement should feel considered without appearing rigid.
Step back and look at the sequence from a distance. Move any two unusually large orange slices apart so one side does not appear heavier.
Step 8: Thread the Beads and Attach the Ornaments
Thread the wooden beads directly onto the base cord. If the cord is too soft to pass through easily, wrap its end tightly with a small piece of removable tape or use a large-eye needle.
Attach the orange and star loops to the base cord between the beads. A lark’s-head attachment works well: fold the hanging loop, place the folded end behind the base cord, bring the ornament through the loop, and pull gently.
If a paper-star loop is not large enough for this method, secure it with a small square knot instead. Keep knots facing toward the back.
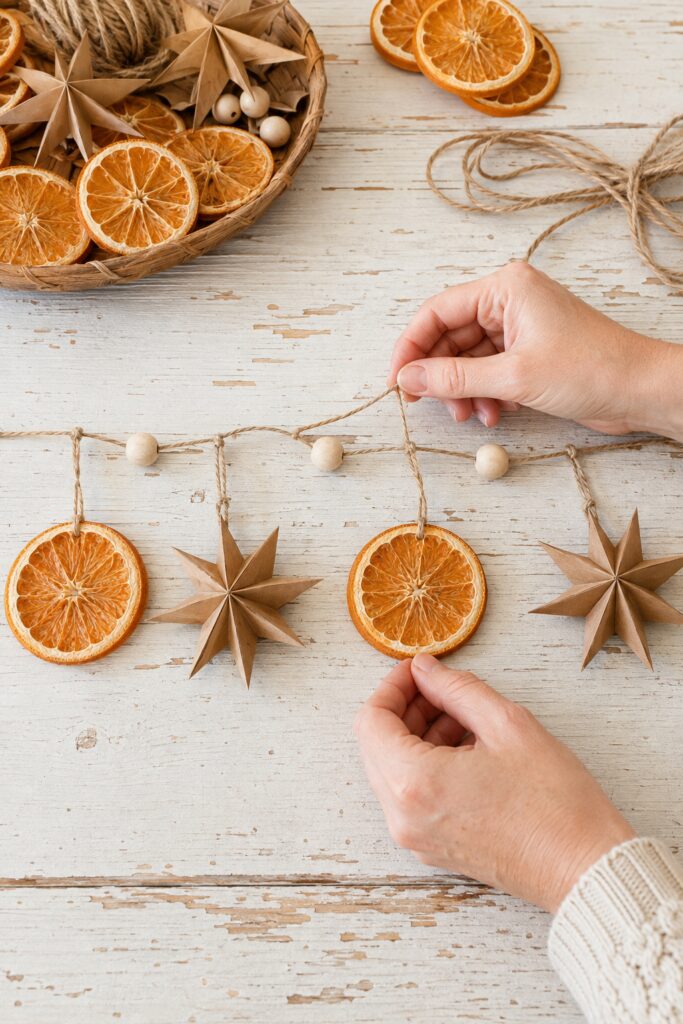
Slide the beads and ornaments until the spacing feels balanced. Small knots placed on either side of a bead can prevent it from drifting, although a little movement contributes to the handmade appearance.
Step 9: Finish and Hang the Garland
Tie a hanging loop at each end of the base cord. Lift the garland carefully from both ends rather than pulling it across the table.
Hang it from small removable hooks, existing knobs, or securely placed nails appropriate for the surface. Support a longer strand at its center so the weight of the citrus does not create excessive tension.
Turn individual orange slices and stars forward. Because they hang separately, they can be adjusted after the strand is in place.
Tips for Capturing the Inspiration Look
Keep the palette restrained. The amber citrus is most noticeable when the paper, beads, and cord remain natural and undecorated.
Use orange rounds of roughly similar diameter, but retain a few imperfect edges. Their variation helps the garland feel handmade.
Make the stars approximately the same width as the orange slices. Tiny stars can disappear between the citrus, while oversized ones may hide the wooden beads.
Hang the strand against a pale background when possible. Cream-painted wood, white dishes, and evergreen branches provide the soft contrast seen in the inspiration image.
If you add greenery above the garland, keep it separate. Fresh branches can transfer moisture to dried citrus and paper.
Easy Ways to Customize It
For a more traditional Christmas palette, replace a few natural beads with muted cranberry-red beads. A lighter Scandinavian version could use ivory paper stars and bleached wooden beads.
Book pages or subtle sheet-music paper can replace the kraft paper, provided the paper is sturdy enough to hold a crease. To create a fuller display, make a second, shorter strand using only small wooden beads and hang it slightly above the ornamented garland.
For a kitchen window, shorten the strand and use smaller orange slices. For a mantel, enlarge the stars slightly and allow a deeper swag.
Displaying and Storing the Garland
This project is best displayed indoors in a dry location. Avoid hanging it over a working stove, sink, fireplace opening, heat vent, or area exposed to condensation.
Inspect the fruit occasionally and discard any slice that softens, develops an odor, or shows mold. Do not let children or pets chew the citrus, twine, beads, or glued paper components.
After Christmas, store the garland in a breathable cardboard box with tissue between the ornaments. Avoid a sealed plastic container if any residual moisture might remain. In a humid climate, it may be better to save the paper stars and beads but replace the orange slices the following season.
The finished strand does not need to duplicate every detail of the inspiration image. Its character comes from the combination of glowing citrus, folded brown paper, pale wood, and simple cord. Careful drying and crisp folds will do more for the finished result than perfect uniformity.