*This post may contain affiliate links for which I earn commissions.*
A freestanding rope spiderweb turns an ordinary garage, workshop, porch, or covered patio into a playful Halloween scene without covering every surface in decorations. The oversized scale gives this project its impact, while natural rope and unfinished wood keep it warm, textural, and surprisingly stylish.
In the inspiration image, the web is stretched across a tall wooden frame and finished with soft black spiders and a wrapped crescent moon. The result feels handcrafted rather than overly spooky, making it a fun choice for family-friendly Halloween decorating.
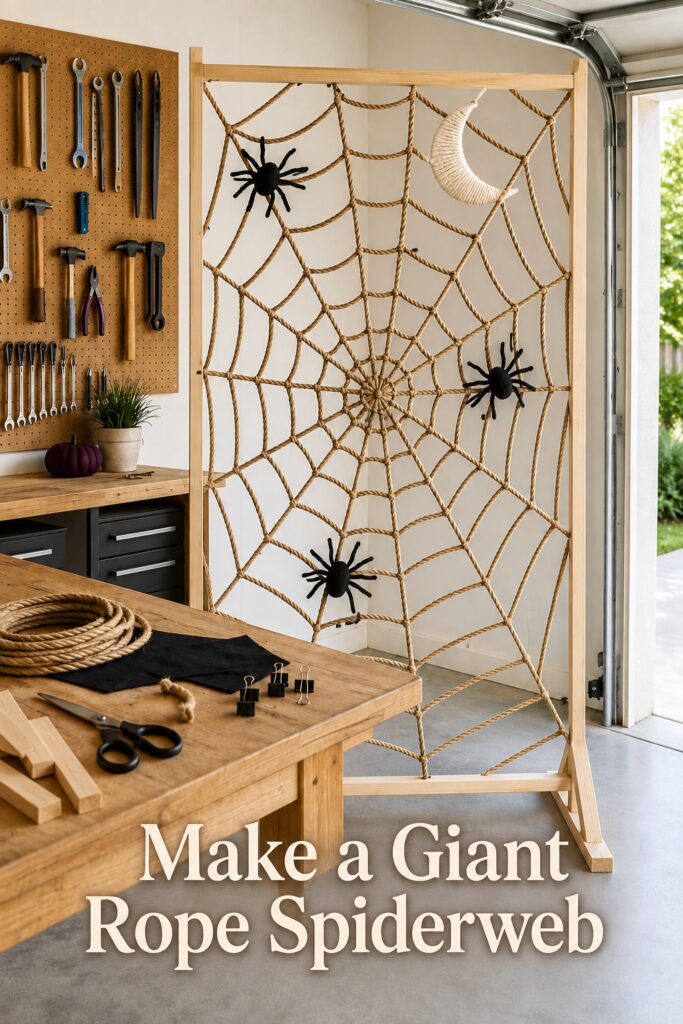
The inspiration image featured in this post was created with AI. Use it as a creative starting point for making a similar display with materials suited to your own space.
Why This Oversized Spiderweb Works
The rope web is the clear focal point. It fills nearly the entire wooden frame, creating enough visual presence to work as a temporary room divider or dramatic Halloween backdrop.
Its neutral palette is an important part of the design. Honey-toned rope and pale wood soften the traditional black Halloween accents. Instead of relying on orange and purple throughout the display, the image uses only a few dark details to establish the theme.
Scale also makes the arrangement memorable. A small web would simply read as another seasonal ornament. Stretching the pattern from floor level to above eye height makes it feel architectural.
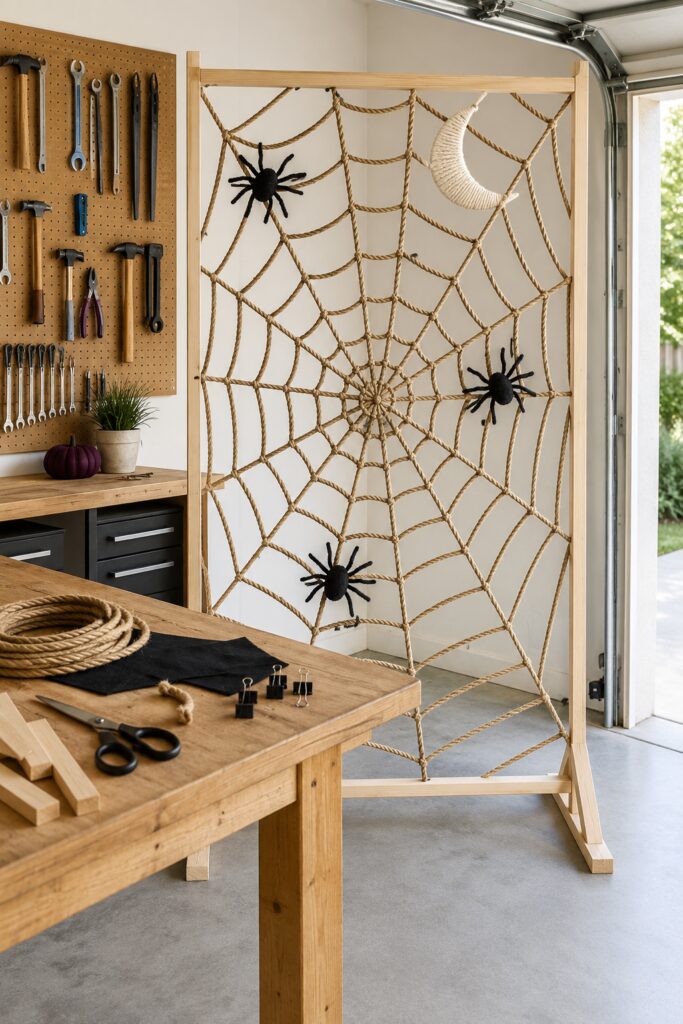
The curved lines of the web contrast with the straight lumber frame. Meanwhile, three plush spiders and one crescent moon interrupt the pattern without concealing the handmade ropework.
The web does not appear perfectly uniform, and that is part of its charm. Slight differences in spacing and knot placement give the installation an organic, handwoven character.
Choose a Sturdy Freestanding Frame
The frame needs to be tall and wide enough to make the web feel substantial. A simple rectangular structure made from smooth wood boards can create the same effect, especially when supported by broad feet at the bottom.
Build the frame according to the size of your available area rather than copying the image exactly. A narrower version could stand beside an entryway console, while a wider one could become a party backdrop.
Sand the wood thoroughly anywhere the rope will touch it. Rough corners can catch or fray the fibers as you tighten the web.
For a lower-commitment alternative, use a sturdy photography backdrop stand or garment-style display frame. Wrap or disguise visible metal sections with rope if you prefer the natural appearance of the inspiration image.
Whatever frame you choose, test its stability before decorating it. Use an appropriate anti-tip solution, wall tether, or weighted base if the finished piece will be accessible to children or pets.
Weave the Web With Natural Rope
Medium-weight natural rope gives this project its warm, handmade appearance. Look for a thickness that is visible from across the room but still flexible enough to knot comfortably.
Begin by creating several straight spokes that meet slightly below the center of the frame. These lines establish the web’s basic structure.
Next, work outward from the center with increasingly large rings. Tie each ring to the spokes as you go. The lines do not need to form perfect circles. Gently uneven arcs make the web look more natural.
Leave a little slack in each curved section instead of pulling every strand tight. This produces the relaxed, scalloped shape visible in the inspiration image.
The center can be finished with a small wrapped circle, a decorative knot, or several tight rounds of thinner cord. That concentrated detail helps the entire pattern feel intentional.
Add Soft Black Spiders
Three large black spiders provide just enough contrast against the tan rope. Their fuzzy finish also balances the web’s coarse texture.
Choose spiders in more than one size if possible. Place one toward an upper corner, another near the side, and a third lower on the web. This triangular arrangement leads the eye around the full divider.
Avoid spacing them at identical intervals. An asymmetrical layout feels more animated, as if the spiders have crawled into place.
Lightweight decorations are best for this project. Heavy figures may distort the web or cause the frame to lean. Attach each spider with thin wire, reusable ties, or short lengths of black cord.
Make the Wrapped Crescent Moon
The creamy crescent moon gives this spiderweb divider an unexpected handcrafted accent. It softens the black spiders and adds a gentle celestial theme.
You can start with a lightweight crescent form made from foam, cardboard, or wire. Wrap it with cream yarn, cotton cord, or narrow macramé rope until the base is concealed.
Keep the wrapping close and consistent for a clean silhouette. A few tiny gaps are unlikely to be noticeable once the moon is hanging within the web.
Position the moon near the upper part of the frame, away from the largest spider. This creates balance without making the decorations appear overly symmetrical.
How to Assemble the Divider
Measure the intended display area first, including ceiling height, doorway clearance, and available floor space. Build or assemble the frame where it will be used if it is too large to move easily.
Mark the center point and the approximate positions of the web’s main spokes. Small screw eyes provide secure anchor points on a wooden frame, although the correct fastener will depend on your materials.
Attach the spokes before adding the curved connecting lines. Keeping the central structure under moderate tension will make the later sections easier to position.
Step back frequently while weaving. It is easier to notice crowded or empty areas from several feet away than when standing directly beside the web.
Once the ropework is complete, trim loose ends or tuck them behind knots. Add the spiders and moon last so they do not interfere with weaving.
If the divider will be used outdoors, select weather-tolerant materials and bring soft decorations inside during rain or strong wind. Natural rope can absorb moisture, and an unsecured freestanding frame can become hazardous in windy conditions.
Style It Beyond the Workshop
Although the inspiration image places the divider in a garage workshop, the idea can be adapted for many parts of the home.
Stand it behind a Halloween treat table to make a party backdrop. Place it on a covered porch with pumpkins gathered around the base. A smaller web could sit behind an entry bench or fill an unused corner of a family room.
For evening ambiance, weave a strand of warm battery-operated lights loosely through a few sections. Keep the lighting secondary so the rope pattern remains visible.
A black textile, deep plum pumpkin, or small grouping of handmade decorations nearby can connect the divider with the rest of your Halloween decor. Leave some open space around the frame so its silhouette does not disappear into visual clutter.
Shop Similar Rope for the Web
Look for medium-weight twisted jute, manila, or sisal-style rope with a warm natural tone. A longer continuous roll will create fewer joins.
Look for a Freestanding Display Frame
Choose a frame or backdrop support with enough height for a room-scale web. Stability and a wide base matter more than decorative detailing.
Add Oversized Black Spiders
Soft, lightweight spiders are easier to attach than rigid figures. Look for bendable legs and a matte or fuzzy surface.
Shop Crescent Moon Craft Forms
A lightweight foam, wire, or unfinished wooden crescent can serve as the foundation for the wrapped moon.
Add Cream Cord or Yarn
Use soft cream cord that contrasts gently with the darker natural rope. A smooth fiber will give the moon a tidy wrapped finish.
Look for Discreet Fasteners
Small screw eyes, reusable ties, craft wire, and compact clamps can help secure the web and ornaments without dominating the finished design.
Final Styling Tip
Let the rope pattern supply most of the decoration. A large handmade web, three strategically placed spiders, and one soft celestial accent are enough to turn a simple freestanding frame into an imaginative Halloween centerpiece.