*This post may contain affiliate links for which I earn commissions.*
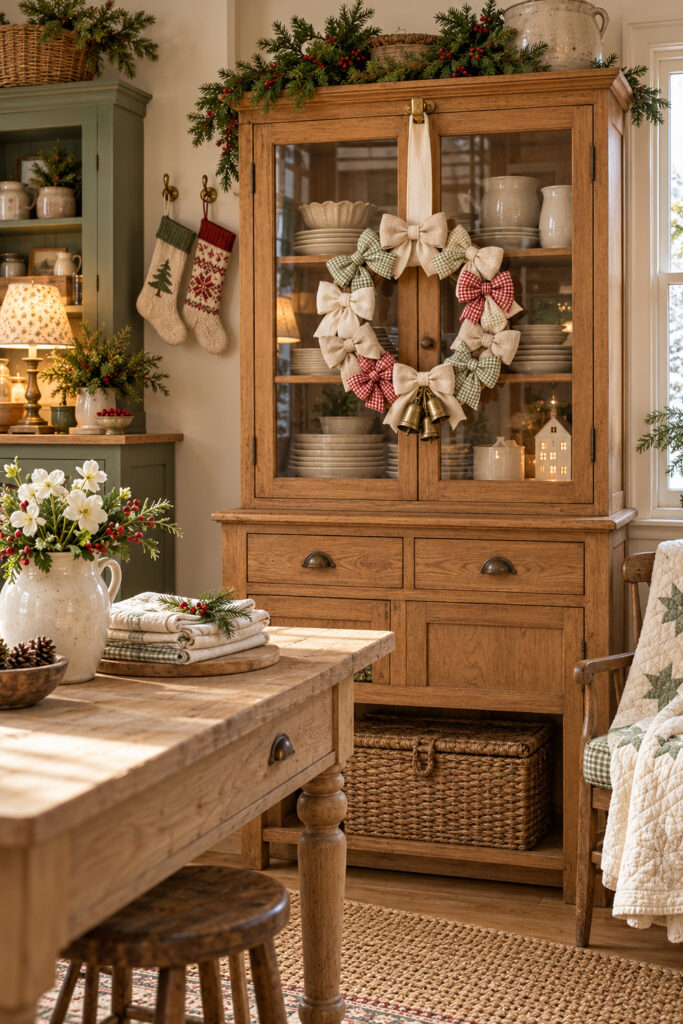
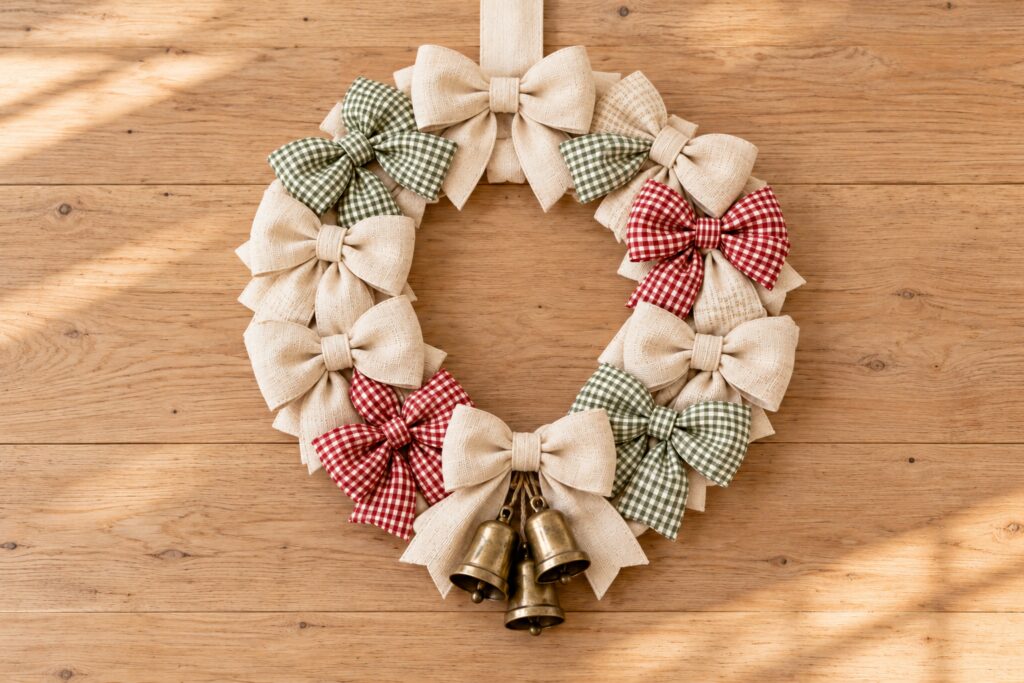
Cream bows, sage checks, and a little cranberry red give this Christmas wreath its farmhouse character. The bows sit close together around an open ring, with a small cluster of brass colored bells finishing the bottom. Against a wooden cabinet, the mix of plain fabric and gingham feels warm without needing a lot of extra decoration.
Wide fabric ribbon is a straightforward way to borrow the idea. Tie individual bows, arrange them around a wrapped hoop, and secure them with floral wire or hot glue. The fullness comes from the ribbon loops and the way they overlap.
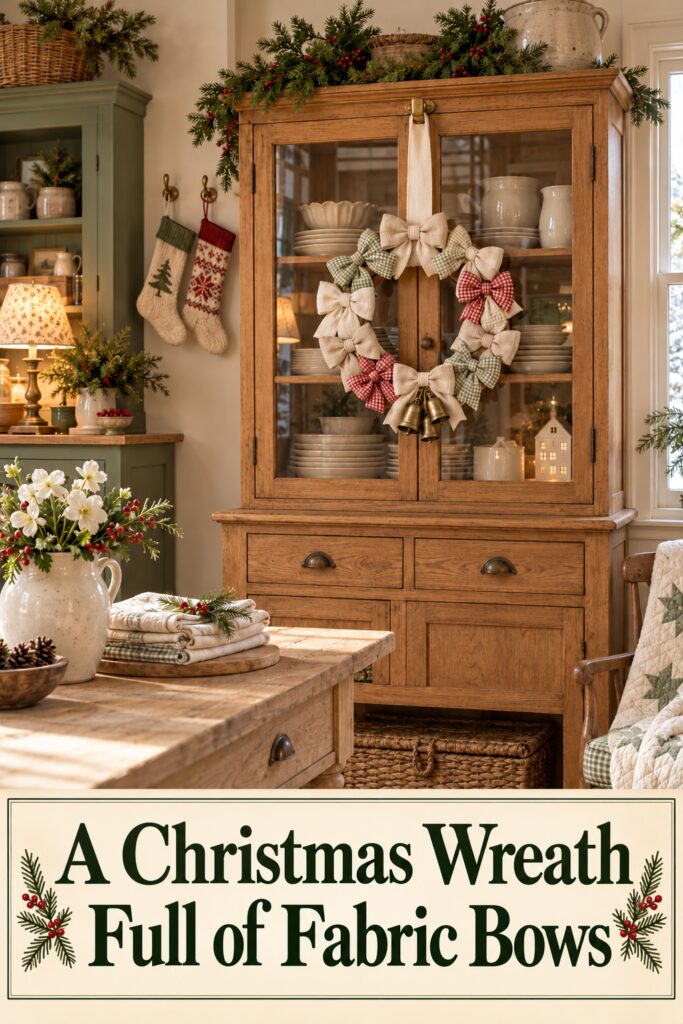
The inspiration and tutorial images were created with AI to illustrate the decorating idea and proposed construction method rather than document a physically tested project.
What You’re Making
You’ll cover a lightweight hoop with cream ribbon, then add a closely spaced circle of tied bows. A wooden craft hoop is a good starting point because it gives you a firm base to wrap and handle. A lightweight metal hoop can work too if that’s what you have or find more economical.
For a suggested 12 inch hoop, start by planning around twelve bows about 5 to 6 inches across. Their loops should overlap slightly while leaving the center open. These are suggested working dimensions, so make one sample before deciding how much ribbon to cut.
Materials and Supplies
Main Materials
- One approximately 12 inch wooden craft hoop or lightweight metal hoop (and if you’re looking to save money, I think you could get away with a hoop cut out of cardboard since you’re going to wrap it anyway – depends on where you’re going to place it and if it’s a gift you want to give to someone or not)
- Cream ribbon or fabric strips to wrap the hoop
- Wide fabric ribbon in cream, sage gingham, and cranberry red gingham
- Flexible floral wire, around 24 gauge, for attaching the bows (or a hot glue gun)
- Sturdy cream ribbon for the hanging loop (you can use the same ribbon you used for wrapping or for the cream bows as long as it’s sturdy)
- Optional small brass colored bells and strong cord for attaching them
Ribbon about 2 1/2 inches wide is a useful starting point for the bows. Choose a woven fabric finish with enough body to hold a loop. Lightly wired edges make shaping easier, though a crisp unwired ribbon can also work. Avoid very floppy fabric if you want the bows to spread over the frame.
As a planning estimate, allow about a yard per bow and some extra for your sample and adjustments. Eight cream bows, two sage bows, and two red bows would give a mostly neutral wreath. The final amount depends on your bow size and tail length.
Want to Make this Bow Wreath?
I’ve put together a convenient Amazon supply list featuring hand-picked, well-rated products that match the items in the list above to save you time.
See My Hand-Picked Supply ListAs an Amazon Associate I earn from qualifying purchases but this doesn’t increase your price at all!
Tools and Attachment Options
Use scissors, a measuring tape, and wire cutters. A hot glue gun and glue suitable for your materials are an alternative for attaching the bows. You can also use a little glue to anchor the hoop wrapping even when the bows are wired on.
If using hot glue, protect the table with a suitable mat and keep fingers clear of the nozzle and fresh glue. Cut floral wire with wire cutters rather than your fabric scissors.
Before You Start
Tie one sample using an uncut length from the ribbon roll. Adjust its loops until it looks right against the hoop, then cut the ribbon and measure what you used. That gives you a much better guide for the remaining bows than cutting every piece to a fixed length first.
If You Want to Use Your Own Fabric
Cut strips of a crisp woven cotton or cotton linen blend and press the long raw edges toward the back. Slightly frayed edges can suit a rustic version, but turn them under if you want a neater finish. Folded strips will look different on the reverse, so use them where you can keep the finished face visible.
For more body, fuse a lightweight or medium weight interfacing to the wrong side of one fabric layer, following its instructions. If you want fabric on both sides, use a second fabric layer and a suitable fusible web to join them, with raw edges turned inward. Ordinary single sided interfacing won’t bond two layers by itself. Test a small piece first; an overly stiff strip will be difficult to knot. Ready made fabric ribbon is the simpler route.
Step by Step Tutorial
1. Wrap the Hoop
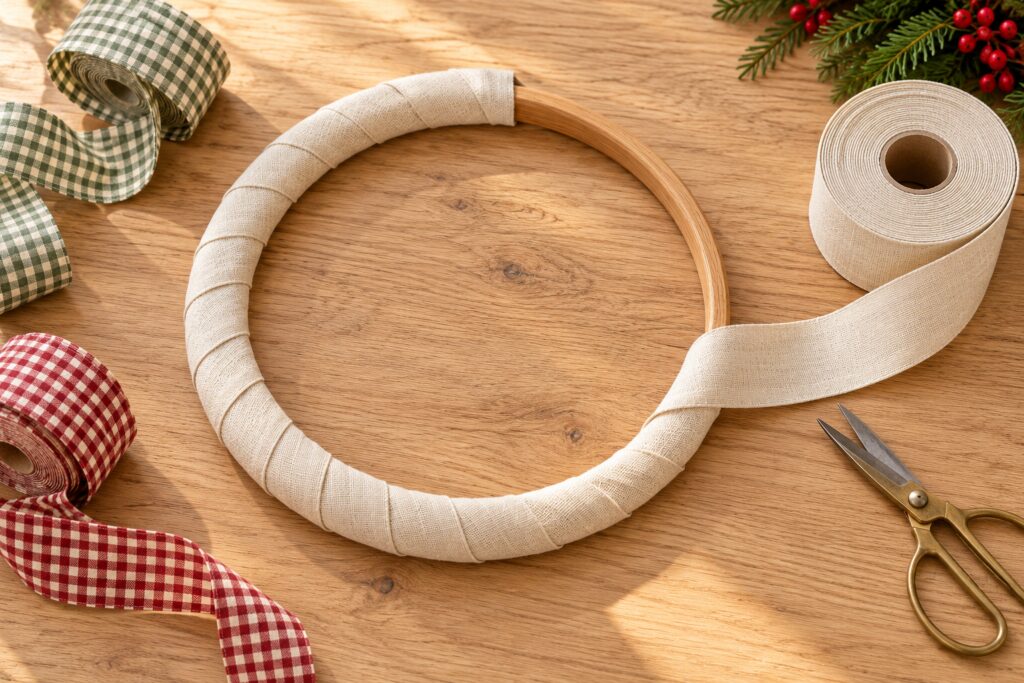
Anchor the end of the cream ribbon on the back of the hoop with a small amount of hot glue, then let it cool. Wind the ribbon around the band, overlapping each turn enough to hide the wood. Keep it snug and smooth rather than building up thick ridges.
Continue around the circle, checking the inner and outer edges for bare patches. Finish on the back, trim the ribbon, and glue the end down. Let the glue cool before arranging bows. Cover a metal hoop the same way; the wrapping hides its finish and gives the attachments a softer surface to sit against.
2. Tie the First Bow
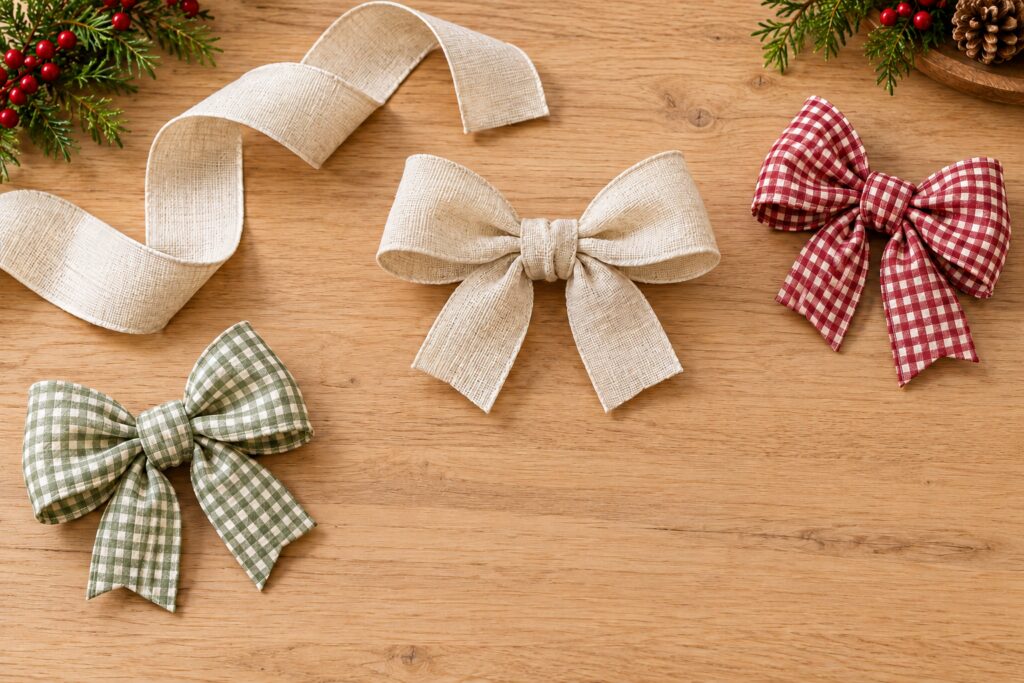
Leave a short tail, form one loop, and wrap the working ribbon around its middle. Push a second loop through the opening behind the first, as you would when tying a shoelace bow. Pull the two loops gently in opposite directions to snug the center knot.
Adjust by drawing small amounts of ribbon through the knot until the loops look balanced. Keep the attractive side facing forward and smooth out accidental twists. If the ribbon is wired, curve the loop edges gently so they open instead of lying flat.
Trim the tails after the loops are the size you want. Short tails tucked behind neighboring bows will help keep the circle full. Leave the lowest bow’s tails a little longer if you want them to frame the bells.
3. Make the Remaining Bows and Plan Their Spacing
Use your sample as a size guide while tying the others. They can vary a little, but similar loop widths will make it easier to cover the hoop evenly. Lay them around the frame before fastening anything.
Spread the red and sage bows among the cream ones, rather than placing both red bows beside each other. Turn each bow so its width follows the curve of the hoop. Let neighboring loops overlap, and tuck short tails behind them where needed. If gaps remain, enlarge a loop or add another bow before committing to the arrangement.
4. Secure the Bows with Floral Wire
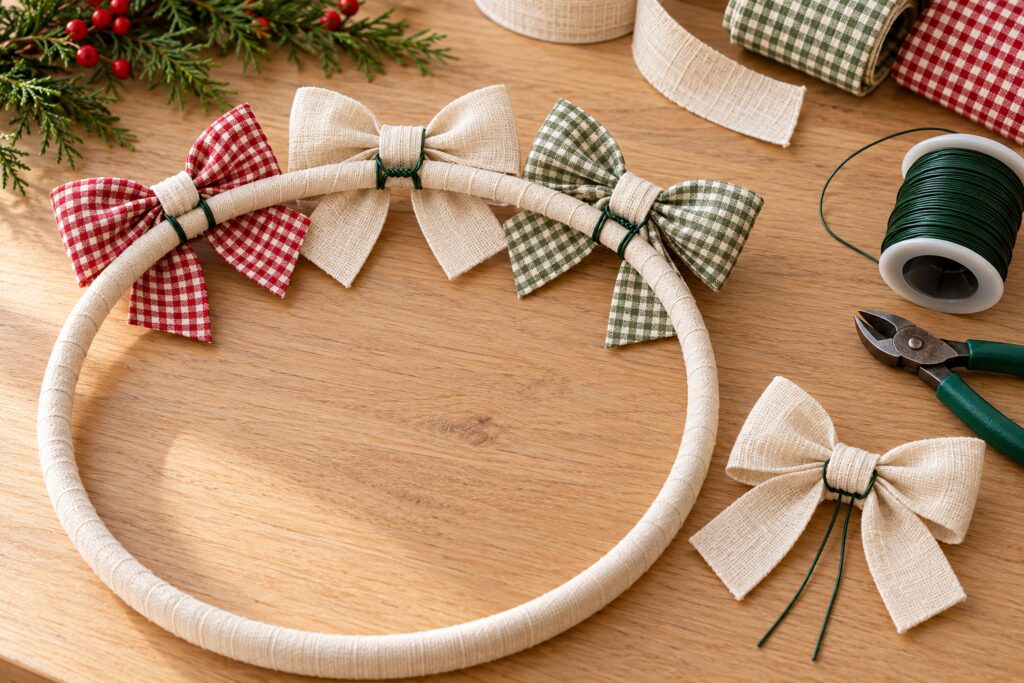
Cut a piece of floral wire long enough to go beneath the back of a bow’s knot, around the hoop, and still leave ends you can twist together comfortably. About 8 inches is a suggested starting length; adjust it to your frame and knot size.
Slide the wire beneath the back of the center knot without puncturing the ribbon. Set the bow on the front of the hoop, bring both wire ends around the band, and twist them together at the back. Tighten enough to hold the bow without crushing its loops. Trim excess wire and fold the cut ends flat toward the hoop so they won’t scratch your display surface.
Repeat around the ring, checking the front as you go. A bow that turns can usually be steadied by tightening its wire and letting its loops nest against its neighbors.
Prefer Hot Glue Instead
After checking the complete layout, lift one bow at a time and apply a small bead of suitable hot glue where the back of its center knot meets the wrapped hoop. Press it into position without touching the hot glue and hold it until it grips. Let it cool fully before moving on.
Test the bond on a sample first, especially with coated ribbon. Keep glue behind the knot rather than inside the loops. Wire is the more adjustable choice if you want to move bows or reuse the frame later.
5. Add Bells and a Hanging Ribbon
Tie the bells directly to the bottom of the hoop with strong cord, hiding the knot behind the lowest bow. Let the bells rest in front of that bow’s tails. The frame should carry their weight.
At the top, part two bows and pass a length of sturdy hanging ribbon around the hoop itself. Tie its ends securely to form a loop, then return the bows to hide the attachment. Lift the wreath by that loop and check its balance before putting it on a suitable hook.
Tips for Getting the Finished Look
Fluff the loops after attaching every bow. A loop pressed flat during wiring can make a gap seem larger than it is. Adjust its edges first, then decide whether you need another bow.
Keep the cream as the main color and use the checks in smaller patches. The warm woven texture will do much of the decorating, so a simple bell cluster is enough at the bottom.
Easy Ways to Customize It
Choose small scale plaid instead of gingham, use all cream ribbon, or replace the red with a color already in your room. For a smaller hoop, reduce the bow size as well as the number so the open center doesn’t disappear.
Displaying the Finished Wreath
Hang it indoors on a cabinet, interior door, or wall hook that supports the completed weight. Check that the back has no exposed wire points, and protect delicate finishes from rubbing. Keep the ribbon away from flames and heat, and place small detachable bells out of reach of children or pets.
Final Encouragement
Begin with a wrapped hoop and one good sample bow. Once its loops hold their shape, repeat that bow in your chosen ribbons and adjust the spacing until the frame disappears behind them. That simple combination gives you the full fabric covered circle that makes the inspiration appealing.