*This post may contain affiliate links for which I earn commissions.*
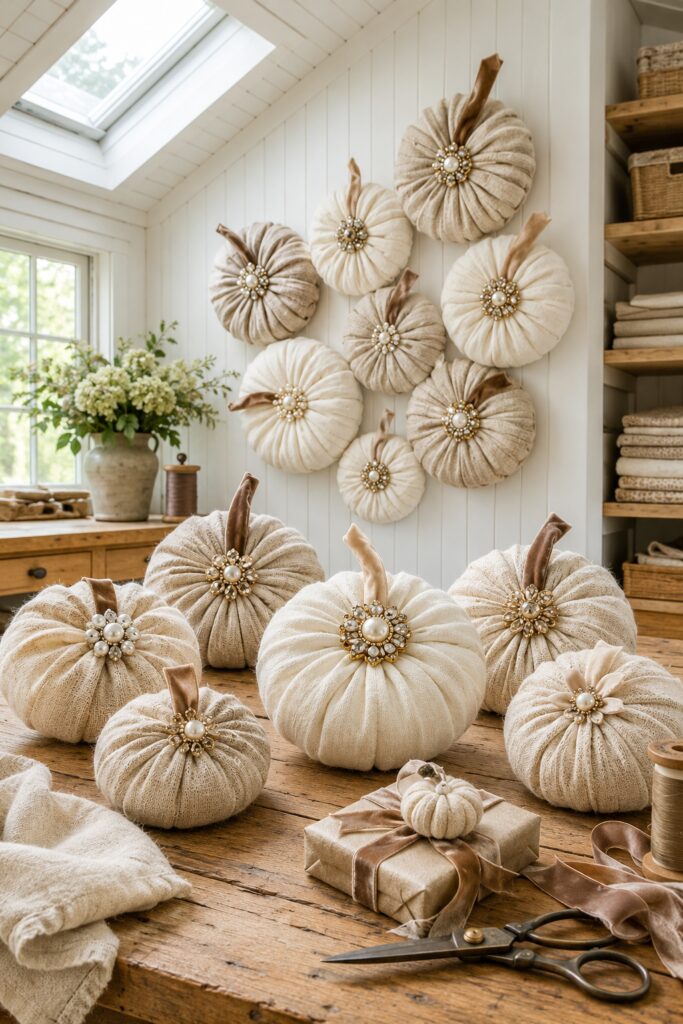
A circle of softly folded linen becomes something special when it meets a velvet stem and a pearl brooch. These pumpkin rosettes borrow their charm from the contrast: humble ivory and oatmeal fabric gathered around a small, jewel-like center.
The inspiration shows a wall collection alongside fuller tabletop pumpkins and a miniature gift topper. This tutorial focuses on shallow, lightly padded rosettes that are practical to hang, with an easy size adjustment for gift wrapping.
The inspiration and instructional images were created with AI. They illustrate a proposed DIY method rather than a photographed project made by hand.
The Shape You Will Be Making
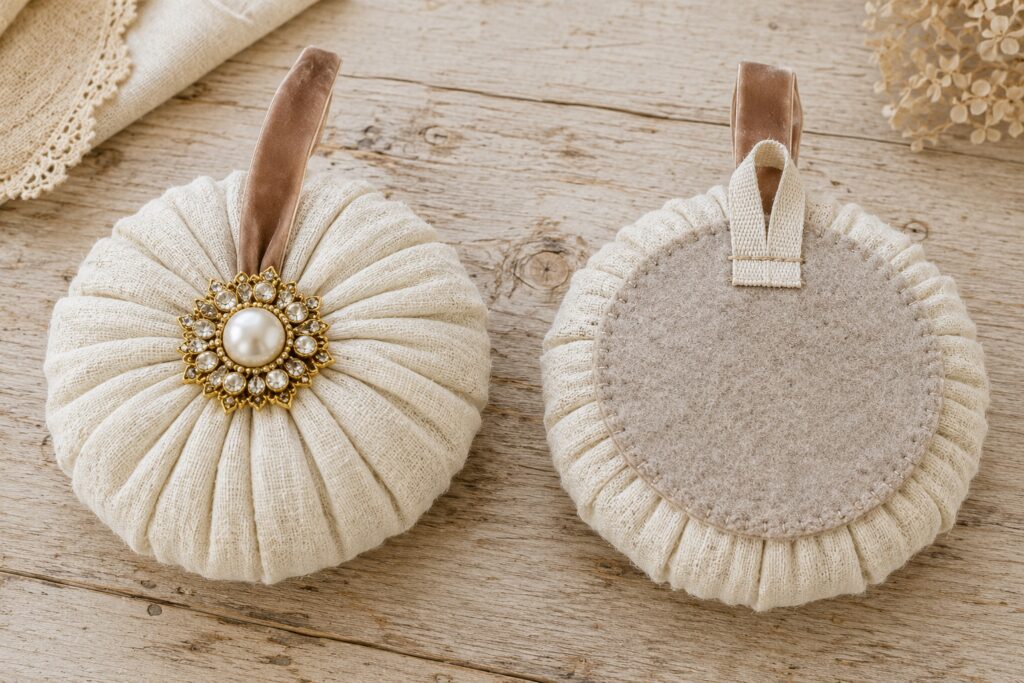
Think of this as a large fabric yo-yo with deliberate radial folds, a softly rounded edge, and a velvet stem extending upward from the center. It is a shallow pumpkin silhouette rather than a fully stuffed, freestanding pumpkin.
A suggested 16-inch fabric circle makes a rosette approximately 7 to 8 inches across, depending on the fabric and gathering. A felt backing helps it lie neatly against the wall. The brooch covers the reinforced gathering point, while a separate loop on the back supports the decoration.
The image’s folds are interpreted as hand-arranged gathers. You do not need to measure and press dozens of identical accordion pleats.
Supplies for One Medium Rosette
Fabric and Structure
- One approximately 16-inch square of ivory or oatmeal linen, or a soft linen-cotton blend
- One approximately 7-inch circle of low-loft batting
- One approximately 6-inch circle of felt for the back
- One approximately 1½-inch circle of firm felt for the center reinforcement
- Some polyester fiberfill to fill each pumpkin
- About 10 to 12 inches of nonwired velvet ribbon, approximately 1-2 inches wide, for the stem
- About 5 inches of narrow cotton twill tape for a hanging loop
- Strong sewing thread close to the linen color
Decorative Center
- One lightweight vintage-style pearl brooch, approximately 1-2 inches across, large enough to hide the center of the felt patch
- Optional matching thread for discreet stabilizing stitches through open metalwork
Tools
- Paper, pencil, ruler, and a fabric-safe marking tool
- Fabric scissors, sewing needles, pins or clips
- Iron and pressing cloth suitable for the fabric
- A small wall hook appropriate to the surface and finished weight
For a miniature gift topper, use a small sew-on pearl button or embellishment instead of a brooch. A little polyester fiberfill is optional if you want a slightly fuller tabletop version.
Choose a pliable fabric that gathers easily. Very coarse burlap and heavy upholstery linen can make the center bulky. If the weave is open enough to show the batting, switch to a more closely woven linen blend.
Want to Make These Pumpkins?
I’ve put together a convenient Amazon supply list featuring hand-picked, well-rated products that match the project shown in this post.
See My Hand-Picked Supply ListAs an Amazon Associate I earn from qualifying purchases but this doesn’t increase your price at all!
Choose the Brooch Before You Gather
Lay the brooch beside the fabric and ribbon. Cream pearls with a muted gold setting suit oatmeal linen, while an ivory rosette can carry a slightly darker champagne stem.
Inspect the clasp and the reverse of the jewelry for loose parts or sharp projections. Use a lightweight piece with a clasp that closes securely. Keep valuable or sentimental jewelry removable, and avoid adhesives that could damage its finish.
Wash and press the linen if appropriate to its care instructions. Make one sample before cutting a whole collection, because thickness affects both the finished diameter and the fullness of the folds.
Gather, Shape, and Finish the Rosette
1. Cut the Circle and Sew the Gathering Line
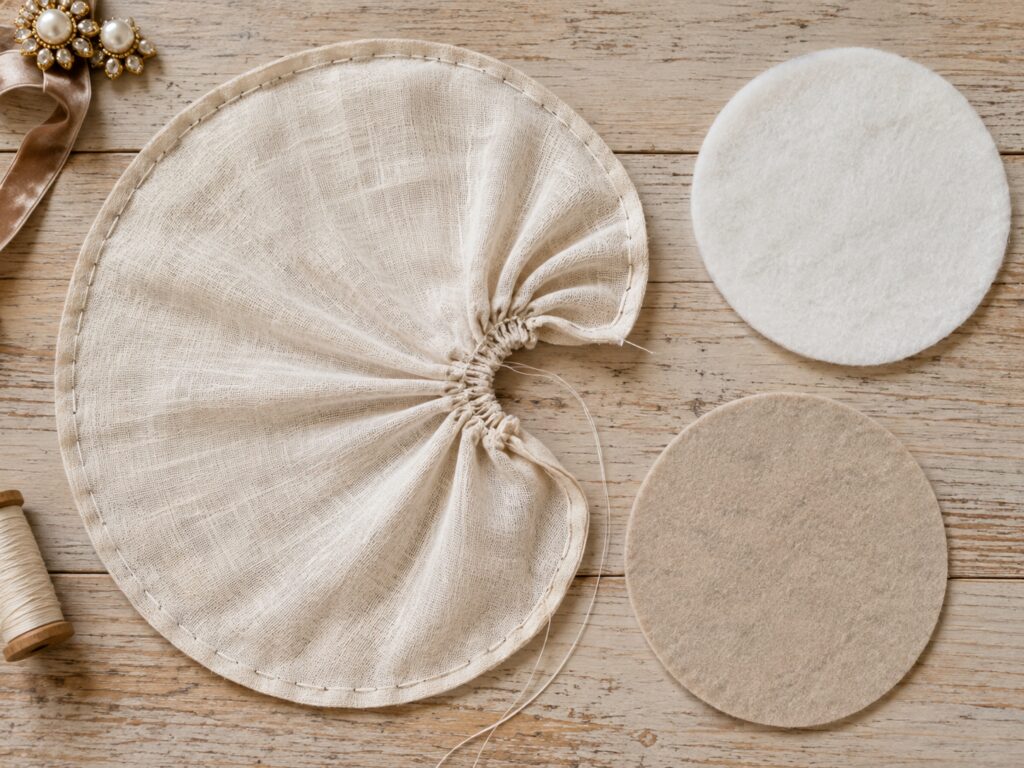
Draw and cut a 16-inch circle. With the wrong side facing you, turn the outer edge inward approximately ¼ inch. Finger-press the fold or press lightly with an iron.
Using a generous length of doubled strong thread, sew small running stitches through this folded edge all the way around. Leave long thread tails at the beginning and end rather than tying them together yet. Keep the stitches reasonably even, about ¼ inch apart.
Pull gently on the tails to check that the edge gathers. Work the fabric along the thread instead of pulling hard enough to snap it.
2. Draw the Fabric into a Shallow Pouch
Keep the fabric right side facing outward as you gather the edge upward and inward. The original center of the circle becomes the back; the gathered opening becomes the front center.
You may want to fill some pumpkins with polyester fiberfill. If so, gradually add filling before taking the next steps and make sure you leave enough room to secure the opening when you’re done.
Before closing the opening, slip the batting inside and spread it flat against the back. Let the linen roll softly around its edge. If the batting buckles or prevents the gathers from reaching the center, trim it slightly.
Draw the opening down to approximately ½ inch. Arrange the fabric around it into soft radial folds, distributing fullness around the entire circumference. Aim for an even outline with natural variation between the folds.
Knot the gathering threads securely, then take several small stitches through the gathered edge to lock it. Keep the rosette shallow enough to sit against the wall. Do not pull until the linen puckers into a hard central lump.
3. Reinforce the Center and Make the Velvet Stem
Place the small felt patch over the gathered opening. Sew around its perimeter, catching several linen folds with each section of stitching. This spreads the brooch’s weight across the center rather than asking one thin fold to support it.
Fold the velvet ribbon in half with the velvet faces outward. Stitch the long edges together discreetly, leaving the folded end as the stem tip. Tuck the cut ends inward at the base. The doubled ribbon makes a soft stem without exposed wire.
Lay the stem up the front of the rosette, with approximately ½ to ¾ inch of its base resting on the felt patch. Adjust its angle so the tip projects beyond the upper edge. Sew the base securely to the patch and underlying folds. If needed, add a tiny hidden tack farther up to keep it from falling sideways.
4. Build a Separate Hanging Loop
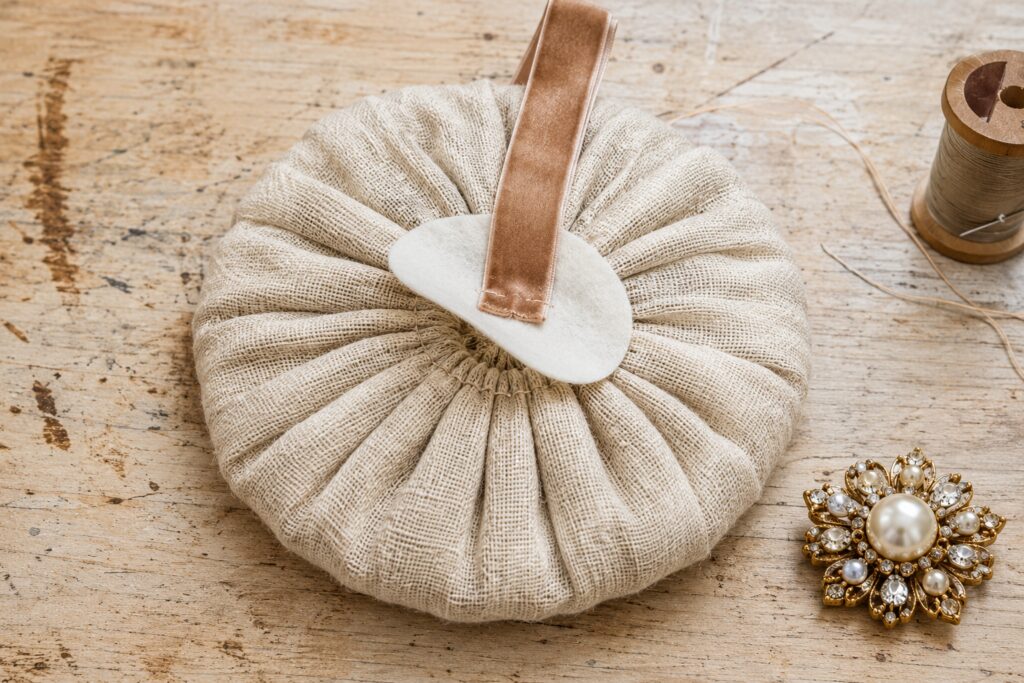
Fold the twill tape into a loop. Place its two tails against the upper part of the large felt backing circle, overlapping the felt by about an inch. Leave enough loop projecting above the backing to catch a hook.
Sew the tails firmly to the felt with two short rows of backstitches. Place this backing against the rear of the rosette with the loop aligned behind the stem.
Sew around the felt circle with small whipstitches, catching the linen back without pulling the front folds out of shape. At the top, add reinforcing stitches through the tape tails, felt, and linen together. The hanging connection should not depend on the velvet stem or brooch pin.
5. Add the Pearl Center
Position the brooch over the center patch and stem base. Open the pin carefully and pass it through the felt reinforcement and a small amount of supporting linen, avoiding the gathering thread. Close the clasp fully and check that the point is covered.
If the jewelry tilts, take a few removable thread stitches through suitable openings in the metal setting and the reinforced fabric. Do not force a needle through the metal, pierce pearls, or sew over the clasp mechanism.
Lift the decoration by its back loop over your worktable. Check that the center stays upright and that the stem clears the upper edge. Redistribute any folds that have shifted.
Arrange a Collection with Some Breathing Room
Alternate ivory and oatmeal rather than trying to match every piece. A few different pearl settings can look collected while repeated velvet stems tie the group together.
For varied sizes, try fabric circles approximately 12, 16, and 20 inches across. Treat those as starting points for roughly 6-, 8-, and 10-inch rosettes. Adjust batting, backing, and center decoration to fit the actual result.
Cut paper circles in the finished sizes and test the wall arrangement first. Leave a little space between the edges so each set of folds remains visible. Use separate suitable hooks rather than hanging several pieces from one another.
Make a Miniature Gift Topper
Start with a 6-inch linen circle and a small piece of thin batting to make a rosette roughly 2½ to 3 inches across. Gather it in the same way and shorten the velvet stem to suit.
Replace the brooch with a small sew-on pearl button, stitched through the reinforced center. Sew two ribbon ties to the backing so the topper can be tied around the gift’s ribbon. Keep needles, pins, and exposed clasps out of the finished wrapping.
For a fuller tabletop accent, add a modest amount of fiberfill behind the batting before closing the gathering. Keep the back relatively flat and rest the piece in a shallow bowl or against another object. This variation will not necessarily stand upright on its own.
Display and Store the Finished Pieces
Hang the rosettes indoors away from damp areas, heat, and open flames. Keep the brooches, buttons, and hanging loops out of reach of young children and pets. Check each hook and loop before leaving the arrangement in place.
Remove detachable jewelry before cleaning or storing, and avoid crushing the folds beneath heavy decorations. A little variation in the pleating is part of the appeal. Let the linen stay soft, give the pearl center a secure foundation, and the finished piece will have the relaxed vintage character that makes this idea inviting.