*This post may contain affiliate links for which I earn commissions.*
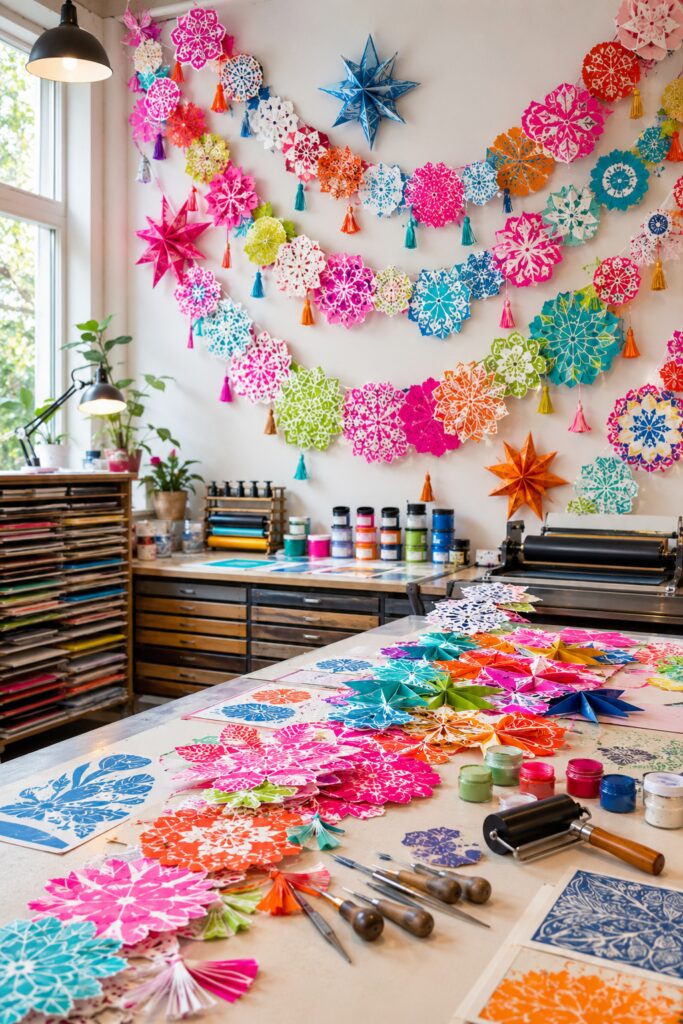
Paper snowflakes take on a completely different personality in this imaginative Christmas printmaking studio. Instead of a traditional white-and-silver palette, the wall is filled with hot pink, turquoise, cobalt, orange, lime, and red.
Printed white patterns give every snowflake intricate detail, while tiny tassels and folded paper stars add movement and dimension. Several garlands sweep across the wall in loose curves, creating an installation that feels handmade without looking sparse.
The same idea could decorate a craft room, family room, home office, staircase, party backdrop, or children’s creative space.
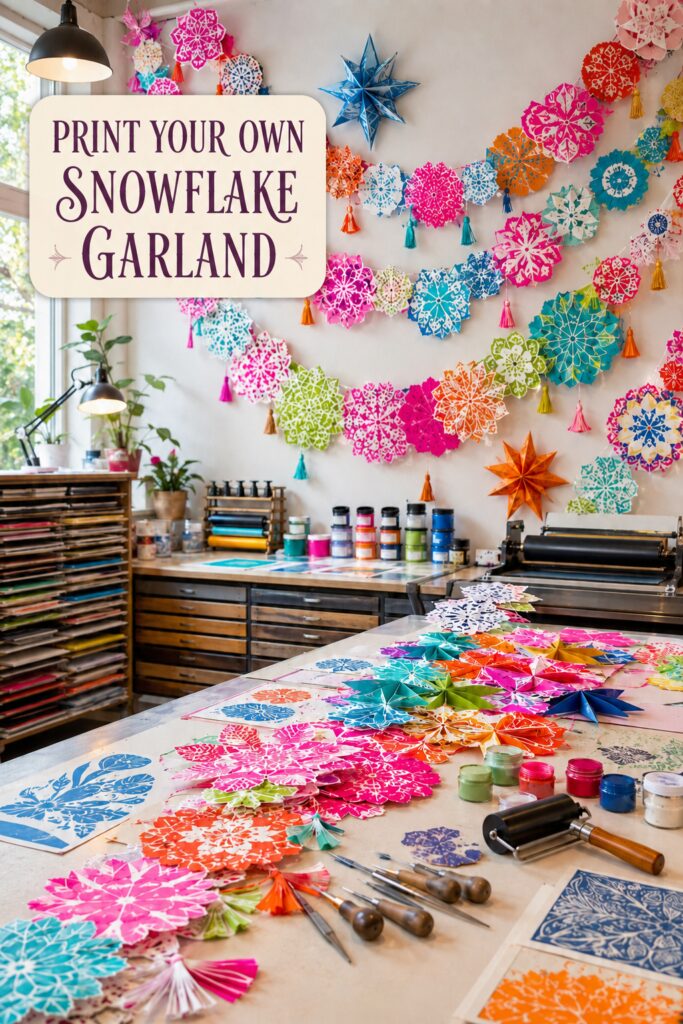
The inspiration image featured in this post was created using AI.
Why This Paper Snowflake Display Works
The display is successful because it combines repetition with variation. Every piece is recognizably a snowflake, but the sizes, designs, background colors, and cut edges continually change.
White ink unifies the collection. It appears on pink, blue, orange, green, and red paper, allowing a wide palette to feel coordinated rather than random.
The snowflakes are arranged in several curved rows instead of one straight banner. These swooping lines give the wall movement and fill a large area without requiring one oversized decoration.
Tassels create visual pauses between the intricate cut-paper shapes. Folded stars provide a second type of geometry and prevent the installation from looking completely flat.
Select a Saturated Paper Palette
Begin with sturdy colored cardstock in five or six shades. Hot pink, turquoise, cobalt, orange, lime, and red will reproduce the energy of the inspiration.
Choose paper with enough weight to hold its shape after cutting. Medium-weight cardstock is usually easier to print and cut than very heavy cover paper. Test one sheet before preparing an entire batch.
White cardstock can also be included. Print those pieces with cobalt, pink, turquoise, or orange ink to reverse the relationship between the background and design.
Avoid using equal amounts of every color. Let two shades, such as pink and turquoise, dominate. Use the others as supporting accents.
Shop Similar Assorted Cardstock
Print the Snowflake Designs
Screen printing produces the crisp, flat designs suggested by the image. A small beginner setup with a screen, squeegee, and water-based ink can be enough for a paper project.
Start with one or two reusable snowflake images. Print each design on several paper colors before switching patterns. This reduces setup and cleanup time while creating a repeated motif for the garland.
Make a test print on scrap paper first. Check that the ink is neither flooding the fine details nor drying too quickly in the screen.
Allow every printed sheet to dry completely before stacking or cutting it. Follow the ink manufacturer’s directions for drying, cleanup, ventilation, and suitable surfaces.
Readers who do not want to screen print can use reusable stencils, a foam pouncer, and craft paint. Block printing is another option for producing a slightly more textured handmade effect.
Look for Beginner Screen-Printing Supplies
Cut the Snowflakes After Printing
Printing the design before cutting allows the detailed white pattern to guide the final shape.
Some snowflakes can be cut into neat circles or scalloped medallions. Others can follow the outer points of the printed motif more closely. Mixing these edge treatments will make the collection feel handmade.
Use a precision craft knife and self-healing cutting mat for interior openings or intricate contours. Keep fingers outside the cutting path, work slowly, and replace dull blades rather than applying extra pressure.
A large snowflake punch or compatible cutting die can simplify the process. It will produce more uniform pieces, which can be mixed with a few hand-cut feature snowflakes.
Add Paper-Cutting Tools or Snowflake Punches
Build Layers for More Dimension
Several decorations in the image appear to combine contrasting paper layers. A pink snowflake may sit over white paper, while a white printed center overlaps a blue or turquoise edge.
Create this effect by stacking two slightly different sizes. Rotate the upper snowflake so the lower points remain visible, then connect the layers at the center with adhesive or a small paper fastener.
Gently fold a few points forward. Small shadows will make the designs easier to see when the garland is displayed against a pale wall.
Do not make every piece dimensional. Alternating flat and layered snowflakes will keep the garland lighter and easier to hang.
Add Tassels Between the Snowflakes
The tiny tassels are an important finishing detail. They introduce vertical movement below the horizontal cord and repeat the saturated colors without adding more intricate patterns.
Attach one tassel beneath every second or third snowflake. Vary the colors so a turquoise tassel might hang below an orange piece, while a pink tassel accents a white-and-blue snowflake.
Premade mini tassels offer the fastest option. You can also create small tassels from embroidery floss and trim them to a consistent length.
Keep them short enough that they do not become tangled when the garland is stored.
Shop Similar Multicolored Mini Tassels
String the Garland Securely
Punch two small holes near the upper edge of each snowflake so it hangs facing forward. Thread the pieces onto cotton cord, baker’s twine, narrow ribbon, or strong embroidery floss.
For a cleaner front surface, tape or glue the cord across the back. Leave a small amount of movement so the pieces can turn slightly without flipping completely.
Space the snowflakes closely enough to overlap in a few places. The image feels abundant because the garlands read as continuous bands rather than isolated ornaments.
Add hanging loops at both ends and test the completed strand before mounting it on the wall.
Arrange Several Swooping Rows
One garland can decorate a mantel or window, but several rows create the immersive effect shown in the image.
Hang the upper strand first. Let the center dip gently, then add a second garland below it with a slightly different curve. A third strand can travel diagonally or wrap around the corner of the room.
Use removable hooks rated for the wall surface and total weight. Paper decorations are lightweight, but long garlands can still pull against poorly attached hooks.
Maintain open wall space between rows. This allows individual snowflake edges and tassels to remain visible.
Include Folded Paper Stars
Large dimensional stars punctuate the garland display and introduce a second paper-craft technique. Pink, blue, and orange stars repeat the dominant hues while creating deeper shadows.
Place the largest star slightly away from the densest snowflake group. Two or three stars are enough to balance a substantial installation.
Ready-to-hang folding paper stars are an easy substitute. Craft-oriented readers can fold their own from printed cardstock and repeat one of the snowflake patterns on the star points.
Add Dimensional Paper Stars
Adapt the Project to Your Time and Skill Level
For a quick version, use colored cardstock, reusable stencils, and premade tassels. Cut the pieces into circles or use a large paper punch instead of following every intricate edge.
For a more involved version, screen print several original patterns, hand-cut the shapes, and add folded paper stars.
A smaller strand can decorate a bookshelf or window. A collection of longer strands can cover a party wall or creative workspace. The effect comes from repeating the same materials, not from producing an exact number of pieces.
Final Styling Tip
Choose one consistent feature, such as white ink or the same tassel size, and let the paper colors and snowflake patterns vary around it. That single repeated detail will hold the entire handmade display together.