*This post may contain affiliate links for which I earn commissions.*
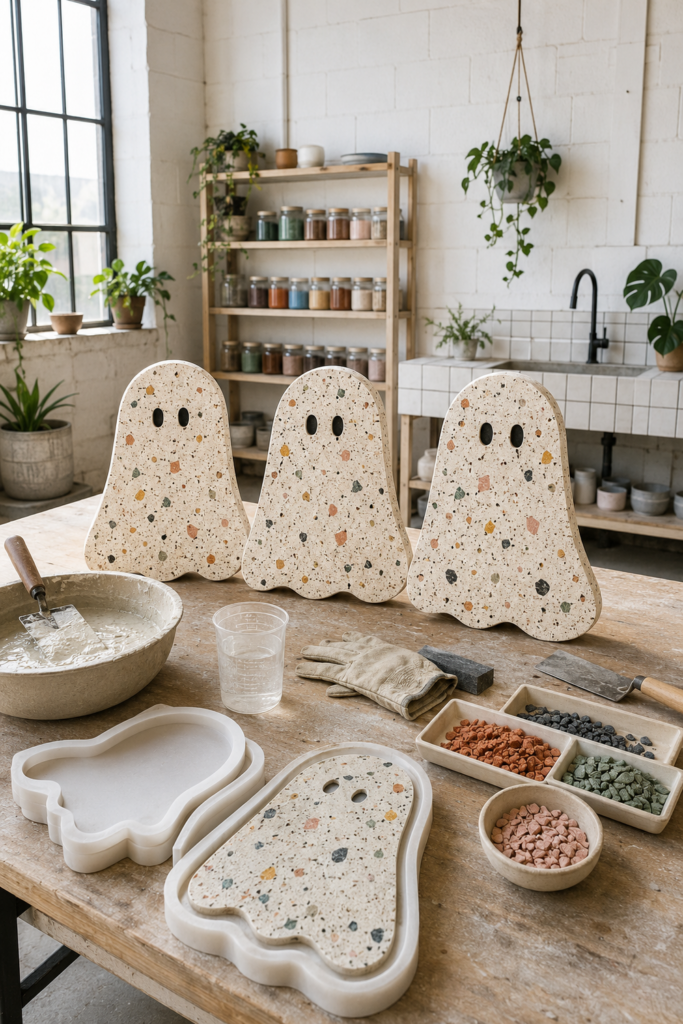
These friendly ghost stepping stones combine creamy concrete with muted chips of terracotta, sage, ochre, dusty rose and charcoal. The terrazzo-inspired finish gives each ghost enough personality for Halloween without making it feel overly themed or cartoonish.
The AI inspiration shows several finished ghosts standing upright. This tutorial adapts them into flat, reinforced stepping stones that can be installed securely in a garden path. Instead of open eye holes that could collect water and weaken the concrete, smooth black stones create eyes that sit flush with the walking surface.
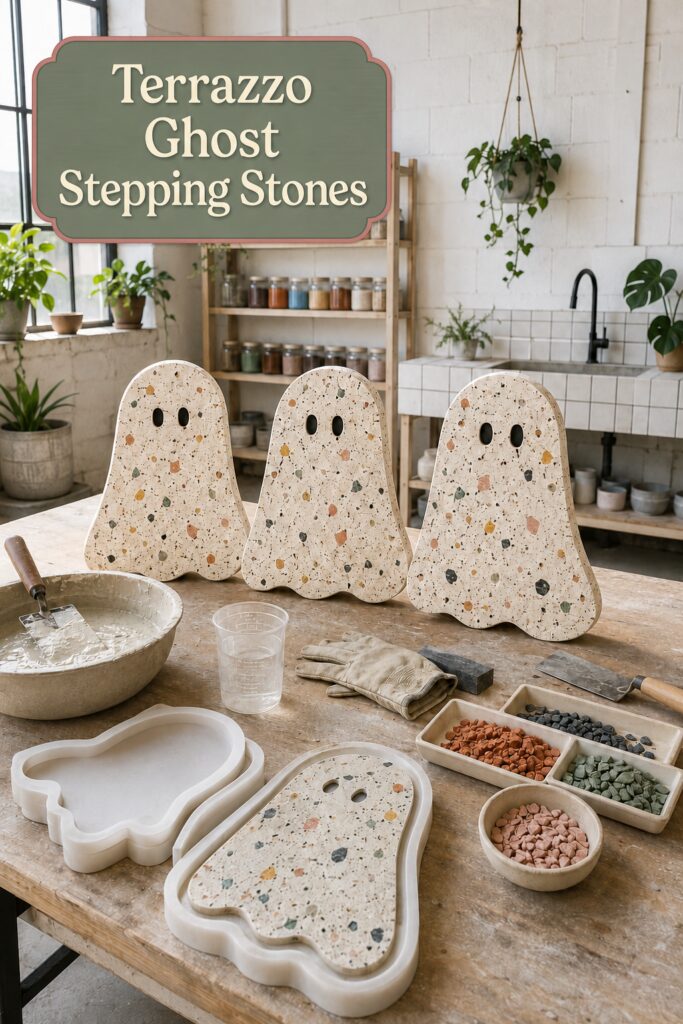
The inspiration and instructional images for this project were created with AI. This tutorial translates that visual concept into a practical project you can recreate at home.
What You’re Making
You will cast one or more ghost-shaped concrete stepping stones with gently scalloped lower edges, rounded heads and two black oval eyes.
A practical finished size is approximately 12 inches wide, 16 inches long and 2 inches thick. The exact measurements can be adjusted, but a walking stone should be broad enough for a comfortable step and thick enough to resist cracking.
Decorative stone chips are cast into the upper surface and then revealed through wet polishing. Alkali-resistant fiberglass mesh is embedded near the center for reinforcement.
Materials and Supplies
For the Ghost Mold
- Melamine-faced board or another rigid, smooth mold base
- Flexible plastic mold strip approximately 2 inches wide
- Removable ghost-shaped paper template
- Strong waterproof adhesive or hot glue for temporary mold construction
- Silicone sealant
- Mold-release product suitable for concrete
- Rigid plywood boards for supporting and moving the molds
A premade flexible ghost mold may be used if it is approximately 2 inches deep and has a flat bottom.
For the Stepping Stones
- White or light-colored concrete casting mix rated for exterior use
- Clean water
- Muted stone, glass or terrazzo aggregate chips
- Two smooth black oval pebbles per ghost
- Alkali-resistant fiberglass reinforcing mesh
- Exterior penetrating concrete sealer
- Fine concrete patching mixture, optional
Tools and Safety Equipment
- Sturdy mixing bucket
- Low-speed drill and mixing paddle
- Measuring container
- Margin trowel
- Putty knife or concrete finishing tool
- Rubber mallet
- Small level
- Work gloves
- Safety glasses
- Particulate respirator suitable for cement dust
- Wet diamond hand-polishing pads in progressive grits
- Spray bottle or gentle water source
- Plastic sheeting
- Shovel and hand tamper for installation
Before You Start
Concrete is heavy. Place each mold on its own rigid plywood board before filling it so you can move the project without flexing the mold.
Work in a ventilated area. Wear gloves, safety glasses and an appropriate particulate respirator while handling dry concrete. Wet concrete is alkaline and can irritate or burn skin, so wash accidental contact off promptly.
Sort the terrazzo chips by color and size before mixing anything. Pieces approximately 1/4 to 1/2 inch wide provide visible color without creating large weak areas.
Make the black eye stones as flat and similar in thickness as possible. Rounded river pebbles work better than jagged stones because they create a smoother walking surface.
Step-by-Step Tutorial
1. Draw a Walkable Ghost Shape
Draw the ghost on heavy paper or join several sheets to create a template. Begin with a rounded head and gently taper the sides toward the bottom.
Add three broad, shallow curves along the bottom edge. Avoid deep, narrow valleys between the curves because those areas can crack when the stone is lifted or stepped on.
The silhouette should be compact rather than tall and narrow. A shape approximately 12 by 16 inches provides a comfortable walking surface while remaining recognizable as a ghost.
Cut out the template and test it on the intended path. Make certain the stone will fit comfortably among the surrounding plants or other pavers.
2. Construct the Mold
Trace the ghost onto the smooth side of a melamine-faced board. Cut flexible plastic mold strip long enough to follow the entire outline.
Bend the strip around the ghost, securing it to the base as you work. Keep the wall vertical and approximately 2 inches high. Apply additional support around tight curves so the strip cannot bow outward under the weight of the concrete.
Seal the joint between the mold wall and base with a narrow bead of silicone. Seal the point where the two ends of the wall meet as well.
Let the sealant cure completely. Brush or spray the inside of the mold with a thin, even coat of concrete release.
If you want to make three ghosts at once, construct three matching molds. Otherwise, reuse one mold after each stone has been demolded.
3. Arrange the Eyes and Terrazzo Chips
Set the prepared mold on a rigid plywood board and check it with a level in both directions. An uneven mold will produce a stone that is thicker on one side.
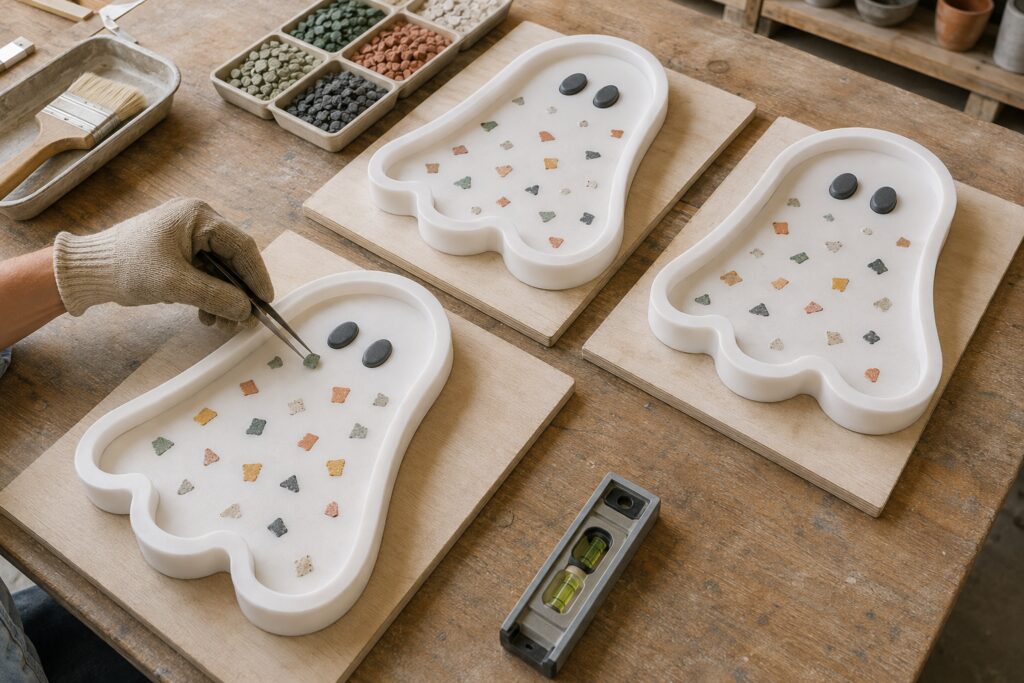
Place two black oval pebbles face down near the rounded head. Remember that the mold bottom becomes the visible top after demolding.
Leave enough space between the eyes that they remain distinct after the surrounding chips are added. Keep them several inches from the mold wall so they do not weaken the rounded top edge.
Scatter the muted aggregate chips face down across the mold. Mix small and medium pieces and rotate them in different directions. Leave open areas between the chips so the creamy concrete remains visually dominant.
Distribute the colors rather than creating separate clusters. A few charcoal pieces will connect the surface to the black eyes, while terracotta, sage, ochre and dusty rose provide the warmer terrazzo character.
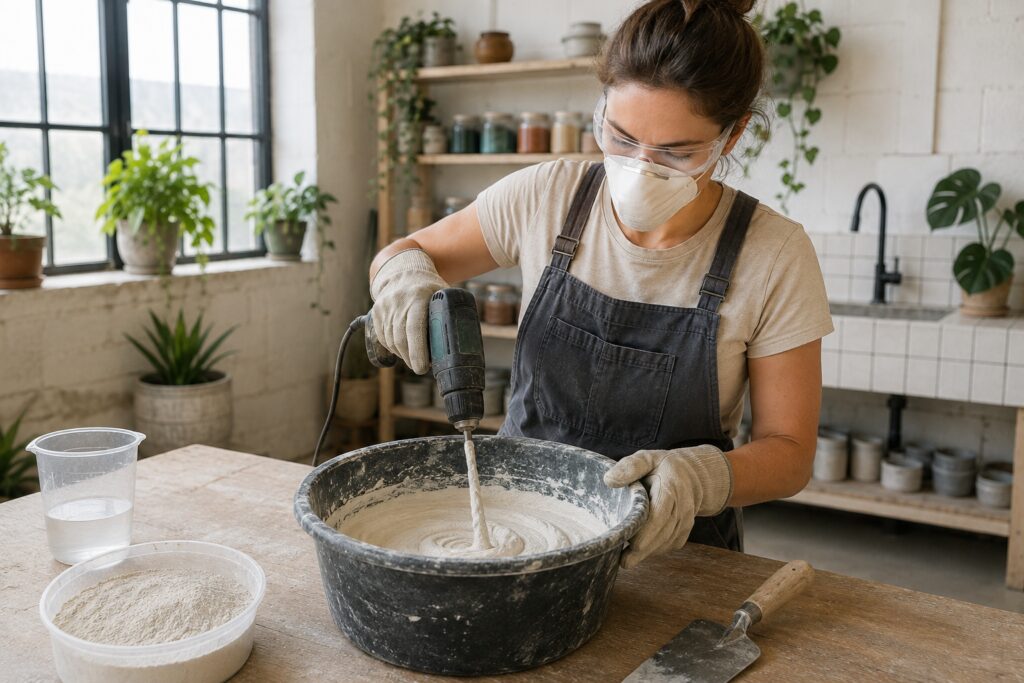
4. Mix a Small Terrazzo Face Coat
Put on gloves, safety glasses and a particulate respirator before opening the dry concrete.
Measure the concrete and water according to the mix instructions. Add the dry material gradually to the water to reduce airborne dust. Mix at low speed until the material is smooth and thick enough to hold together without becoming runny.
For the first layer, prepare only enough concrete to cover the mold bottom by approximately 1/4 to 1/2 inch. A smaller batch gives you more control around the decorative pieces.
The concrete should flow around the chips when guided with a trowel, but water should not pool on the surface. Excess water weakens the finished stone and can allow the aggregate to shift.
5. Cover the Decorative Surface
Spoon small amounts of concrete around the eye stones and terrazzo chips. Work carefully so the pieces stay flat against the mold bottom.
Use the tip of a margin trowel to encourage the mixture into narrow spaces. Cover all the decorative elements with a continuous layer of concrete.
Tap the sides of the mold lightly with a rubber mallet. This helps release trapped air around the chips and eyes. Do not strike hard enough to shift the mold walls.
Inspect the visible back of the face coat for air pockets. Add concrete where needed, then level it gently without disturbing the pieces underneath.
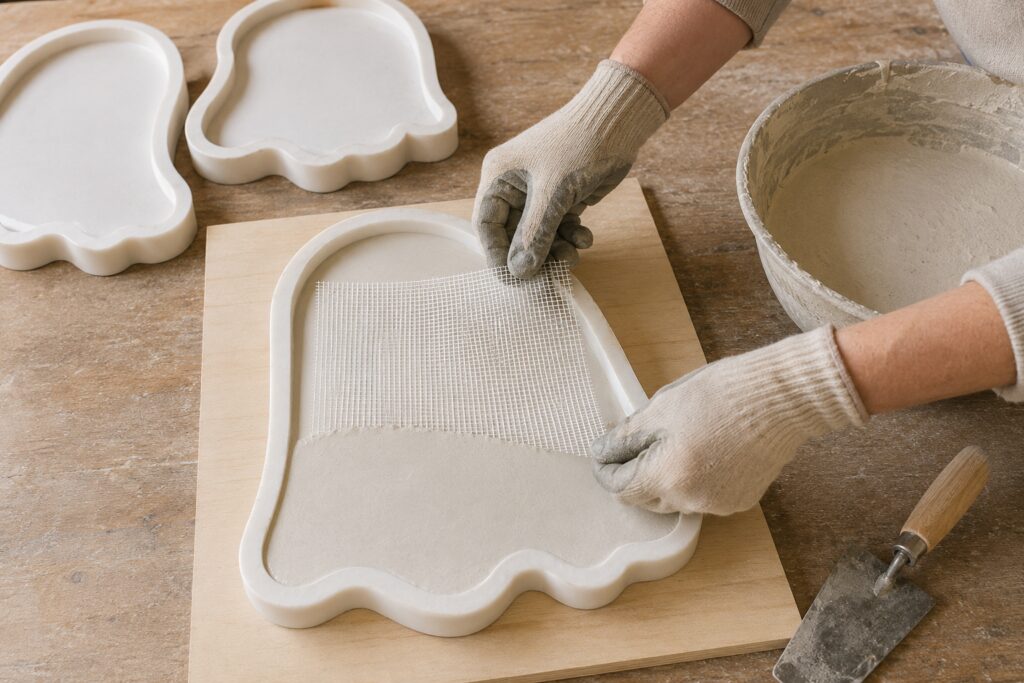
6. Fill Halfway and Add Reinforcement
Mix enough concrete to bring the mold to approximately half its final depth. Add it in small portions and spread it into the curved edges.
Cut a piece of alkali-resistant fiberglass mesh that follows the general ghost silhouette. Keep the mesh at least 1 inch away from every outer edge and from the narrow valleys along the bottom.
Lay the mesh flat over the half-filled mold. It should remain inside the concrete rather than contacting the mold walls.
Press it gently until concrete rises through the openings. Do not push it down far enough to contact the decorative face coat.
7. Complete the Pour
Add the remaining concrete until the mold is full. Work the mixture into the rounded head and scalloped lower curves.
Tap the mold sides again to help air bubbles rise. You can also vibrate the supporting plywood gently by lifting one edge a fraction of an inch and setting it down repeatedly.
Level the exposed back with a straightedge or finishing tool. The back does not need a polished appearance, but it should be reasonably flat so the stone will rest securely on its prepared base.
Cover the filled mold loosely with plastic. Keep it level, protected from direct sun and within the temperature range recommended for the concrete mix.
8. Cure and Demold Carefully
Leave the stone undisturbed in the mold for the initial curing period specified by the concrete manufacturer. For many mixes, demolding should not be attempted for at least 24 to 48 hours.
Remove the mold walls rather than pulling the new stone out forcefully. With help if necessary, turn the mold and its support board together so the stone remains fully supported.
Lift away the base to reveal the terrazzo face. Do not stand the new stone on edge. Young concrete is still vulnerable to cracking even when it feels hard.
Cover the stone again and continue curing it according to the mix instructions. Protect it from rapid drying, freezing temperatures and foot traffic.
9. Reveal the Terrazzo Finish
Once the stone has gained enough strength to handle safely, wet its surface with clean water. Use wet diamond hand-polishing pads to remove the thin layer of cement covering the decorative chips.
Begin with a coarser pad intended for concrete and work slowly in overlapping circles. Keep the surface wet throughout the process. Wet polishing controls dust and helps you see when the aggregate is evenly exposed.
Move to progressively finer pads once the chips and eye stones appear. Stop before the surface becomes glossy and slippery. A lightly honed finish is more appropriate for a walking stone.
Smooth the perimeter and scalloped lower edge by hand. Round sharp points slightly without changing the ghost silhouette.
If a small air pocket appears, fill it with a compatible cement patching mixture, let it cure and blend it into the surrounding surface with a fine wet pad.
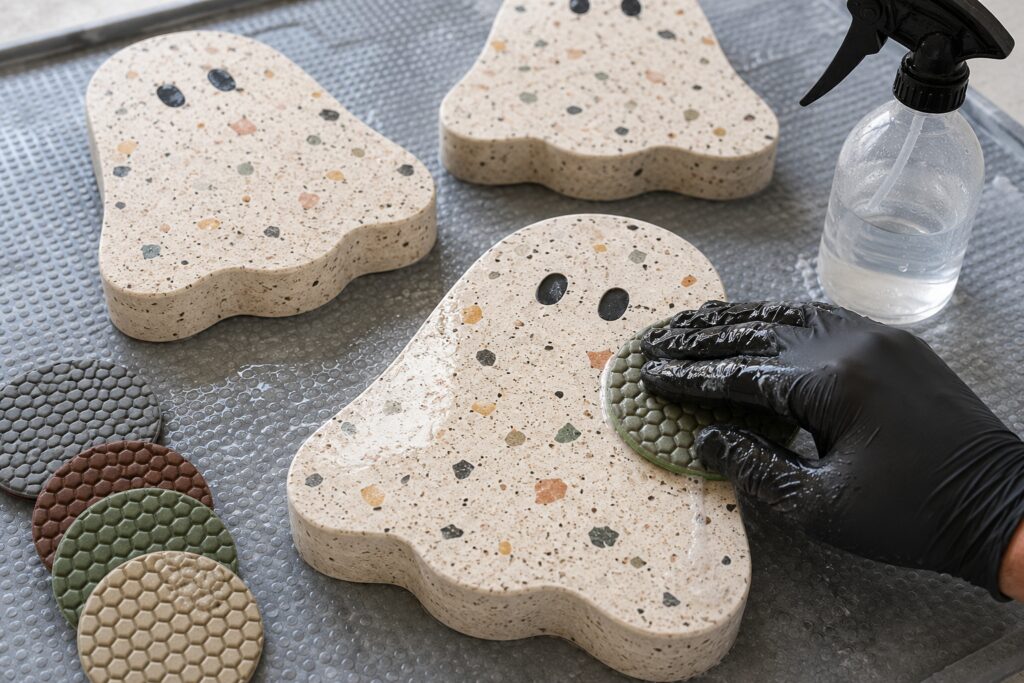
[STEP IMAGE 4: Place after this paragraph. Show a flat, fully supported ghost stone being wet-polished by hand, with the flush black eyes and muted aggregate becoming visible.]
10. Finish the Concrete Curing Period
Continue curing the stones for the full period recommended by the concrete manufacturer. Concrete develops strength gradually, so do not place the ghosts into a walking path immediately after polishing.
Keep them flat and protected during this stage. Avoid leaning them against a wall, which concentrates their weight along the scalloped lower edge.
Many concrete mixes require approximately 28 days to reach their expected design strength. Follow the timing for the specific material you use.
11. Seal the Surface
Once the concrete has cured sufficiently and dried as required by the sealer instructions, apply a penetrating exterior concrete sealer.
Choose a matte or natural-look product rather than a thick glossy coating. A penetrating finish will help protect the stone while preserving a more slip-resistant surface.
Apply thin coats and wipe away any excess. Do not allow sealer to pool around the black eyes or between exposed chips.
Let the sealer cure completely before installing the stepping stones.
12. Prepare a Stable Garden Base
Place the stones where they will form a natural walking pattern. Test the spacing before digging. Most people find a center-to-center distance of approximately 20 to 24 inches comfortable, but adjust it for the intended users.
Mark around each ghost and remove the stone. Excavate deeply enough to accommodate a compacted base plus the 2-inch concrete piece.
Add a layer of compactable crushed stone or paver base. Tamp it firmly and check it with a level. Add a thin bedding layer of coarse sand if necessary.
Set the ghost flat into the prepared area. The top should sit level with or only slightly above the surrounding grade so it does not become a tripping hazard.
Check for rocking by stepping carefully near each side. Lift the stone and adjust the base if it moves. Do not attempt to correct instability by placing loose stones under individual corners.
Tips for Getting the Terrazzo Look
Use several aggregate sizes. Small speckles fill the quiet areas while a restrained number of larger pieces creates the recognizable terrazzo effect.
Keep the cream concrete dominant. If the chips are packed too tightly, the surface may feel busy and the ghost silhouette will be less noticeable.
Repeat the same palette across all the stones but change the exact chip arrangement. This gives the set continuity without making the ghosts identical.
Choose black eye pebbles with smooth, nearly flat faces. They should sit level with the surrounding concrete after polishing, not protrude above the walking surface.
Keep the finish honed rather than highly polished. The softer sheen suits the creamy handmade appearance and is more practical outdoors.
Easy Ways to Customize the Ghosts
Create a slightly different lower edge on each ghost by changing the number or depth of the scallops. Keep every curve broad enough to remain structurally strong.
For a more autumnal set, use rust, mustard, charcoal and olive aggregate. A quieter neutral version could combine cream, tan, gray and black chips.
Add a tiny mouth using one additional flat black pebble, or leave only the eyes for a simpler expression.
Smaller ghost casts can be made as decorative garden accents, but do not use undersized pieces as walking stones. A foot should fit comfortably on the flat surface.
Displaying and Using the Finished Project
Use these ghosts along a garden path, beside a covered patio or as a seasonal route leading toward the front porch. They can remain subtle during the day and become more noticeable when surrounded by small landscape lights at night.
Do not place them on loose soil, mulch or uncompacted gravel. An unstable base can cause rocking, cracking or a tripping hazard.
In climates with repeated freeze-and-thaw cycles, use an exterior concrete mix and sealer suited to those conditions. Ensure water can drain away from the stones rather than collecting beneath them.
You do not have to reproduce every speckle or color from the AI inspiration. A strong ghost outline, two simple eyes and a balanced scattering of earthy chips are enough to create the same friendly Halloween character.