*This post may contain affiliate links for which I earn commissions.*
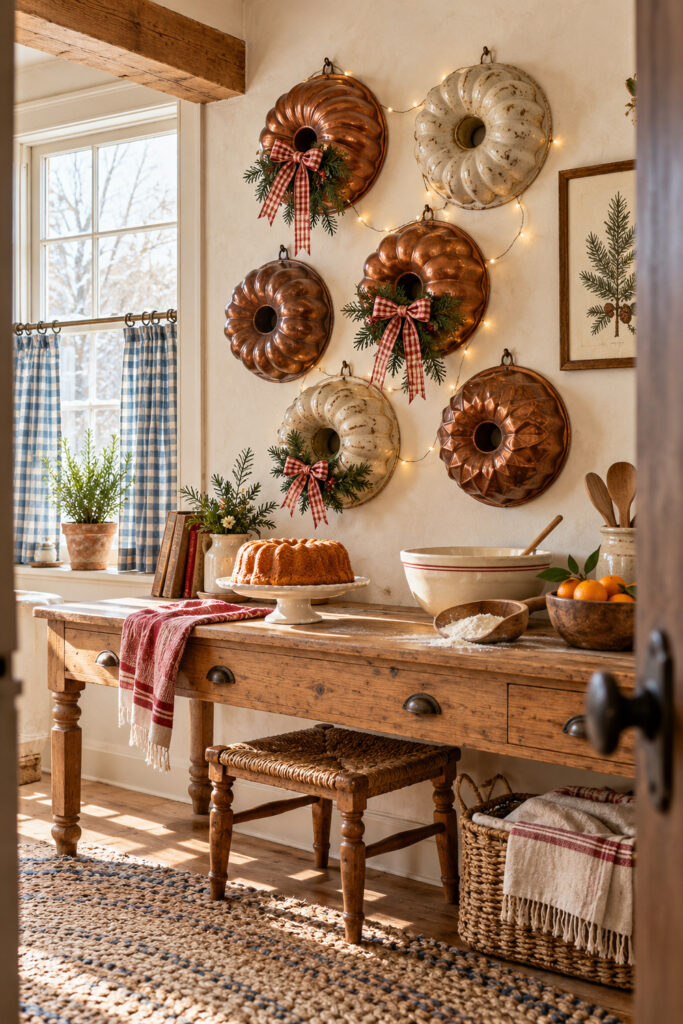
Fluted cake pans have plenty of character before you put anything inside them. This Christmas baking room uses that familiar shape as wall decoration, arranging copper and pale metal pans above a wooden worktable. Small greenery accents and red checked bows make the collection seasonal while leaving the ridges and center openings visible.
Below, a bundt cake repeats the ring shape on a much smaller scale. Mixing bowls, wooden utensils, folded fabric, and a basket keep the room connected to baking. You could adapt the wall alone, even if your baking happens at an ordinary kitchen counter rather than a separate room.
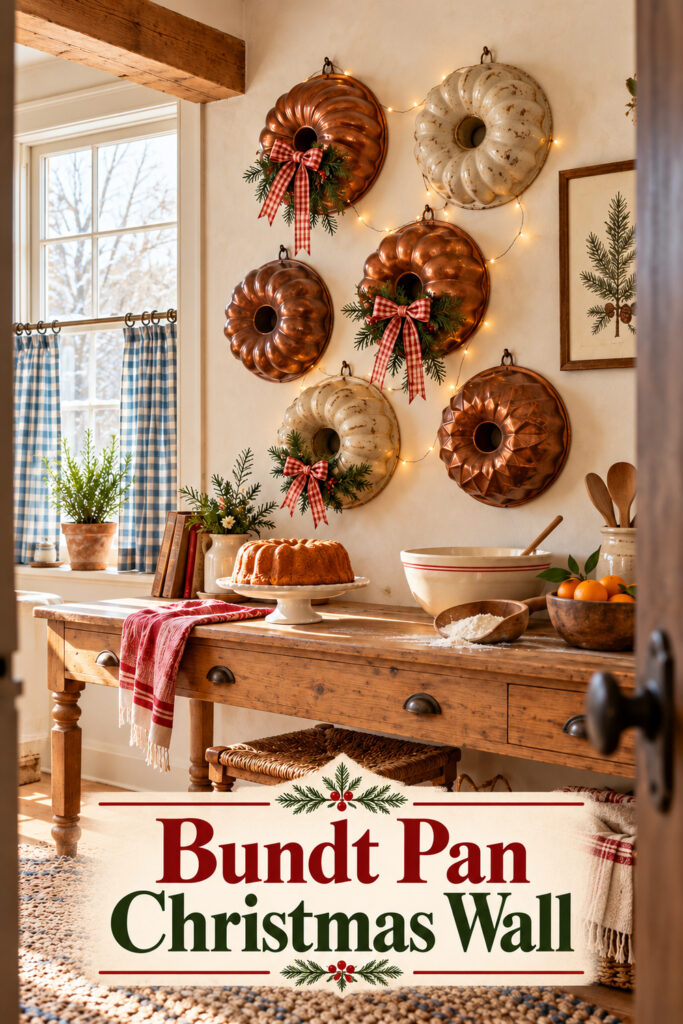
The inspiration image was created with AI and shows a decorating concept you can adapt with similar pieces.
What Makes This Christmas Wall Work
The pan collection carries the composition. Similar circular outlines tie it together, while different molds, sizes, and finishes keep it from looking like a repeated printed pattern. The copper surfaces catch warm light; the pale pans give the arrangement a few quieter places. That contrast is especially useful against the cream wall.
Notice that the greenery isn’t equally large on every pan. Some forms remain mostly uncovered, while others hold a small spray and bow. This makes room for the metalwork itself. If you fill each center and cover every ridge, the wall starts to read as a group of wreaths and loses its baking-room character.
Small points of warm light connect the pans without replacing them as the subject. The lights look delicate against the heavier metal shapes. For your own wall, plan a tidy, removable route for a suitable light string and keep its power source accessible. The pans should have their own secure supports rather than hanging from the lighting wire.
Find Decorative Ring Cake Molds
Browse current Amazon options that can help you recreate this look.
Browse Decorative Ring Cake Molds on Amazon →As an Amazon Associate I earn from qualifying purchases.
Key Pieces to Recreate the Baking-Room Look
Decorative Ring Cake Pans
Start with the pans you have available, particularly ones you no longer use for baking. A few different molds can be enough. Lay them out on the floor before making holes in the wall, turning individual pans until the fluting catches the light in a way you like. A pale pan beside a darker one helps both outlines show.
If you’re buying similar pieces, focus on shape and finish rather than an exact set. The inspiration is an imagined collection, so there may be no identical retail match. Decorative molds and usable bakeware can also have different hanging provisions. Inspect each piece and choose a support method suited to its construction and weight.
Small Cedar Accents
Short faux cedar sprays can sit near the lower edge of selected pans. Keep them shallow enough that the circular center remains visible. Using the same foliage throughout the wall helps several different molds feel related. You can make the Christmas layer removable so the pans remain useful as a year-round kitchen collection.
Avoid putting adhesive or wire on a food-contact surface if you intend to bake with the pan later. One simpler choice is to reserve a few pans for decoration and keep working bakeware in the cupboard. That removes the need to dismantle a holiday arrangement each time you want to make a cake.
Red and Cream Checked Ribbon
The checked bows add a soft texture against the metal. Choose a ribbon width that leaves the pan’s main pattern exposed, then vary the tail length slightly between larger and smaller pieces. The bows should belong to the pans rather than hang across neighboring ones. Trim or turn a tail if it covers the center opening.
A little red elsewhere will connect the wall to the worktable. In the image, a cloth drapes over the edge below. A folded towel could do the same job in a smaller kitchen. Keep working surfaces clear enough for their intended use, especially if the holiday display shares space with actual baking.
A Wooden Console or Worktable
The broad table below gives the wall a base. Its warm finish echoes the copper without trying to match it exactly. An existing sideboard, baker’s table, or section of counter can work. What matters visually is having a clear horizontal line underneath the rising arrangement of pans.
If you want to serve food there, keep the surface clean and place the cake on a suitable stand or plate. The rustic setting is an appearance to borrow, not a reason to use an unsuitable food surface. Put decorative stems and lighting where they won’t drop into the serving area.
Cream Pottery and Familiar Baking Tools
Plain bowls and a utensil crock explain the room without competing with the wall. They also provide useful differences in height: a low bowl, an upright crock, and a raised cake stand. Leave some empty table between them so the pieces read separately. A row of evenly spaced small accessories would make this lower area fussier than it needs to be.
How to Arrange a Similar Wall
Choose the wall area from the viewpoint you normally use. The inspiration is seen diagonally from the doorway, which makes the pan shapes and table depth easy to notice. Your best view might be across the kitchen or from a breakfast table. Stand there while deciding the overall width instead of planning only from directly underneath the display.
Use paper outlines to test the placement. Mark each pan’s outer shape and actual hanging point so the mock-up reflects how it will sit. Arrange the largest or most distinctive form first, then place lighter and smaller pieces around it. Keep the group related to the furniture below rather than letting a single pan drift far beyond its edge.
Check the wall construction and select appropriate hardware for each loaded piece. A secure existing hanging ring may be useful, but don’t assume every old mold has one or that a decorative loop can carry weight. If you’re unsure how a pan can be supported, use a purpose-made display solution or choose another piece. Leave enough space that neighboring pans won’t knock together.
Add the bows and cedar after the metal shapes are settled. Work on alternate pans first and step back before dressing the rest. You may discover that only two or three need greenery. Let the lightest pan remain relatively plain if it helps break up the darker copper. The goal is a readable collection, not equal decoration on every surface.
Finally, arrange the table from large pieces to small ones. Place the cake or a plain stand off center, add a bowl and utensil crock, then stop to check the wall. Keep any light string clear of heat, water, and food preparation, following its intended-use instructions. Leave the worktable convenient to clean and use throughout the season.
Shop Similar Pieces
Look for Fluted Ring Molds
Compare the center openings, ridge patterns, and finish rather than searching only by color. A mix of copper-toned and pale forms gives the wall its contrast. Confirm the piece’s dimensions and possible hanging method before planning its position.
Shop Similar Checked Ribbon and Cedar
Buy or reuse modest amounts for small accents. Thin sprigs that bend against the pan are more useful here than a bulky garland. Keep the bows tied separately where possible so you can adjust them after hanging.
Add Simple Baking-Room Accessories
A cream bowl, wooden spoon crock, or folded red towel can echo the inspiration below the wall. Select the pieces you will actually use and leave enough open surface for a cake plate or serving tray.
Final Styling Tip
Keep at least one pan almost bare. Its uninterrupted fluting makes the collection easier to read and gives the decorated pieces something quieter to sit beside.