*This post may contain affiliate links for which I earn commissions.*
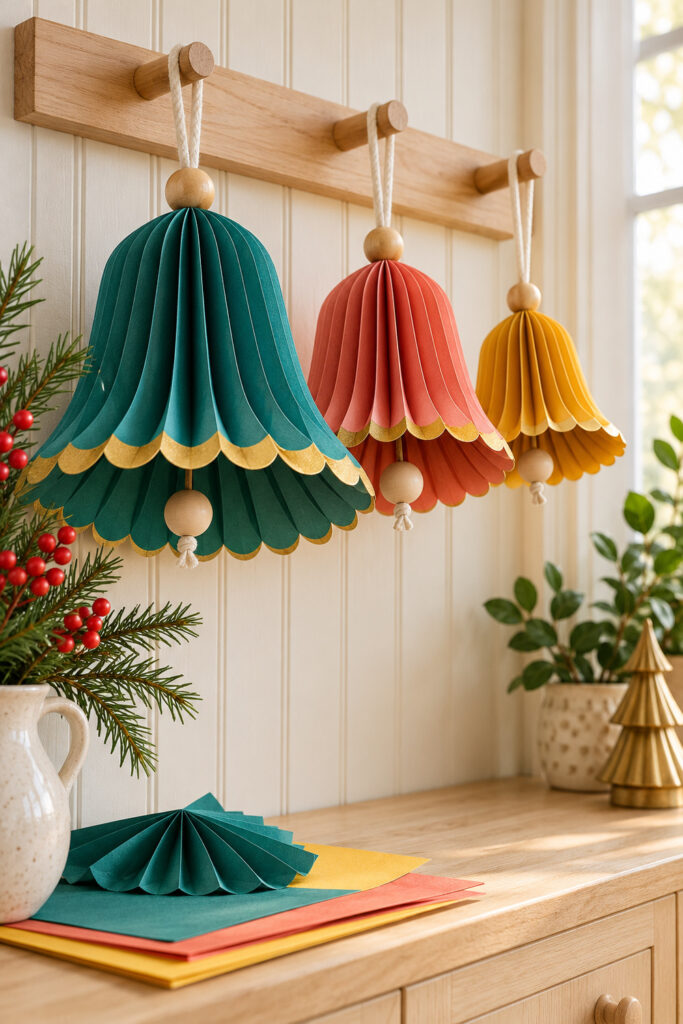
Teal, coral, and mustard paper bells give this peg rail a handmade Christmas rhythm. Deep folds catch the light, gold follows the scalloped rims, and wooden beads finish the tops and clappers. The inspiration shows elaborate layered shapes; this tutorial keeps their recognizable details using one pleated cone for each bell.
The method begins with a paper semicircle, folds it like a radial fan, and joins the straight edges into a hollow bell. Make a scrap-paper sample first so you can adjust the proportions before cutting your chosen colors.
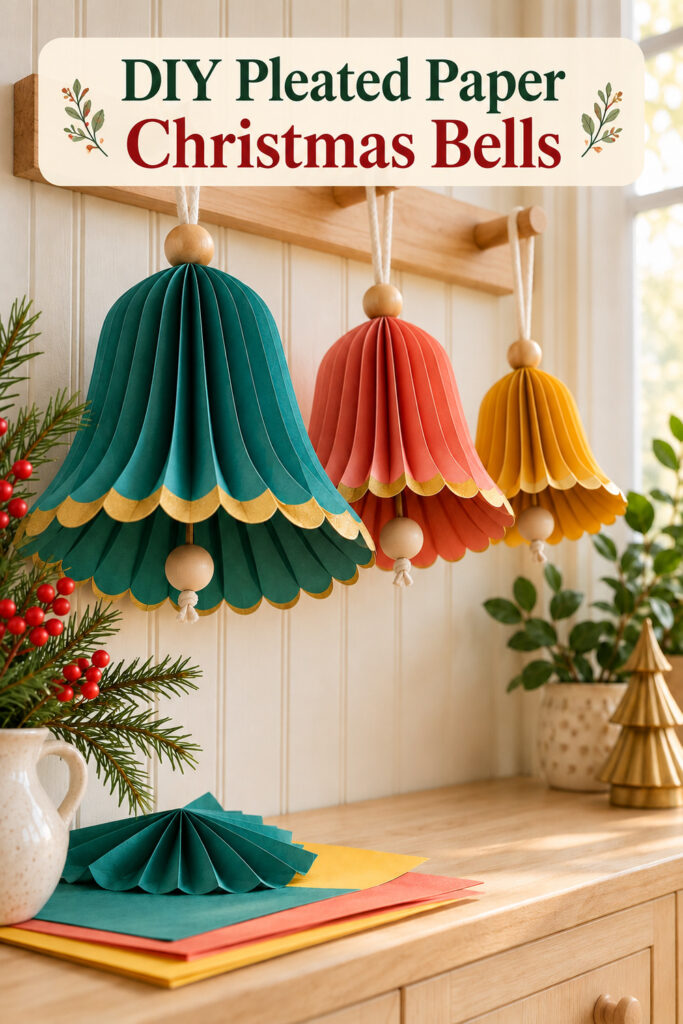
The inspiration and instructional images were created with AI. They illustrate the decorative idea and proposed construction stages rather than documenting a tested physical project.
What You’re Making
You’ll make a coordinated trio of lightweight decorative bells, each with a single fluted skirt, a scalloped gold rim, and a wooden clapper hanging on cotton cord. The single skirt is a practical adaptation of the inspiration’s layered forms. These are display ornaments, not working musical bells.
This means that the instructions below won’t give you the exact same bell shape as shown in the image but will give you a more angular bell that takes the color and idea from the image.
Suggested starting radii for the paper semicircles are approximately 4, 5, and 6 inches, adjusted after making a sample. Those are proposed project dimensions, not measurements taken from the image. A larger semicircle requires a correspondingly larger sheet. Begin with a size your paper comfortably accommodates.
Materials and Supplies
Materials
- Teal, coral, and mustard light cardstock or medium weight craft paper
- Narrow strong double sided tape suitable for paper
- Cream cotton cord thin enough to pass doubled through the chosen beads
- Two drilled wooden beads per bell with holes that accept the doubled cord
- One smooth wooden washer per bell with a center hole for the doubled cord (if you can’t find these, look for nylon washers – you just want something that’s lightweight)
- Gold acrylic paint pen for a narrow decorative edge
- Scrap paper for the sample and template
Choose lightweight beads. The wooden washer should be wider than the paper’s top opening so it spreads the load across the crown. Check the bead holes with the actual cord before cutting anything. If the cord won’t pass through twice, choose a thinner cord or beads with larger holes.
Want to Recreate This Look?
I’ve put together a convenient Amazon supply list featuring hand-picked, well-rated products that complement the inspiration DIY project shown in this post. Save time by clicking through and finding just what you need!
See My Hand-Picked Supply ListAs an Amazon Associate I earn from qualifying purchases but this doesn’t increase your price at all!
Tools
- Pencil ruler compass and protractor
- Scissors
- Blunt scoring tool or bone folder
- Protective craft mat
- Clips with scrap paper pads to protect folds while joining
A blunt scoring tool makes a crease without cutting the sheet. Avoid using a knife for scoring; a weakened fold can split when the cone is opened.
Before You Start
Test a short folded section of the colored paper. It should take a crisp crease without cracking badly along the surface. Very thick card resists the narrow folds near the top, while thin tissue won’t support the bead arrangement. Use the scrap sample to check the material as well as the shape.
Protect the table before using the gold pen and follow its drying instructions. Keep cutting tools and small beads away from young children. This project uses paper tape rather than hot glue, so there is no need to introduce a heated tool.
Step by Step Tutorial
1. Cut and Mark a Semicircle
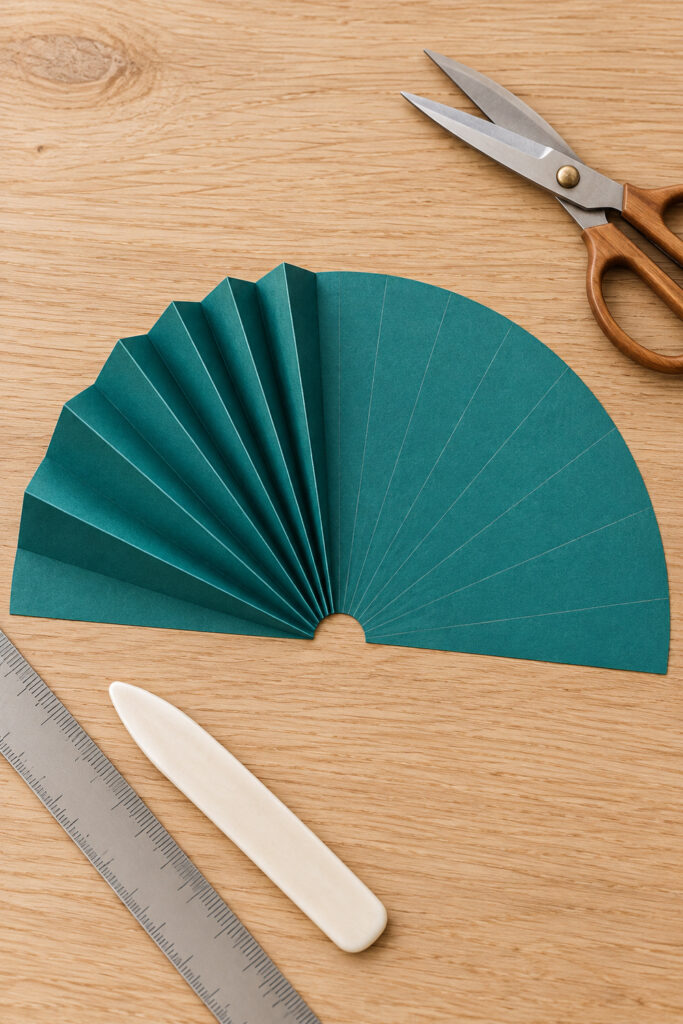
Draw a semicircle on scrap paper with the compass point centered on its straight diameter. Cut it out. At that same center, remove a tiny semicircular notch; when the straight edges meet, this becomes the small crown opening. Start small and enlarge only enough for the doubled cord to pass freely.
Use a protractor to divide the half circle into an even number of equal wedge-shaped sections. For a first sample, try eighteen sections at ten-degree intervals. Draw faint radial lines from the notch to the curved edge. Keep the last section available as the joining overlap.
2. Score and Fold the Radial Pleats
Lightly score the pencil lines with a ruler and blunt tool. Fold the first line upward, the next downward, and continue alternating across the semicircle. These are mountain and valley folds, like an accordion, except they radiate from the notch rather than running parallel.
Work gently near the narrow center. Close the fan loosely and reopen it to check the rhythm. Don’t force a bulky stack flat at the notch. If the folds crush or split, use lighter paper or reduce the sample size before transferring the template to colored paper.
3. Shape the Scalloped Rim
Open the pleats enough to work on the curved outer edge. Draw one shallow rounded scallop across each pair of fold sections, making the shape repeat consistently. Cut the scallops individually with scissors. Avoid cutting deeply into the folds, which would make the rim fragile.
Trace the same template onto colored paper once the sample looks right. Repeat the scoring, folding, and scallop cutting. Add a slim gold line along the curved rim, leaving the bulk of each scallop in the bell color. Let it dry completely before bringing the folded surfaces together.
4. Join the Back Seam
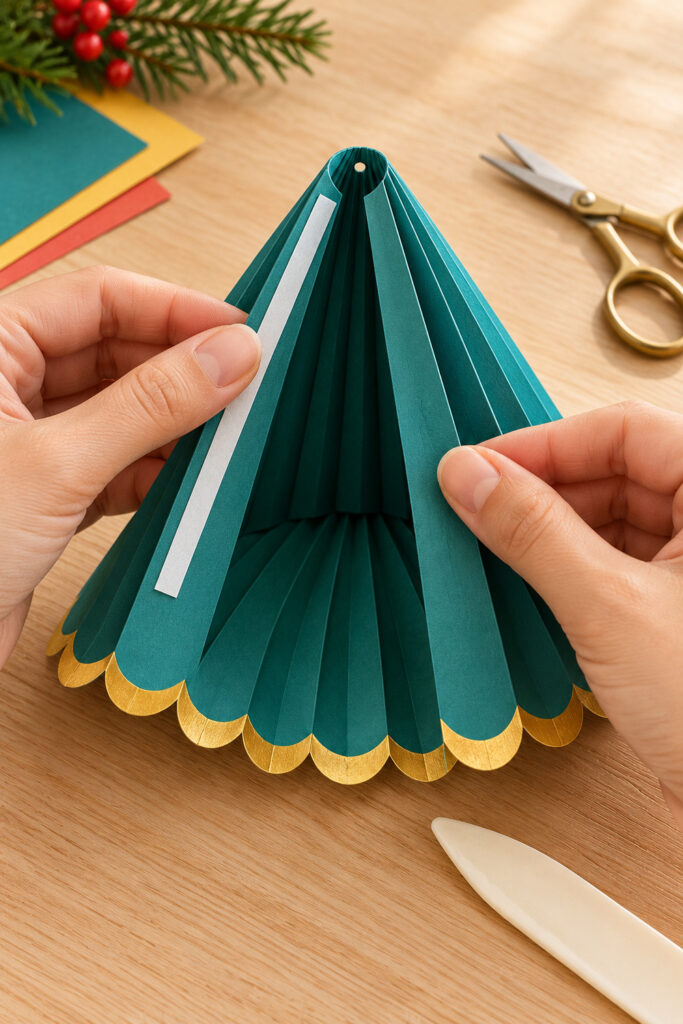
Bring the two straight edges toward each other to form a pleated cone. Overlap one end section onto the other and adjust the pleats until the lower rim sits evenly. The crown should retain its little opening. Check this fit on the sample first; the overlap changes the final width.
Apply narrow double sided tape to the overlapping end section, avoiding the crown opening. Press the matching edge onto it from top to bottom. Support the seam from inside with a finger while pressing outside, then let the adhesive bond as directed. Don’t crush all the pleats together to reach the seam.
5. Thread the Hanging Loop and Support Washer
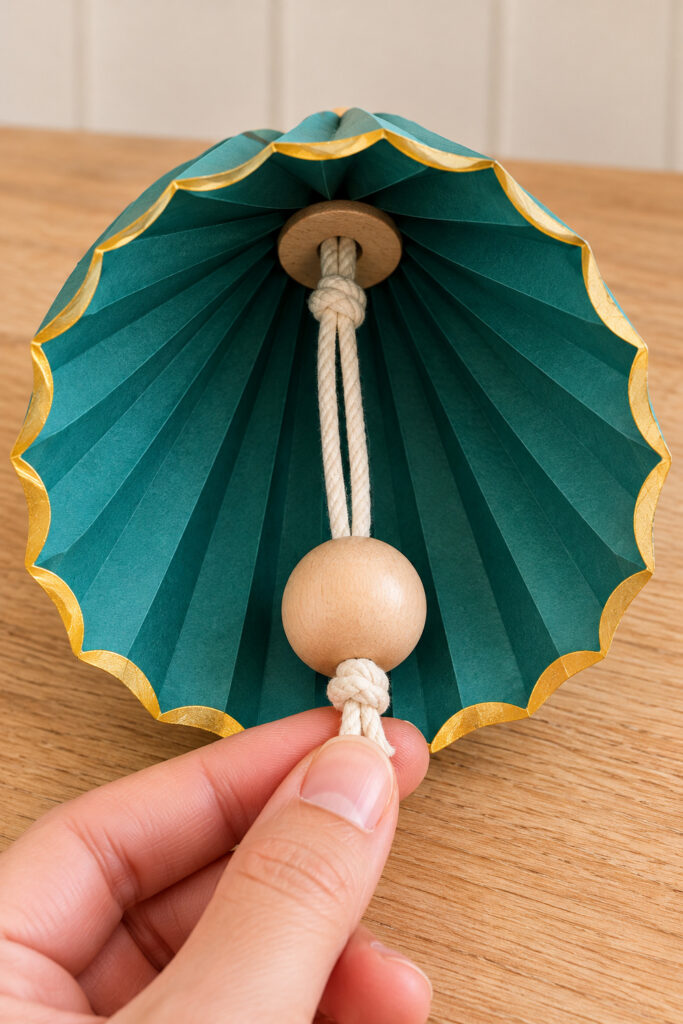
Cut a generous length of cotton cord and fold it in half. Push both free ends through the decorative top bead, then down through the paper crown. Inside the bell, thread both ends through the wooden washer. Tie an overhand knot in the doubled cord directly beneath the washer.
Pull the loop gently upward so the washer rests against the inside crown and the top bead rests outside. The washer must cover the opening completely. Its knot supports the washer; the washer supports the paper. The top bead is decorative rather than the load-bearing stop.
6. Add the Wooden Clapper
Thread the second bead onto both free cord ends beneath the support knot. Slide it until it hangs near the lower rim, then tie another overhand knot immediately below it. Keep enough cord between the knots for the bead to hang freely. Trim the tails neatly after checking their length.
Lift the bell by its loop over the table and inspect the crown. If the opening stretches or the washer pulls through, stop and change the support or paper before hanging it. Adjust the clapper position so it stays visible without pulling against the rim.
Tips for Getting the Finished Look
Keep the gold edge narrow. A broad band can overwhelm the colored paper, while a slim line highlights each scallop. The pleats supply most of the texture, so the bell doesn’t need additional ribbon or glitter. Let the teal bell be largest and repeat the same construction in coral and mustard.
The sample may produce a more angular cone than the softly curved inspiration. Accept that difference rather than crushing the paper into an unsupported shape. Open the lower folds a little more widely if they allow it, keeping the crown compact and the seam intact.
Easy Ways to Customize It
Use one paper color in three sizes for a quieter display, or retain the trio of colors with the same cream cord and natural beads. Smaller bells can hang on individual wall hooks. Keep the bead weight modest as you reduce the paper size.
You can omit the gold for an all-paper finish, but retain the scalloped edge if that detail drew you to the image. Make each size from its own sample template rather than cutting a completed bell down after assembly.
Displaying the Finished Bells
Hang the trio on a securely mounted peg rail with space between the widest rims. Vary the loop lengths slightly so the bells form a gentle sequence. Use them indoors away from steam, damp windows, candles, heat, and moving doors. Keep the cords and loose beads out of children’s reach.
Final Encouragement
Finish one sample before making the full set. Once the folds, seam, and supported hanging cord work together, you can concentrate on the colors and scallops that make these little paper bells distinctive.