*This post may contain affiliate links for which I earn commissions.*
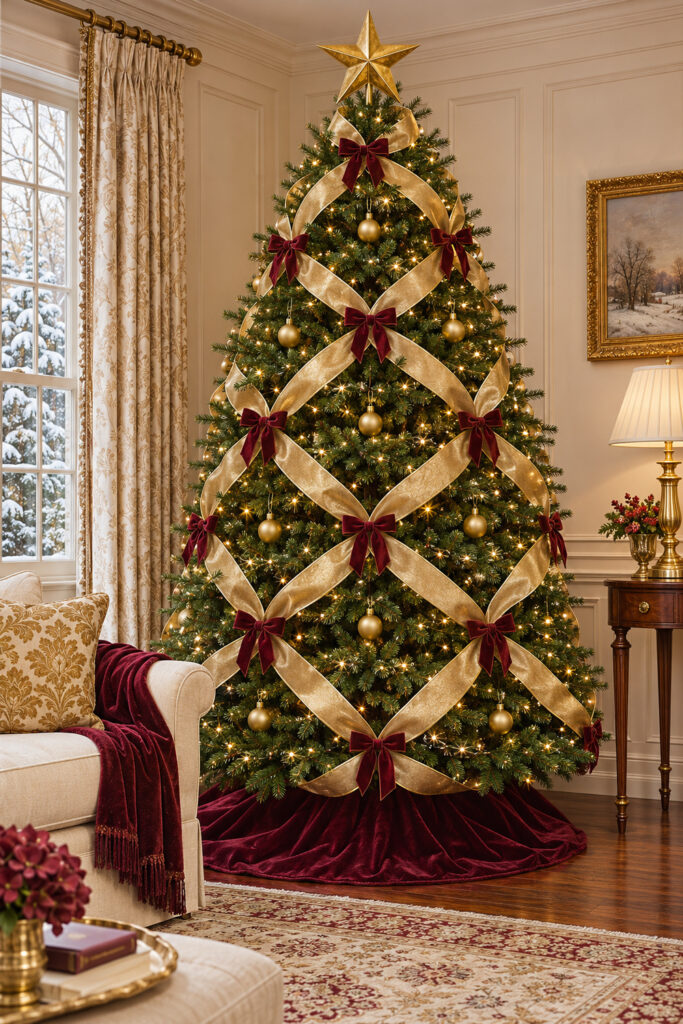
Wide gold ribbon crosses this Christmas tree in both directions, leaving broad green diamonds between the bands. Burgundy bows mark selected crossings, and small gold baubles sit inside the openings. The tree is full, but the pattern stays easy to follow from the star at the top to the velvet skirt below.
This is a useful alternative to hanging separate ribbon tails down the front. The lattice gives the whole tree one connected treatment. You can adapt it to your own tree by working out the spacing first, then adding a smaller number of ornaments where the branches remain visible. The surrounding cream upholstery lets that gold-and-green pattern lead.
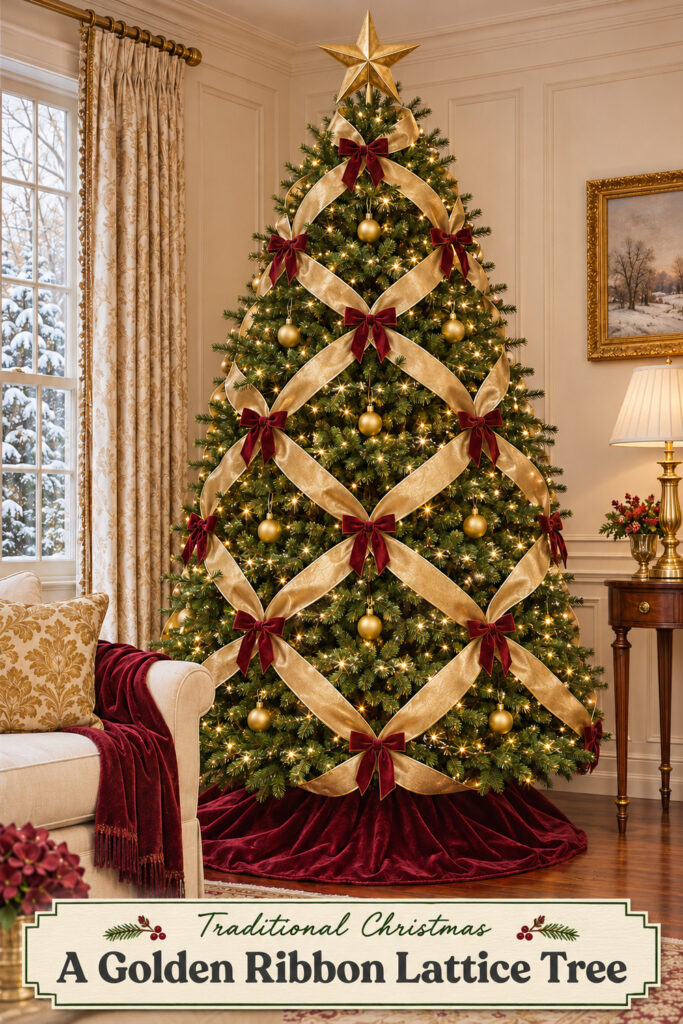
This image was generated with AI as decorating inspiration. Similar pieces can recreate the effect; pictured objects are not verified products.
Keep green windows between the gold bands
The open diamonds are as important as the ribbon. They stop the tree from looking wrapped in a solid gold covering and give the baubles their own clear spaces. If the bands crowd together, the pattern becomes harder to read even though you’ve used more ribbon.
Burgundy bows make the crossings visible without introducing a second large pattern. Their darker color also connects the tree to the velvet skirt and the throw on the sofa. The star and plain baubles repeat gold in different sizes, so the ribbon doesn’t have to carry every bit of shine.
Start with those relationships rather than a fixed number of diamonds. A narrow tree needs fewer visible crossings than a broad one. The picture offers a pattern to interpret, not a measured wrapping plan that fits every branch shape.
Select ribbon that bends without collapsing
A broad wired ribbon is a practical candidate for this effect because its edges can hold a gentle curve. Look for enough body to remain visible across the needles without becoming a stiff strip. Very thin ribbon can disappear, while a heavy material may pull the branch tips down.
Check the face and reverse before buying a large amount. Both sides may show where the ribbon curves and crosses. A similar-looking reverse makes those turns easier to arrange than a bright backing that interrupts the soft gold finish.
Use a small sample against your tree’s actual green. Gold can look pale, yellow, or brown depending on its weave and the room’s light. The pictured ribbon has a soft sheen rather than an all-over glitter surface, which helps the broad bands remain distinct from the tiny lights.
Estimate quantity from your own trial run. Tree height alone doesn’t tell you the length needed for diagonal paths, tucks, crossings, and any coverage around the back. Leave cutting until you’ve established the route and allowed enough material for the intended finish.
Work out one direction before crossing it
Prepare the tree and its lights according to their instructions before arranging ribbon. Shape the branches so the tree has an even outline, then identify the main viewing side. On a tree seen from several directions, continue the pattern where people will actually see it rather than finishing only a narrow front strip.
Lay out the first diagonal direction loosely. Allow the ribbon to curve over the outside of the branches and tuck it inward at suitable intervals. The line should look relaxed but deliberate, with changes in direction supported by branches rather than suspended across large empty gaps.
Add the opposite direction after the first paths are reasonably spaced. Compare the resulting green windows as you go. They won’t be identical on a natural-looking tree, but they should feel related instead of becoming one small opening beside a very large one.
Use suitable decorative ties where needed, keeping them discreet and away from light wiring. Don’t pull the ribbon tight around electrical components or use the light strand as an attachment point. Follow the tree and light makers’ guidance for placement and clearance.
Place bows and baubles after the pattern settles
The bows in the inspiration sit at selected intersections, with visible loops and short tails. They cover some of the joining points and make a darker beat along the lattice. A bow at every possible crossing may be too much on a small tree, so begin with the most visible positions.
Keep their scale consistent. If one bow is much larger, it can make its crossing appear lower or heavier than the rest. Shape the loops before attaching it, then step back to compare the group. You can still vary the exact angle with the branches.
Hang plain gold baubles in the green openings. Place some slightly deeper so the tree retains depth rather than looking like a flat decorated net. Keep the ornaments clear of the ribbon edges so each shape remains recognizable.
The large star finishes the narrow top, while the burgundy skirt supplies a calm base. Let the skirt settle in broad controlled folds, keeping it clear of electrical access points and the room’s route. There is no need to cover the bottom with parcels if they would hide the pattern you’ve just arranged.
Fit the room around the tree
The cream sofa and curtains give the bright ribbon a quieter background. A gold-patterned cushion and burgundy throw repeat the tree colors at seat level. Those pieces are enough to link the room without covering every nearby surface in matching ornaments.
If your furniture is dark, keep a pale cushion or light throw nearby to separate it visually from the tree. In a room with patterned curtains, use plain burgundy bows and simple baubles so the ribbon lattice remains the main repeated pattern.
A slimmer tree can use the same idea with fewer diagonal bands. Preserve clear green windows and a visible base. Reducing the number of crossings usually works better than forcing narrow strips into a complicated pattern that disappears from across the room.
Choose the three highest-impact pieces
The ribbon determines the pattern; the darker textile color gives it definition. Shop for those first and reuse plain ornaments where possible.
Look for wide gold wired ribbon
Compare the weave, reverse, and bend against real branches. A soft metallic finish will give the broad bands light without making them look like flat foil.
Shop similar burgundy velvet bows
Choose loops with enough body to stay distinct against the ribbon. Check their attachment method and avoid heavy fittings that strain small branches.
Look for simple gold baubles
Use restrained shapes that fit comfortably inside the lattice openings. A mix of modest sheen and matte surfaces can add depth without introducing another strong motif.
Keep a small spare length of the selected ribbon for later adjustments. A matching offcut is useful if a visible tuck needs correcting after the tree settles, and it avoids introducing a second gold that looks different in the same light.
Check the whole outline before adding more
Look at the tree from the doorway, then from the sofa. Compare the open spaces, the bow sizes, and the amount of ribbon visible near the base. Correct a crowded band before filling an uneven gap with another ornament.
Switch on the room lamps as well as the tree lights. The gold should remain readable, and the burgundy should still show its color. A pattern that works only in a very dark room won’t have the same clear effect during the day.
Final Styling Tip
Leave one or two green diamonds almost empty. Those quiet openings make the neighboring ribbon crossings look more deliberate.