*This post may contain affiliate links for which I earn commissions.*
The chairs in this Christmas dining scene are ordinary oak chairs with woven seats, and that’s what makes the small garnet wraps so appealing. Each one has a diagonal flap and a single brass bell. They follow the line of the chair backs down the table, with the same red showing up in the napkins.
You can make a practical version from wool-blend craft felt, sew-on hook-and-loop tape and a lightweight bell. The band opens flat, so it can go around a chair upright without taking anything apart. Make one to fit your chair first, then use it as the pattern for the rest.

The inspiration and step illustrations were created with AI. The tutorial proposes a practical adaptation using felt and a sew-on closure.
Decide where the bell will sit
Look for an upright post with a straight stretch below the top rail or a horizontal bar in a ladder back chair. Hold a scrap of paper around the post and see where the bell would hang. The outer side is usually a good place because the metal can face away from the seating surface.
Make sure the back of the chair still feels comfortable and that the bell doesn’t hit the table when you tuck the chair in. The pictured bells are decorative, so you can go smaller if the post is slim. A light bell on a short sewn loop is enough to give the cuff its shape.
I’d start with a band about two to three inches high, adjusting it to the straight section of the actual chair. These are suggested proportions. The length depends entirely on your post. A narrow cuff looks more settled on a thin spindle than a wide cuff that spreads into the chair back. If your chair has a wide solid back, this particular wrap works better on a different chair with an exposed upright.
Gather the felt and fasteners
- Medium-weight garnet wool-blend craft felt, about 2 mm thick as a starting point, enough for one measured strip per chair plus a test strip.
- Low-profile sew-on hook-and-loop tape, without an adhesive backing. Allow one matched pair of small patches per cuff.
- One lightweight brass-tone jingle bell with an attachment eye per chair.
- Garnet polyester sewing thread and a hand-sewing needle with an eye large enough for doubled thread.
- Flexible tape measure, paper, pencil, fabric shears and sewing clips.
- Optional scrap of matching felt for reinforcing a thin bell attachment area.
Use felt that curves easily when wrapped around the chair. If a swatch springs open, a small patch will have to work harder than it should.
The fastener needs enough contact area to hold the band closed while staying well within the overlapping fabric. Dark tape is easy to hide with this color. Match the thread to the felt so the stitches blend into the face.
Make the first cuff fit
1. Wrap a paper pattern around the chair post
Measure all the way around the upright at the chosen height. Add about an inch and a quarter for overlap as a starting point. For example, a post that measures four inches around might start with a paper strip five and a quarter inches long.
Wrap that paper around the post and clip it together. The ends need to overlap comfortably, without the paper pinching the wood or sliding freely down it. Mark the face you want to see and the position of the bottom edge. Those marks help you repeat the placement on every chair.
If the post narrows noticeably toward the seat, move the cuff up to a straighter section. You can vary the paper length slightly from chair to chair later. It’s easier to start with a straight-sided rectangle and let the fit tell you what needs to change.
2. Cut the strip and shape one overlap
Lay the paper flat with the outward face up. Keep the left end square and trim a shallow diagonal at the right end. Test the paper again before cutting fabric.
The short edge of the diagonal still needs to reach well beyond the underlapping end. If the corner exposes the fastener, make the slope shallower or cut a longer strip. Trace the final shape onto felt and cut it with long smooth strokes. Set out both halves of the sew-on tape and the bell before you start sewing.
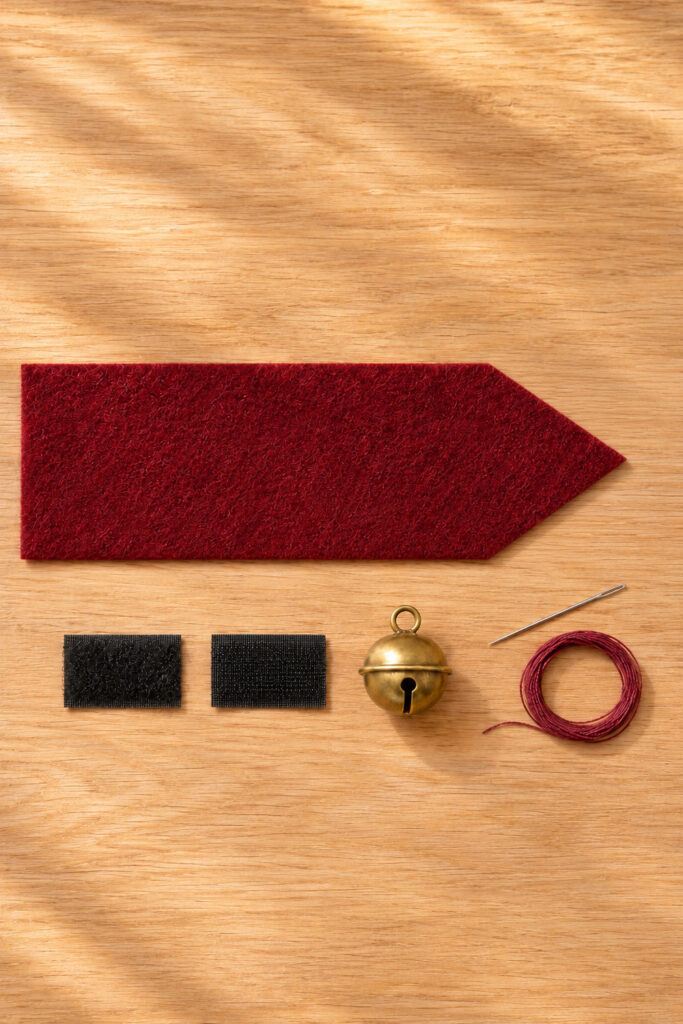
Sew the closure and bell
3. Mark where the two fastener faces meet
Wrap the felt around the post with the square end underneath. Mark the spot on the outward face of the square end where the tape will sit. Mark the corresponding spot on the underside of the diagonal flap.
Take it off the chair and clip the patches in their marked positions. Press them together to check that the upper and lower edges of the band line up. Leave a little bare felt between each patch and the edge so the tape won’t show when the cuff closes.
4. Stitch the square end and attach the bell
Stitch the first tape patch around its perimeter near the square end. Use small stitches and tie off securely. With a separate length of doubled thread, sew the bell by taking several passes through its attachment eye and through the felt near the diagonal edge.
Keep the stitch point far enough in from the cut edge to leave sound material around it. Check that the bell hangs freely on a short loop, then knot the thread on the underside. If the felt distorts, reinforce the back with a small matching scrap and stitch through both layers.
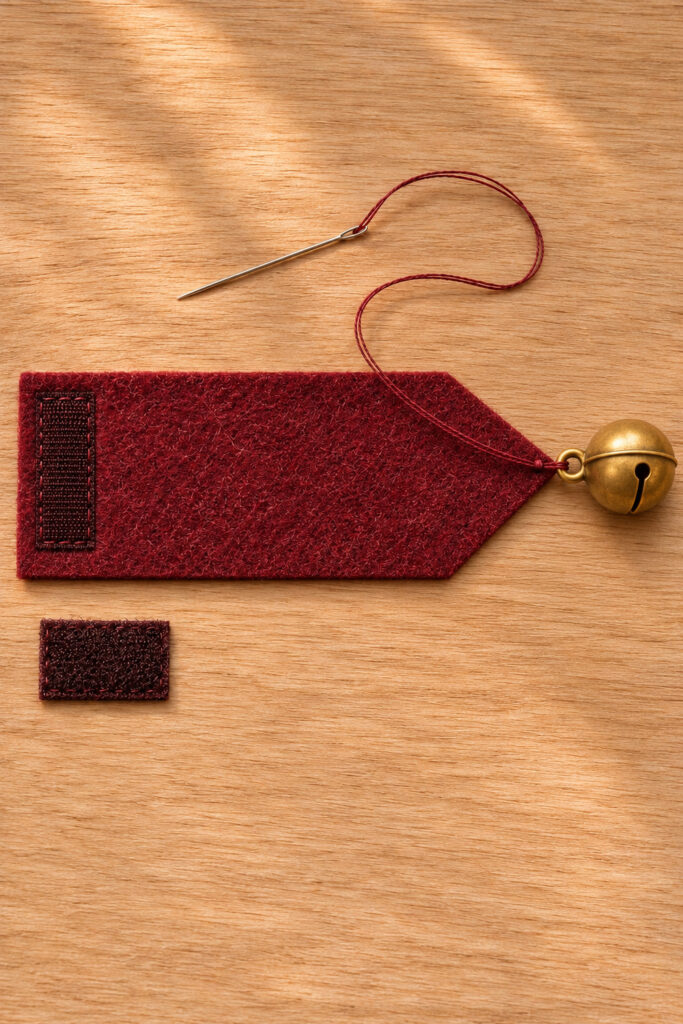
5. Close the flap and test the fit
Sew the second tape patch to the reverse of the diagonal flap on the mark you made earlier. Keep this patch separate from the bell attachment stitches so the thread doesn’t interfere with the closure.
Fit the cuff to the chair with the finished flap facing outward. Pull the chair in and out once and give the bell a gentle check. The cuff should stay where you placed it while opening easily when you peel the flap back. If the patch lands off-center, reposition it before cutting the other bands.
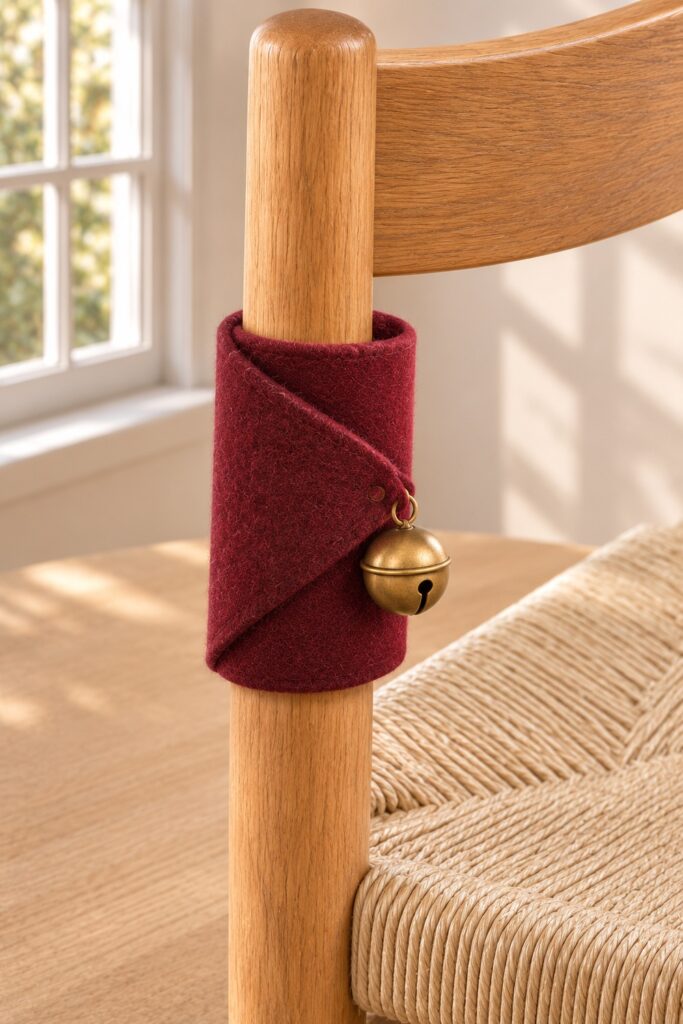
Fix a slipping band or a flap that curls
When a cuff slides, check the chair shape before tightening it. A taper can lead the band down to a narrower section. Move it to a more even part of the post, or shorten the band slightly and test again.
A flap that curls at the point may be too sharply cut or the bell may be pulling it sideways. Shift the stitch point toward the wider part of the felt, or use a smaller bell. A piece of tape visible under the edge is usually a sign that the fastener is wider than the available overlap. Trim the patch before sewing it back down.
Repeat the small detail down the table
Use the finished pattern for the matching chairs and check the fit on each one. Hang the bells at the same height as you walk along the table. If you want a quieter version, skip the bells and use a line of matching blanket stitches along the diagonal instead.
For a different palette, try fir green felt and an aged brass finish. Keep the felt deep enough in color to show against the wood.
These cuffs are for indoor display. Keep small bells out of reach of children and pets who may pull them off, and remove a cuff if a bell loosens.
When the season is over, open each band, press the fastener halves together loosely and store the set flat so the diagonal ends keep their shape. Start with the chair guests see first when they enter the room. It will tell you exactly how high to place the others.