*This post may contain affiliate links for which I earn commissions.*
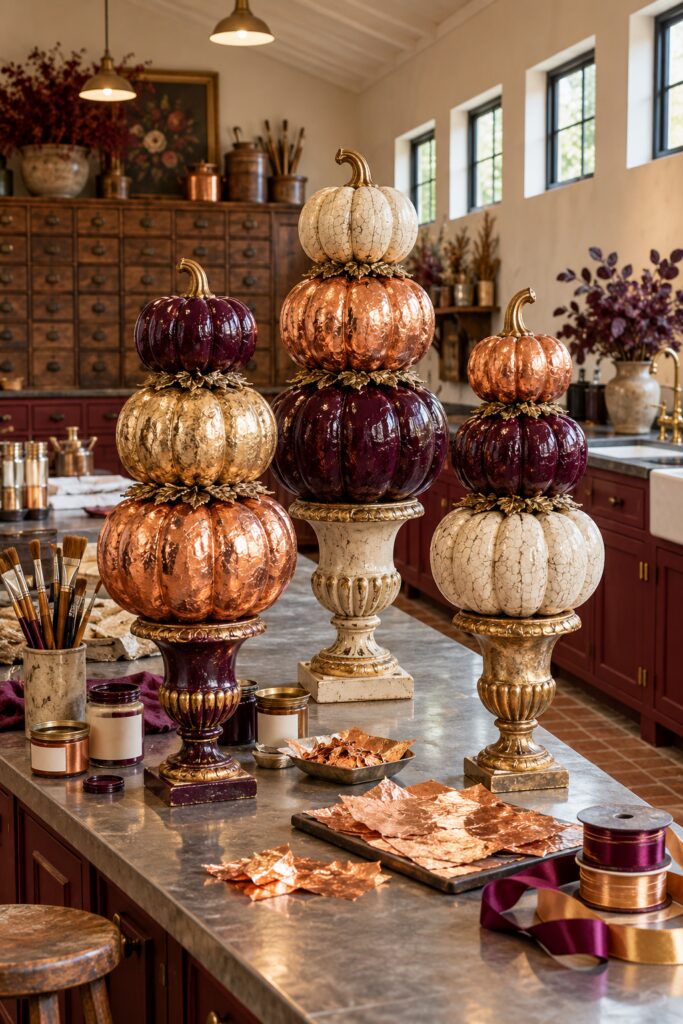
Three pumpkin stacks give this display its character: glossy plum beside gleaming copper, aged gold, and softly crackled ivory. The inspiration image shows them on ornate pedestals at different heights, with gold leaves tucked between the pumpkins.
This tutorial turns that visual idea into a lightweight indoor display. Faux pumpkins, broad pedestal bases, and concealed supports create a similar effect without asking the pumpkins to balance on their stems.
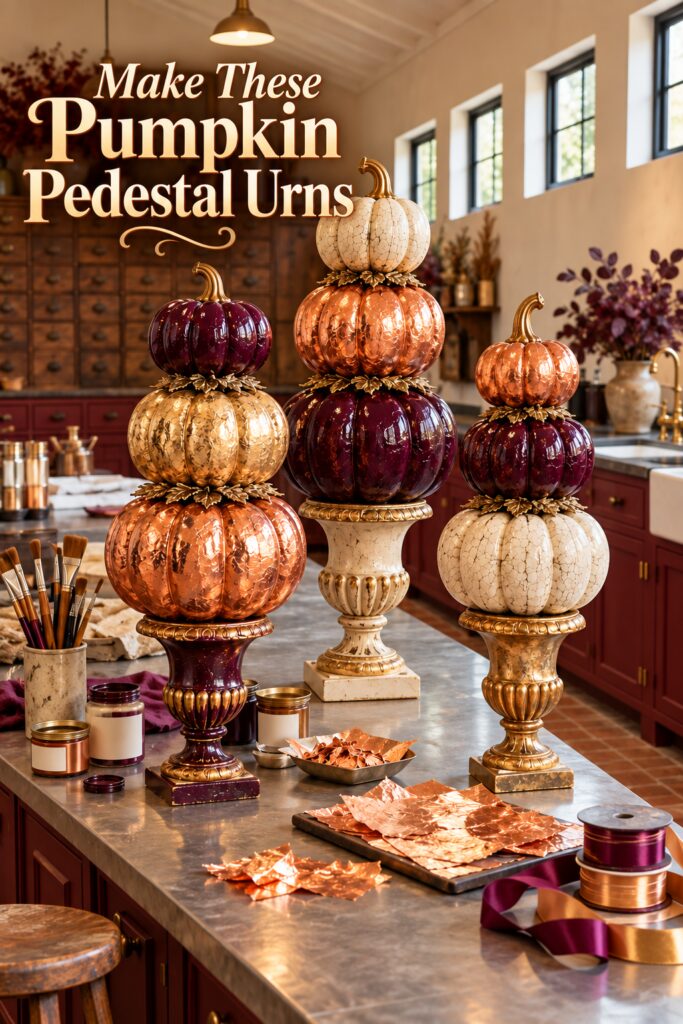
The inspiration image and instructional images were created with AI. They illustrate the design and construction stages; they do not document a physical project being made.
What you’re making
Make one pedestal urn or a group of three, each with two or three graduated faux pumpkins. For the closest match to the image, vary both the stack height and the order of the finishes. The pumpkins sit on stable, flat attachment points; small gold leaf collars conceal the joins.
Choose lightweight, paintable foam pumpkins rather than heavy ceramic or solid resin ones. This version is intended for indoor display.
Materials and supplies
Quantities depend on how many urns you make.
For the structure
- Lightweight faux pumpkins in graduated sizes
- Sturdy decorative pedestals or pedestal urns with broad, level tops and bases
- Wooden dowels for two or three pumpkin stacks
- Small, thin wood disks to make flat joining surfaces where needed
- Adhesive suitable for the pumpkin material and pedestal surface
For the finishes
- Primer suitable for the faux pumpkins and pedestals
- Plum, copper, ivory, and aged gold craft paint
- Clear gloss finish for the plum pumpkins
- Crackle medium compatible with the chosen paint
- Copper leaf sheets and the adhesive specified for them
- Copper leaf adhesive and compatible clear protective finish (you can buy these 2 items as a set)
- Faux gold leaves or small gold leaf picks for the joins
Tools:
craft knife, cutting mat, ruler, pencil, paintbrushes, soft gilding brush, and a drill or hand tool suitable for making centered dowel holes.
- Craft knife
- Cutting mat
- Ruler
- Pencil
- Paintbrushes
- Soft gilding brush
- Drill or hand tool for cutting the hole for the dowel
Follow the directions and ventilation guidance on the finishes and adhesives you select.
Going to Make These Pumpkin Stacks?
I’ve put together a convenient Amazon supply list featuring hand-picked, well-rated products that match the materials list for this project to save you time.
See My Hand-Picked Supply ListAs an Amazon Associate I earn from qualifying purchases but this doesn’t increase your price at all!
Before you start
Arrange the unpainted pumpkins on the pedestals first. The largest pumpkin should sit at the bottom of each stack, with each upper pumpkin noticeably smaller. A broad, level pedestal top matters more than an exact measurement.
Check whether each pumpkin has a stem. A stem buried under the next pumpkin can prevent a firm join, so remove or shorten it only where the pumpkins will meet. Keep the visible stem on each top pumpkin. Mark the center of each meeting surface before painting, and keep those small attachment areas free of glossy finish and leaf.
Step 1: Prepare flat attachment points
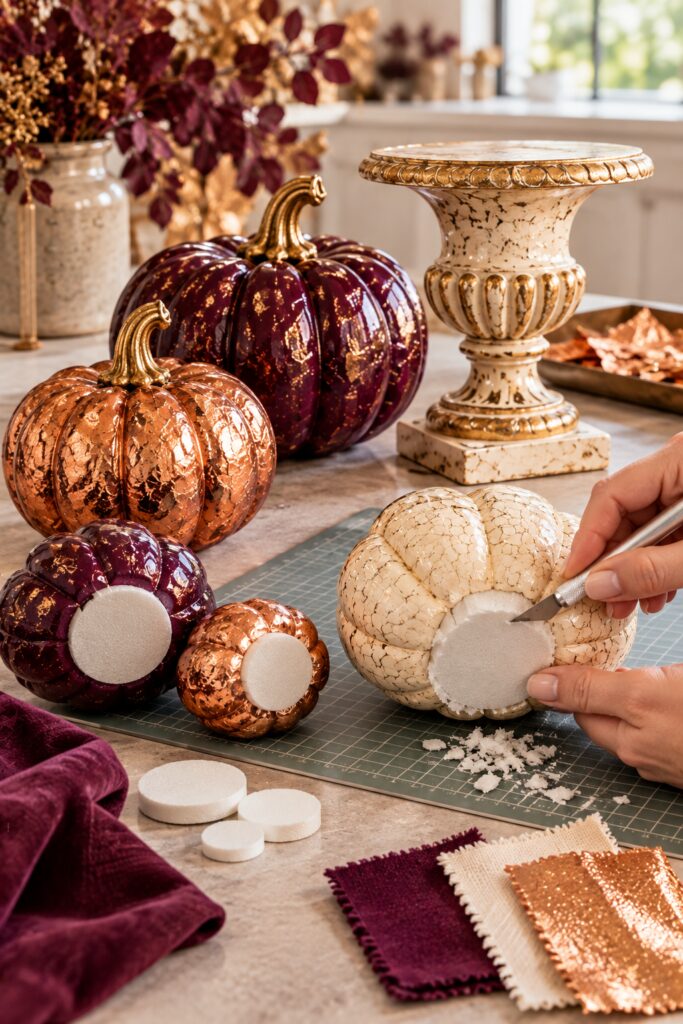
On a cutting mat, carefully trim or sand a small flat area on the underside of each pumpkin. Make a corresponding flat area on the top of a lower pumpkin if its ribs or stem keep the next one from sitting securely. Remove only enough material to create a reliable join.
Dry fit the stack again. If two surfaces still meet at only a few points, use a thin wood disk between them. Keep the disk smaller than the pumpkins so it will disappear behind the gold foliage later. Work slowly with the knife and cut away from your supporting hand.
Step 2: Paint the pumpkins and pedestals
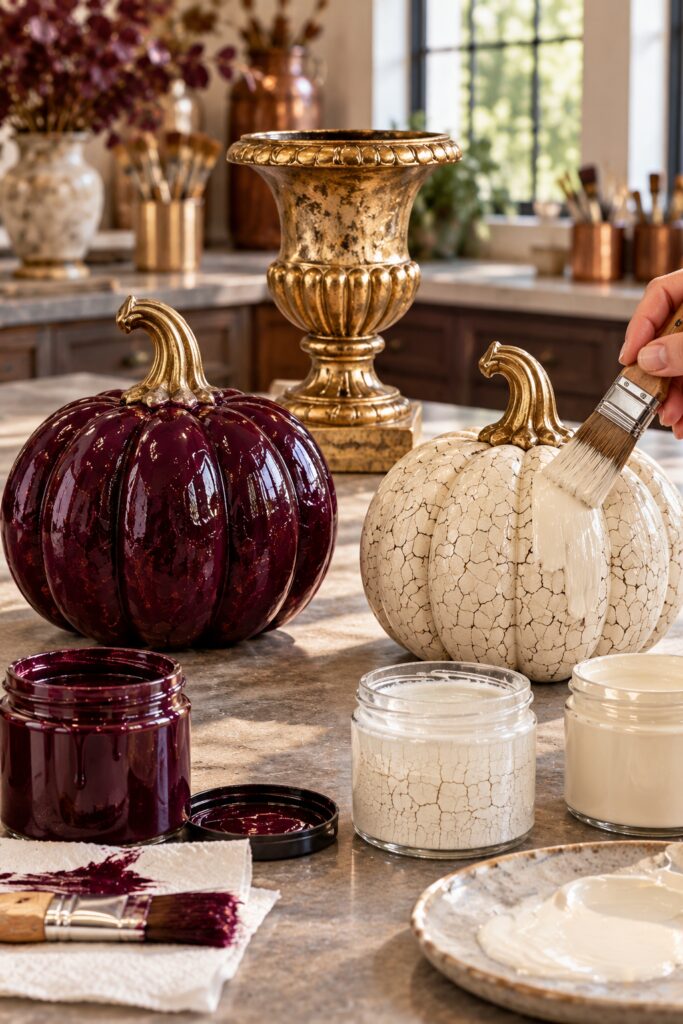
Prime the surfaces as directed by the primer manufacturer. Paint the pumpkins designated for the plum finish in thin coats, allowing each coat to dry before adding the next. Once the color is fully dry, apply a compatible clear gloss finish. The deep shine is what gives the plum pumpkins their lacquered appearance.
Give the copper pumpkins an even copper-colored base coat. It will make small gaps in the leaf less noticeable. Paint the remaining pumpkins in the base color recommended for your crackle medium. Finish the pedestals in plum, ivory, or aged gold, picking out raised details with a nearly dry brush rather than covering every recess. Let painted pieces dry completely before handling them for assembly.
Step 3: Create the crackled ivory finish
Test the crackle combination on a spare piece of foam or an inconspicuous area first. Apply the crackle medium and ivory topcoat in the order and thickness specified for those products. Avoid repeatedly brushing back over the wet topcoat, which can disturb the developing cracks.
The goal is a warm ivory surface with an aged pattern, rather than a perfectly uniform coat. Once dry, lightly touch the stems with gold paint. Keep the marked joining surfaces clear so adhesive can contact the underlying material.
Step 4: Apply copper leaf
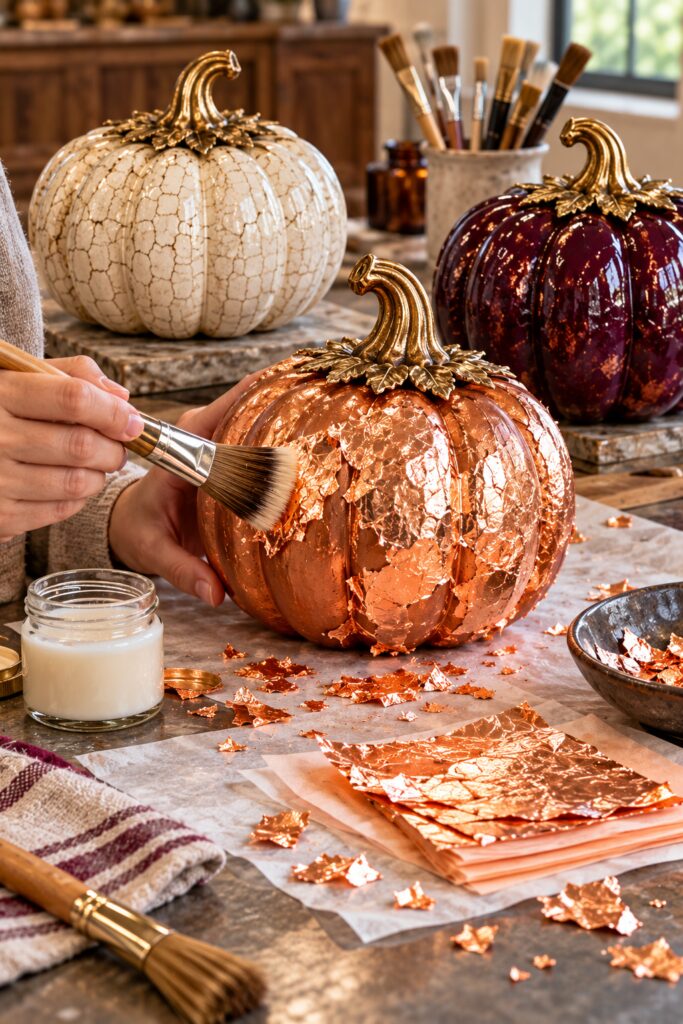
Brush leaf adhesive onto a copper-painted pumpkin according to its directions. Work on a manageable area and wait until the adhesive reaches the tacky stage specified on the container. Lay down copper leaf gently, then press it into the curves with a soft gilding brush. Brush away loose pieces and use them to fill gaps.
You can leave a little copper base coat visible in the deepest grooves. Repeat until the pumpkin has the luminous, irregular surface you want. After the adhesive has set, apply a protective finish confirmed to work with the leaf. Leave the flat joining areas untreated.
Step 5: Secure the stacks
Center the largest pumpkin on its pedestal and mark its position. For a taller stack, make centered holes through the meeting points of the pumpkins and use a dowel as an internal guide and support. Size the holes to the dowel you have, then dry fit the entire arrangement before applying adhesive. The dowel should remain hidden inside the finished stack.
Secure the bottom pumpkin to the level pedestal top using an adhesive compatible with both surfaces. Add a small amount of adhesive at each flat pumpkin-to-pumpkin join, slide the next pumpkin into position, and check that the stack remains vertical. Use thin wood disks where they improve contact. Allow the adhesive to cure for the time stated on its packaging before moving the piece.
A dowel helps keep the pumpkins aligned, but it cannot make a narrow or top-heavy pedestal safe. If a dry-fitted stack feels unstable, use fewer pumpkins or a wider, lower base.
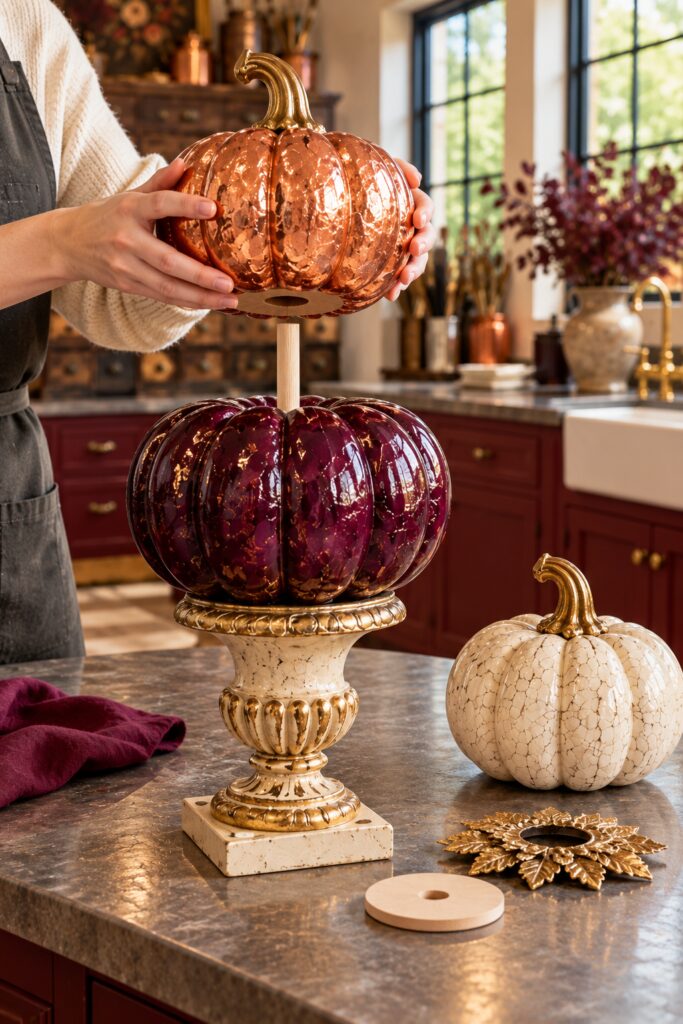
Step 6: Hide the joins with gold leaves
Once the structure is secure, tuck small faux gold leaves around each pumpkin join. Attach them to the pumpkin surfaces without forcing foliage into a structural gap. Let some leaves extend beyond the ribs to give the stack the ornate, layered edge seen in the inspiration image.
Stand back and inspect all sides. Add a little more foliage where a disk or attachment point shows, while leaving enough of each pumpkin visible for the alternating colors to read clearly.
Tips for getting the finished look
Place a copper pumpkin next to a plum one so their different kinds of shine are easy to see. Use ivory to break up a taller, darker stack. For a group of three, vary the pedestal finishes and pumpkin order rather than making identical copies.
Keep the gold leaves concentrated at the joins. Scattering them over every pumpkin would compete with the copper leaf and crackle texture. The contrast among those three surfaces is the strongest feature of this project.
Easy ways to customize it
A single two-pumpkin urn can make a smaller mantel or sideboard display. If copper leaf is beyond your budget or available time, use a reflective copper craft finish, understanding that it will have a smoother look. You could also repeat plum on two stacks and reserve the crackled ivory pumpkin for the tallest one.
Displaying the finished urns
Group them on a sturdy console, sideboard, or covered indoor table with room around every base. Keep them away from open flames and places where children or pets might pull on the stacks. These materials and finishes should be treated as indoor decor unless every component and the completed construction are specifically suited to outdoor use.
The aim is the image’s mix of sculptural height, rich color, and metallic detail. A secure two-pumpkin version can capture that idea just as well as a taller arrangement.