*This post may contain affiliate links for which I earn commissions.*
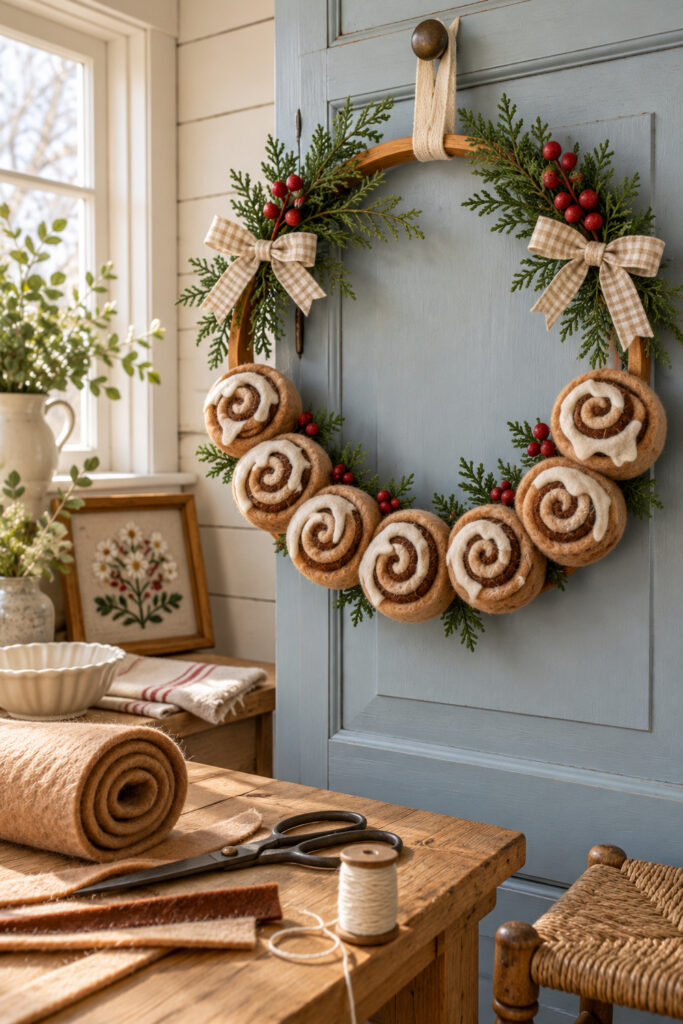
Tan felt spirals, dark cinnamon centers, and ivory icing details give this Christmas wreath its baking inspired character. The rolls follow the lower half of a wooden hoop, with cedar, red berries, and cream gingham bows at the sides. A stretch of bare wood at the top keeps the individual pieces easy to recognize.
This tutorial proposes a practical version using layered felt strips and separate cut felt icing. Small backing disks give the coils a place to attach to the hoop. The result will be flatter and more handmade than a sculpted fabric pastry, while keeping the spiral shapes that make the idea appealing.
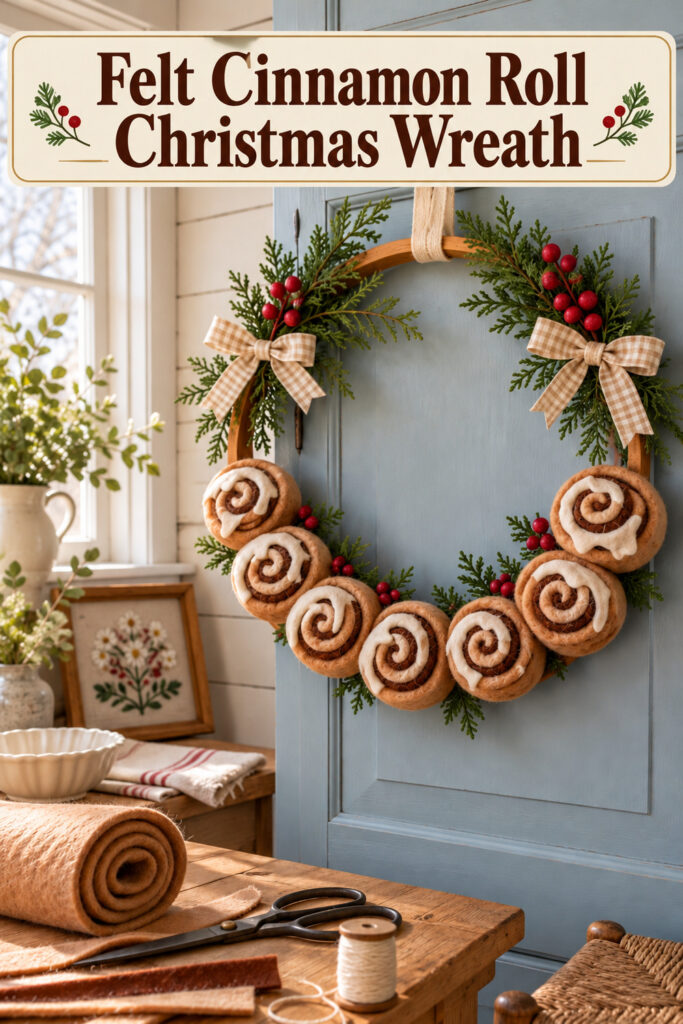
The inspiration and instructional images were created with AI. They illustrate the design and proposed construction method rather than documenting a tested physical project.
What You’re Making
Make an indoor hoop wreath with seven felt cinnamon rolls arranged around the lower arc. A suggested starting point is a hoop about 16 inches across and rolls roughly 2 to 3 inches wide. These are planning dimensions, not measurements taken from the image. Dry fit your own components before committing to the full set.
Each roll is a tight coil of tan and brown felt, with a tan backing disk sewn to the rear. Fine craft wire connects the disk to the hoop. Faux cedar and berries fill a few spaces, and two gingham bows cover the greenery attachments at the upper sides.
Materials and Supplies
Materials
- A sturdy natural wooden craft hoop approximately 16 inches across (you may want to paint or stain your hoop if you want it to be as dark as the one in the image but can only find pale hoops)
- Soft tan and dark cinnamon brown felt for seven coiled rolls (you may need to fold your felt in half to get it thick enough to resemble a large cinnamon roll so plan on getting extra)
- Ivory felt for cut icing details
- Extra tan felt for backing disks
- Strong tan sewing thread
- Short length of reinforcing cotton tape
- Flexible fine brown craft wire
- Small faux cedar sprigs and red berry picks
- Beige and cream gingham ribbon for two bows
- Strong cotton tape or ribbon for the hanging loop
- Fabric adhesive suitable for the chosen felt
Want to Make This Wreath?
I’ve put together a convenient Amazon supply list featuring hand-picked, well-rated products that fit the supply list above to save you time!
See My Hand-Picked Supply ListAs an Amazon Associate I earn from qualifying purchases but this doesn’t increase your price at all!
Tools
- Sharp fabric scissors and a ruler
- A hand sewing needle suitable for the felt
- Clips for holding coils while adhesive sets
- Wire cutters and small pliers
- Scrap paper and a pencil for trial icing shapes
Read the adhesive directions for material compatibility and curing. Test a scrap before making the rolls, since felt blends absorb adhesive differently. Keep scissors, needles, cut wire, and small berry pieces away from children and pets.
Before You Start
Set the hoop flat and mark its top with a temporary tie. Plan one roll at the bottom center, with three climbing each side. Leave the upper arc open for the hanging loop and side greenery. This loose layout will tell you how large the rolls can be without crowding the hoop.
Make one test roll first. Suggested strip widths are about 1 inch for tan and 3/4 inch for brown, with the brown centered on the tan. Start with lengths around 24 inches and extend with neatly butted joins if needed. Thickness and firmness will change the final diameter, so measure the test coil rather than assuming those lengths produce an exact size.
1. Cut and Coil the Felt Strips
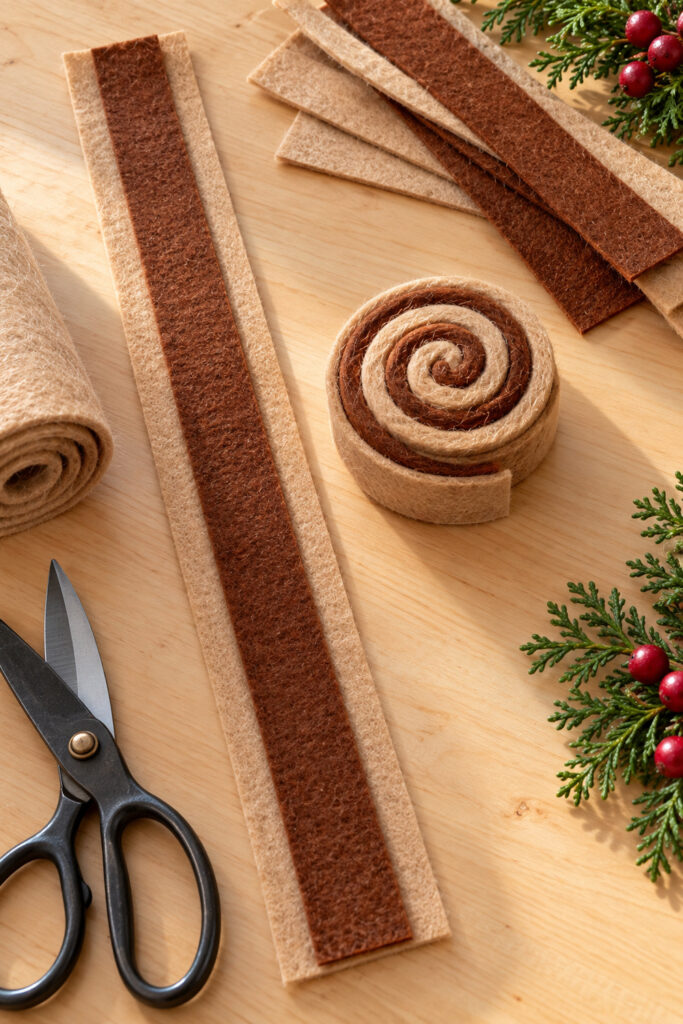
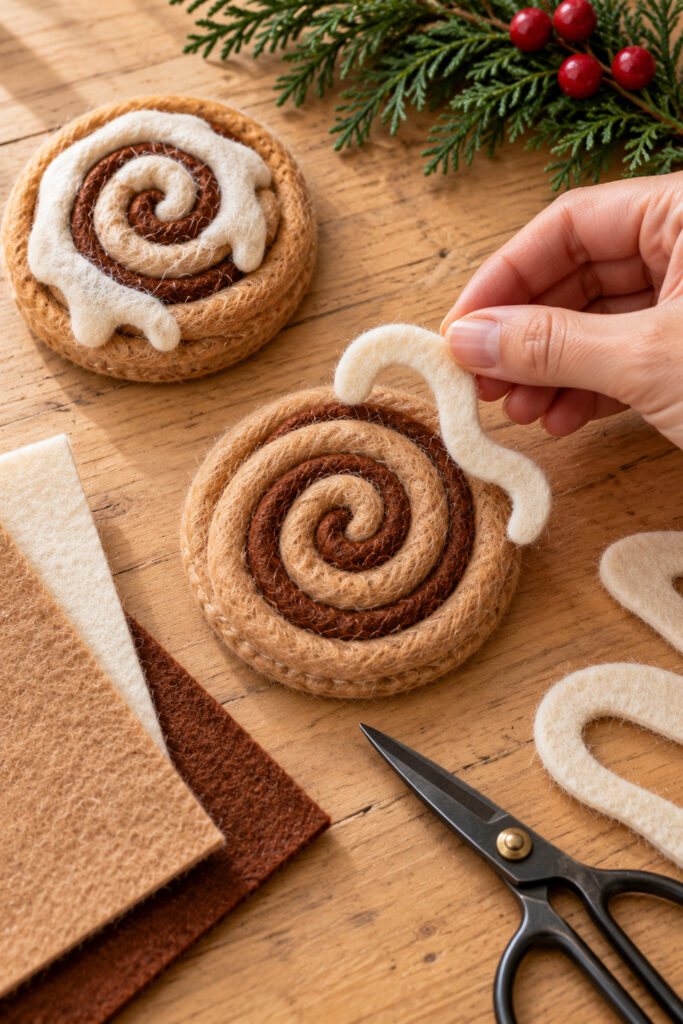
Cut the tan strips evenly so the finished rolls have consistent depth. Cut the narrower brown strips and lay one along the center of each tan strip. The tan border will remain visible along both long edges, while the recessed brown layer forms the cinnamon line inside the coil.
Apply a thin line of compatible fabric adhesive between the layers, keeping it away from the visible edges. Starting at a short end, roll the layered strip into a snug spiral. Keep one face as level as possible, nudging the felt back into line before the adhesive sets. The brown can sit slightly below the tan surface and still be visible between its turns.
Use small adhesive dabs between turns as needed rather than soaking the felt. Secure the outer tail with a few discreet stitches into the neighboring tan layer. Clip gently while it cures, following the adhesive instructions. Don’t squash the spiral flat with a heavy weight.
2. Make the Remaining Rolls and Backings
Compare the test coil with the hoop layout. If it is too small, add another layered length at the outside, staggering joins so the tan and brown ends don’t form one bulky seam. If it is too large, unroll and shorten it before the adhesive cures. Record the useful length for the remaining pieces.
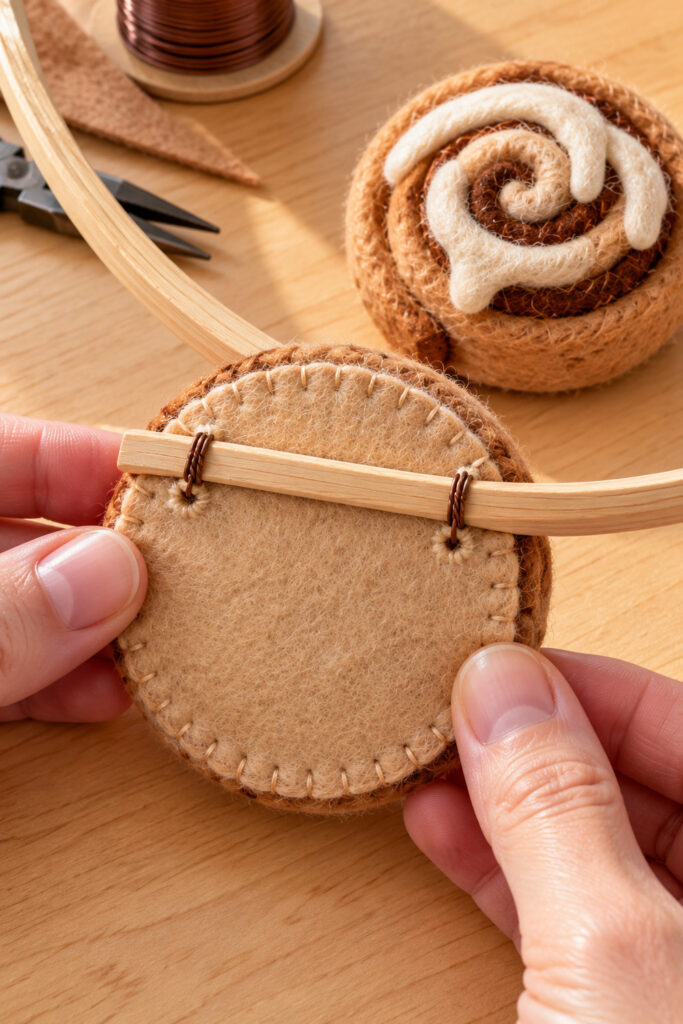
Make six more rolls, varying them slightly while keeping similar depth and color. Trim seven tan backing disks just smaller than the rear faces. On each disk, sew a small piece of cotton tape across the area that will sit over the hoop. This reinforcement spreads the pull from the wire instead of leaving two small holes to carry the whole roll.
Stitch each disk around the rear outer tan layer of its coil. Use small whip stitches, passing the needle from the disk edge into the felt edge repeatedly. Keep the thread on the back and side rather than across the decorative spiral. Check that the disk feels secure before moving on.
3. Cut the Ivory Icing Details
Sketch a loose spiral on scrap paper, with a few rounded drips along its outer turn. Fit the paper over a roll and keep enough brown visible to read as cinnamon. You are aiming for a narrow icing accent, not a white cap over the entire coil.
Cut the shape from ivory felt, widening delicate sections so they won’t tear. Make it in two curved pieces if one long spiral is awkward to handle. Apply a small amount of fabric adhesive beneath the ivory, set it partly over the tan spiral, and let the occasional drip reach toward the edge. Avoid stuffing icing into every brown groove.
Allow the icing to cure before handling the roll again. Vary the drip placement across the seven pieces so they look related without appearing stamped from one mold. The flat cut felt is the icing; don’t add wet dimensional paint or loose powdered material.
4. Wire the Rolls to the Lower Hoop
Return the rolls to the dry layout with their faces upward. Begin with the bottom center piece, then work alternately left and right. Turn each coil slightly so the icing shapes vary. Keep neighboring edges close without crushing the rolls or hiding their centers.
For each attachment, pass fine wire through two reinforced points on the backing disk, positioned to straddle the hoop where it crosses the roll. Hold the disk directly against the wood, bring the wire ends around the hoop, and twist them together at the back. Snug the wire gently without cutting into the felt or distorting the disk.
Trim excess wire with cutters and fold the ends flat with pliers. Cover exposed ends with a small secured felt patch. Check for rotation; if a roll swings, add a second separate wire tie through another reinforced area of the backing. Lift the hoop carefully and confirm that all seven rolls stay in position.
5. Add Cedar Berries and Gingham
Cut small faux cedar sprigs and tuck them behind the rolls, with tips extending into the spaces between coils. Wire the stems to the hoop itself, keeping all cut ends at the back. Don’t rely on felt icing or a neighboring roll to support a greenery spray.
Build two small cedar and berry bundles for the upper sides. Point their stems along the hoop and secure them with wire. Tie a gingham bow over each attachment, keeping its tails short enough to sit above the rolls. Leave the very top arc bare so the wooden shape remains visible.
6. Add the Hanging Loop and Check the Back
Loop strong cotton tape around the top of the hoop and secure it with a firm knot or stitched closure. Use a wall or door hook rated for the finished wreath and suited to the surface. Test the hanging arrangement low over a soft surface before putting it in its final position.
Run your fingers carefully around the rear, checking for loose coils, projecting wire, and slipping stems. Tighten attachments where needed and cover any remaining wire ends. Let all adhesive finish curing before hanging the wreath upright for an extended period.
Tips for the Cinnamon Roll Look
Keep the brown line visible around every coil and use the ivory sparingly. If a roll looks too pale, reduce the icing coverage rather than adding extra dark pieces on top. The alternating layers should supply the pattern.
Easy Ways to Customize It
Use a smaller hoop and fewer rolls when you want a compact wreath, checking the layout before cutting a full set. Blue checked ribbon can connect it to a painted door, while plain cream ribbon keeps the baking theme quieter. Maintain the same tan brown and ivory relationship so the subject stays recognizable.
Displaying the Finished Wreath
Use it indoors, away from heat, cooking steam, and damp conditions. This is decorative felt, not food or a toy. Keep it out of reach of pets and small children, particularly because the rolls resemble treats and the greenery contains small parts.
Let the finished coils supply the character. Slight differences in size and icing are welcome, provided the attachments are secure and each spiral is easy to see.