*This post may contain affiliate links for which I earn commissions.*
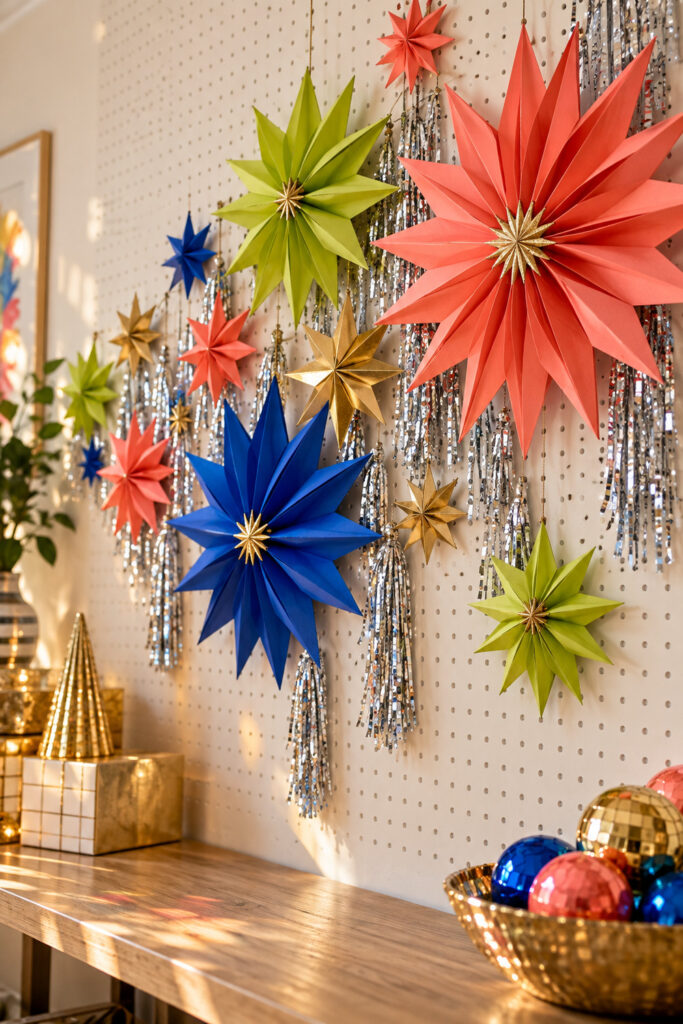
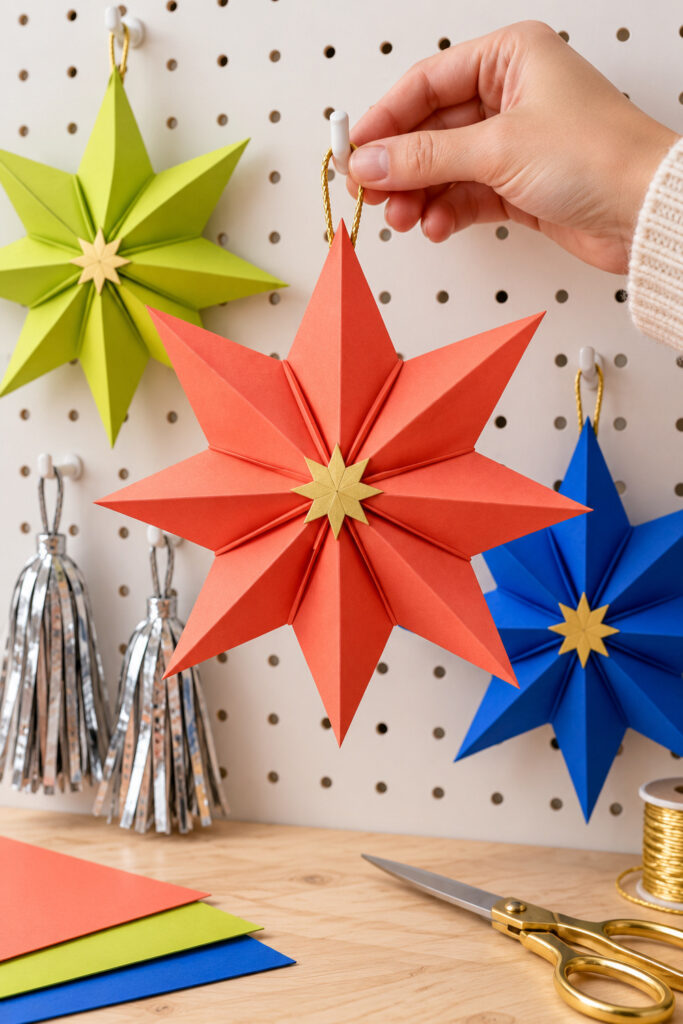
Coral, lime, and cobalt paper stars make the pegboard in this inspiration feel like part of the Christmas decorating. Their sharp folds stand out against the fine silver fringe, and the different sizes let the display travel across the wall without becoming a straight row.
This tutorial uses two four-point folded sections to make each eight-point star. It is a practical adaptation of the many-pointed shapes in the image, keeping the dimensional paper, vivid colors, and small gold centers that make the idea interesting.

The inspiration and instructional images were created with AI and illustrate a proposed DIY method rather than a documented physical project.
What You’re Making
You will make lightweight dimensional stars and hang them separately from short silver fringe bundles on a securely mounted pegboard. Each star uses two equal paper squares. Their folded points overlap visually when the halves are joined back to back at an angle.
Make a few sizes rather than one giant star. As a suggested starting point, try a pair of 8 inch squares for your first star, then adjust after seeing how the folds behave. Those are proposed dimensions, not measurements taken from the inspiration.
Materials and Supplies
Materials
- Two equal squares of colored craft paper per star in coral, lime, cobalt, and gold
- Craft glue suitable for your paper
- Thin hanging cord and small matching paper patches for reinforcement
- Lightweight silver fringe with an intact header strip
- Pegboard hooks suitable for your board and the decoration weight
- Small scraps of gold paper for optional centers
Tools
- Scissors
- Ruler and pencil
- A blunt scoring tool or bone folder if useful
- Small clips for holding glued overlaps without flattening the points
Quantities depend on your planned display. Ordinary paper is useful for a practice star. Avoid very thick card at first because overlapping folds can become bulky and resist the shape.
Before You Start
Check that the pegboard is securely installed and that the hooks fit it. Keep your display clear of outlets, heaters, and the working area below. These are indoor paper decorations; damp conditions can distort them.
Lay out rough positions with loose paper shapes before folding the whole batch. Plan a rising or gently staggered cluster, with the largest star slightly off center. Leave spaces for the fringe instead of expecting to squeeze it in afterward.
Try the folding method on plain paper first. Use the same square size for both halves of one star so their points will match. Protect the work surface when using glue and handle scissors with care.
Step-by-Step Tutorial
1. Crease the Squares and Cut Four Short Slits
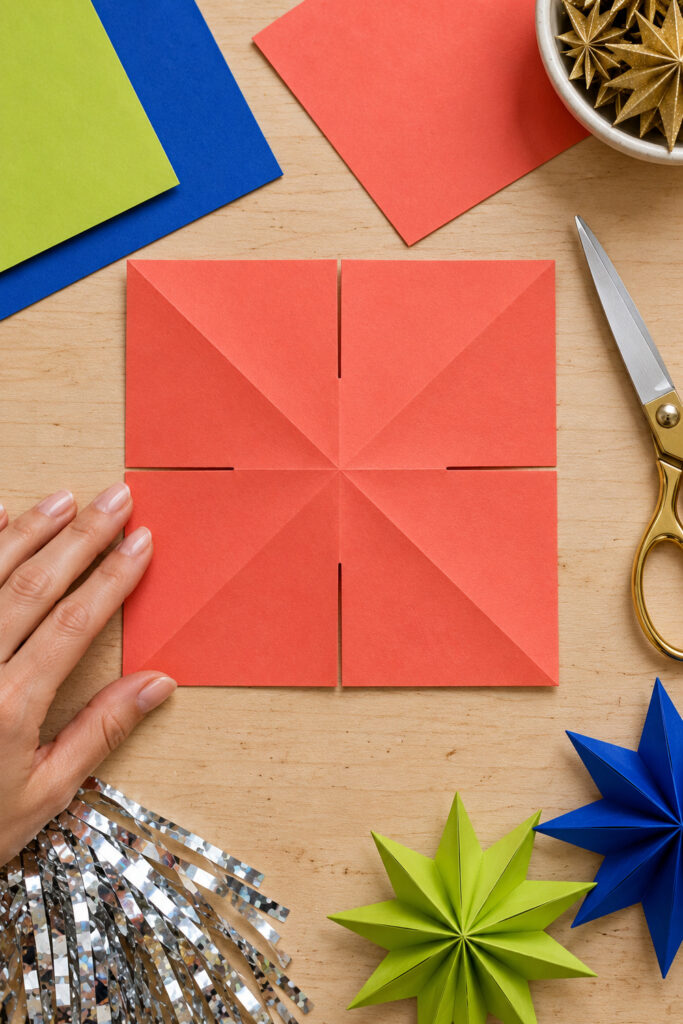
Take one square and fold it in half from edge to edge. Open it, turn it, and fold it in half the other way. Open again. Fold corner to opposite corner along each diagonal, unfolding between folds. You should have horizontal, vertical, and diagonal creases crossing at the center.
On the horizontal and vertical creases, measure from an outer edge to the center. Mark the halfway point of that distance. Cut from each of the four edge midpoints inward to its mark. Do not cut along the diagonal creases and do not cut all the way to the center. The uncut middle holds the star together.
2. Fold and Glue One Four-Point Half
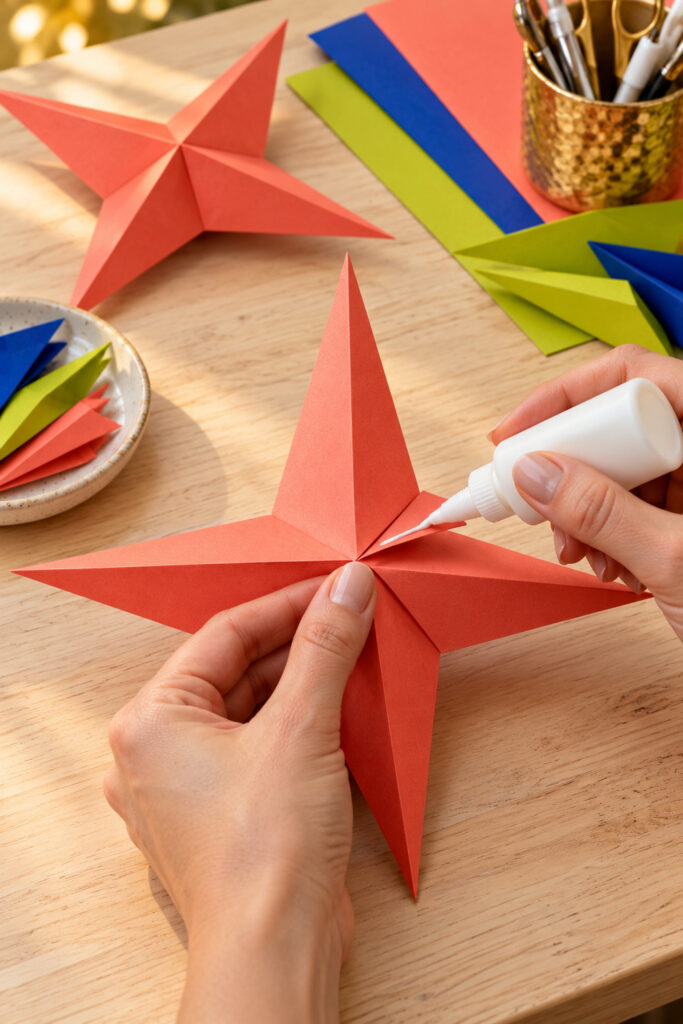
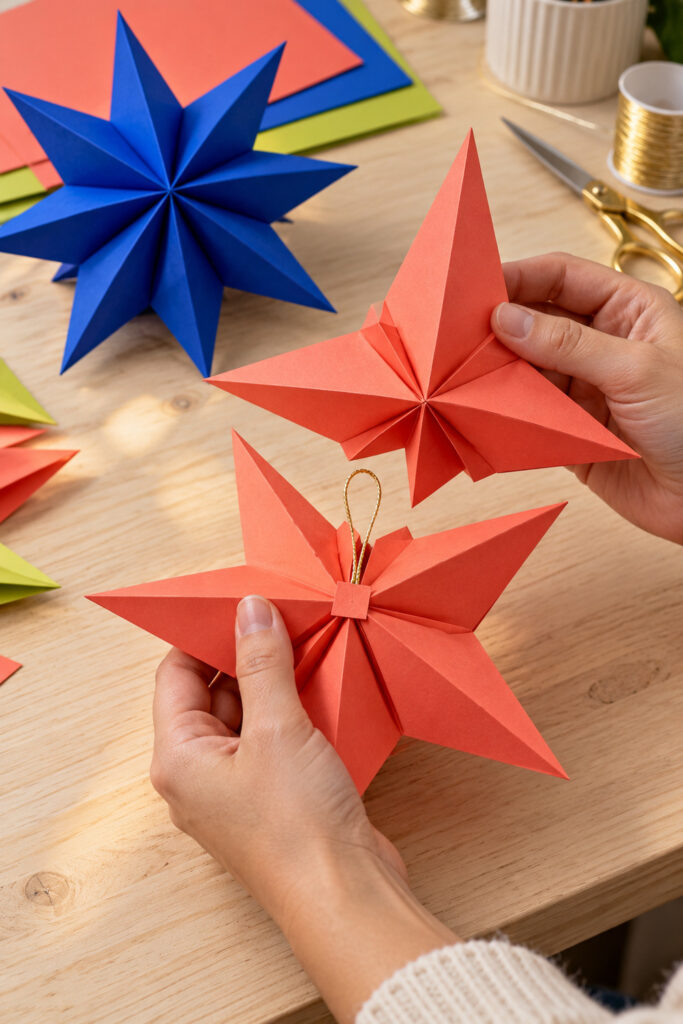
Work on one original corner of the square. Fold the two free edges beside that corner inward to meet its diagonal crease, forming a narrow pointed shape. The corner becomes the tip. Repeat at the other three corners. You now have four points with paired triangular flaps on the back.
Lift one flap in a pair and overlap it slightly over the other, drawing the point into a shallow raised shape. Apply a thin line of craft glue between the overlapping surfaces. Hold or clip the seam without crushing the point. Repeat for the other three points, keeping the overlap similar so the arms look balanced.
The front should show four raised ridges radiating from the middle. If one point twists, loosen its overlap while the glue is still workable and realign it. Let the glue set according to its instructions before handling the half roughly.
3. Add the Hanging Loop and Join the Halves
Make the second four-point half in the same way. On the back of one half, secure both ends of a cord loop near the central area of an upper point. Cover the attachment with a small glued paper patch so the load is spread beyond the cord ends. Let it set and check that the loop holds gently without tearing the paper.
Place the two halves back to back and rotate one by about 45 degrees. The four points from one half should sit between the four points of the other. Dry fit them first. Join the central contact areas with paper-compatible glue, supporting the raised faces so you do not squash them as you press the centers together.
Use small paper tabs at the back center if the contact areas need help meeting. Keep the tabs hidden between the halves. Let the connection dry fully before lifting by the cord. If it separates, repair the joint rather than relying on the hanging hook to keep the halves together.
4. Make the Smaller Stars and Gold Centers
Repeat the method with smaller matching pairs of squares. Keep the same slit proportions rather than copying the first star’s cut length onto a smaller square. This preserves enough intact paper at the center.
For a simple gold center, cut a small star from lightweight gold paper and glue it over the front center once the main assembly is dry. This substitutes a flat paper accent for the elaborate little metallic bursts in the inspiration. Keep it small enough that the folded ridges still show.
5. Hang Stars and Fringe on Separate Hooks
Hang the largest star first and add the smaller ones around it. Let each cord loop carry its own star from a suitable hook. Adjust cord lengths or hook positions to create staggered heights, checking that the points do not press against neighboring decorations.
Cut the fringe into narrow bundles while preserving their header strips. Secure a cord loop to each intact header with a suitable reinforced attachment, then hang each bundle from its own hook. Do not suspend fringe from a paper star’s tip. Separate supports let you adjust the silver without pulling on the folded paper.
Tips for Getting the Finished Look
Keep the folds crisp and the centers relatively small. The broad colored points are the main feature. If a star looks limp, try slightly firmer foldable paper on the next one instead of adding heavy decoration to the existing points.
Use more coral or cobalt in the largest shapes and let lime appear in smaller repeats. This gives the wall a clear color balance. Vary the fringe length, but keep its lowest ends above anything you use on the bench.
Easy Ways to Customize It
For a compact display, make one larger star and two smaller ones. You can change the colors while preserving the contrast between solid paper and silver strands. Leave off the gold centers if you prefer to see the folded construction clearly.
If you do not have pegboard, use a securely installed indoor display rail with suitable individual hooks. Check its weight limits and keep the stars and fringe independently supported. Do not assume a loose string stretched across a wall will support a growing collection reliably.
Displaying the Finished Project
Use the hanging on an indoor craft wall or another dry wall area with safe supports. Keep it away from open flames, hot lamps, and curious hands or pets that could pull the cords. Light from the room can show the metallic fringe without wiring the paper stars.
For storage, remove each piece separately. Support the raised star points in a shallow box rather than flattening them under other decorations. Keep fringe loosely gathered so it is easier to untangle when you use it again.
Final Encouragement
Make one practice star and use it to judge your paper, folds, and hanging loop. Once those details work, the rest of the display is a matter of repeating the method in different colors and sizes. The eight-point version keeps the idea of the inspiration while giving you a clear construction plan.