*This post may contain affiliate links for which I earn commissions.*
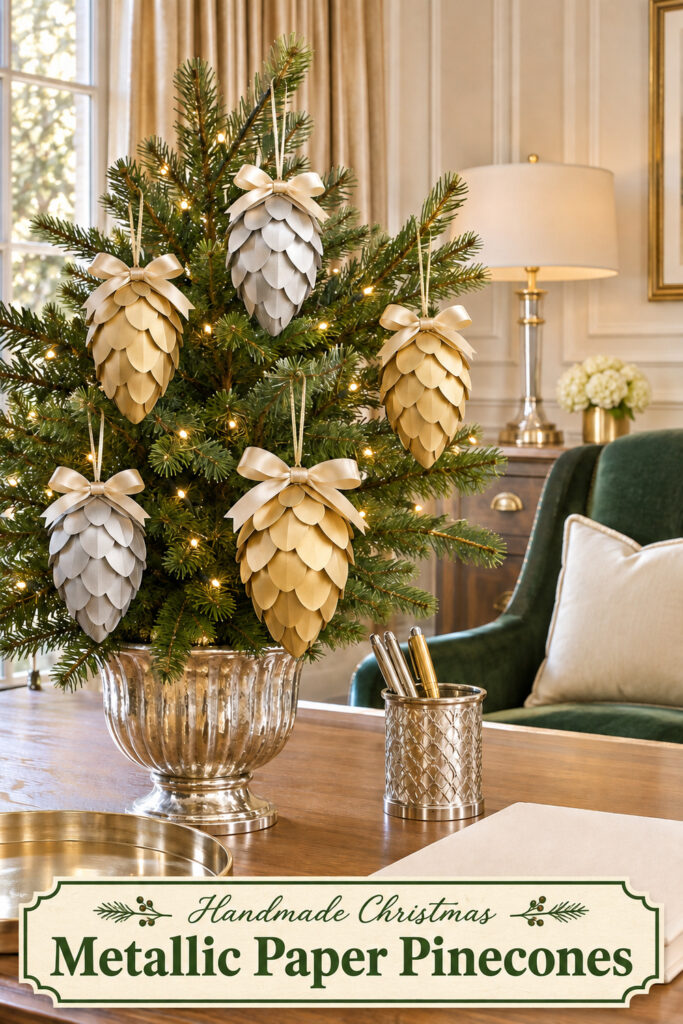
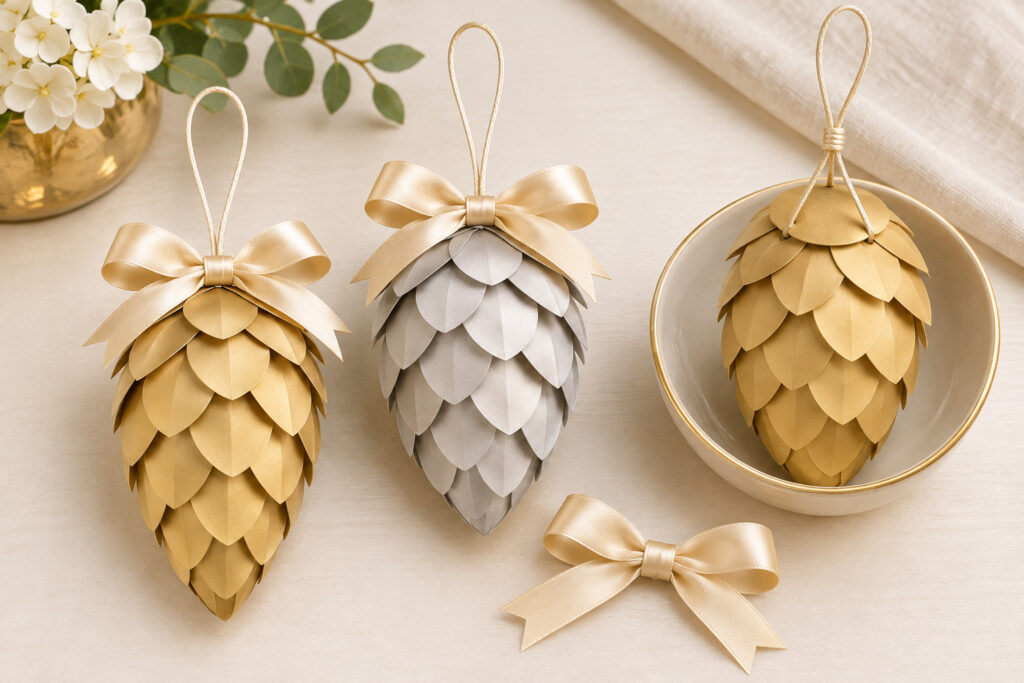
Gold and silver paper scales give these Christmas pinecones a soft metallic finish. Champagne bows sit at their tops, while the rounded layers point down toward each tip. On a small evergreen, their long shapes stand out from the branches without needing a different ornament on every twig.
The practical version below uses lightweight foam egg forms covered with overlapping cardstock pieces. A cord harness passes around each form beneath the paper and becomes its hanging loop. Make one first so you can adjust the scale size before cutting pieces for a whole tree. The dimensions are proposed starting points, not measurements taken from the image.
The inspiration and instructional images were generated with AI. This tutorial proposes a practical construction method and does not document a tested physical project.
Plan One Pinecone Before Making a Set
Use an egg form about 4 inches long, with its narrower end pointing down. The broad end becomes the top beneath the bow. A slim egg shape will look closer to a pinecone than a round ball.
Start with paper scales roughly 1 inch long and 3/4 inch wide. Each piece has a narrow upper end for gluing and a broad rounded lower end that remains visible. Expect to adjust the size as the form narrows. The finished covering should overlap enough to hide the foam without becoming a heavy shell.
One ornament can be all gold or all silver, as in the inspiration. Mixing both colors within every row is another look, but keeping each pinecone in one finish makes the layered shape easier to read.
Collect Paper, Forms and Tools
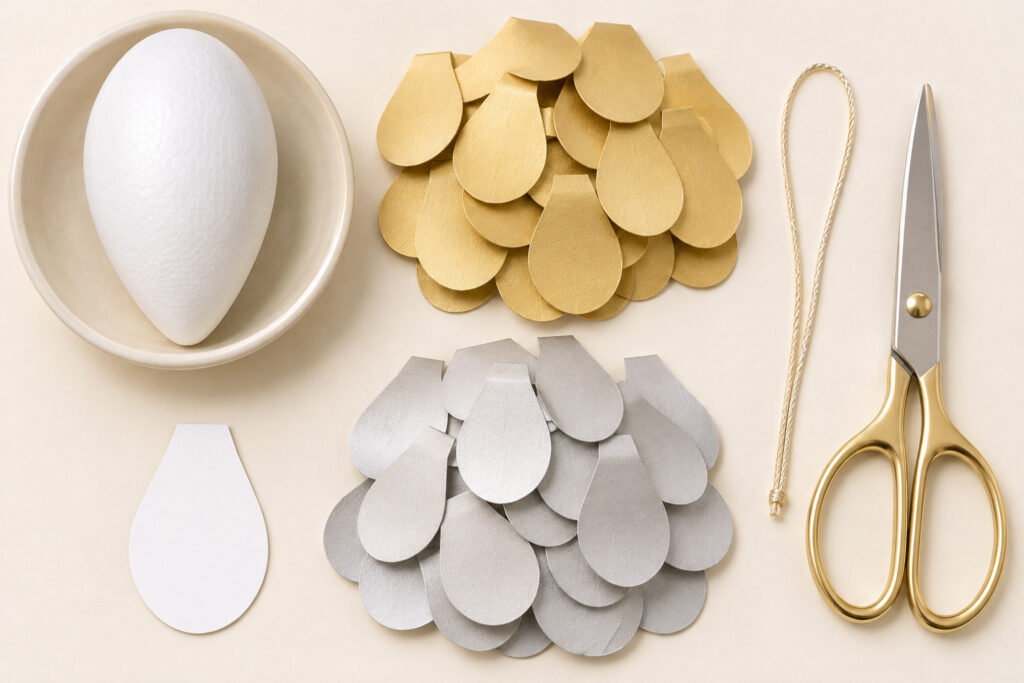
For one trial ornament, gather:
- One lightweight foam egg, about 4 inches long
- Satin metallic cardstock in gold or silver, enough for approximately 60 to 80 scales plus a few smaller finishing pieces
- Narrow hanging cord, approximately 24 inches to allow for the harness and trimming
- Champagne satin ribbon, approximately 3/8 inch wide, for a small bow
- Craft glue explicitly compatible with the selected foam and cardstock
You’ll also need ordinary paper for a template, a pencil, scissors, a blunt pencil or smooth dowel for shaping, a small glue applicator and a shallow bowl to support the form while you work. Keep a cloth or paper towel nearby for excess glue.
The scale count is an allowance, not a fixed pattern. Form width, paper thickness and overlap change how many pieces you need. Check coverage on the trial before multiplying supplies for five ornaments. For a set like the image, plan three gold and two silver versions.
Prepare the Scales and Hanging Harness
1. Cut a Rounded Scale Template
Draw a piece about 1 inch long and 3/4 inch wide. Round its lower end broadly, then narrow the upper end slightly. Keep enough flat area at the top for glue. Cut the template and test it against the egg with the rounded end facing down.
Trace and cut a small batch of matching pieces. Use a smooth curve rather than a sharp lower point. A few smaller pieces will be useful at the tip and top, so keep the template until the ornament is finished.
2. Secure the Cord Around the Form
Pass the middle of the cord beneath the narrow tip, then bring the two ends up opposite sides to the broad top. Keep the cord snug against the egg. Join the ends above the top with a secure knot to make a hanging loop, adjusting the loop length before trimming.
Use small amounts of compatible glue to hold the cord against the foam along its route. The cord forms a cradle around the egg; the knot and loop sit above it. Let the adhesive set as directed before covering the harness. Don’t rely on a small pin pushed into the foam as the only hanging support.
Cover the Egg from the Point Upward
3. Hide the Narrow Tip First
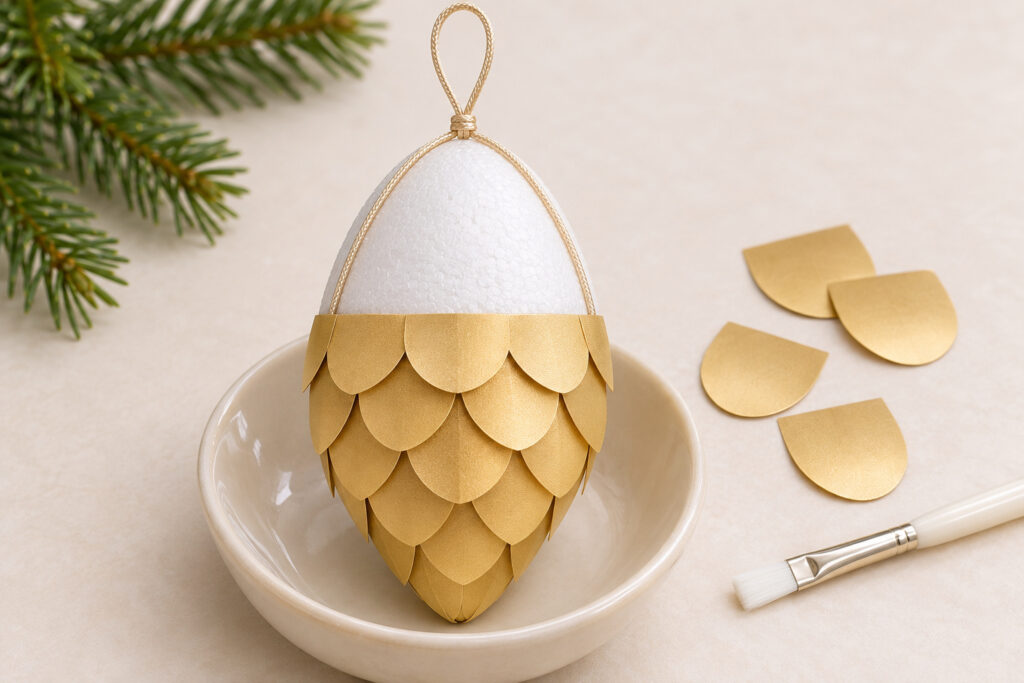
Cut a smaller scale or rounded paper patch to cover the bottom tip and cord bend. Shape it gently over the form, using several small pieces if a single one wrinkles. Apply glue sparingly and press until the pieces hold according to the adhesive directions.
Begin the first ring just above this cap. Put glue on the narrow upper part of each scale and let the rounded lower end sit over the tip covering. Keep the pieces close enough that their sides overlap slightly. Don’t glue every lower edge flat; a small lifted edge gives the paper its pinecone texture.
4. Stagger the Next Rows
Start the next ring above the first, with each rounded end covering the joins between two scales below. Work around the egg rather than completing one vertical strip. Check from the side to see whether any white foam shows through.
A useful starting overlap is about half the scale length, adjusted to the form. Curl the visible lower edge very lightly over a smooth pencil if it needs shape. Avoid a strong crease, which can crack a metallic coating or make the scale stick out sharply.
5. Reduce the Pieces Near the Broad Top
Continue the rows until only a small area remains around the cord at the top. Use shorter or narrower scales as needed to keep the covering smooth. Their rounded ends should still point down over the previous row.
Cover the final exposed foam with a small matching cardstock cap, leaving the hanging loop free. Fit it around the two cord strands rather than cutting either strand. Keep glue away from the loop’s free section so it remains easy to hang.
6. Add the Bow and Check the Hanging Loop
Tie a small champagne bow separately. Attach it at the top where it can cover the paper cap and cord join without carrying the ornament’s weight. Trim its tails so they don’t hide much of the upper scales.
Allow the adhesive to set fully following its directions. Test the ornament by hanging it close above a soft surface. Check the knot, harness and paper covering before moving it to a tree. If anything shifts, set it down and correct the attachment rather than adding more decoration over the problem.
Correct Gaps and Uneven Rows
If foam shows between scales, add a small matching piece beneath the nearest loose edge. Avoid covering an entire patch with a large new flap, which can interrupt the row pattern. The staggered joins should remain visible as a repeating texture.
If a row forms a thick ridge, check whether its pieces are too long or overlapped too heavily. Lift only pieces the glue still allows you to move, following its directions. Use smaller scales for the next area rather than forcing large ones around a tight curve.
A twisted pinecone may have uneven cord placement. Before adding the bow, check whether the hanging loop sits above the form’s center. Adjust the harness while the construction still allows it; don’t try to balance a poorly centered form with a heavy embellishment.
Keep the Finish Light and Consistent
Use satin paper for a softer shine, or test a small glossy piece if you prefer more reflection. Thick card may resist the egg’s curves, while very thin foil paper can crease easily. The trial ornament helps you choose a workable middle ground.
Repeat the scale shape across the set and let the metal colors vary. Small differences in individual layers are normal for a handmade effect. Neat overlap matters more than cutting every piece to a mathematically exact curve.
Display and Store the Paper Pinecones
Hang the ornaments on branches that can support them, with space for the scales to show. Keep paper and foam away from heat, open flames and any lighting equipment that becomes hot. These are indoor decorations, not weatherproof garden ornaments.
Store them in a dry box with soft tissue between pieces. Avoid wrapping them tightly or pressing them beneath heavier decorations, which can flatten the lifted paper edges. Keep the loops accessible so next year’s display starts with checking the supports rather than untangling the bows.