*This post may contain affiliate links for which I earn commissions.*
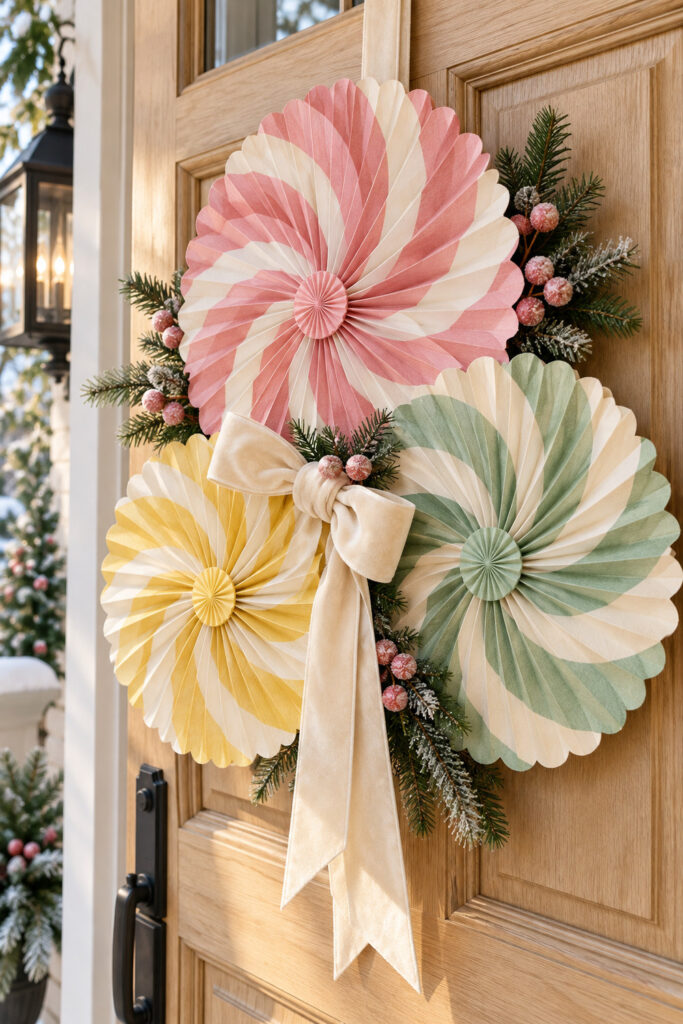
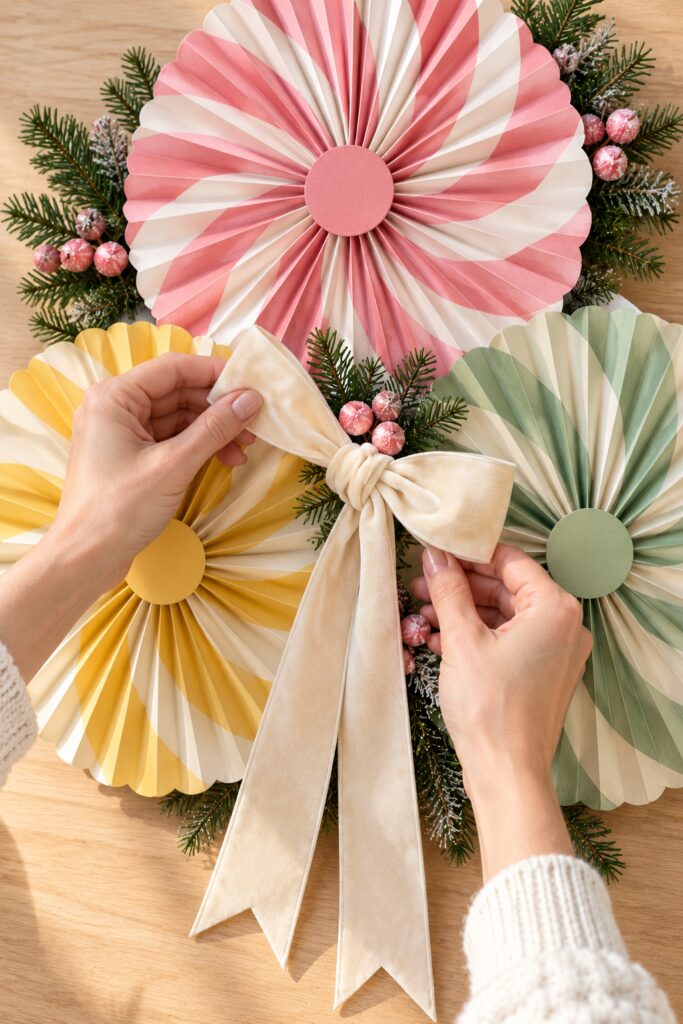
Three pleated paper rosettes, a cream bow, and a little evergreen make a surprisingly substantial Christmas door decoration. Pink sits at the top, with mint and butter yellow beneath it. The rounded shapes do most of the work, so you can keep the extra details fairly simple.
This tutorial uses folded paper fans attached to a shared lightweight backing. We’ll adapt the picture’s candy swirls into patterned pleats rather than trying to reproduce an imaginary paper construction exactly.
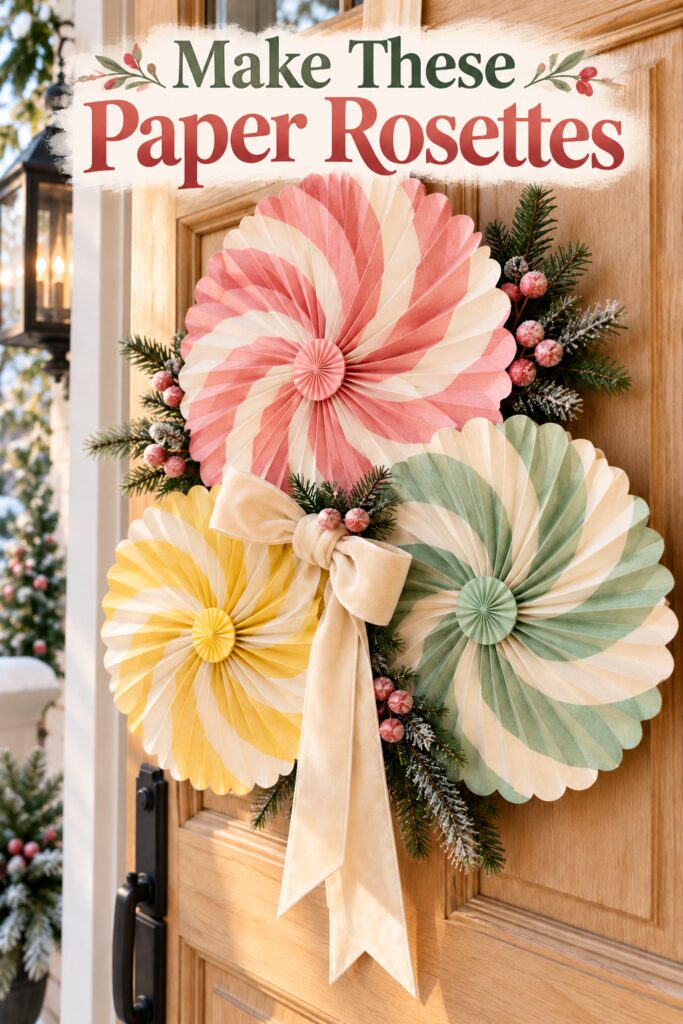
The inspiration and instructional images were created with AI. This tutorial proposes a practical version of the visual idea rather than documenting a tested physical project.
What You’re Making
You’ll make three round accordion rosettes in different sizes, arrange them in a loose triangle, and add faux evergreen and a cream ribbon bow. A concealed backing supports each rosette separately. The paper overlaps visually, but one fan won’t need to carry the weight of another.
This is best for an indoor door or a thoroughly sheltered dry location. Paper can soften in damp air, so move the finished decoration inside if its display spot gets wet.
Materials and Supplies
Materials
- Lightweight decorative paper in pink and cream, mint and cream, and yellow and cream combinations – you can try this set of scrapbook paper but the stripes aren’t as wide and you may need a few sets to have enough sheets to get the size you want for each color – or browse this selection of pastel striped craft papers
- Scrap cardstock for front and back center circles
- Lightweight foam board for the concealed shared backing
- Paper craft glue or suitable double sided craft tape
- Low temperature hot glue sticks suitable for your materials
- Cream ribbon for a bow and tails
- Faux evergreen sprigs with frosted berries
- Ribbon for the hanging loop
- A wreath hanger suitable for the door and finished weight
Tools
- Scissors, ruler, and pencil
- Scoring tool and scoring board or a blunt folding tool
- Low temperature glue gun with a heat resistant work mat (I tend to use parchment paper on my heat-resistant kitchen counter…)
- Craft knife and cutting mat for the foam board
- Clips to hold glued paper seams while they set
- Wire cutters if your greenery has wired stems
Paper quantities depend on the diameters and how tightly you pleat it. Make a small sample before buying enough for the entire decoration.
Want to Make This Door Hanging?
I’ve put together a convenient Amazon supply list featuring hand-picked, well-rated products that match the supply list for this project to save you time.
See My Hand-Picked Supply ListAs an Amazon Associate I earn from qualifying purchases but this doesn’t increase your price at all!
Before You Start
Measure the usable door area, including clearance around the handle and frame. Draw three rough circles on scrap paper and arrange them where you want the fans to sit. Keep the top pink circle largest, the mint one medium, and the yellow one smallest.
For a suggested starting point, try diameters around 14, 12, and 10 inches. These are proposed sizes, not measurements taken from the inspiration. Reduce them if your door is narrow. Each paper strip should be half its rosette’s intended diameter in width because that width becomes the radius.
Use flexible paper that folds sharply without cracking. Patterned paper will suggest candy stripes, although ordinary stripes won’t turn into the exact curved swirls pictured. Test the pattern on your sample and let the folds provide the sculptural detail.
Step-by-Step Tutorial
1. Cut and Accordion Fold the Paper
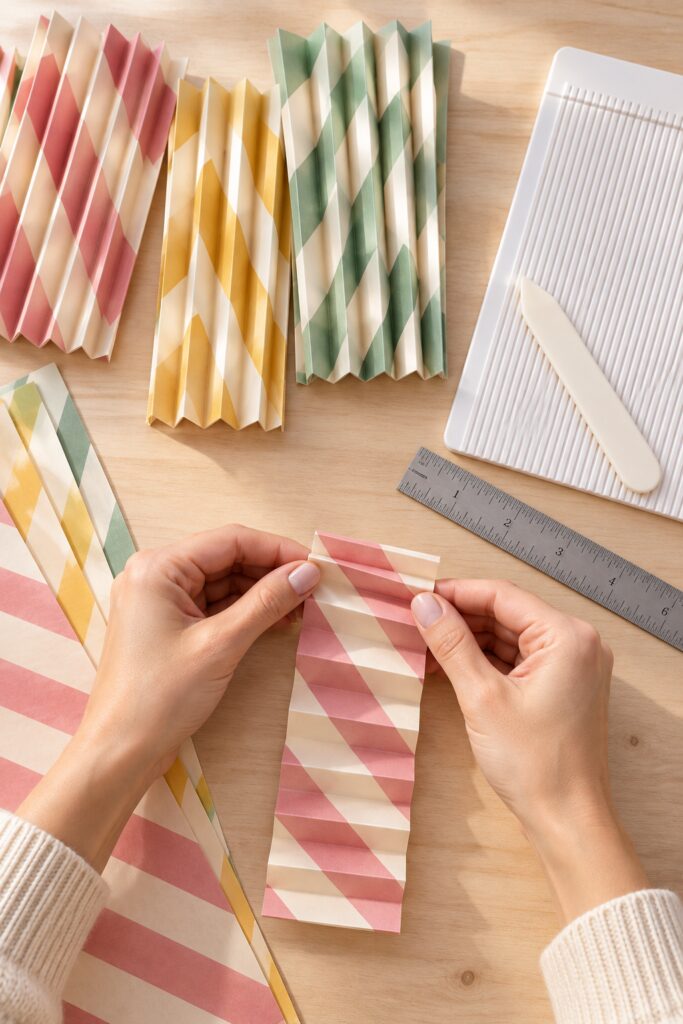
Cut strips of equal width for one rosette. Score parallel lines across each strip at regular intervals, then fold forward and backward along those lines like a handheld paper fan. As a suggested starting point, use folds roughly half an inch apart; change that spacing if your paper folds better another way.
For a scalloped outer edge, round the same exposed outer tip of each folded strip with scissors before joining the strips. Keep cuts shallow and away from the inner edge that gathers at the center.
Keep the fold spacing consistent across all strips used for the same fan. Line the strips up side by side to check the creases before joining them. Uneven folds can make one section pull tighter than the rest and leave the finished circle looking lopsided.
2. Join the Strips into a Pleated Ring
Join the strips end to end by overlapping a matching fold at each seam. Use paper glue or tape appropriate for the paper, keeping the seam flat enough to fold normally. Clip glued seams until the adhesive has set according to its instructions.
Bring the remaining ends together to form a pleated cylinder. Before closing it permanently, gather the inner edge and gently spread the outside edge into a circle. There must be enough paper length to open without straining the seams. Add another folded strip if the circle pulls apart or won’t lie flat.
Close the final seam and check the fold direction. Don’t force a short ring flat and hope the center glue will hold everything together. A little extra paper at this stage is easier to manage than a rosette that keeps springing open later.
3. Flatten and Reinforce Each Rosette
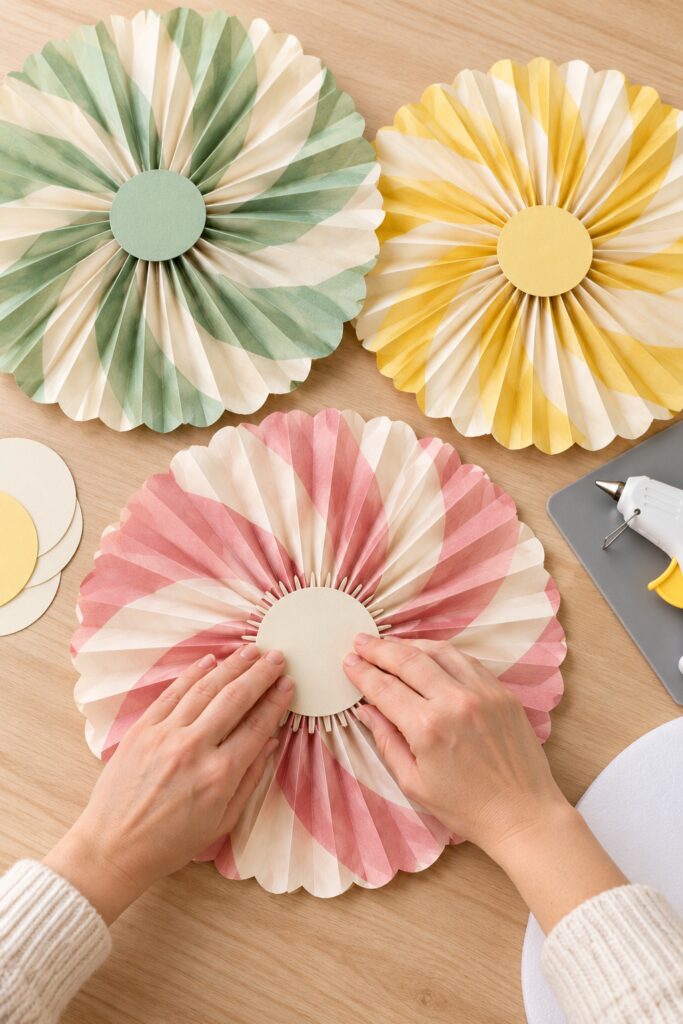
Place the ring on the work surface and gently push its upper edge inward toward the center while spreading the outer edge. The cylinder will flatten into a round pleated fan. Hold the center closed while checking that the folds radiate evenly and the seams remain attached.
Apply suitable low temperature hot glue to a cardstock circle and press it across the back center, catching the inner fold ends. Use the gun according to its instructions and keep fingers clear of molten glue. Let the bond cool before turning the fan over and adding a smaller front center circle.
Make the mint and yellow fans in the same way. Plain centers are a practical substitute for the tiny pleated medallions in the image. They also cover the gathered paper ends neatly without adding another construction stage.
4. Build the Shared Backing and Hanging Loop
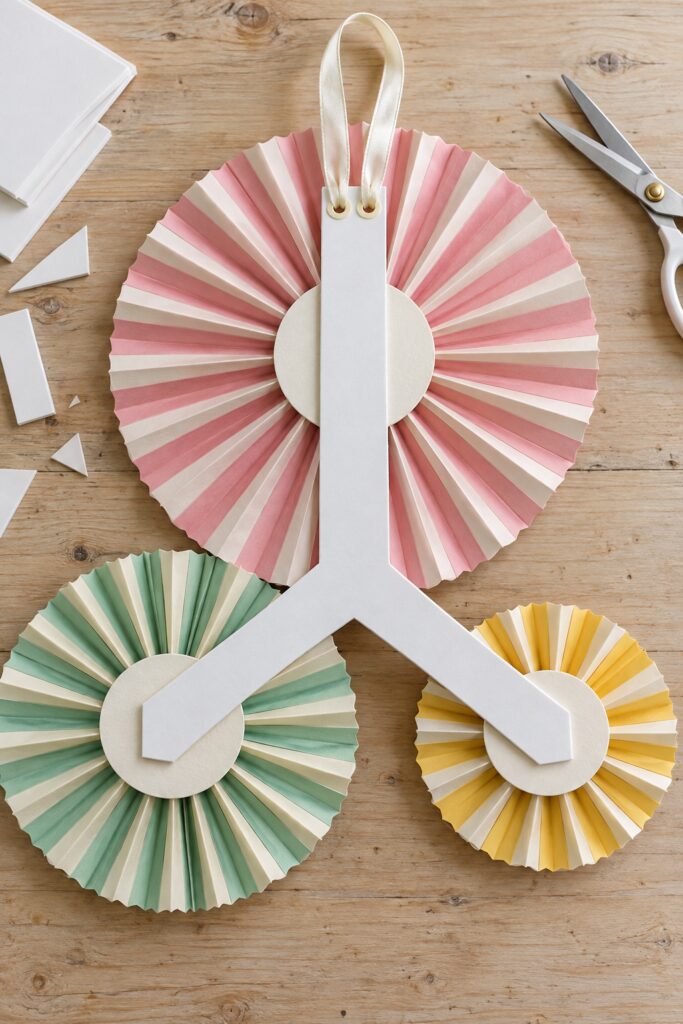
Arrange the fans face up in a triangle, with pink above, yellow lower left, and mint lower right. Overlap their outer edges slightly, leaving their centers visible. Trace a compact backing shape that reaches behind all three reinforced centers while remaining hidden from the front.
Cut the foam board on a cutting mat, keeping your other hand away from the blade path. Attach a hanging ribbon near the top of the backing by passing it through two small holes, tying it securely, and reinforcing the hole area with extra cardstock on both sides.
Attach each fan’s reinforced back center to the shared backing with an adhesive suitable for both materials. Use small foam board spacers behind a fan if needed to accommodate the visual overlap without crushing the pleats. Keep every center supported and let all bonds set before lifting the arrangement.
5. Attach Greenery and the Cream Bow
Tuck short faux evergreen sprigs into the spaces between the fans, checking the front before attaching anything. Fix their cut ends to the backing in exposed gaps or accessible outer areas. Keep glue on the support rather than relying on thin paper pleats to hold a bundle of stems.
Tie the bow separately and leave the tails long enough to hang below the group. Secure its center to the backing in the middle gap, using a ribbon tie through reinforced holes if needed. Place it where it covers attachment points without hiding the smaller fan’s center.
Trim any exposed wire ends and remove loose glue strings. Optional pink berry picks can repeat the largest fan’s color, but add them sparingly. The fans should remain the main shapes.
Tips for Getting the Finished Look
Keep the cream areas visible in every fan. That repeated pale color connects the three different pastels and relates them to the bow. If your patterned paper is very busy, use plain cardstock centers to give the eye a small quiet spot.
Check the arrangement upright before deciding the bow is finished. Ribbon tails fall differently when the backing is vertical, and they may cover more of the yellow fan than expected. Adjust the tails now rather than trying to straighten them after hanging.
Easy Ways to Customize It
Use striped paper for a candy impression or solid paper for a simpler pleated display. A small paper circle made from the same patterned sheet can finish the front center without needing a separate miniature fan.
For a smaller door, reduce all three circles together and shorten the ribbon tails. Keep the size difference between them so the triangle remains easy to read. You can also omit berries while retaining the evergreen and cream bow.
Displaying the Finished Project
Hang the decoration from a suitable door hanger and check its weight and clearance. Open and close the door gently to confirm the backing stays secure and the tails don’t catch. Keep the handle accessible and leave the exit fully usable.
Keep paper and ribbon away from flames and hot lighting. Inspect the hanging loop and adhesive bonds before each use. Store the decoration flat in a roomy dry container so the folds aren’t crushed between seasons.
Final Encouragement
Make the small sample first and settle the folding method before cutting the largest fan. Once that works, the color balance and triangle arrangement can carry the idea even if your paper pattern looks different from the inspiration.