*This post may contain affiliate links for which I earn commissions.*
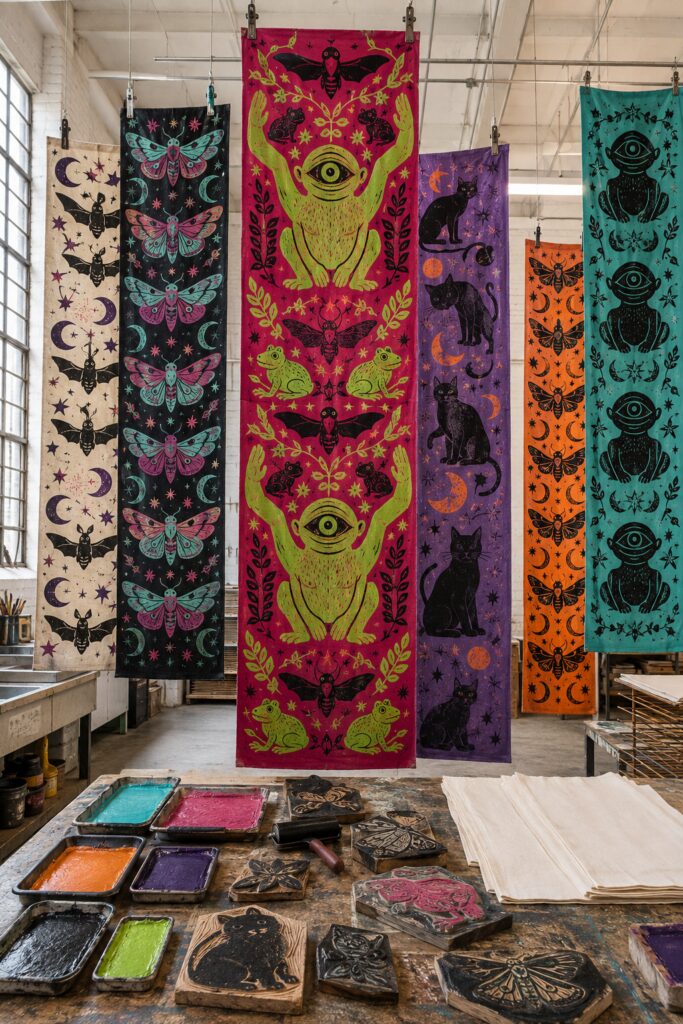
Long fabric panels covered with moths, moons, cats, frogs, leaves, and wonderfully odd little creatures can make a Halloween display feel more collected than store-bought. The inspiration image pairs folk-art motifs with saturated pink, teal, orange, purple, cream, and black, then repeats them vertically for the impact of old festival banners.
This tutorial turns that imaginative scene into a practical block-printing project. Instead of carving every highly detailed design visible in the inspiration, you will make a small family of reusable blocks and arrange them in repeating rows. The result keeps the playful creature-filled look while making the work approachable at a home craft table.
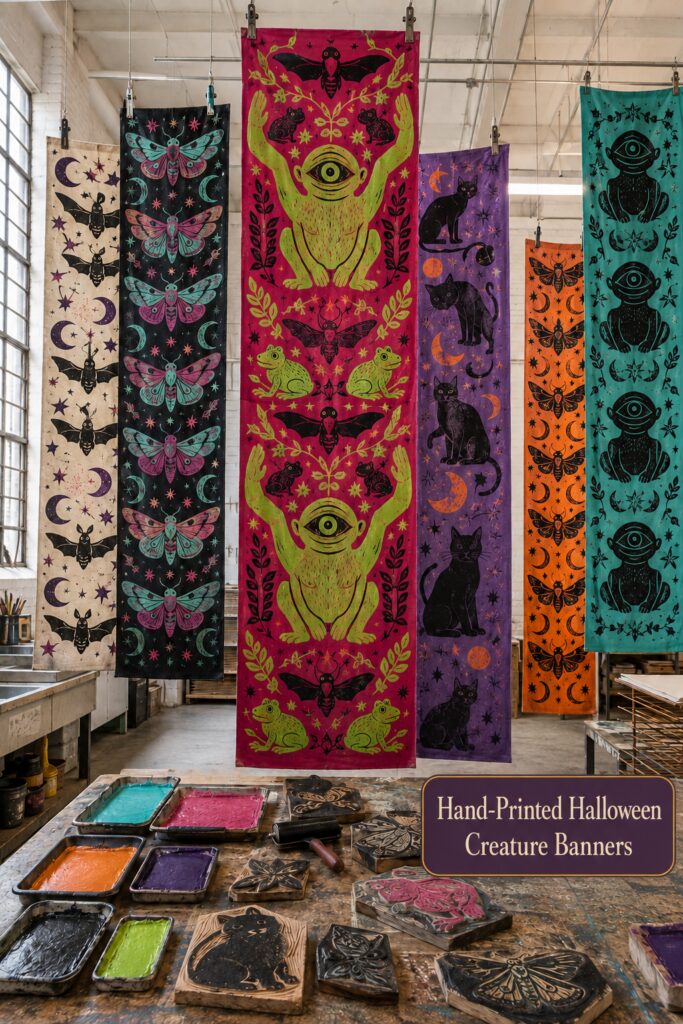
The inspiration and instructional images for this project were created with AI. This tutorial translates the visual idea into a practical project you can recreate at home; the images are illustrative rather than photographs of a completed build.
What you are making
You will make one long cotton banner with a dowel sleeve at the top. A finished width of roughly 12 to 18 inches works well, and the length can suit your wall, door, mantel area, or party backdrop. One large creature block becomes the focal motif. Smaller moth, frog, moon, star, and leafy sprig blocks fill the spaces and create rhythm.
Start with one banner before attempting a grouped display. If you later make several, vary the ground colors and assign each panel its own main creature. This is a practical adaptation of the large, intricately printed collection in the inspiration image.
Materials and supplies
Materials
- Medium-weight cotton canvas, duck cloth, or sturdy muslin
- Fabric block-printing ink in one dark color and one contrasting accent color
- Soft-carve printmaking blocks, one medium or large block plus several small pieces
- Plain paper, tracing paper, and a soft pencil for the motifs
- Scrap cotton for test impressions
- Matching sewing thread
- Smooth wooden dowel slightly wider than the finished banner
- Cotton cord, narrow ribbon, or removable hanging clips
Tools
- Linocut carving handle with small V and U gouges
- Bench hook or nonslip carving mat
- Soft rubber brayer
- Flat acrylic, glass, or washable tray for rolling ink
- Fabric scissors or rotary cutter, ruler, and cutting mat
- Removable fabric pencil or tailor’s chalk
- Sewing machine or hand-sewing needle
- Iron and plain cotton pressing cloth
Optional finishing supplies
- Sewing clips
- Small stencil brush for tiny touch-ups
- Extra blocks for stars, dots, leaves, or moons
- Drop cloth and disposable gloves
Before you start
Prewash and dry the fabric so the banner will not change size after printing. Press it smooth, then cut it with extra fabric for narrow side and bottom hems and a top sleeve. A useful starting proportion is about three times as long as it is wide, but hold the fabric against the intended wall before deciding.
Protect the table and place a thin padded layer, such as folded fabric beneath a clean sheet, under the printing area. The surface should have a little give without feeling squishy. Draw the banner design on paper first. Plan a generous outer margin, repeat the largest motif down the center, and scatter smaller motifs around it. Keep every block within a simple shape that you can carve confidently.
Step-by-step tutorial
1. Build a small motif family
Sketch one memorable creature with a bold silhouette, such as a single-eyed frog-like figure, winged moth creature, or long-tailed cat. Add three to five smaller motifs that share its folk-art style. Moons, stars, leaves, moths, and frogs are useful because they turn easily and fill narrow gaps.
Keep lines thick enough to print cleanly on fabric. Tiny isolated marks may disappear into the weave. Photocopy or redraw the motifs at their final sizes, then arrange the paper versions over the banner to test the repeat before carving anything.
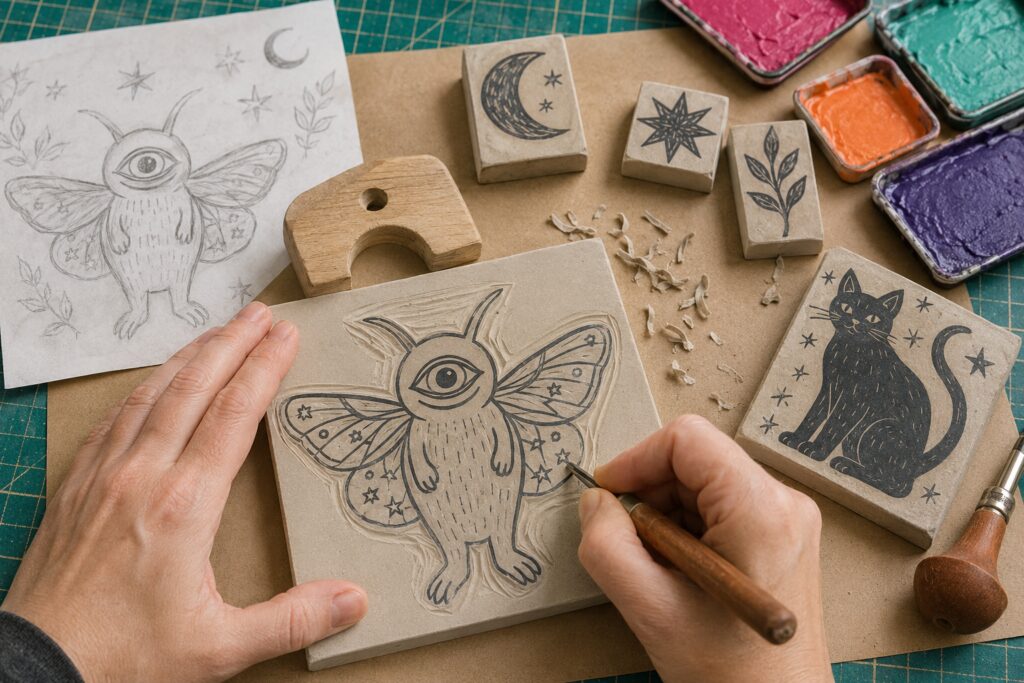
2. Transfer and carve the blocks
Trace each drawing with a soft pencil. Place the drawing face down on a soft-carve block and rub the back firmly to transfer it. Remember that every printed image will reverse. For lettering, asymmetrical faces, or directional moons, reverse the drawing before transfer.
With the block secured against a bench hook or nonslip mat, outline important details using a small V gouge. Clear larger background areas with a shallow U gouge. Always push the tool away from your hands and body, turn the block as needed, and carve in good light. Leave a sturdy border around the main design until the first test print shows what else should be removed.
3. Test the ink and refine each design
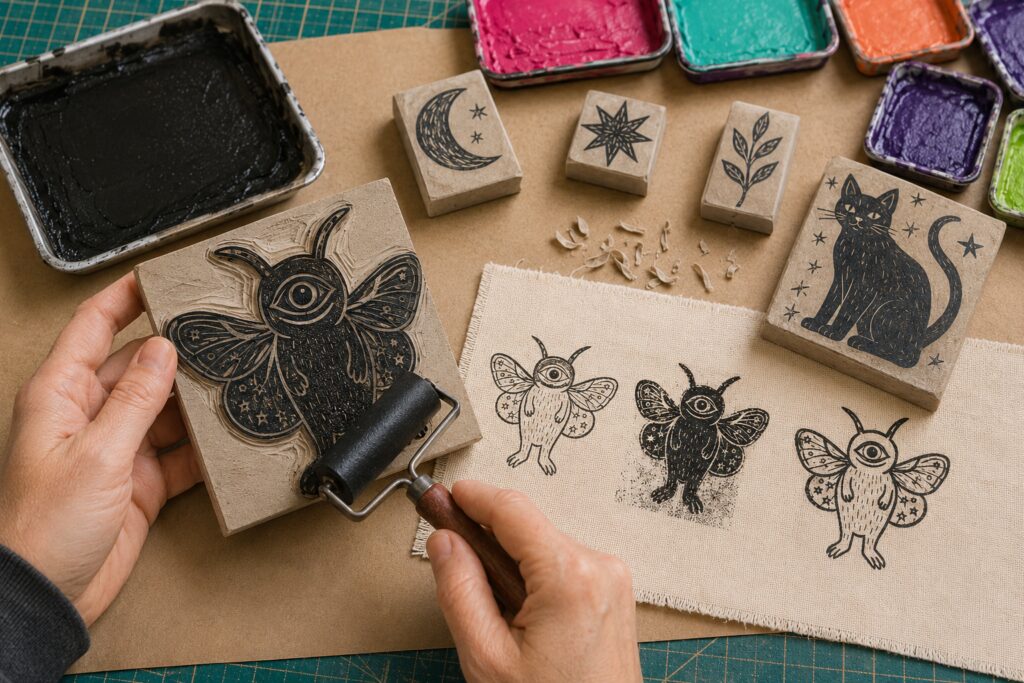
Roll a small amount of fabric ink into a thin, even patch. The brayer should sound softly tacky rather than wet. Roll over the raised block surface several times, changing direction so the ink coat is even. Avoid filling the recessed lines.
Press the block onto scrap cotton. Apply steady pressure across the back with your palm or a clean spoon, then lift straight up. A pale print needs slightly more ink or pressure. Blurred edges and filled details usually mean too much ink. Carve away stray raised marks, retest, and keep the best impression as a reference.
4. Mark the repeat without making it rigid
Press the banner flat and mark its finished side margins with removable chalk. Use the paper motif cutouts to settle on a repeat. For a balanced panel, begin with the largest shape near the upper third, repeat it farther down, and alternate smaller creatures or moths between them.
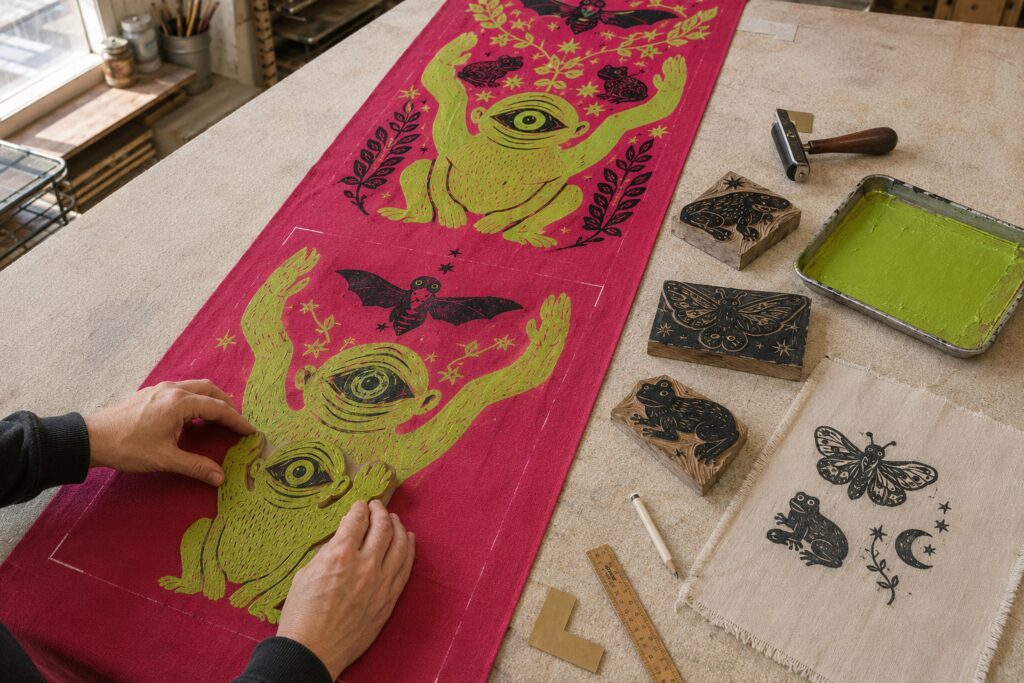
Make two L-shaped registration corners from cardstock. Position them at one corner of the paper motif, tape the guides to the protected table, and slide the fabric into place. Move and remeasure the guides for each row. This simple system gives the display structure while allowing the slight variation that makes block printing feel handmade.
5. Print the largest color first
Start with the lightest or largest color area. On a hot-pink banner, a chartreuse focal creature gives the dramatic contrast seen in the inspiration. Ink the block, align it to the registration guides, press evenly, and lift straight up. Re-ink for every impression.
Work down the banner rather than jumping between distant areas. Check the first few impressions from above so a small alignment error does not grow through the whole repeat. Let this color dry according to the ink instructions before overlapping it with another color.
6. Add dark motifs and small accents
Use the dark ink for moths, frogs, cats, leaves, moons, and stars. Turn repeated blocks in different directions and leave some open space. A narrow banner usually reads better with one strong central motif, two supporting forms, and a scatter of tiny marks than with every inch filled.
If a second accent color is desired, clean and dry the brayer and tray completely before changing ink. Allow overlapping colors to dry between passes. Do not try to repair every irregular edge. Small differences in pressure are part of the textile’s character. Use a tiny stencil brush only for a distracting bare spot inside an otherwise solid shape.
7. Cure the print
Leave the printed banner flat and undisturbed for the full drying time specified by the ink maker. Many fabric-printing inks require heat setting after air drying, but temperatures and times vary. Follow the label for the ink and fabric you chose.
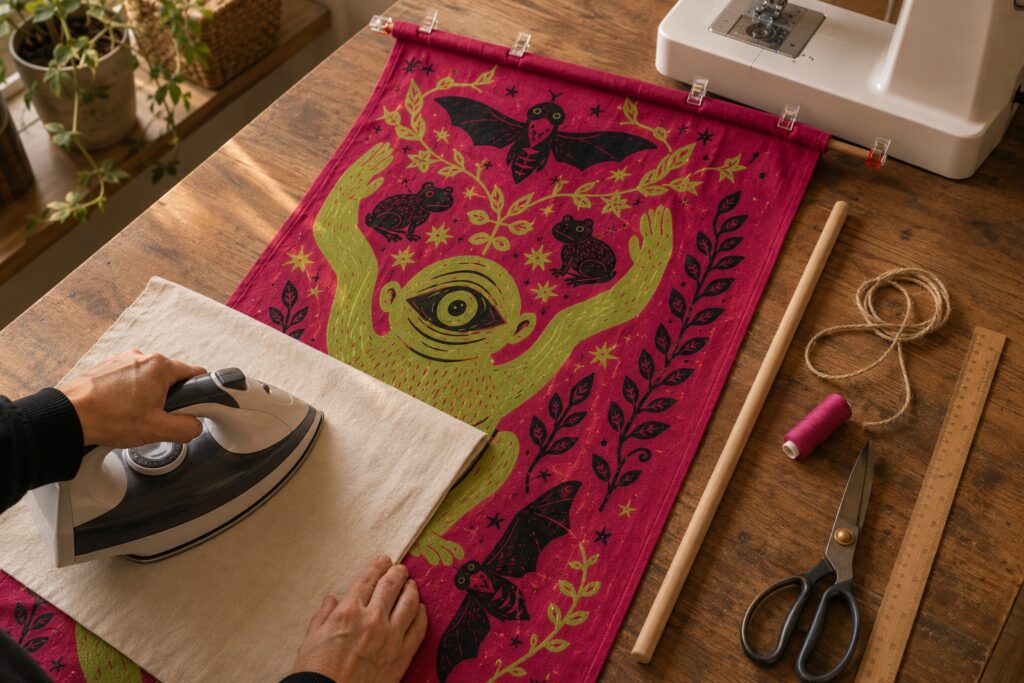
When heat setting is required, cover the print with a plain cotton pressing cloth and work in sections with a dry iron. Keep the iron moving and protect the table beneath it. Test the method on the scrap print first, especially with intense colors.
8. Hem and add the hanging sleeve
Once the print is fully cured, fold the side and bottom edges to the back twice to conceal the raw edge. Press, clip, and stitch. At the top, fold over enough fabric to form a sleeve that fits the dowel without strain. Tuck the raw edge under and stitch across the lower edge of the fold, taking care not to sew the sleeve closed at either end.
Slide in the dowel and tie cord near both ends, or rest the dowel in wall hooks. Keep the banner indoors, away from open flames, hot bulbs, cooking surfaces, damp areas, and strong air vents.
Tips for getting the finished look
- Let one color dominate. Pair a saturated ground with one high-contrast focal color and use black to unify the smaller motifs.
- Mix scale deliberately. One oversized creature, medium moths or frogs, and tiny stars create the layered folk-art effect.
- Repeat, then interrupt. Establish a vertical rhythm, but rotate a moth or swap a moon for a leafy sprig so the banner does not feel mechanically stamped.
- Preserve the print texture. Slightly broken ink over the canvas weave looks more convincing than thick, glossy coverage.
- Hang in a group carefully. If making several panels, vary their widths and colors but align the top dowels. Leave a slim gap so each silhouette remains visible.
Easy ways to customize it
- Print black motifs on natural canvas for a quieter, vintage look.
- Give each family member a different creature banner for a party or craft night.
- Make a short version for a door or a narrow version for a bookshelf end.
- Replace the one-eyed creature with a black cat, owl, beetle, or friendly ghost while keeping the same small accent blocks.
- Add a stitched tassel at each lower corner, keeping embellishments light enough that the fabric hangs flat.
Practical note
The inspiration includes numerous large and highly detailed impressions. A hand-carved home version will be most successful when the shapes are simplified, the smallest details are enlarged, and only a few blocks are repeated. This keeps the project achievable without losing the creature-filled Halloween impact.